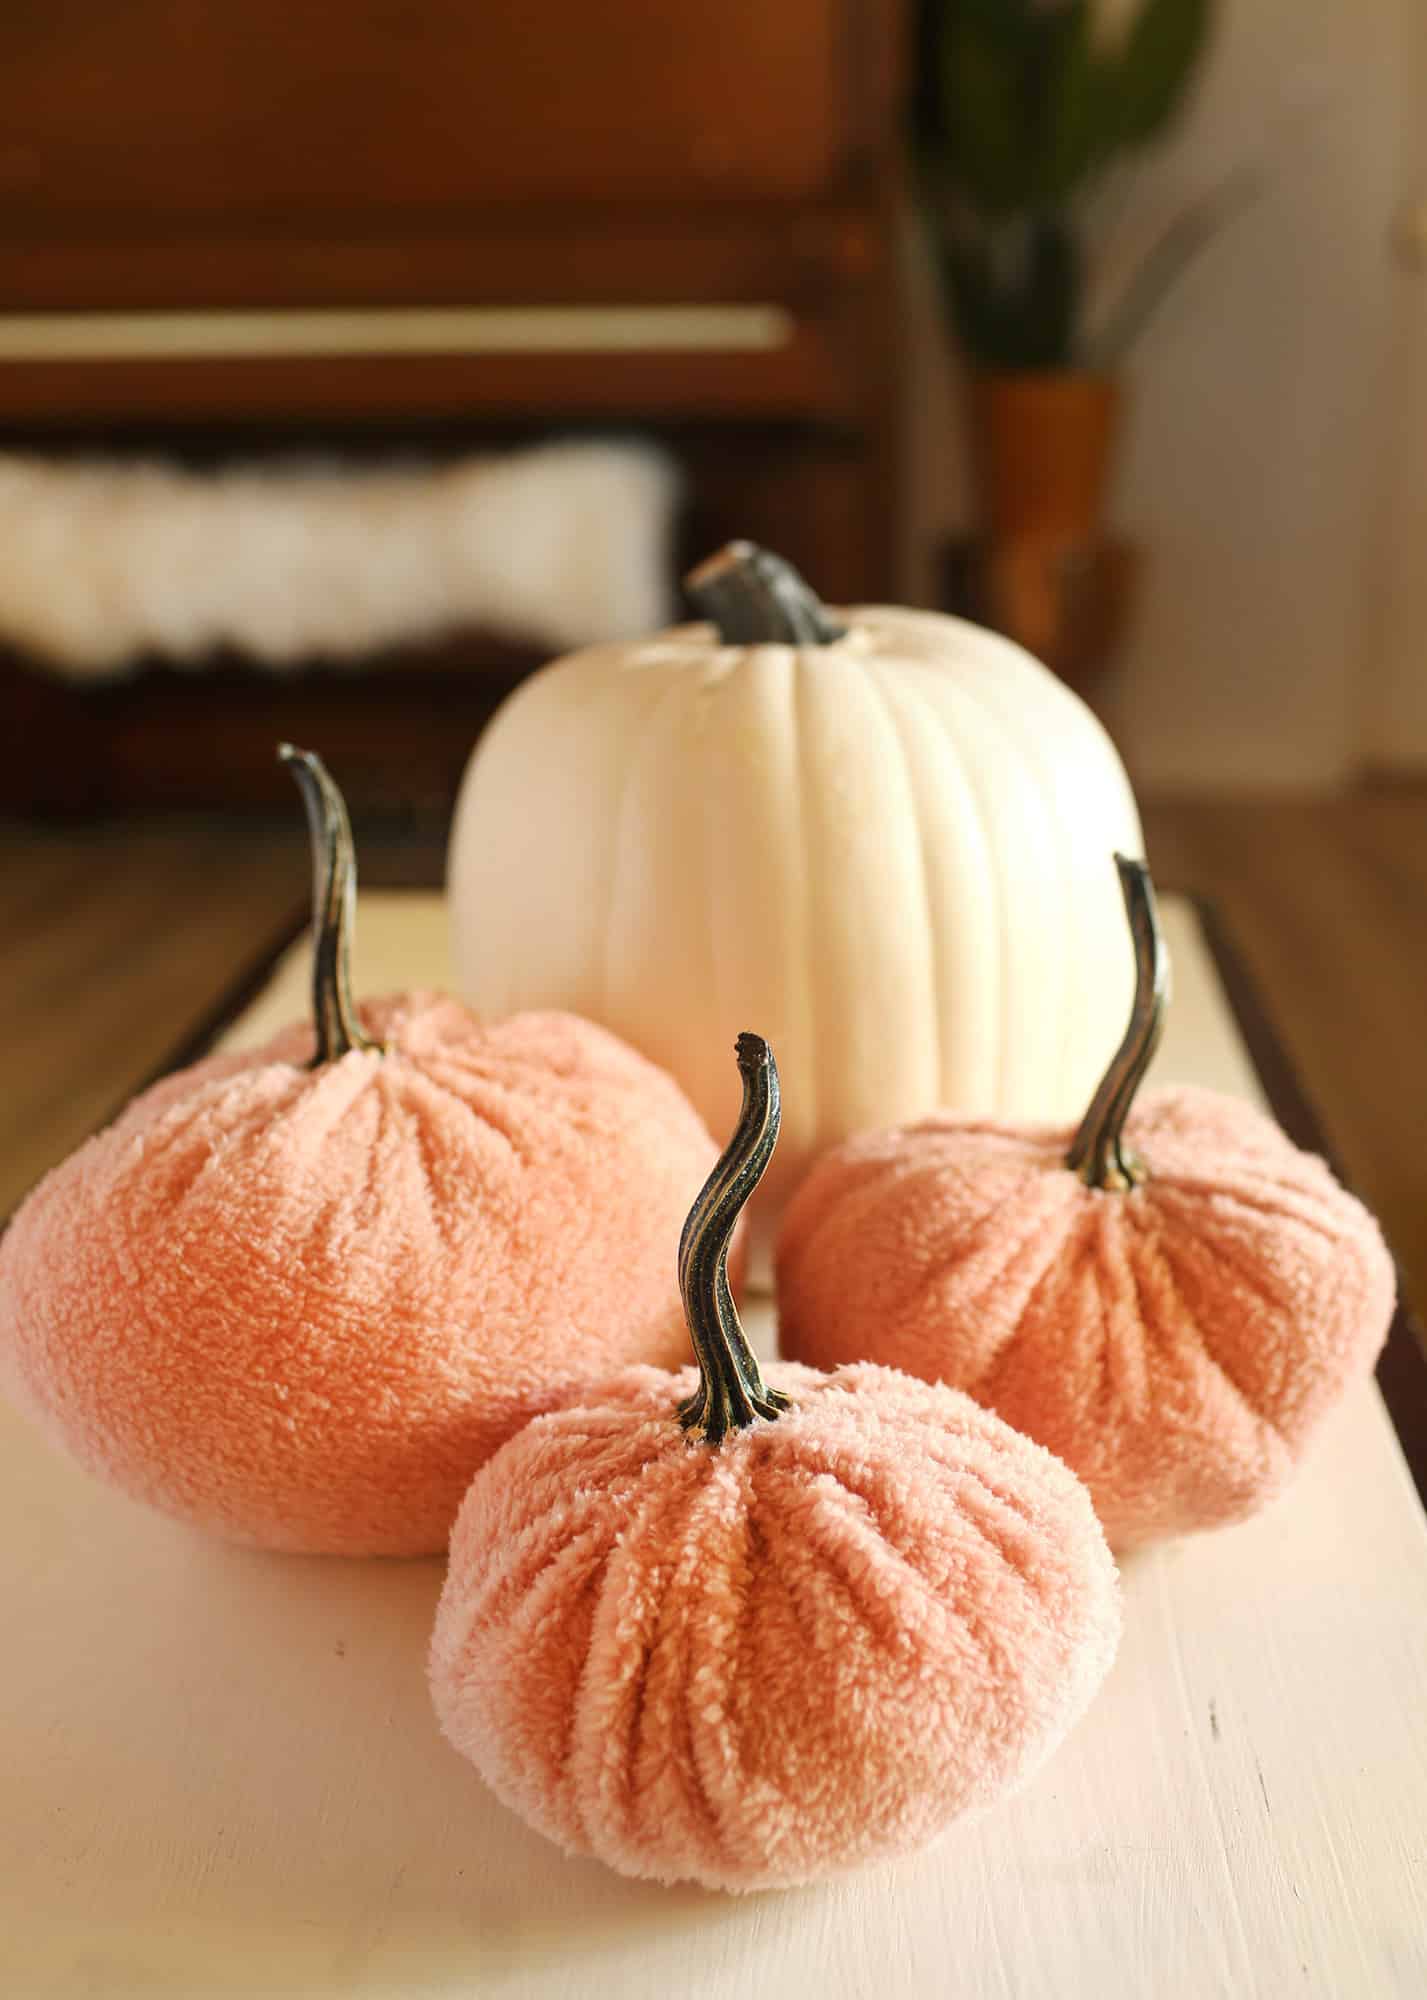
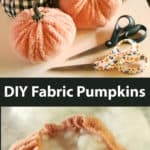
 Today, I am sharing just about the easiest DIY fabric pumpkins ever. Absolutely anyone could make these!
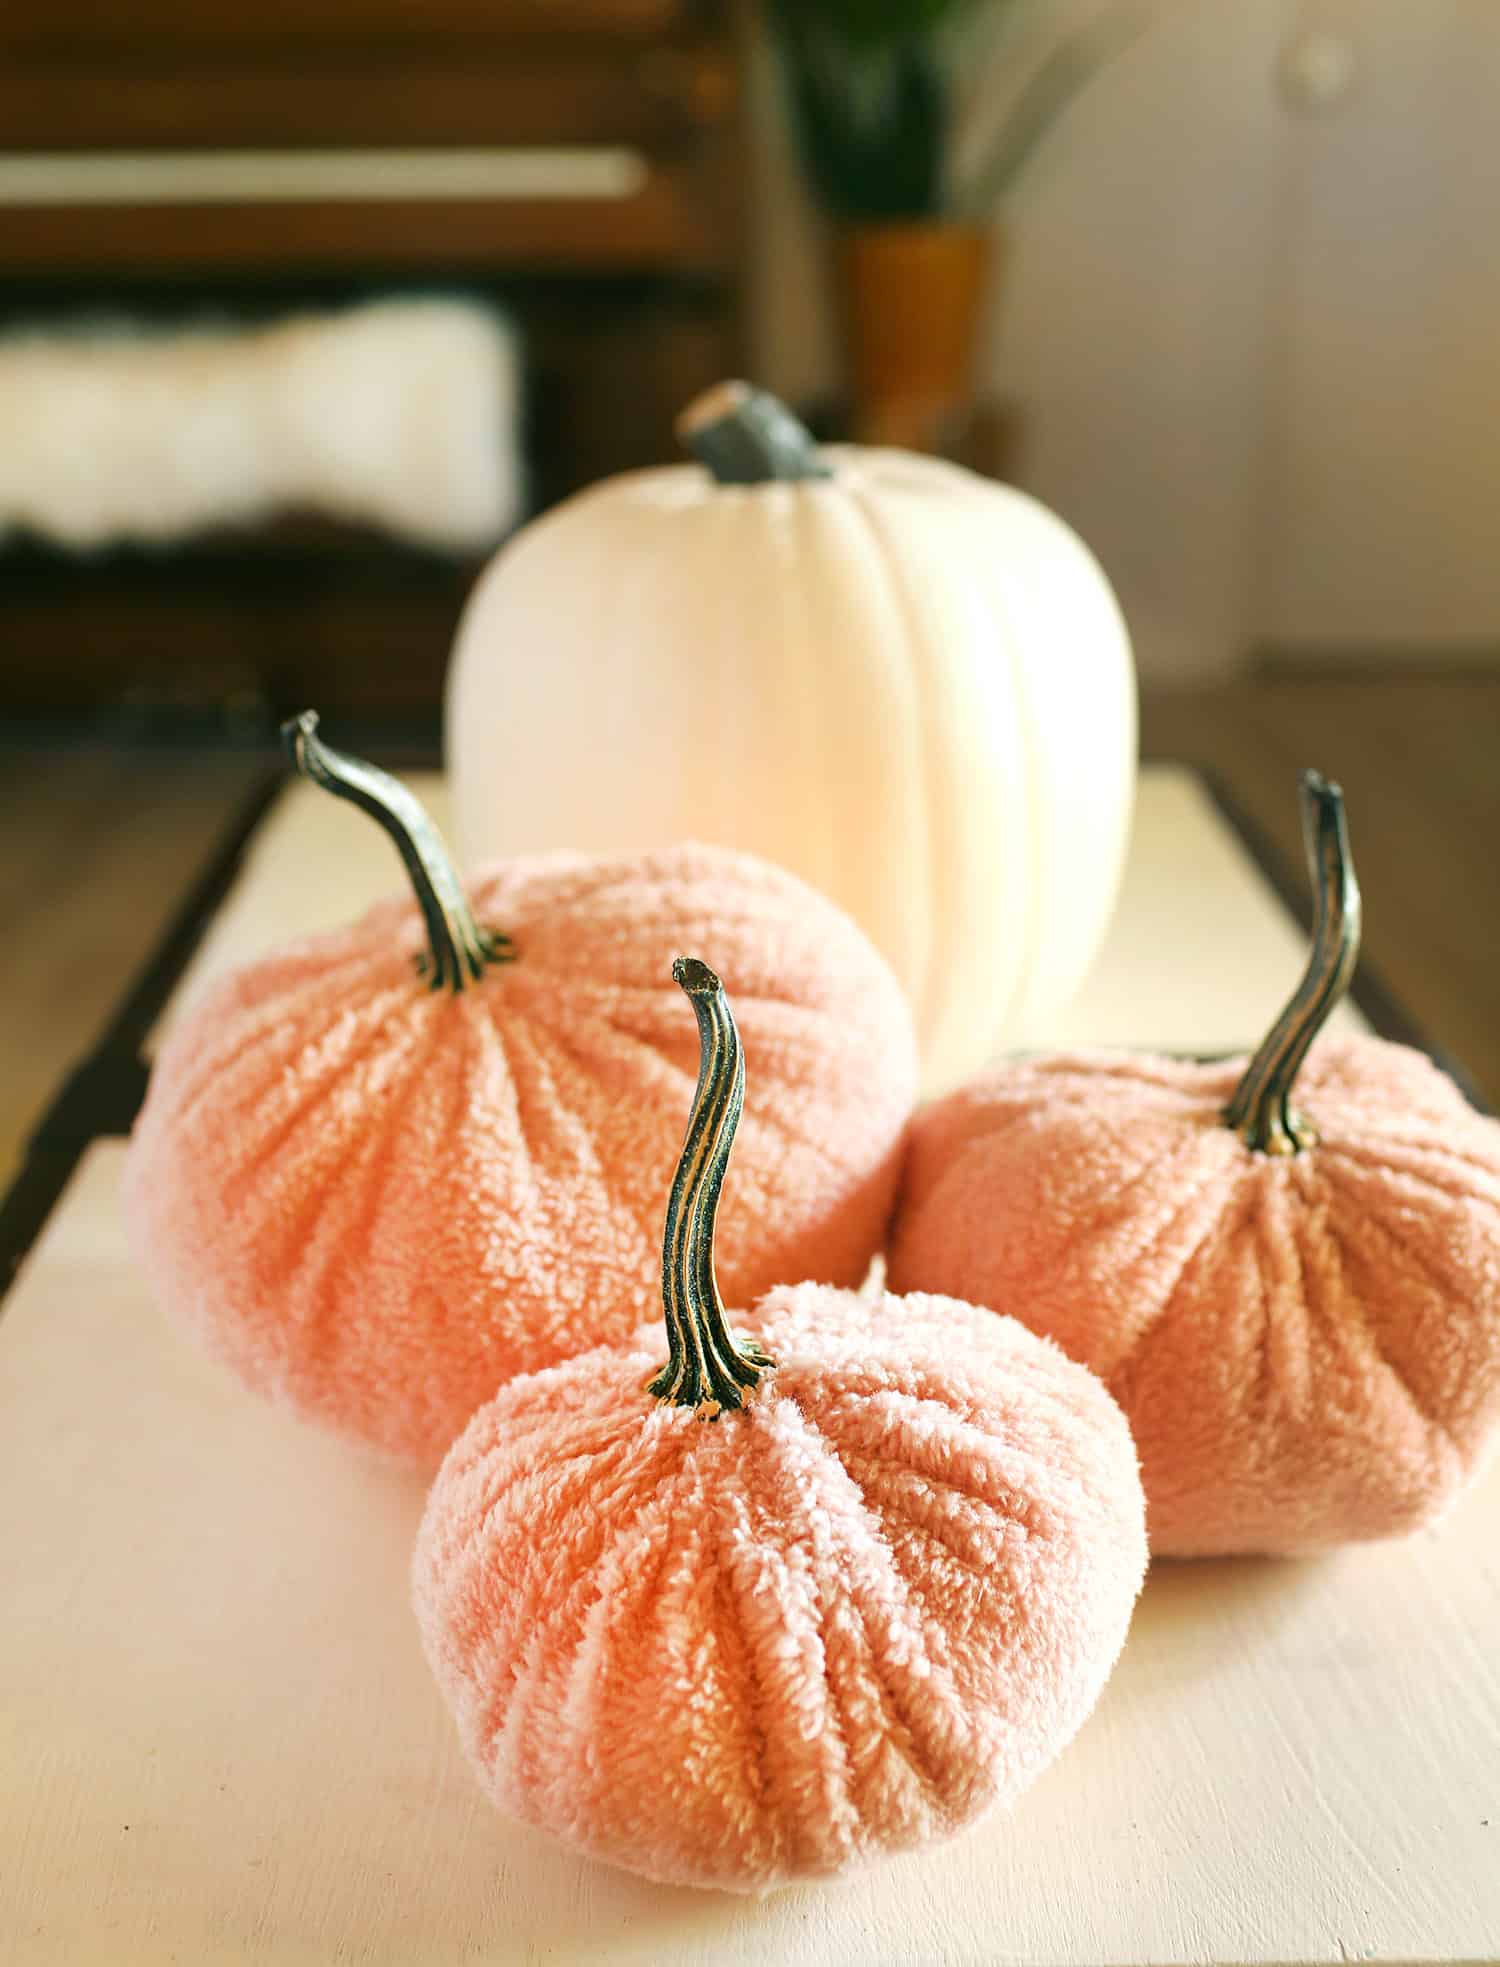
I created these pink fleece pumpkins from a thrifted sweater, but you could use any older sweater, shirt, or scrap fabric you might already have. I love decorating bookshelves and other surfaces with fabric pumpkins like these, but they would also make a fun seasonal gift as well.
I worked with Fiskars on this project. You might remember last year when I worked with Fiskars crafting tools to create the full moon photo backdrop at our haunted house. Their scissors and other crafting tools are super high quality and what I have used and loved for years.
And I was absolutely thrilled to see these limited edition black and pumpkin scissors (available at JOANN). So cute, right? Perfect for sewing and crafting projects this season.
Looking for no-carve pumpkin ideas? Check out 30 No-Carve Pumpkin Decorating Ideas!
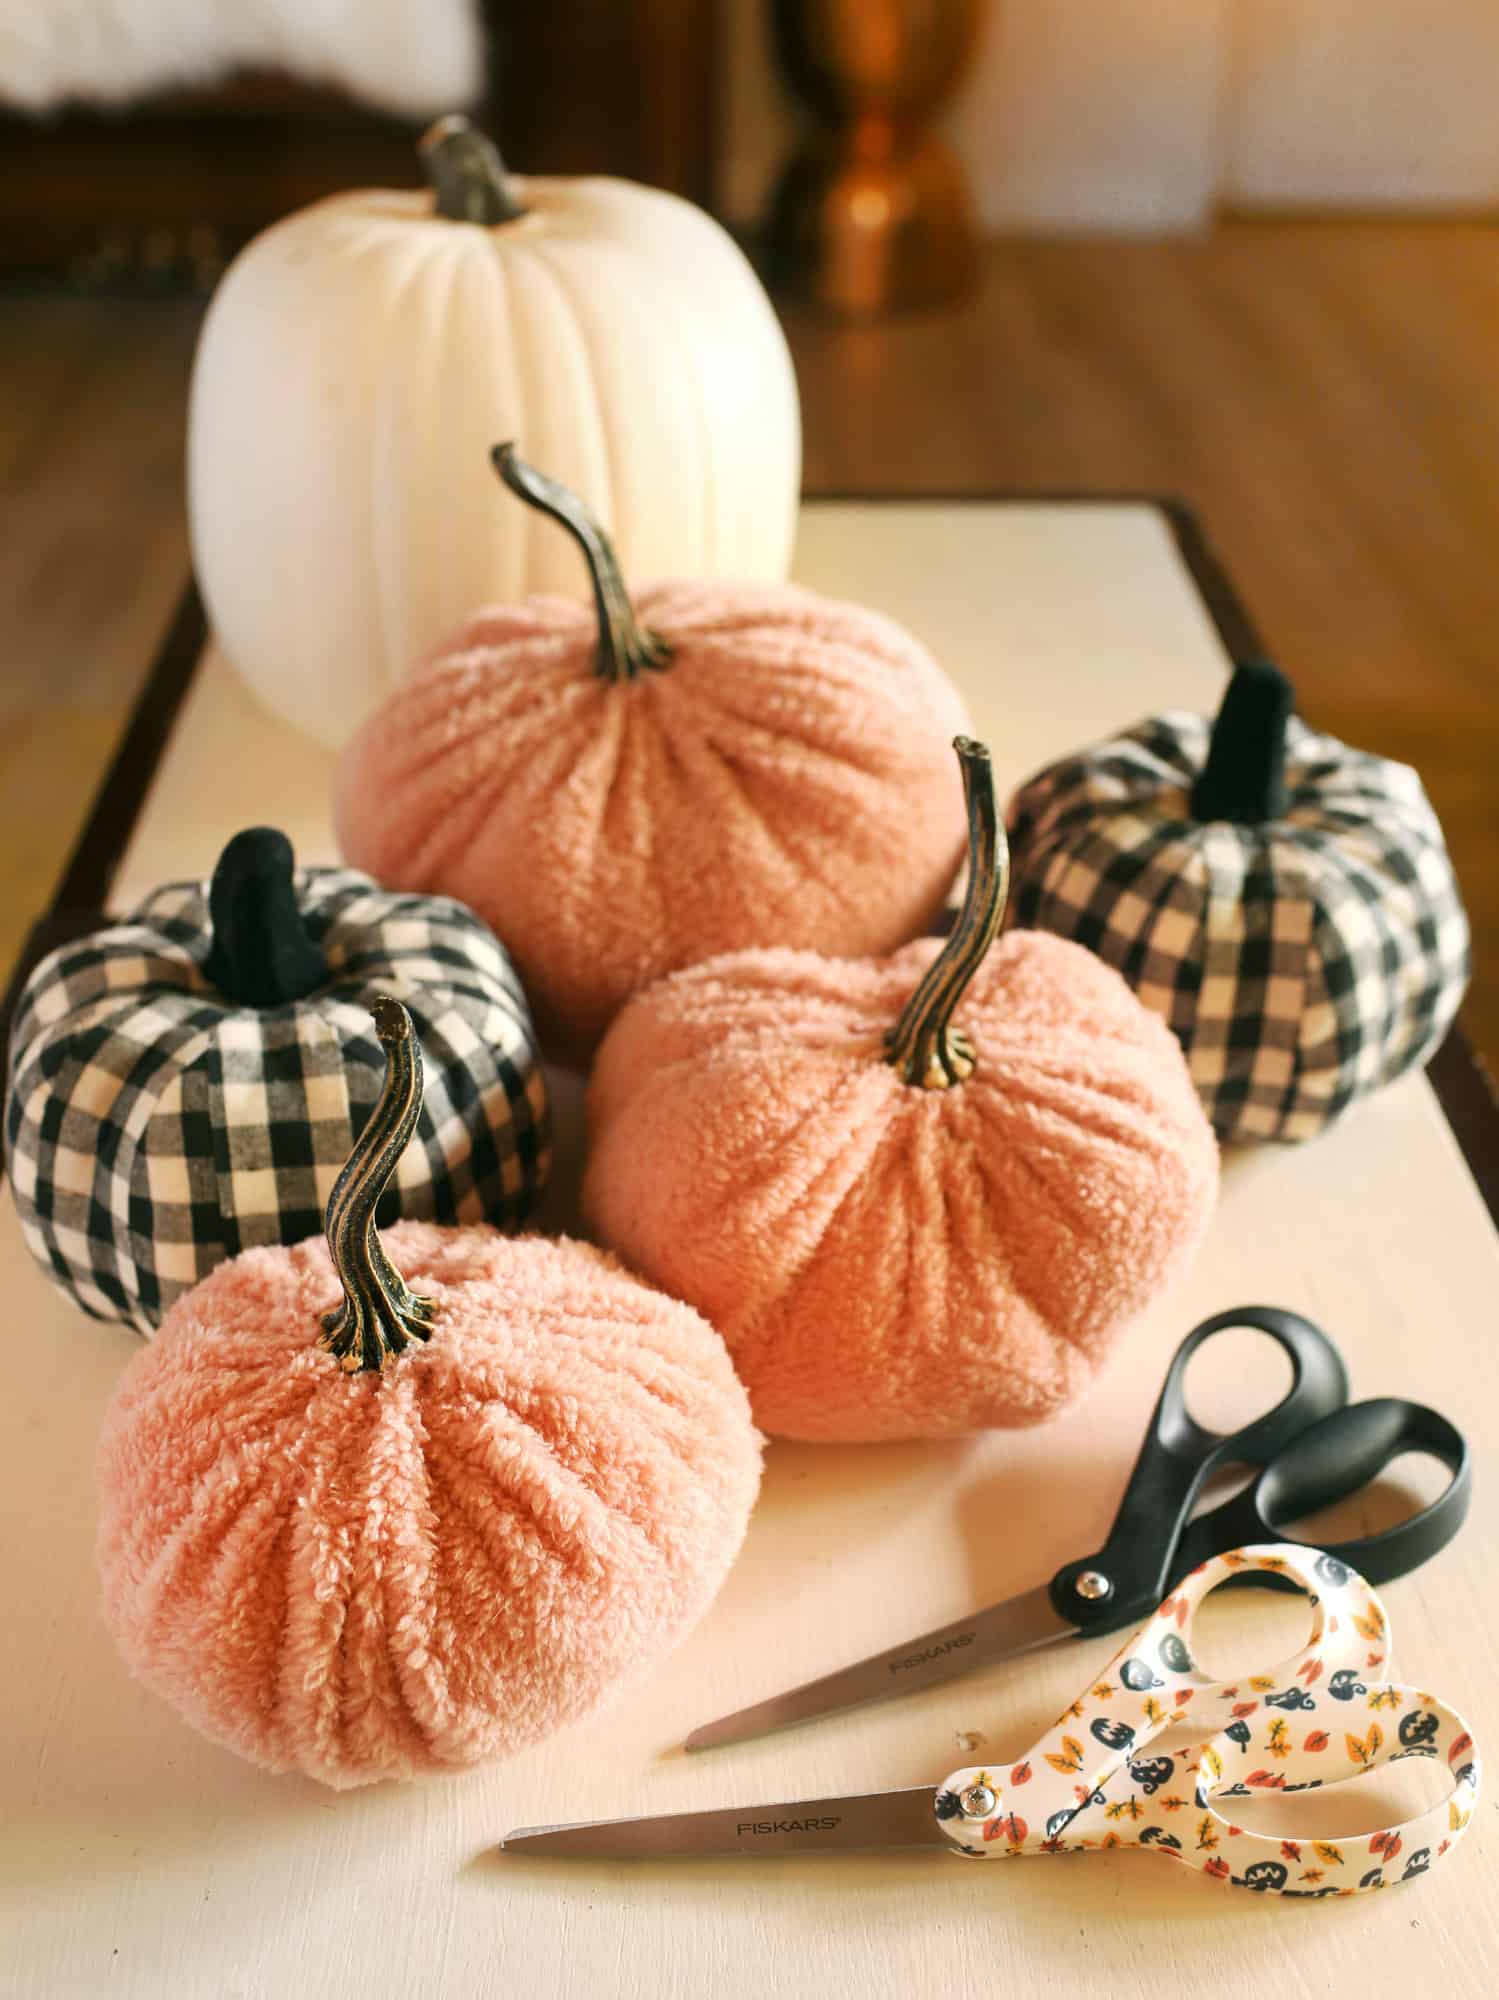
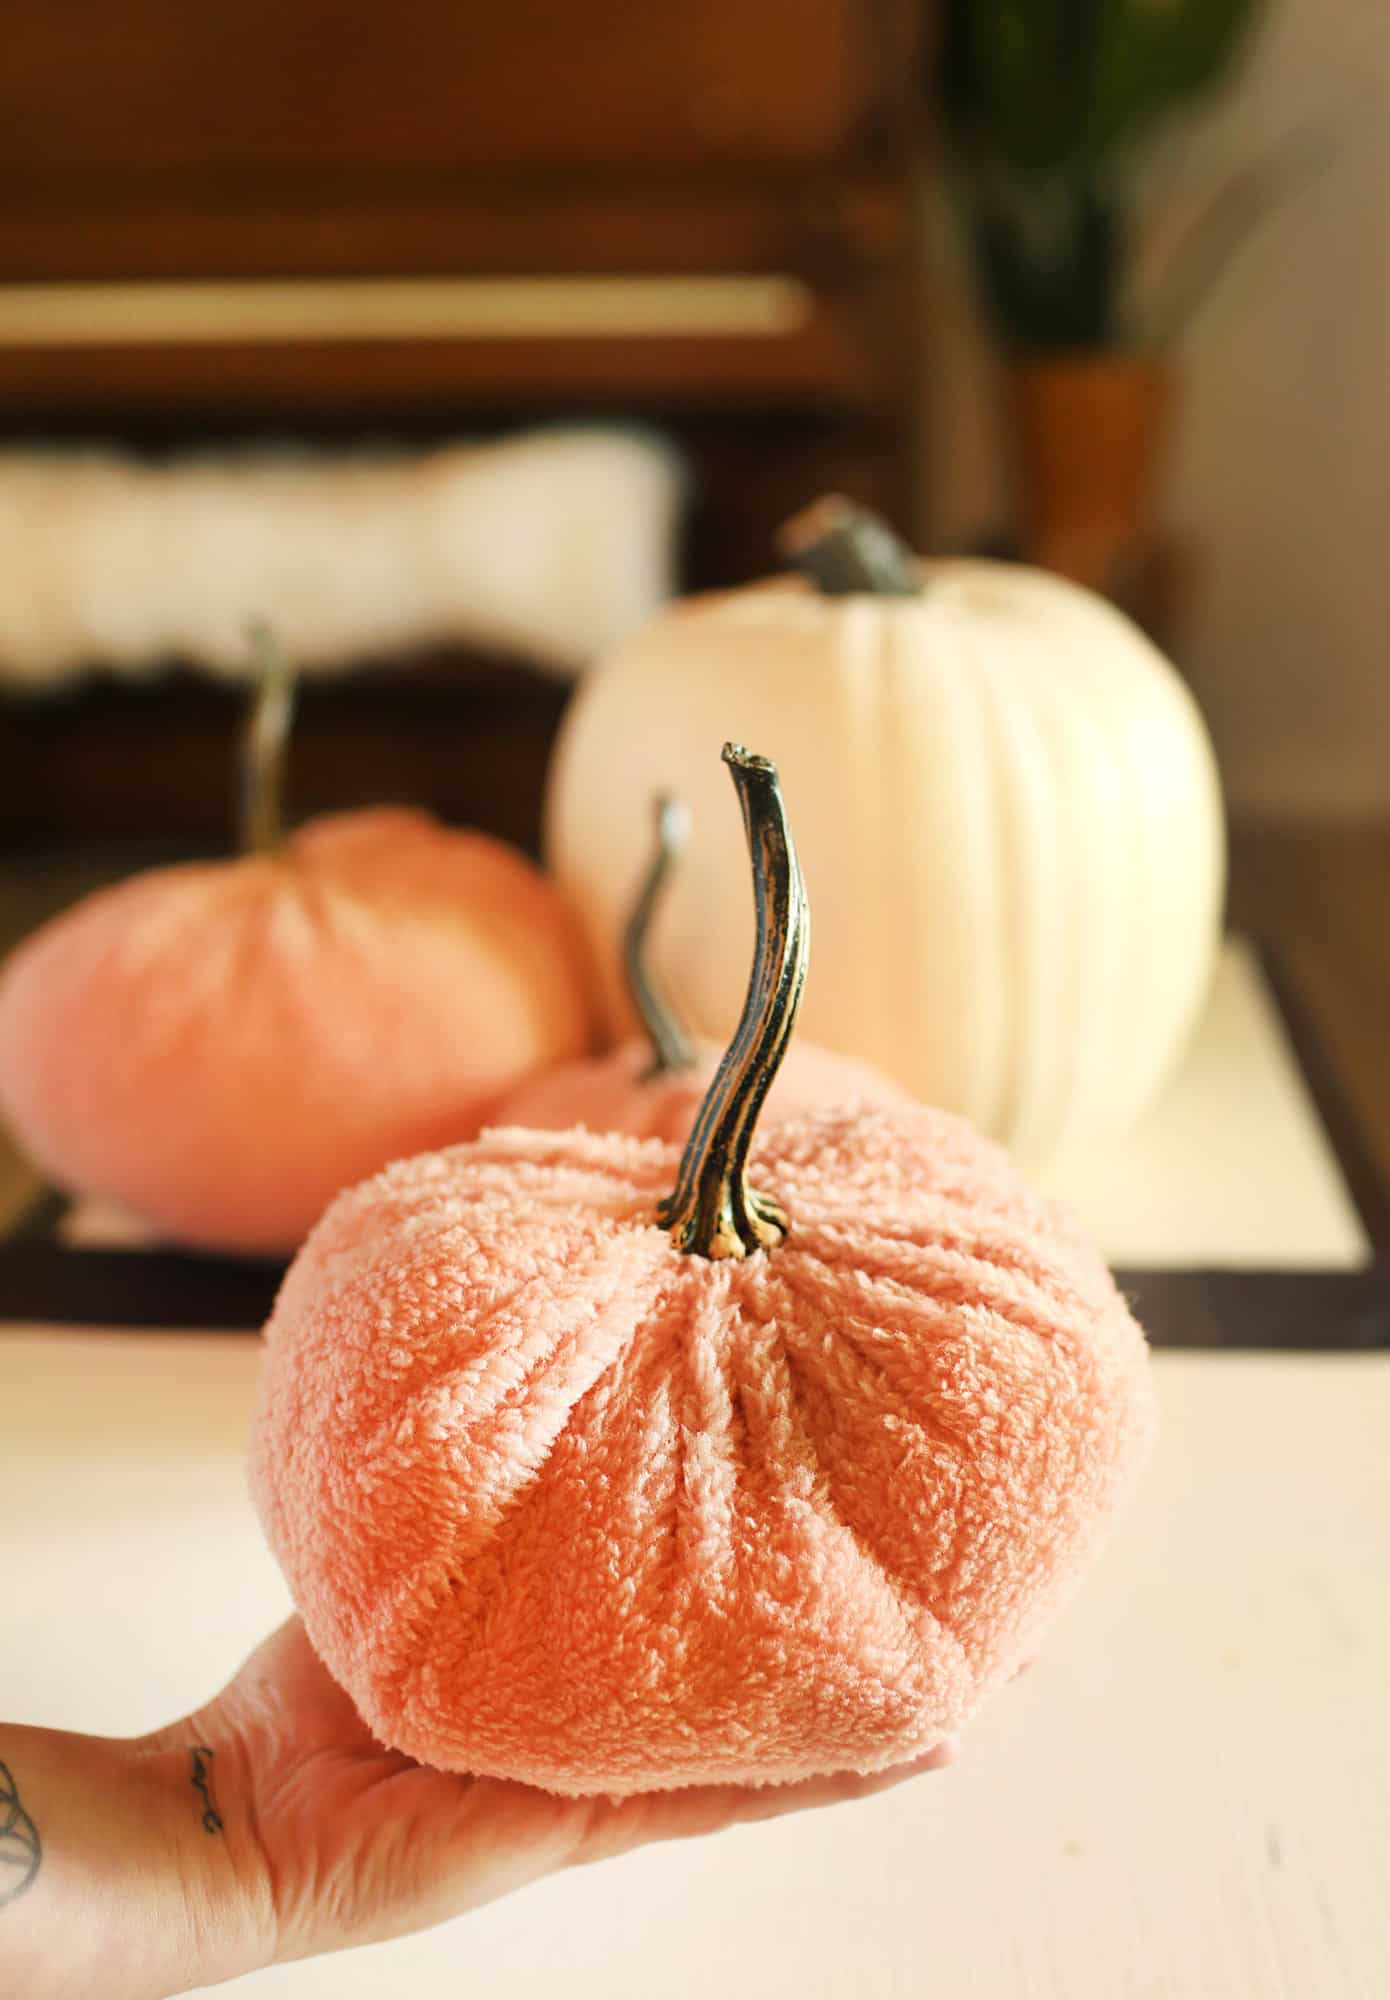 You can easily customize this simple tutorial for easy DIY fabric pumpkins to lots of different sizes, shapes, and colors to match however you like decorating for autumn.
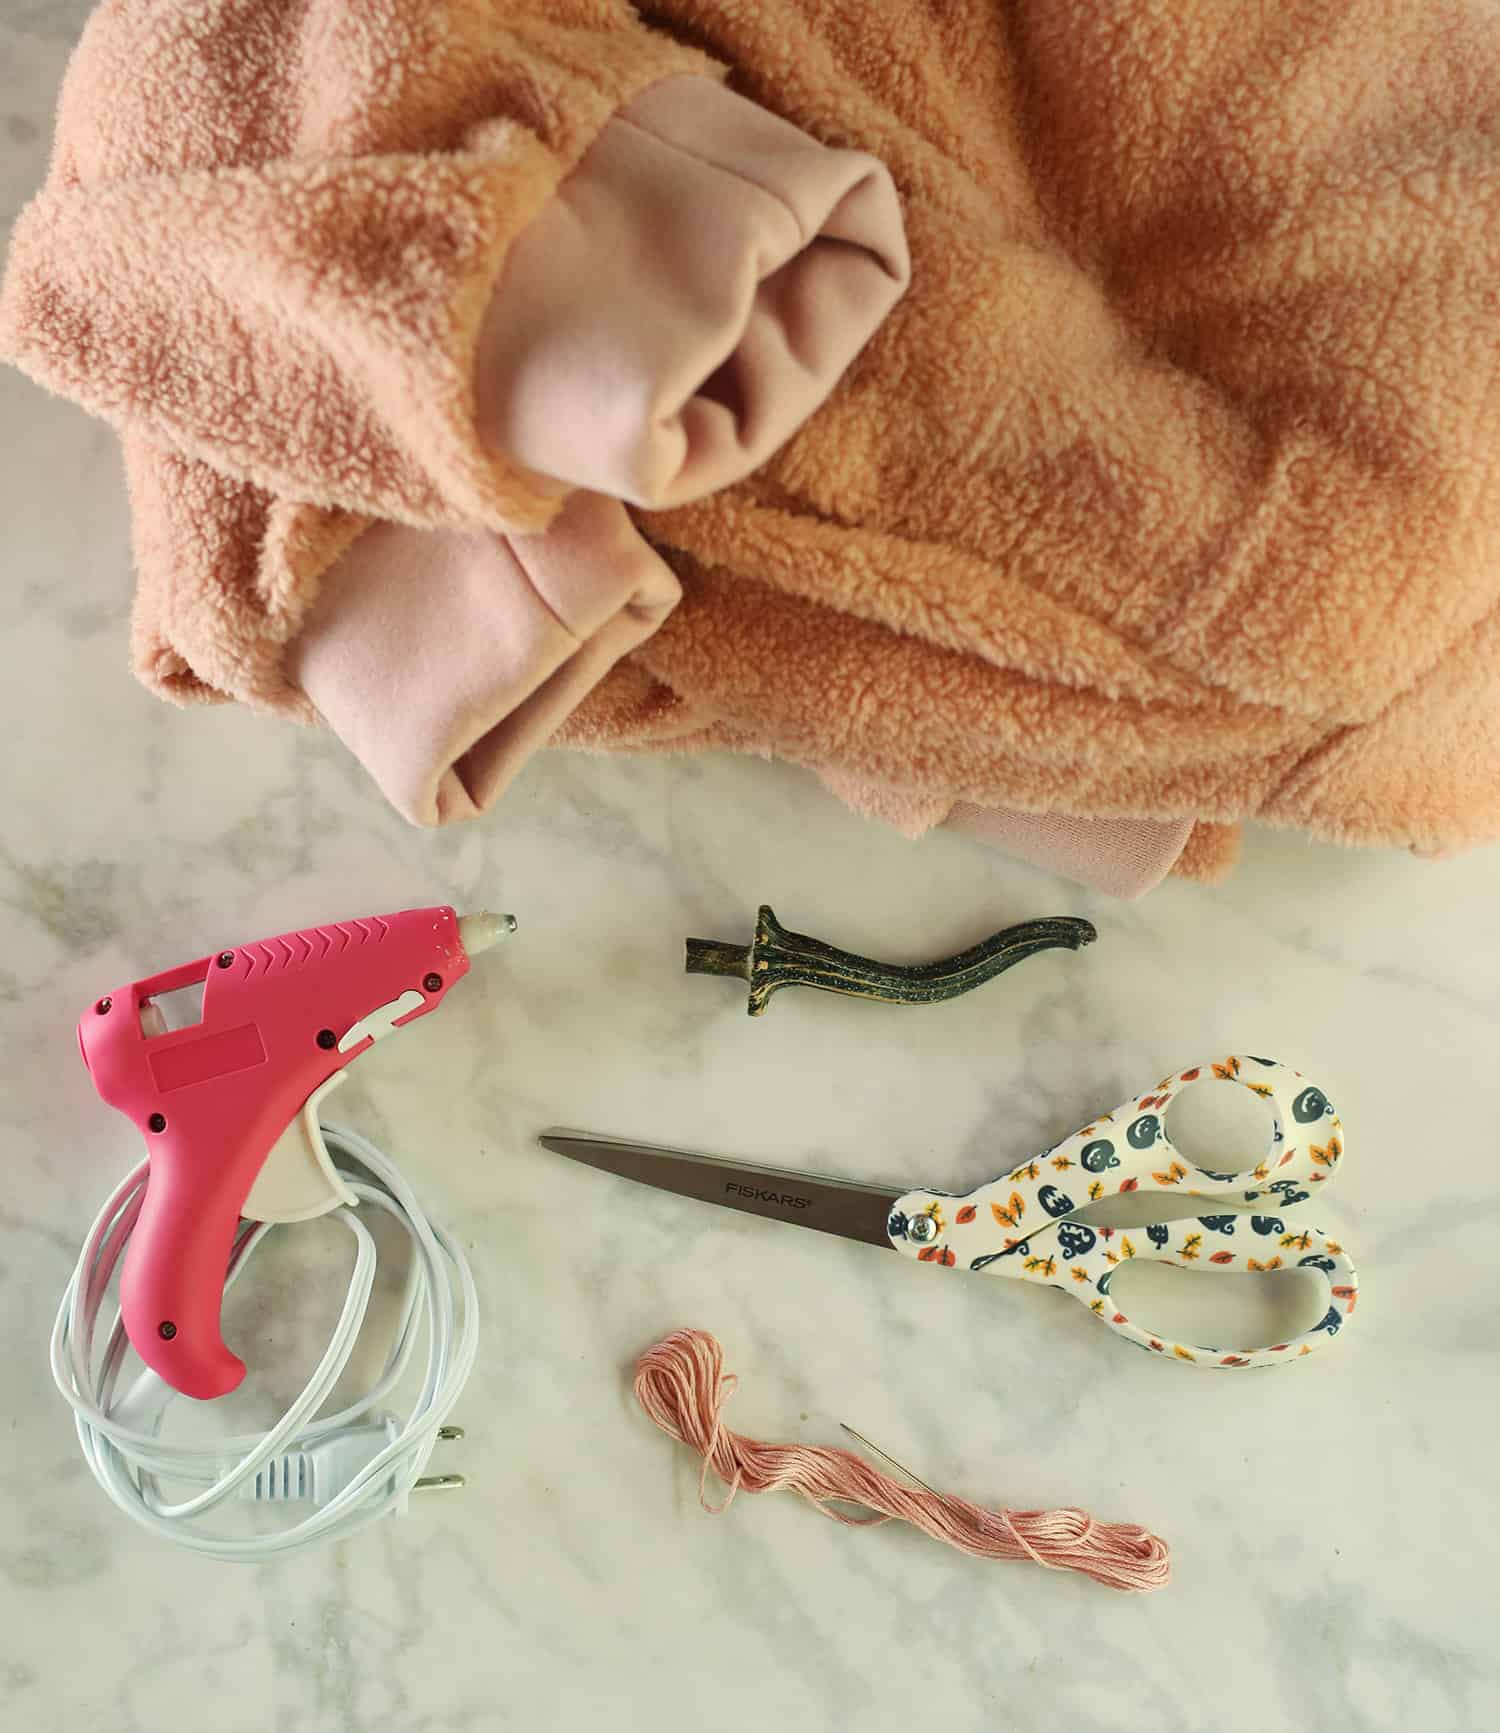 Supplies:
-sweater or thicker shirt (or fabric)
-pumpkin stems, I bought mine here
-embroidery thread and needle
–these limited edition black and pumpkin scissors
-cotton fill
-glue gun and glue sticks
The best fabrics for this project will be medium weight things like fleece, flannel, or velvet. Thicker fabrics will work OK too. Avoid super thin fabrics that are on the transparent side.
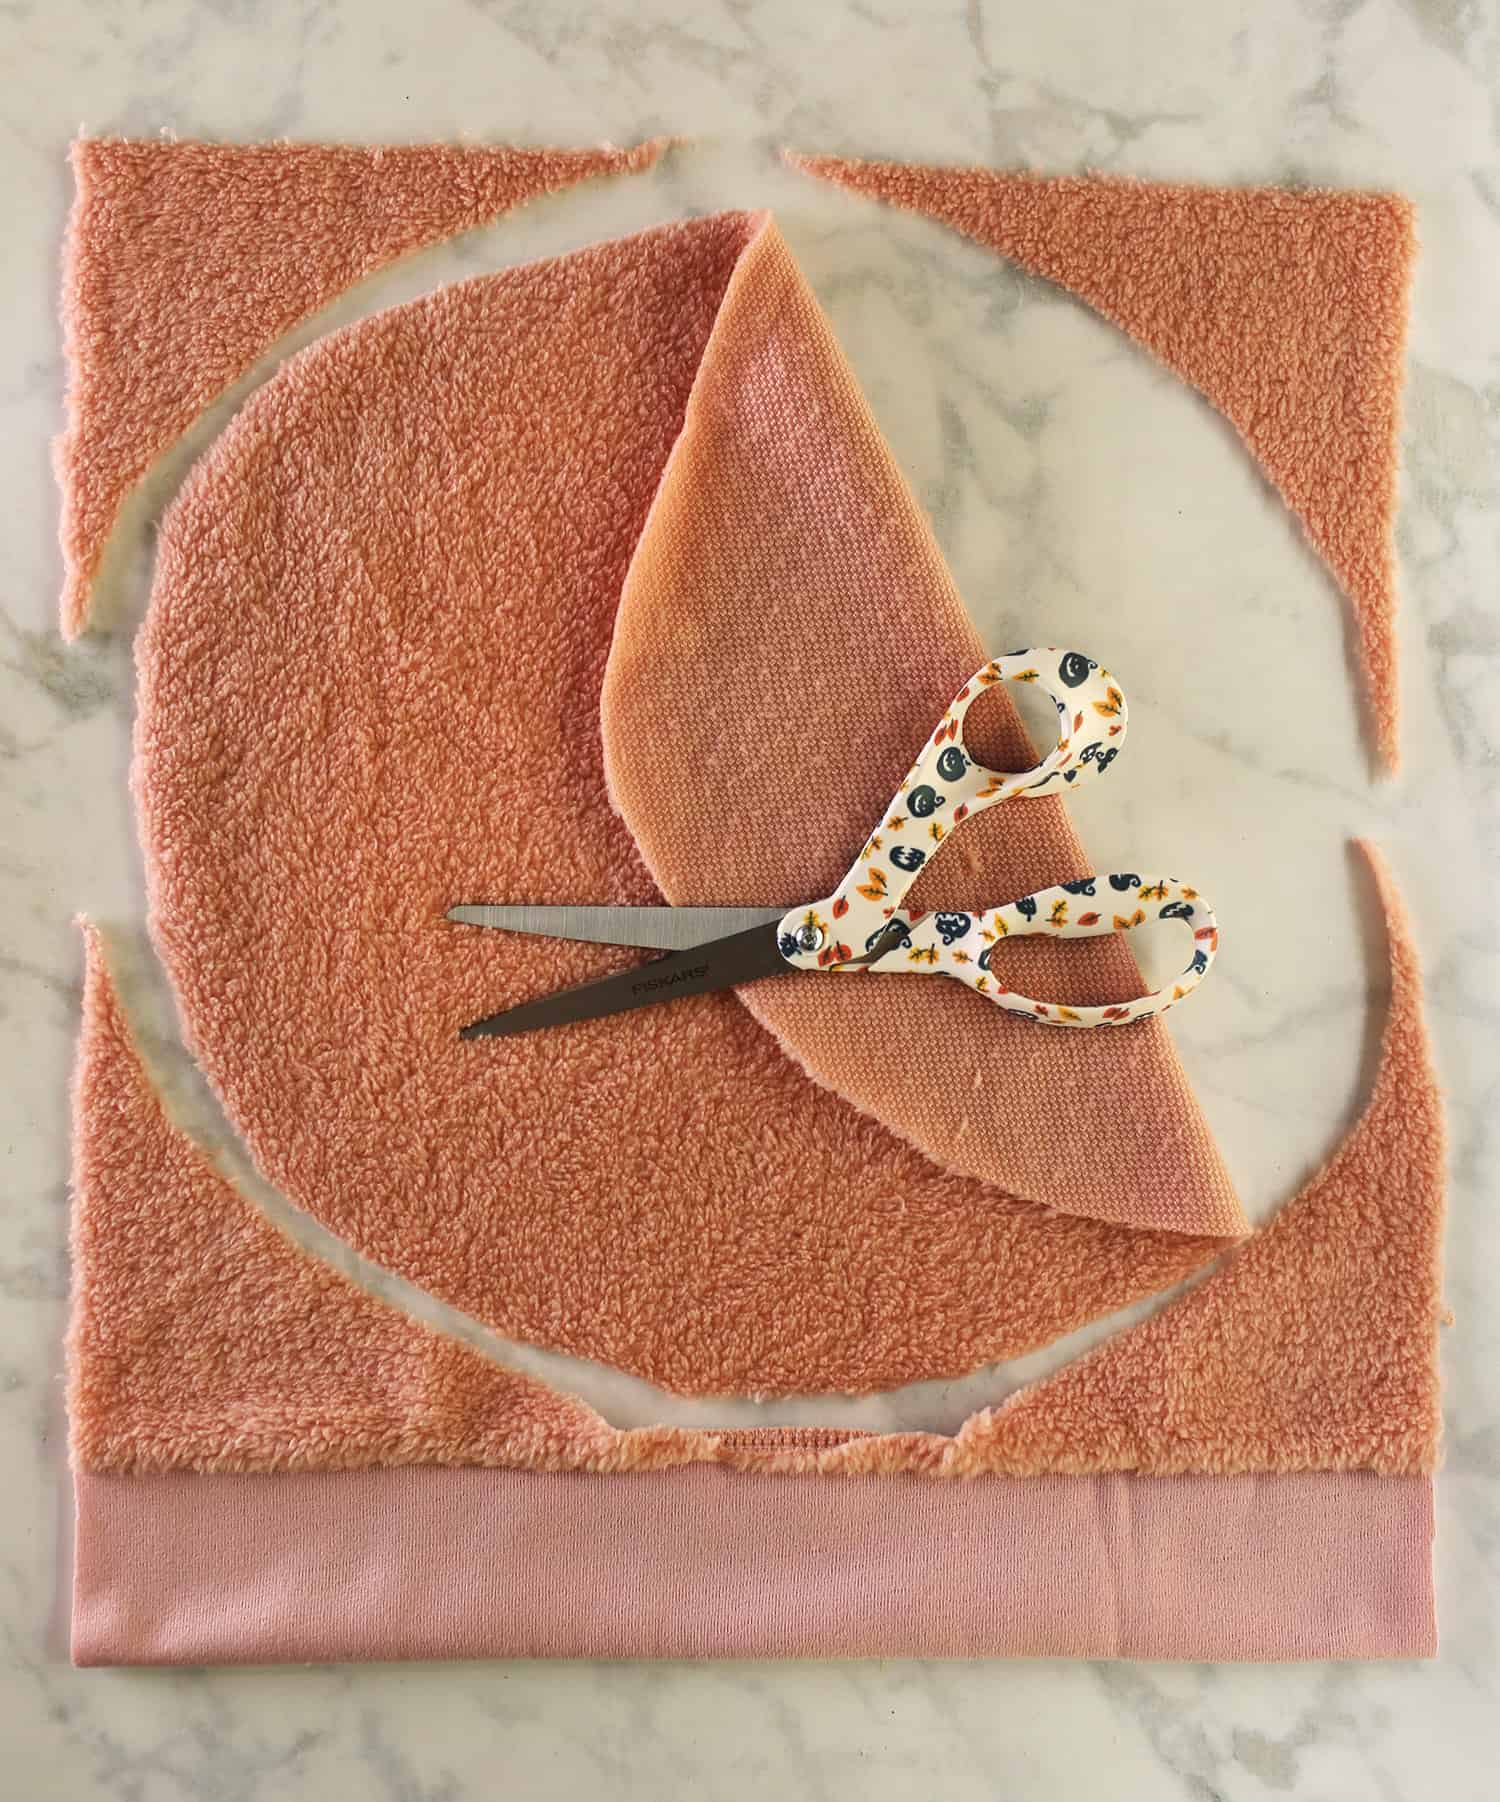 Step One: Cut the sweater into large circles. The size of the circle will determine how big your pumpkin will be, and this can vary depending on what you want. The pumpkins you see in my photos were all around 12-18 inches in diameter.
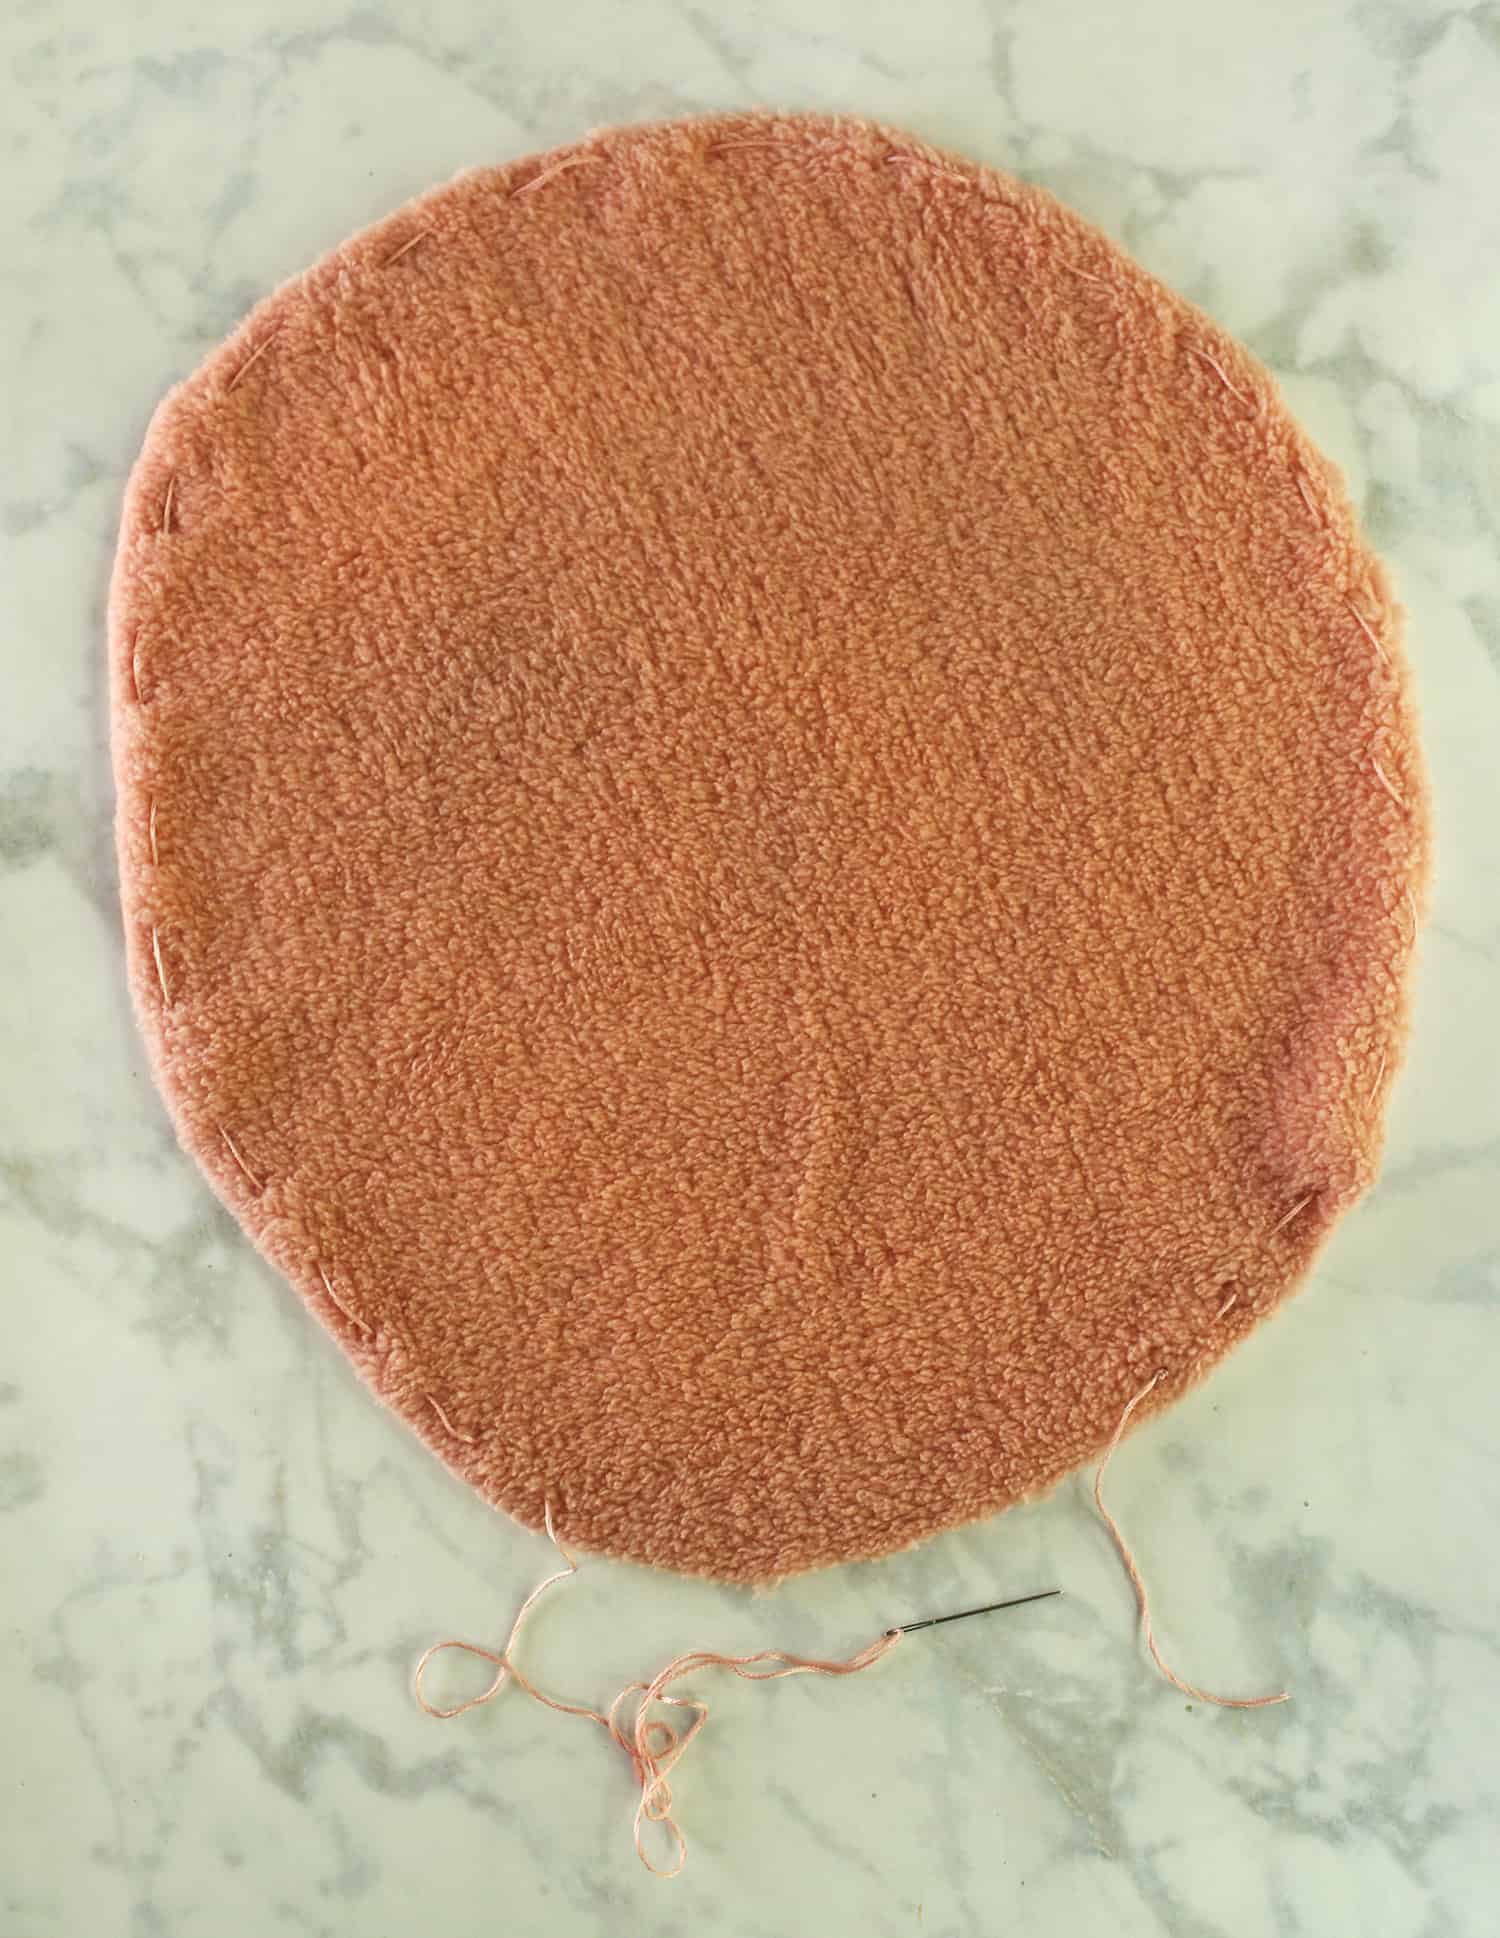 Step Two: Stitch around the edge of the circle.
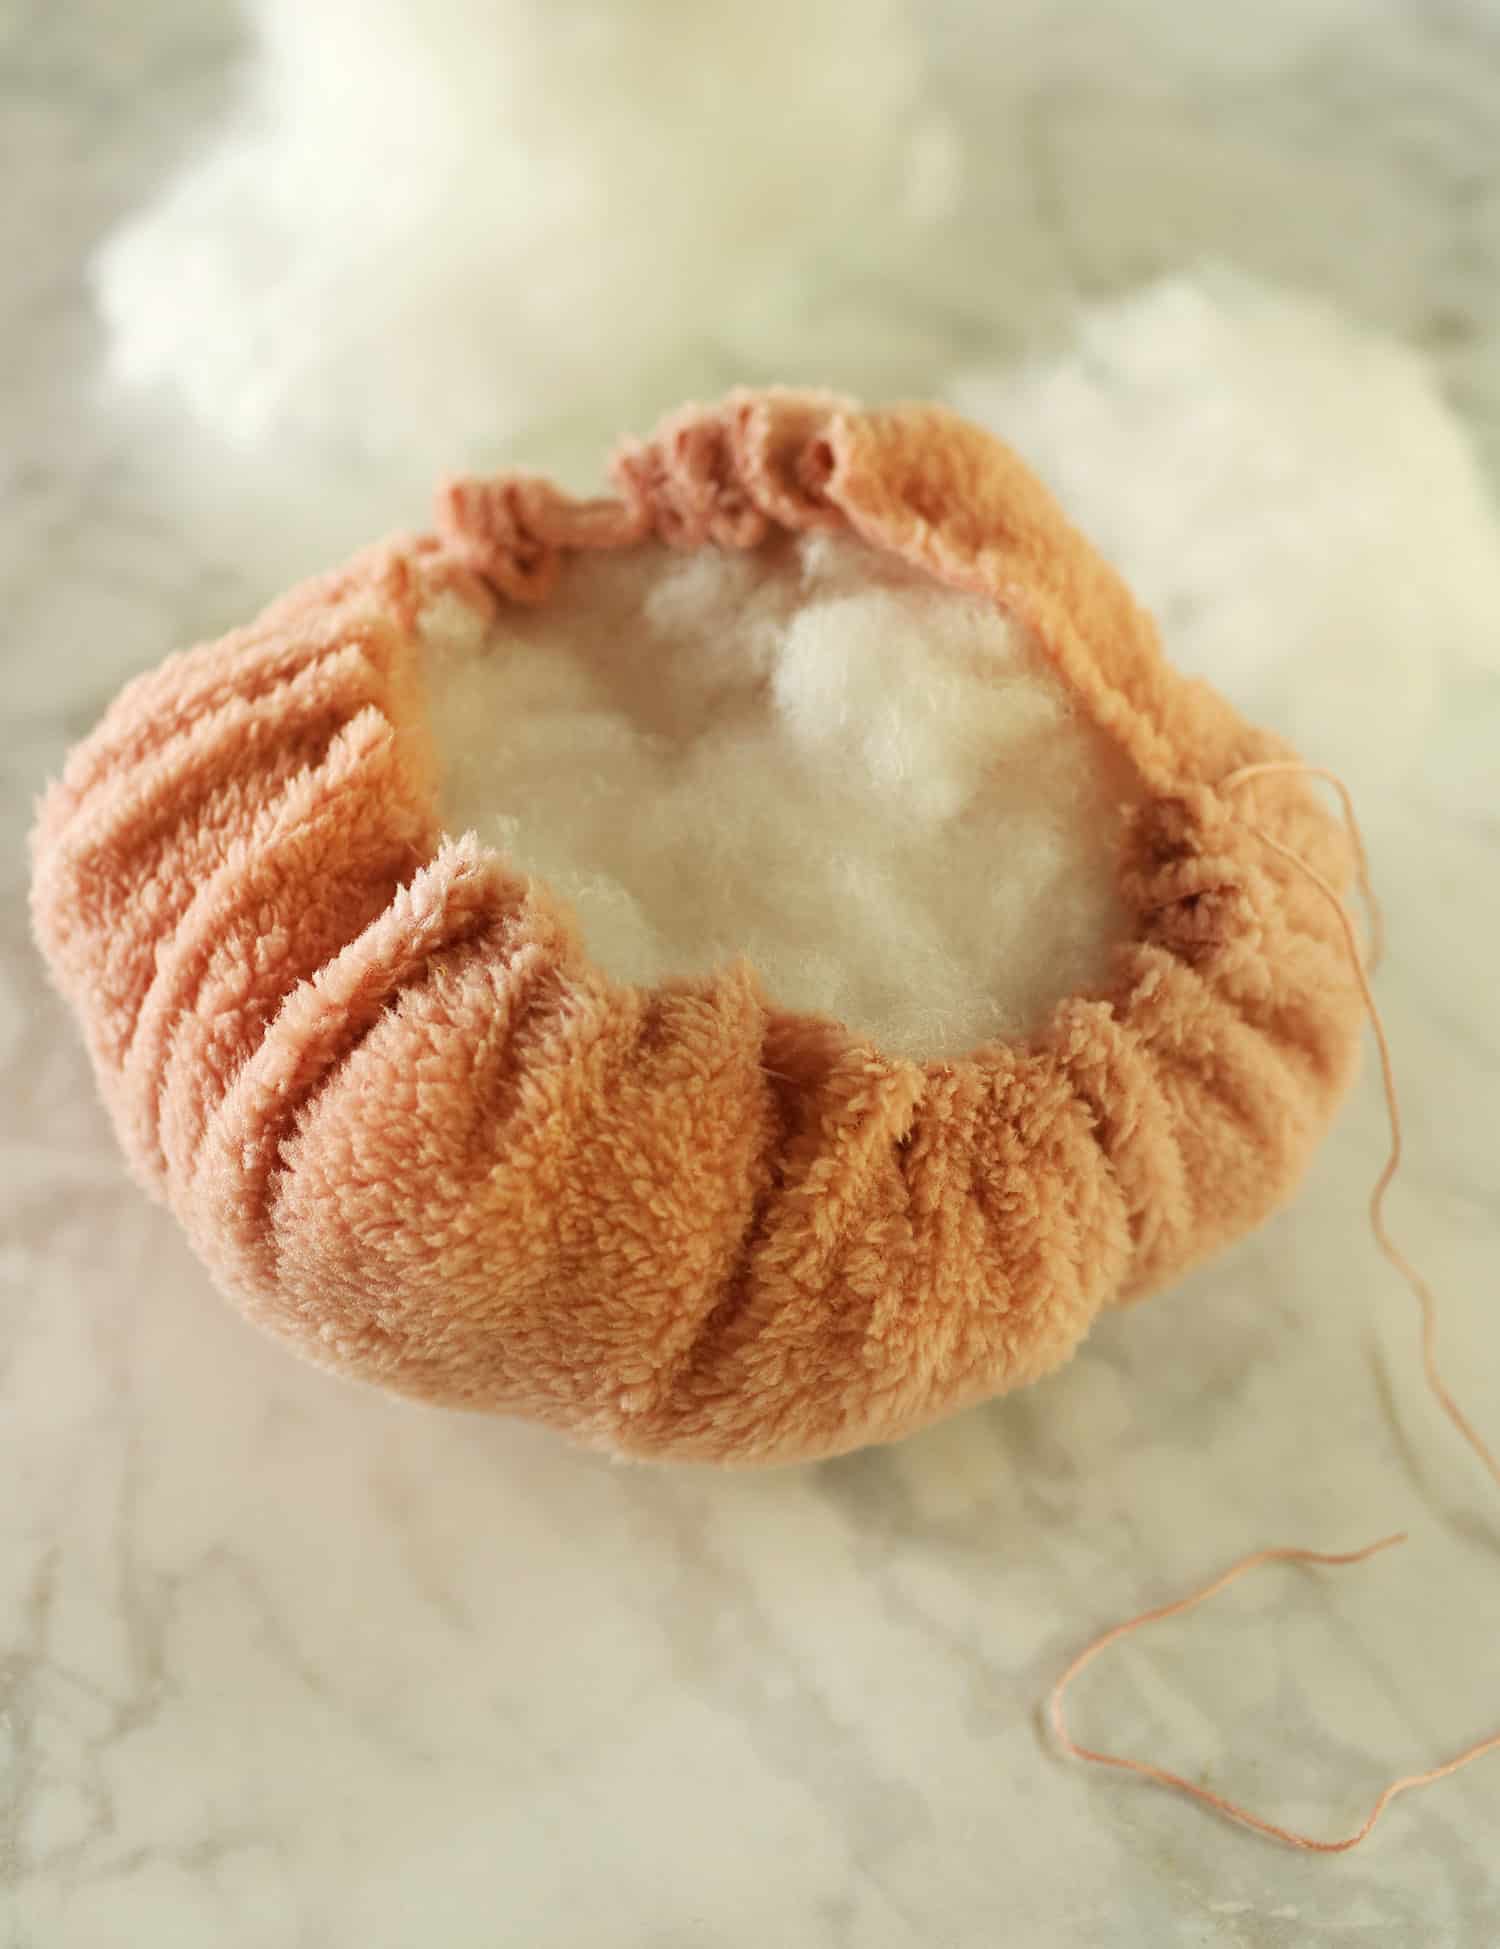 Step Three: Pull the thread to close up the circle; this is kind of like the strings on a drawstring purse. Before you tie the opening closed, fill the inside with cotton fill.
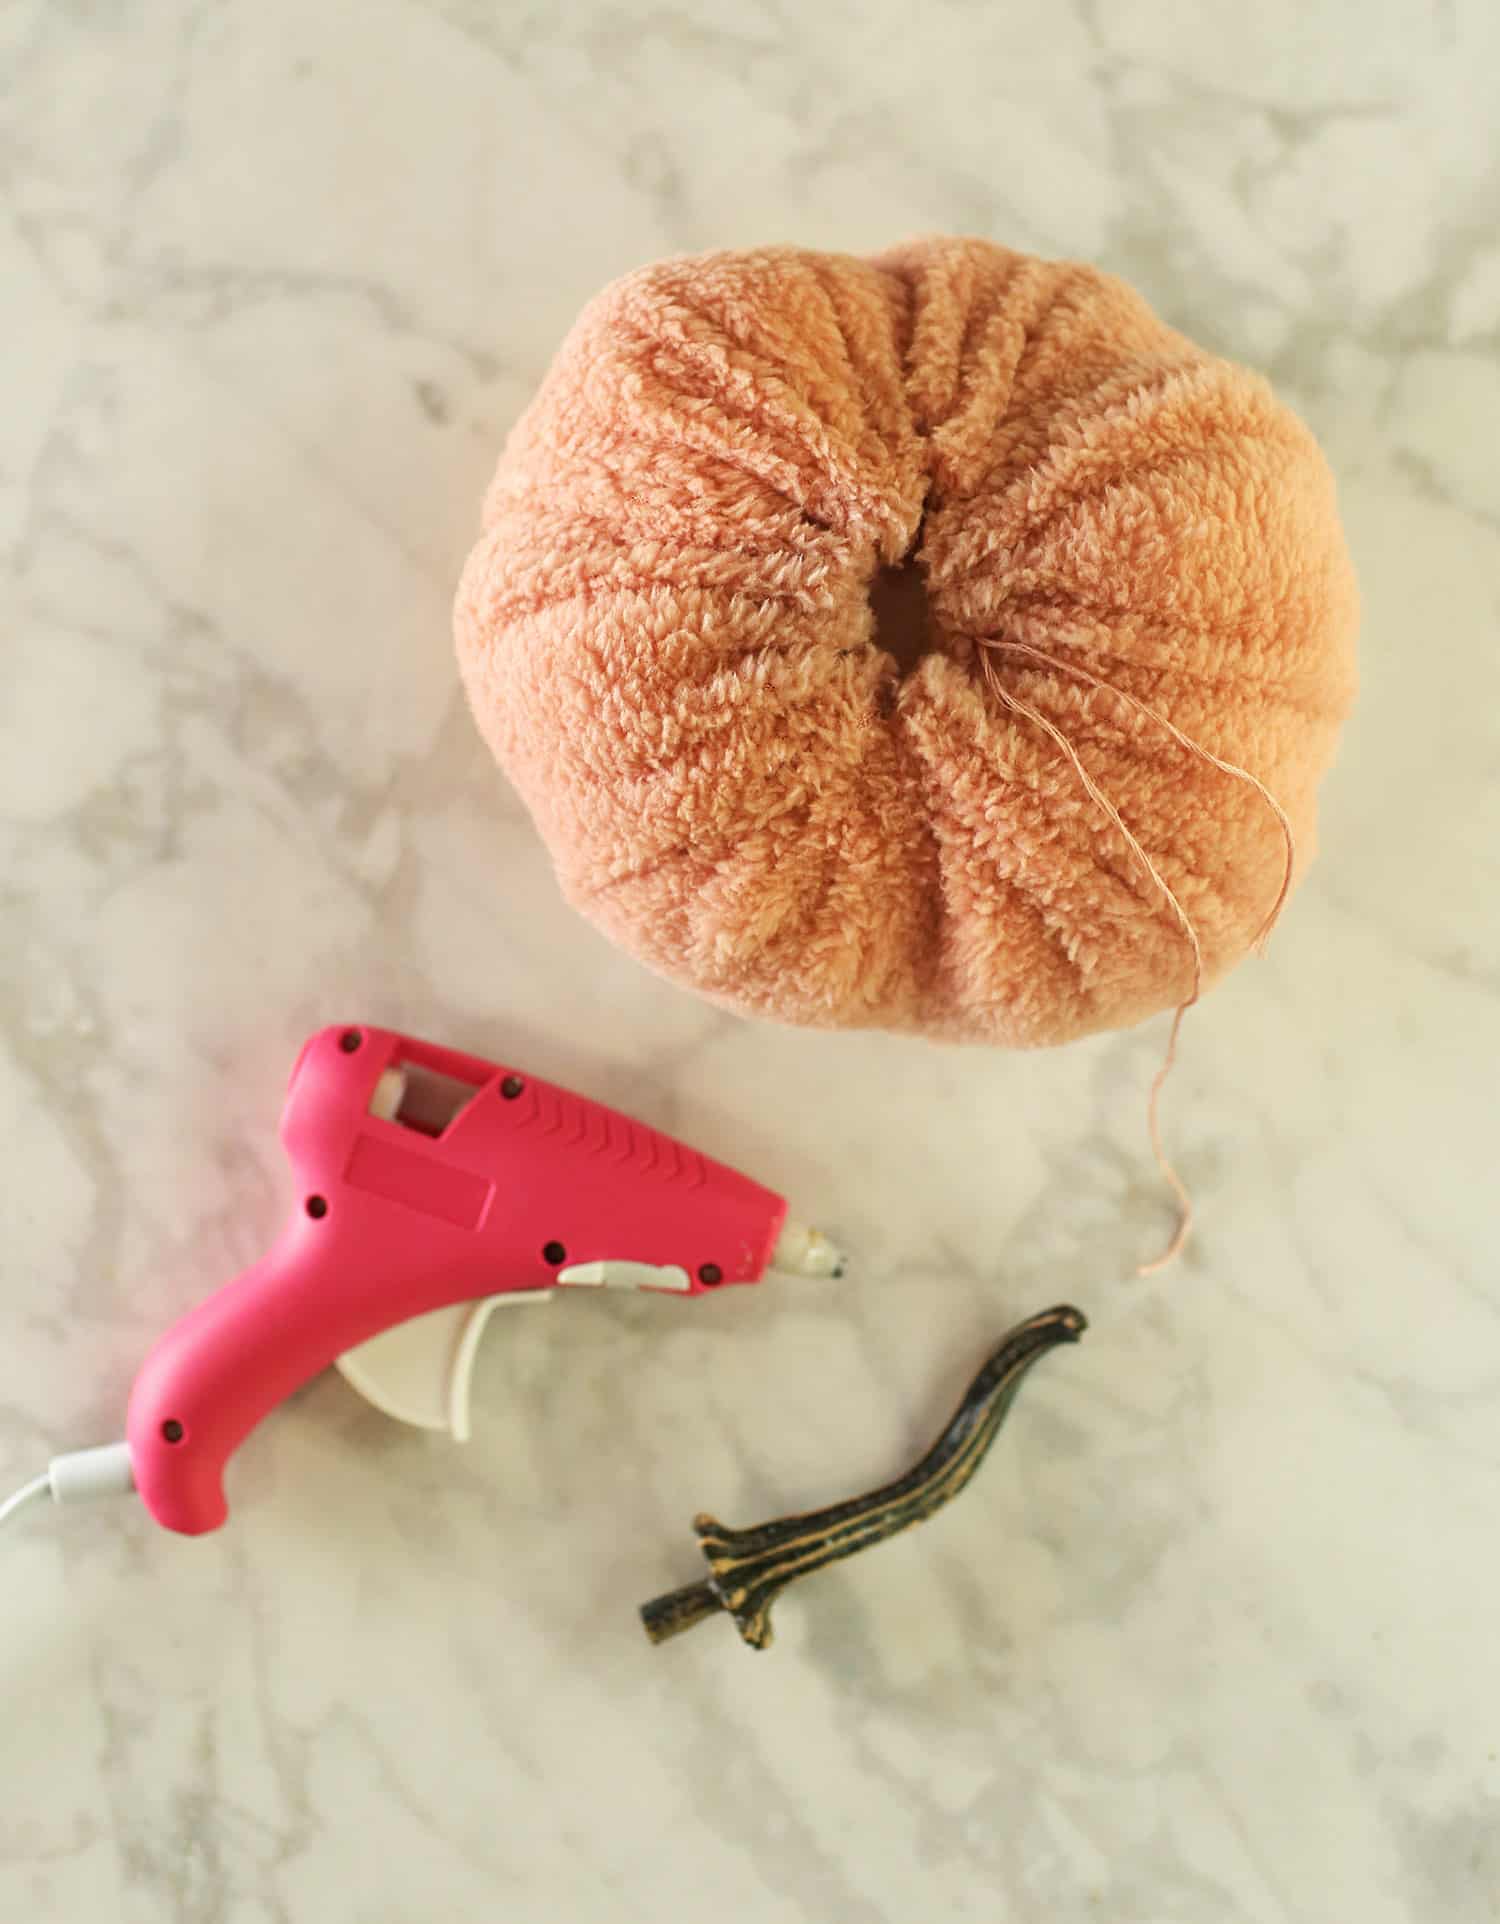 Step Four: Once the opening is tied close, hot glue the pumpkin stem in place. Repeat for as many pumpkins as you want to create.
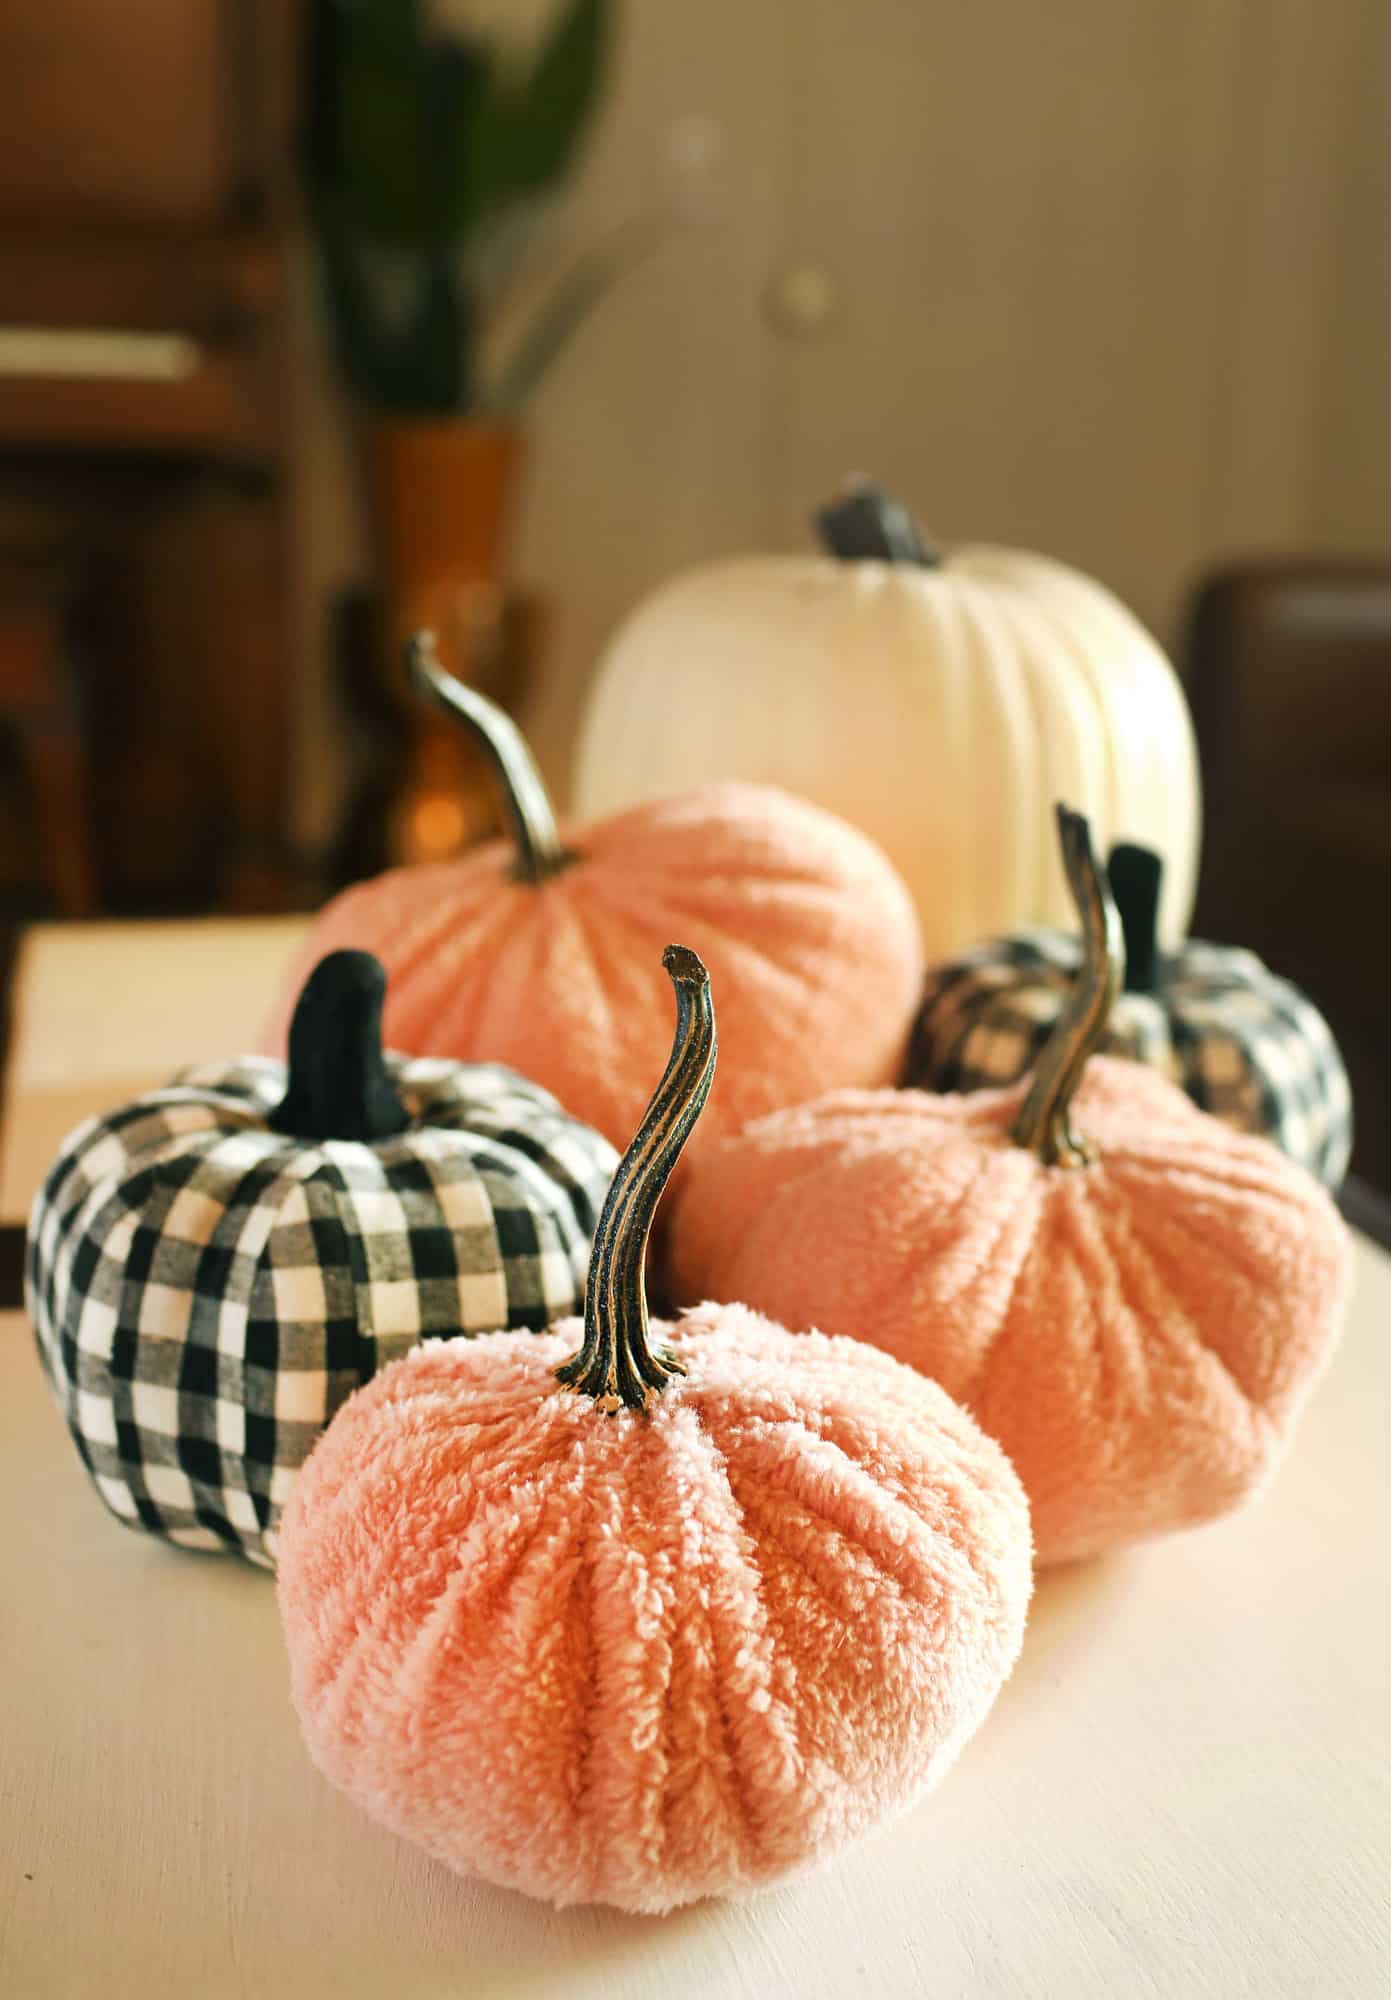 That’s it—super simple! These are lightweight, like a small throw pillow. If you want to weigh your fabric pumpkin down, you can add a small bag of dried beans or pebbles to the inside along with the fill.
P.S. Check out 15 Easy DIY Halloween Decorations for more ideas!
d

Hi! Just found you through Theology of Home email. Signed up for your newsletter and I am so excited to follow you!
Yes, the font is too big for me as well. I have to do a lot of scrolling to move through a post, and I can’t even get a complete photo on the screen, so I don’t get a sense of the overall post. I feel too “zoomed in”.
Real, not teal! Those are for food allergy awareness!
Like probably most of us, I have seen fabric pumpkins for YEARS and didn’t think it would be an easy project. (I tried to justify this by telling myself I really preferred to have teal ones haha!)
Naptime project today: digging around the fabric drawers and making some of these cuties!
Thanks Emma!
I love this, especially because you can change up the fabrics year to year!
Yes, you could use ALL different kinds of fabrics / colors to go with whatever decor or style you have in your home.
Cute!! I love that you used an old sweater for this! What a great way to give a worn out item a new life. If only my house had more storage for seasonal decor!
Yes, exactly! Especially a sweater that maybe just has one small stain, or something that make it not enjoyable to wear but you want to reuse it. 🙂
They turned out really cute!
For the 3 days I see bigger fonts. Is it a new layout?
Yes, it’s just something we’ve been trying as it helps with accessibility for some readers (especially on mobile). But we are still trying to find the right fit. 🙂
I’m a little sad to say that, already at 36, I kind of appreciate the bigger font! Haha
Thank you for the reply.
If it could help as a feedback, then on 15″ computer screen it is a bit big as a font.