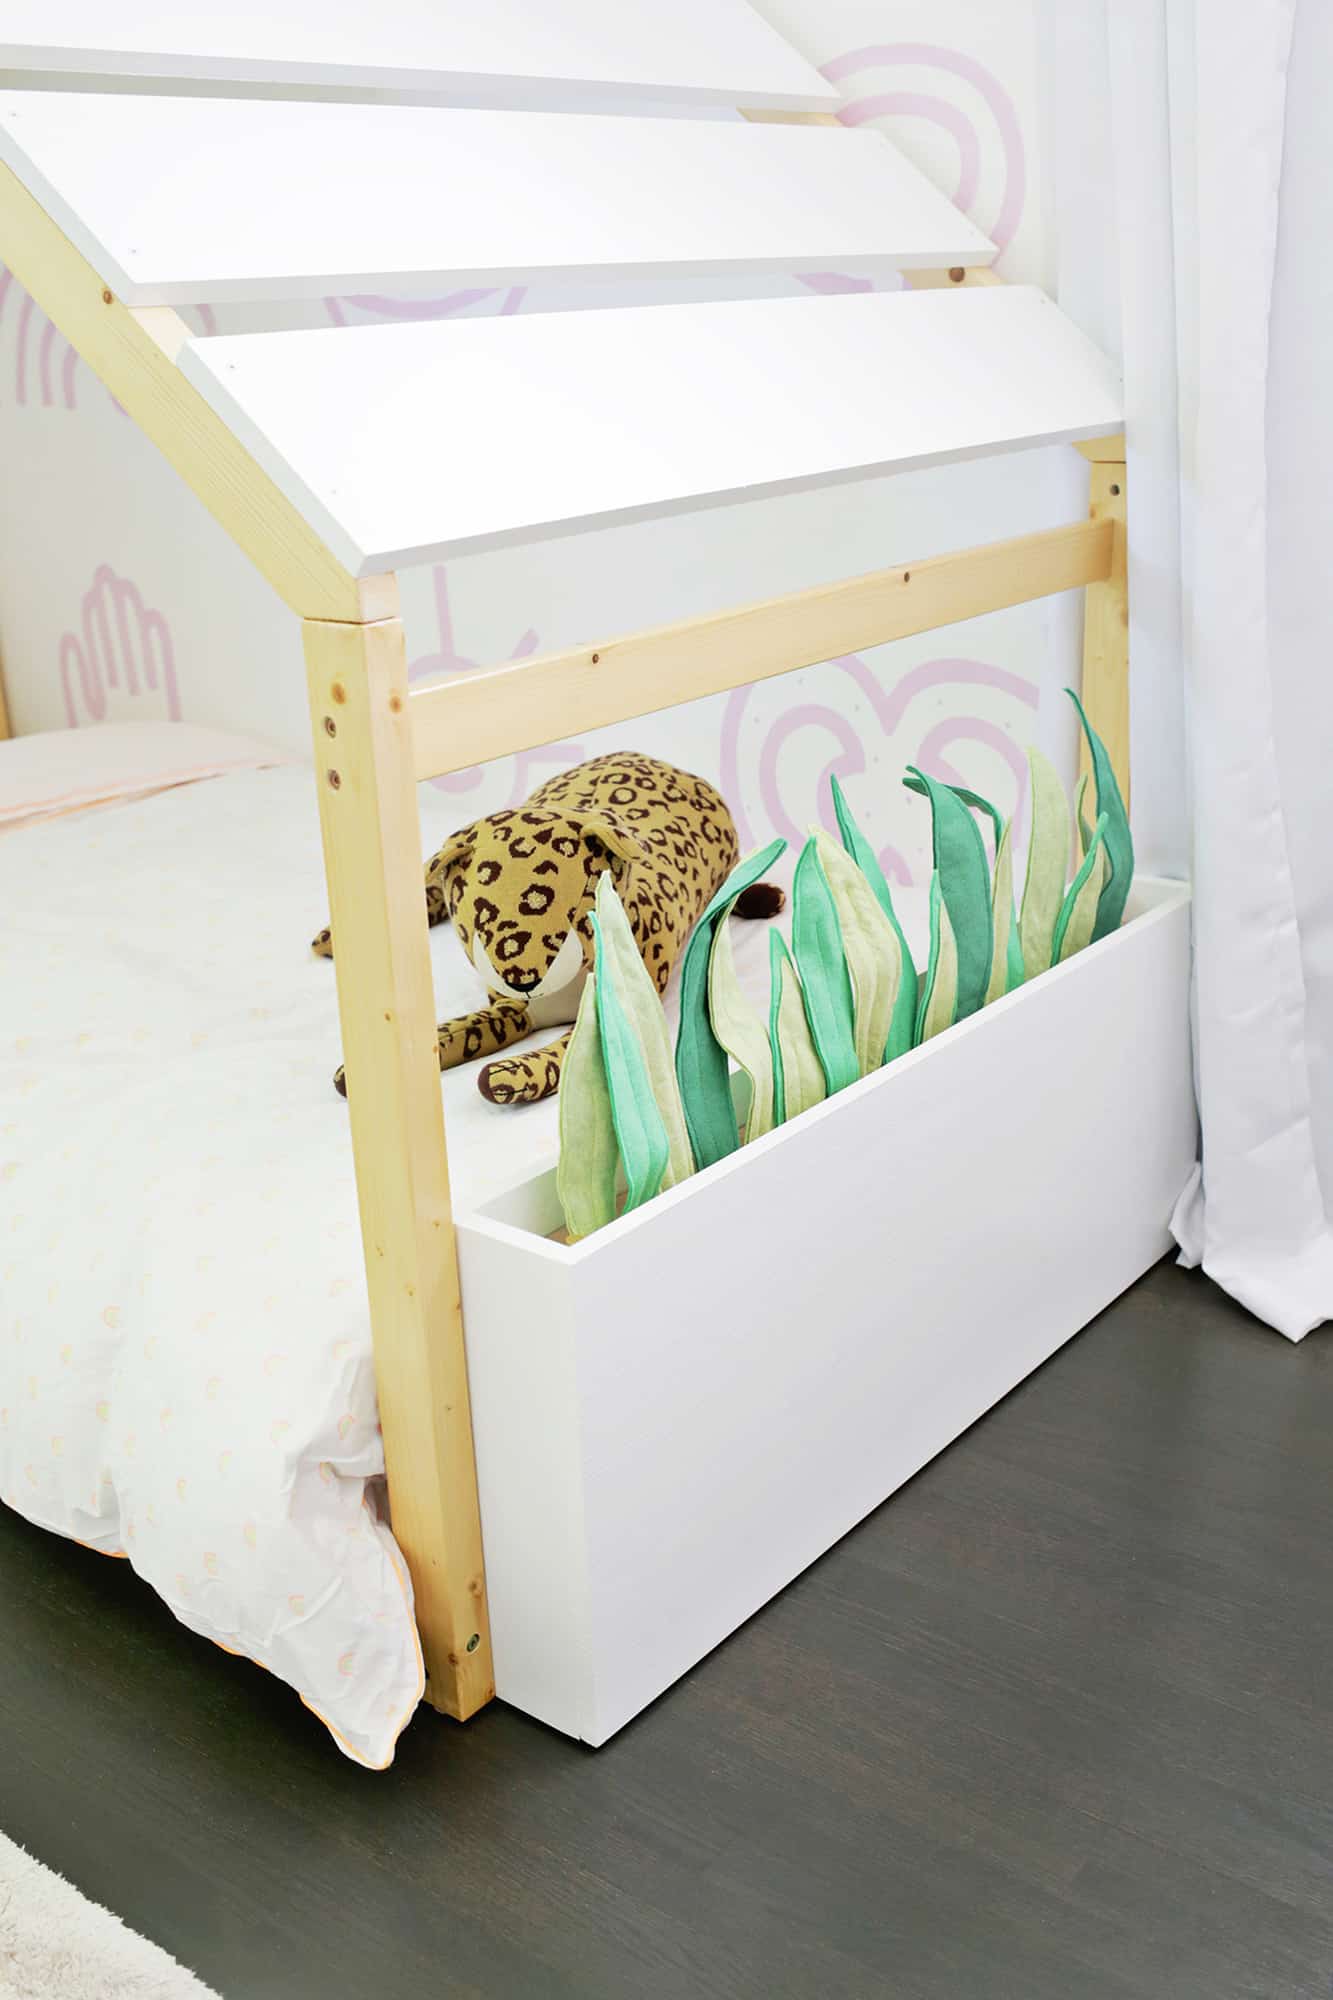
I feel like making DIY things for Lola is truly one of my greatest joys in life as it combines two of my favorite things! When we decided to switch Lola to a big kid’s bed, I knew I wanted to make something that was a little more fun for her than your average bed. I added some Palm Springs-inspired elements to a house bed frame and, if you ask me, cool plants are a must for any good ’60s ranch landscaping! I decided to add two planter boxes that would have felt sansevieria plants “planted” in them, but I wanted them to be crush proof and have hidden storage underneath, so I knew I had to do a little bit of trial and error to find the perfect recipe for success … took a little bit of tweaking but here’s what I came up with:
 Supplies for the 2 planter boxes:
-four 20″ x 4′ x 3/4″ boards
-six 3.5 x 3′ x 3/4″ boards
-four 1/2″ x 1/2″ x 3′ wooden dowels
–circular saw or jigsaw
-wood glue
-1 1/2″ wood screws or nail gun
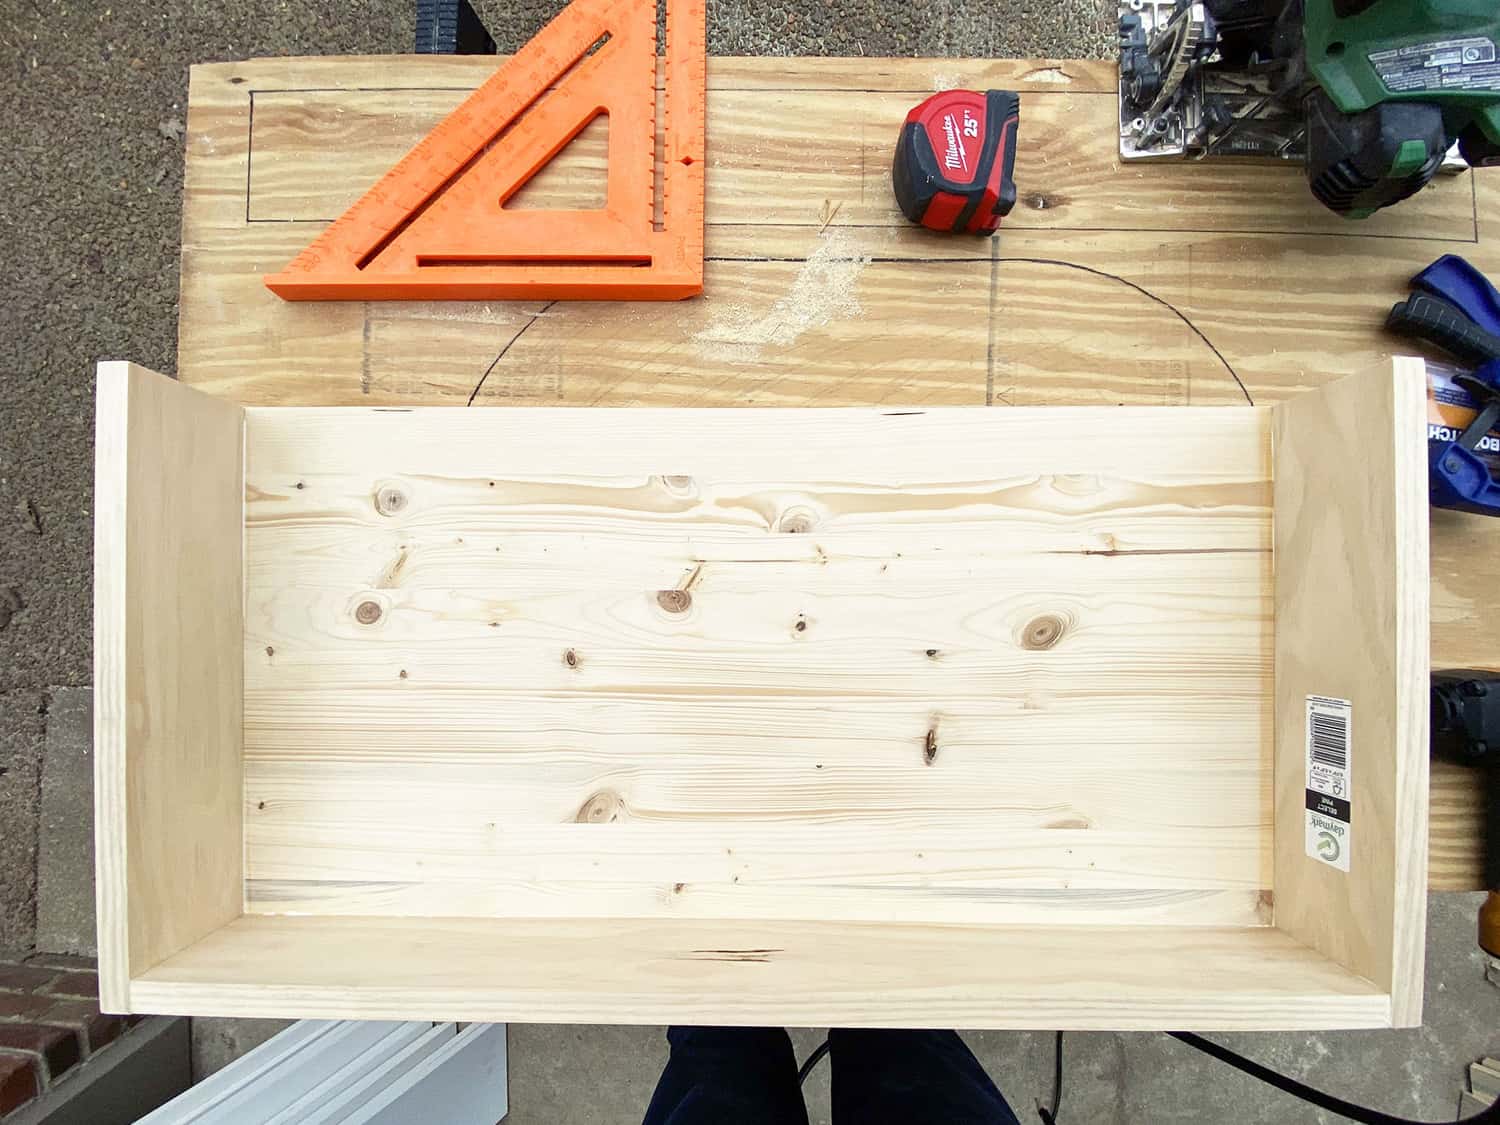
For the planters, you’ll want to create a box that fits whatever dimensions you’d like, but I’ll give you the dimension we made mine. I wanted the finished boxes to be 15″ high, 5″ deep, and 30″ long for the planter near the top of the bed and 37.75″ long for the other planter at the bottom of the bed. For the 30″ wide box you’ll need to cut your wood so that you have two side panels that are 15″ x 3.5″ (the two 3/4″ thick front and back panels will make it 5″ deep overall once added), one bottom panel that is 28.5″ x 3.5″, and two panels for the front and back that are 15″ x 30″. Use wood glue and screws (or a nail gun) to attach the side panels to your bottom panel, and then attach your back panel to the sides and bottom.
Repeat the measurements for your 37.75″ wide box if you are making one of those, but just make the length of the front and back board 37.75″ instead of 30″, and your bottom board length 36.25″ instead of 28.5″.
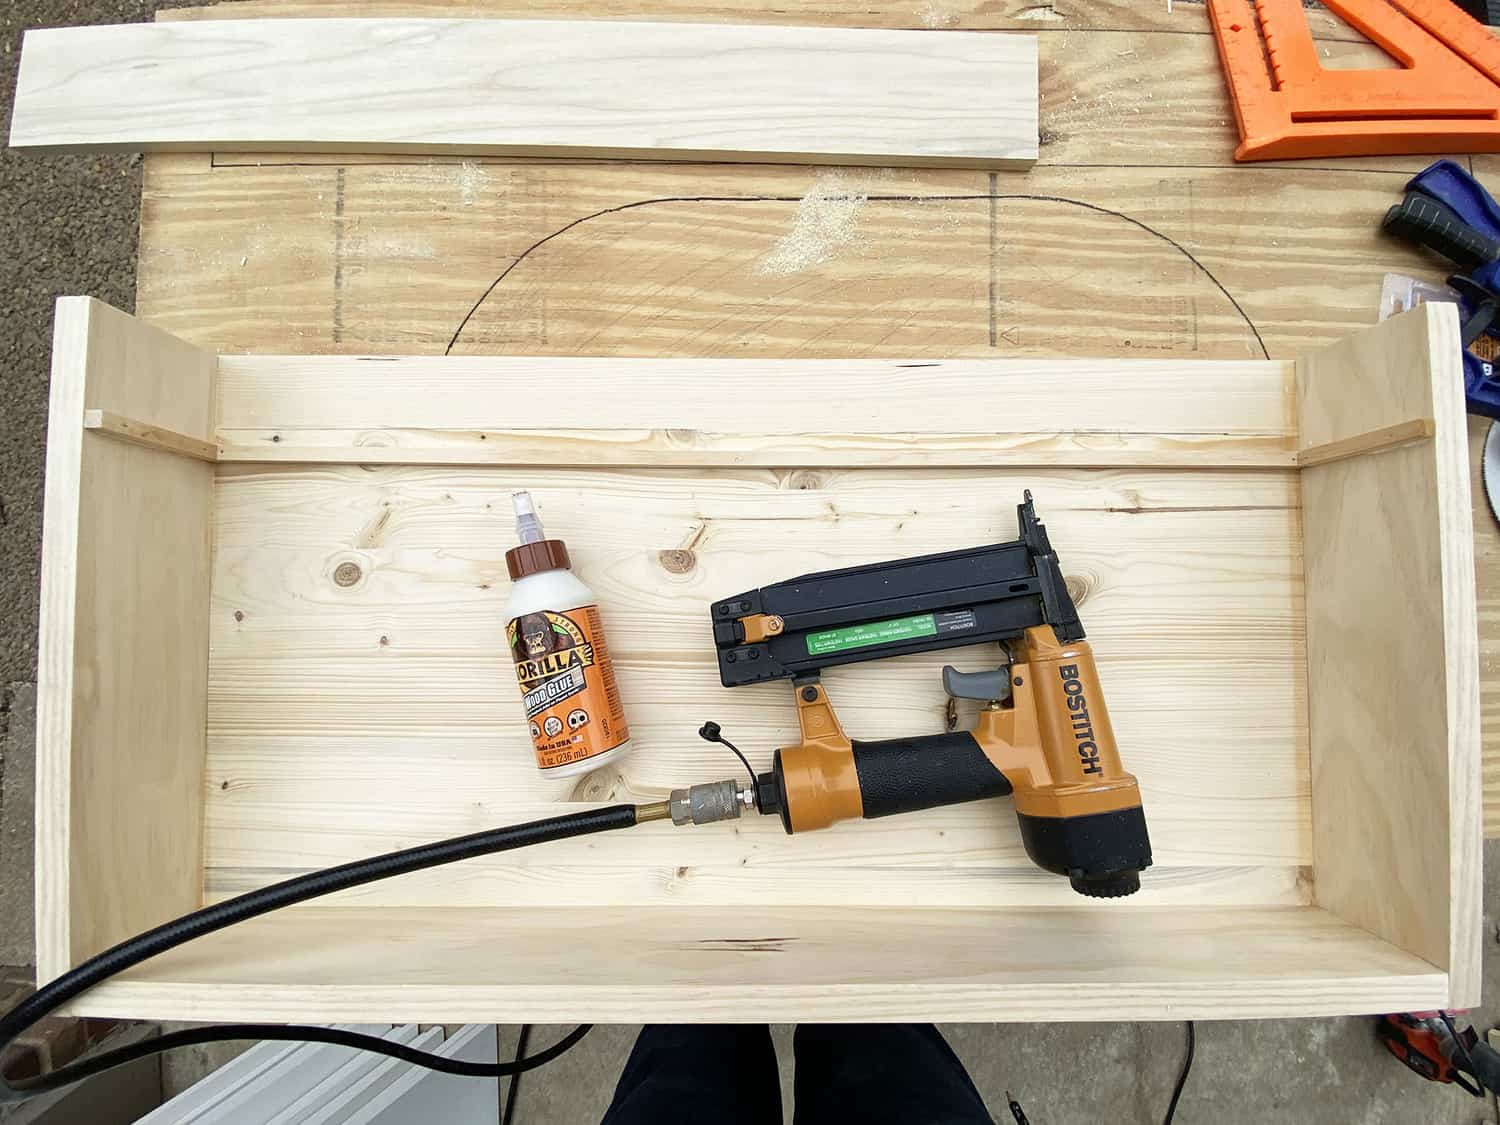
Once you have the sides and back of your board together, cut and add a strip of dowel rod to sit about 2″ from the top of your planter box all the way around. This will be the shelf your lid sits on. It’s easier to glue and nail the dowel rod in before you add the front panel as it gets to be a tight space in there once all sides are on, so that’s why I would attach them on before you finish assembling your box. Attach a strip of dowel rod to the front panel as well in the same spot so it will be a continuous shelf all the way around when attached. Just cut it 1/2″ shy of the edges on both sides so it will have room to sit flush with the side dowels once attached.
Add your front panel with glue and screws/nails and you’re ready to paint your planter! Paint the box whatever color you like.
 For the lid, measure the inside of your planter box and cut a piece of wood that fits the exact dimensions of the inside (make it a little smaller, if anything, so it goes in and out easily). Use a drill and a jigsaw to cut a small 1/4-1/2″ wide slit down the middle of your planter box lid to make an opening for your plants to “grow” through (should be centered on the board and about 2″ away from each edge). I drilled a hole big enough for my jigsaw blade to fit into on each end (that gives you a point of entry for your saw blade) and then used a ruler to draw straight lines to follow with the saw to the other end. Once the slit was cut, I painted the top of the lid a light brown to be the “dirt” that the plants are growing from.
Now it’s time to make your plants!
 Felt Plant Supplies:
–plant template (right click to download)
-green felt in different shades (I got 1/2 a yard each of geranium, clover, and pistachio)
-felt for bottom of planter lid
-hot glue gun
–floral wire
-fabric scissors
-staple gun and staples
-small knobs (I used two of these per lid)
Download the plant template and cut out shapes for as many leaves as you want! You’ll need at least a front and a back piece for each leaf, but you can also add a third piece by cutting a second piece for the front side a little smaller and in another shade of green to give you some more dimension.  If using only two layers, pin them together and sew around the edge with 1/4″ seam allowance, leaving 1″ of the bottom open. If making a three layer multi-tone one, first sew your smaller different tone onto the front layer, then pin that whole front layer to the back layer and sew again all the way around the edge, leaving the bottom open. Fold your floral wire in half and insert into the leaf with the two ends coming out the bottom.
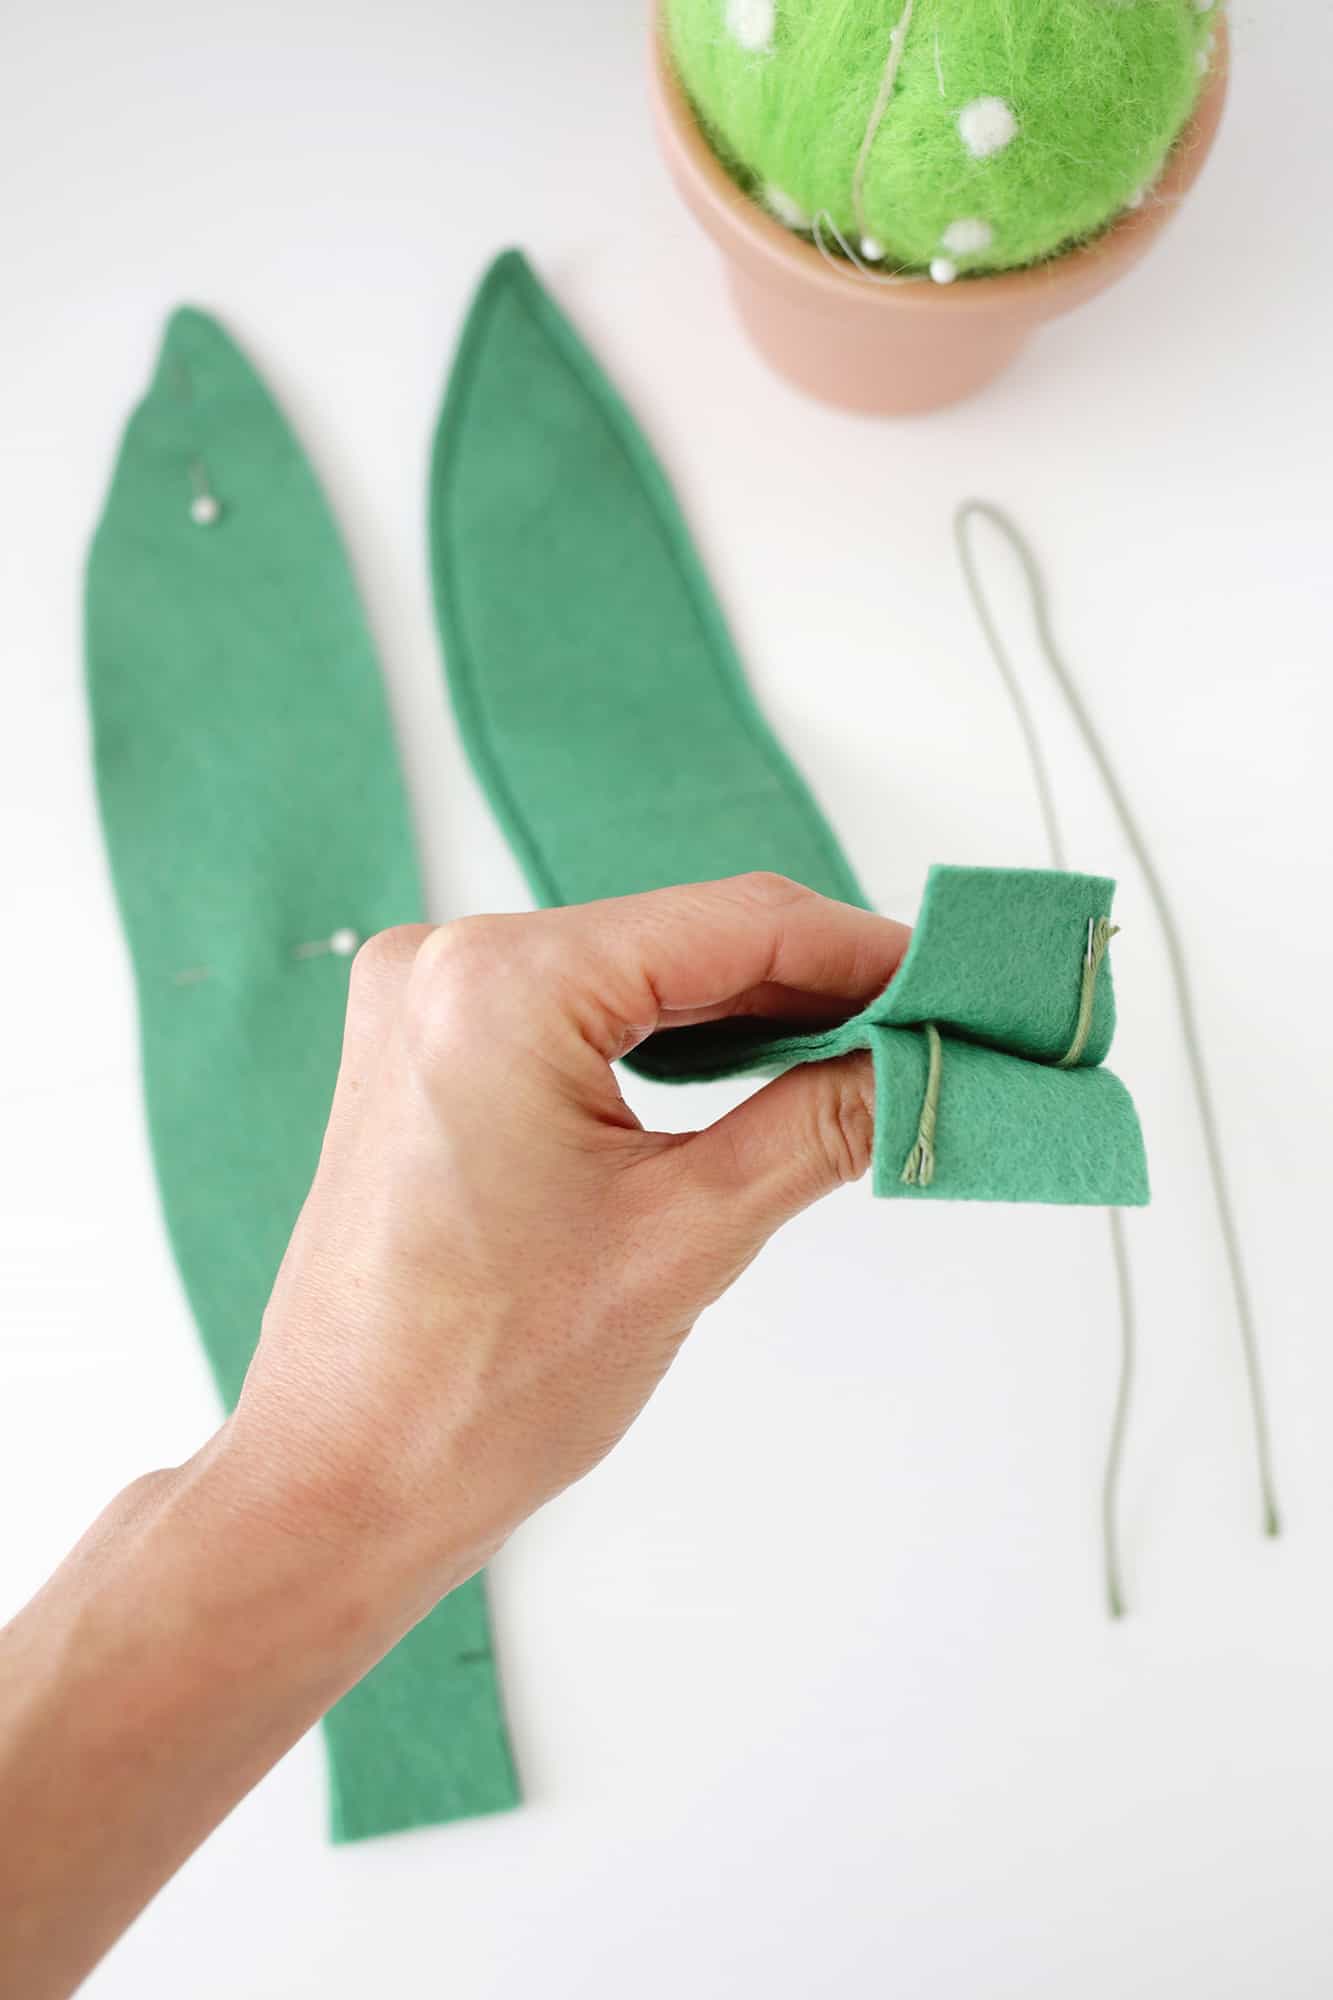
Fold one wire one way and the other the opposite way so it creates a flat bottom for the plant.
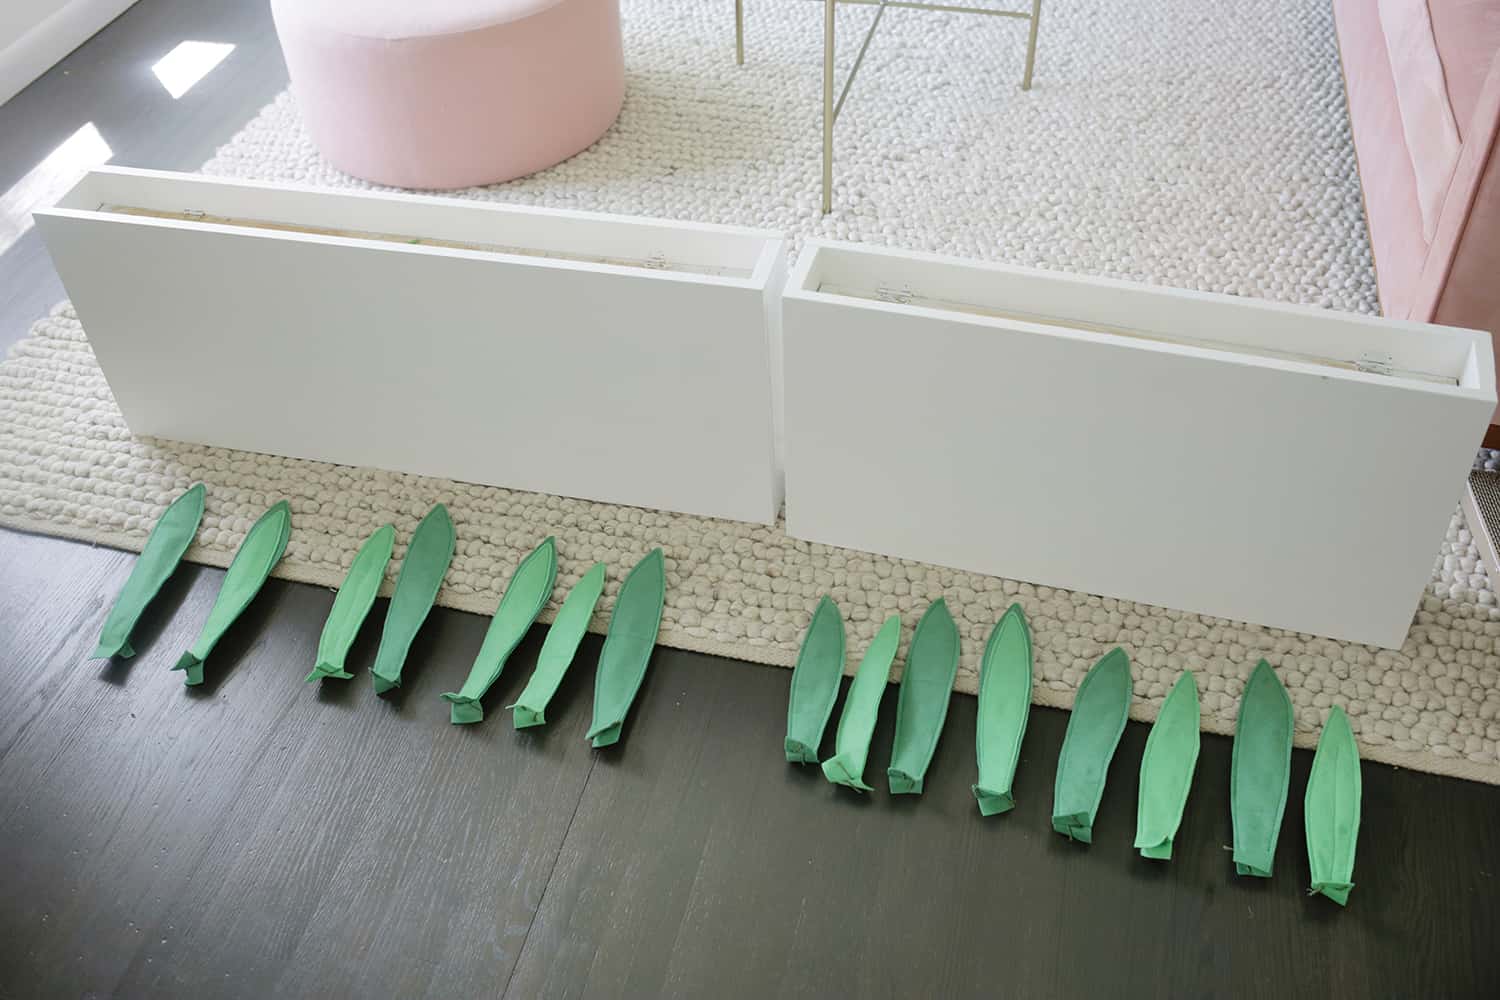
Keep repeating with all your leaves! I basically would line up the leaves next to my boxes as I sewed them so I could see how full I wanted the boxes to be and knew how many more I needed to make.
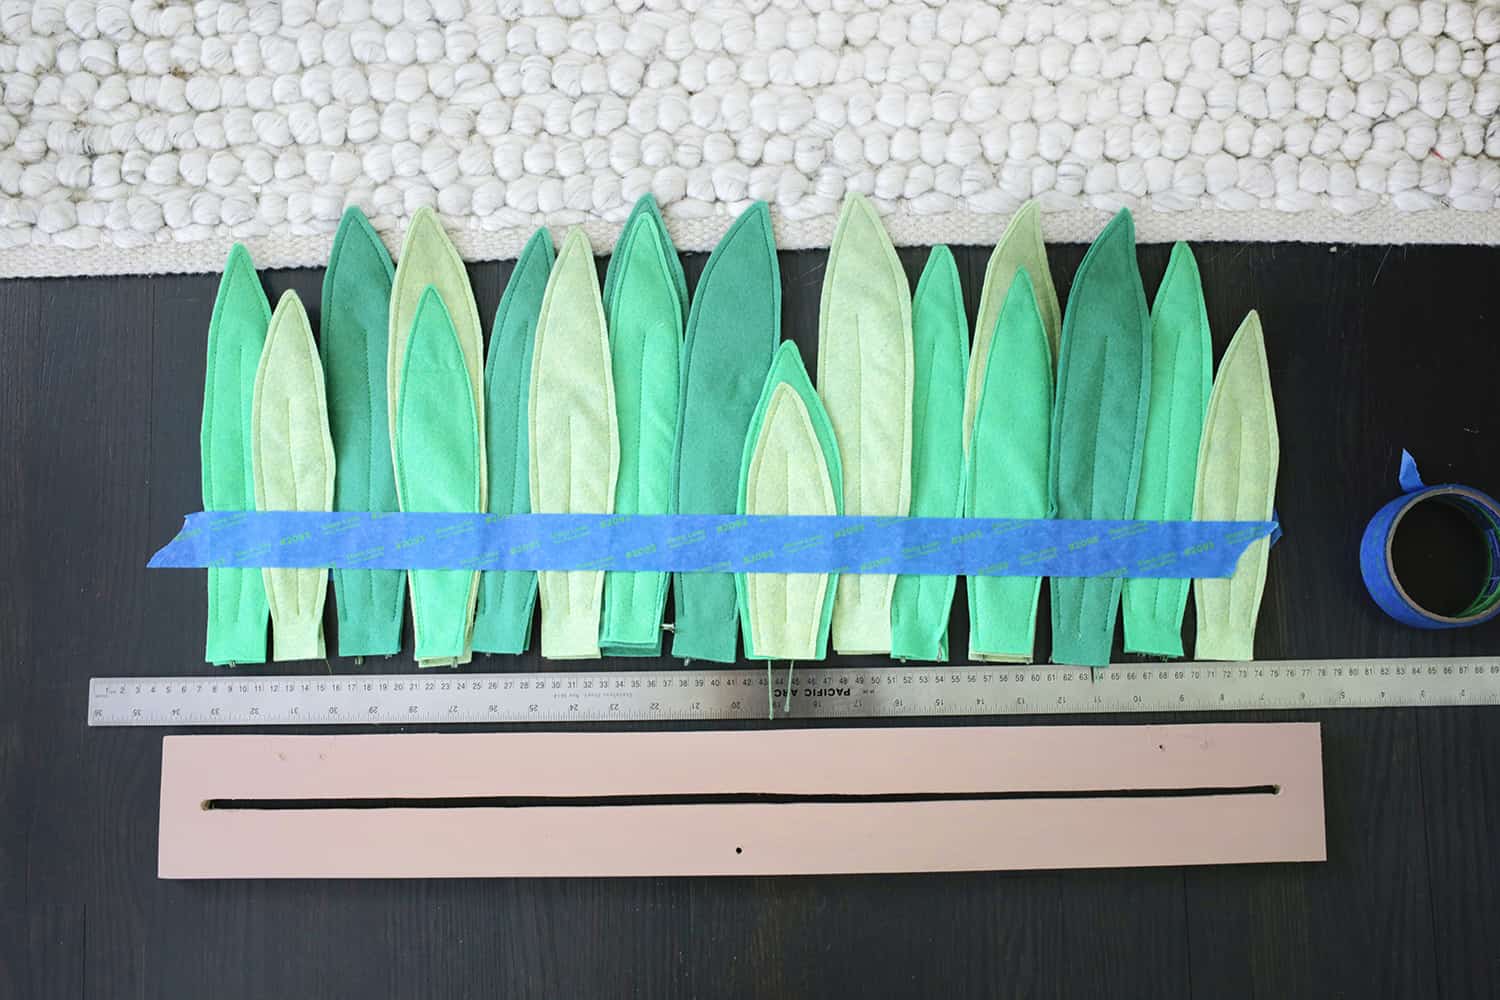
It’s an optional step, but you can see I also sewed a line up the center of some of the leaves and stopped right before I hit the middle bend in the wire (again skipping that 1″ on the bottom to keep it open). That will give the leaves a little more texture and keep the wire from moving around in the leaf as much.
Once I had enough leaves, I placed them where I wanted them to go in order and overlapping as necessary about the width of the lid opening and used painter’s tape to keep them together as I moved them.
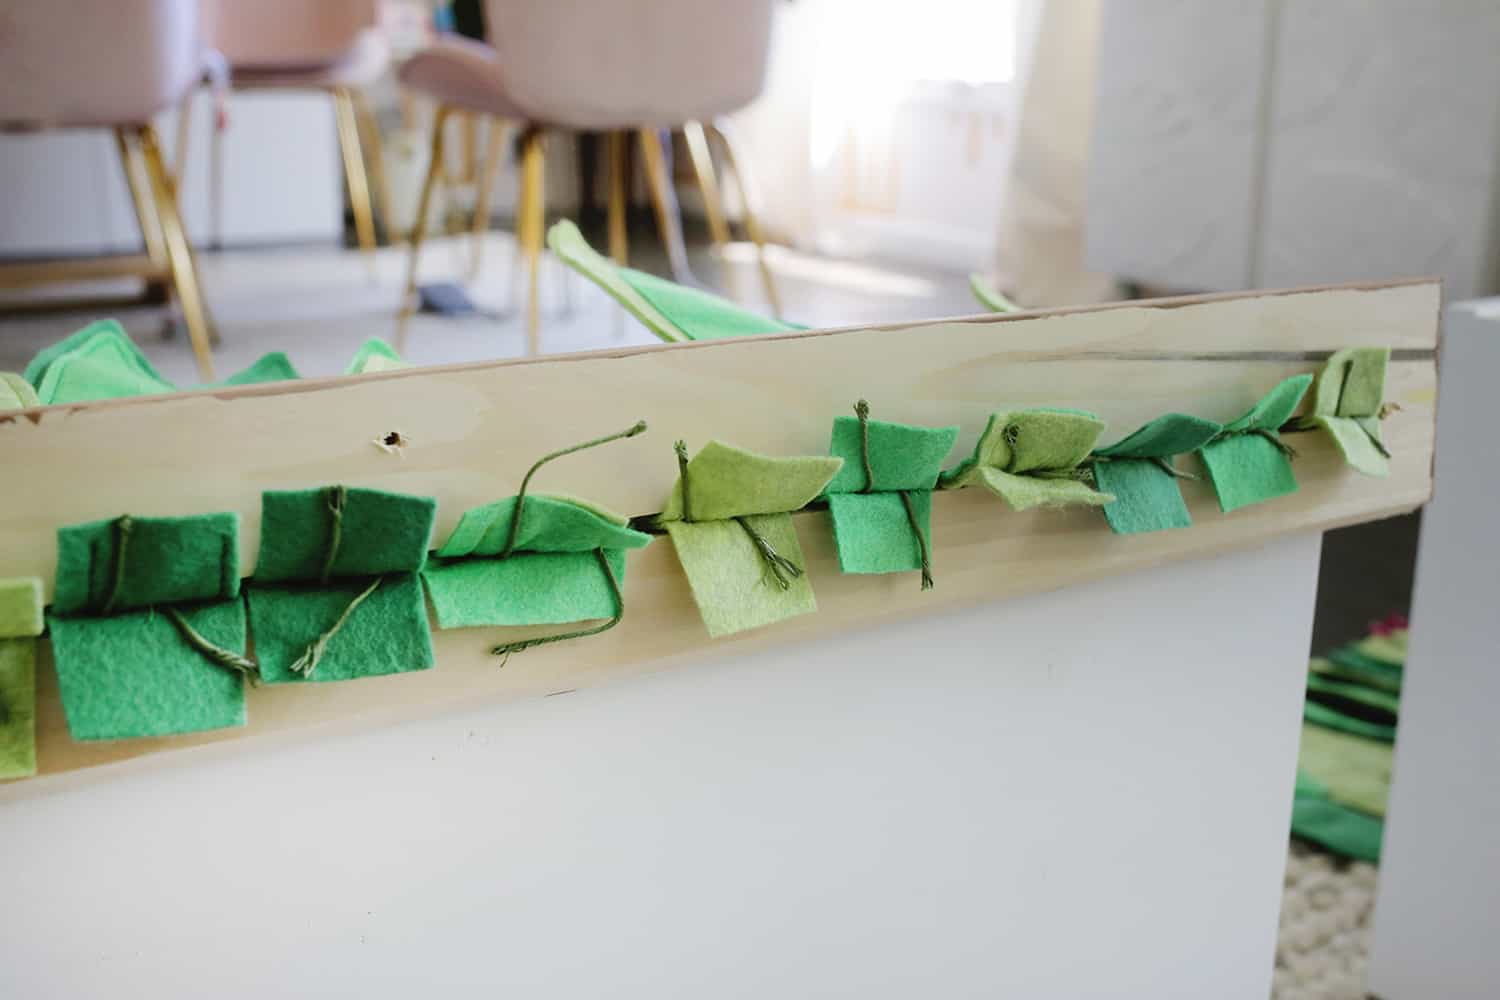
I threaded the ends of the whole lot through the slit and then folded back the tabs and wires in opposite directions.

Then, I used a staple gun to secure each wire/tab on both sides of the opening (you can trim any extra wire bits that are super long).

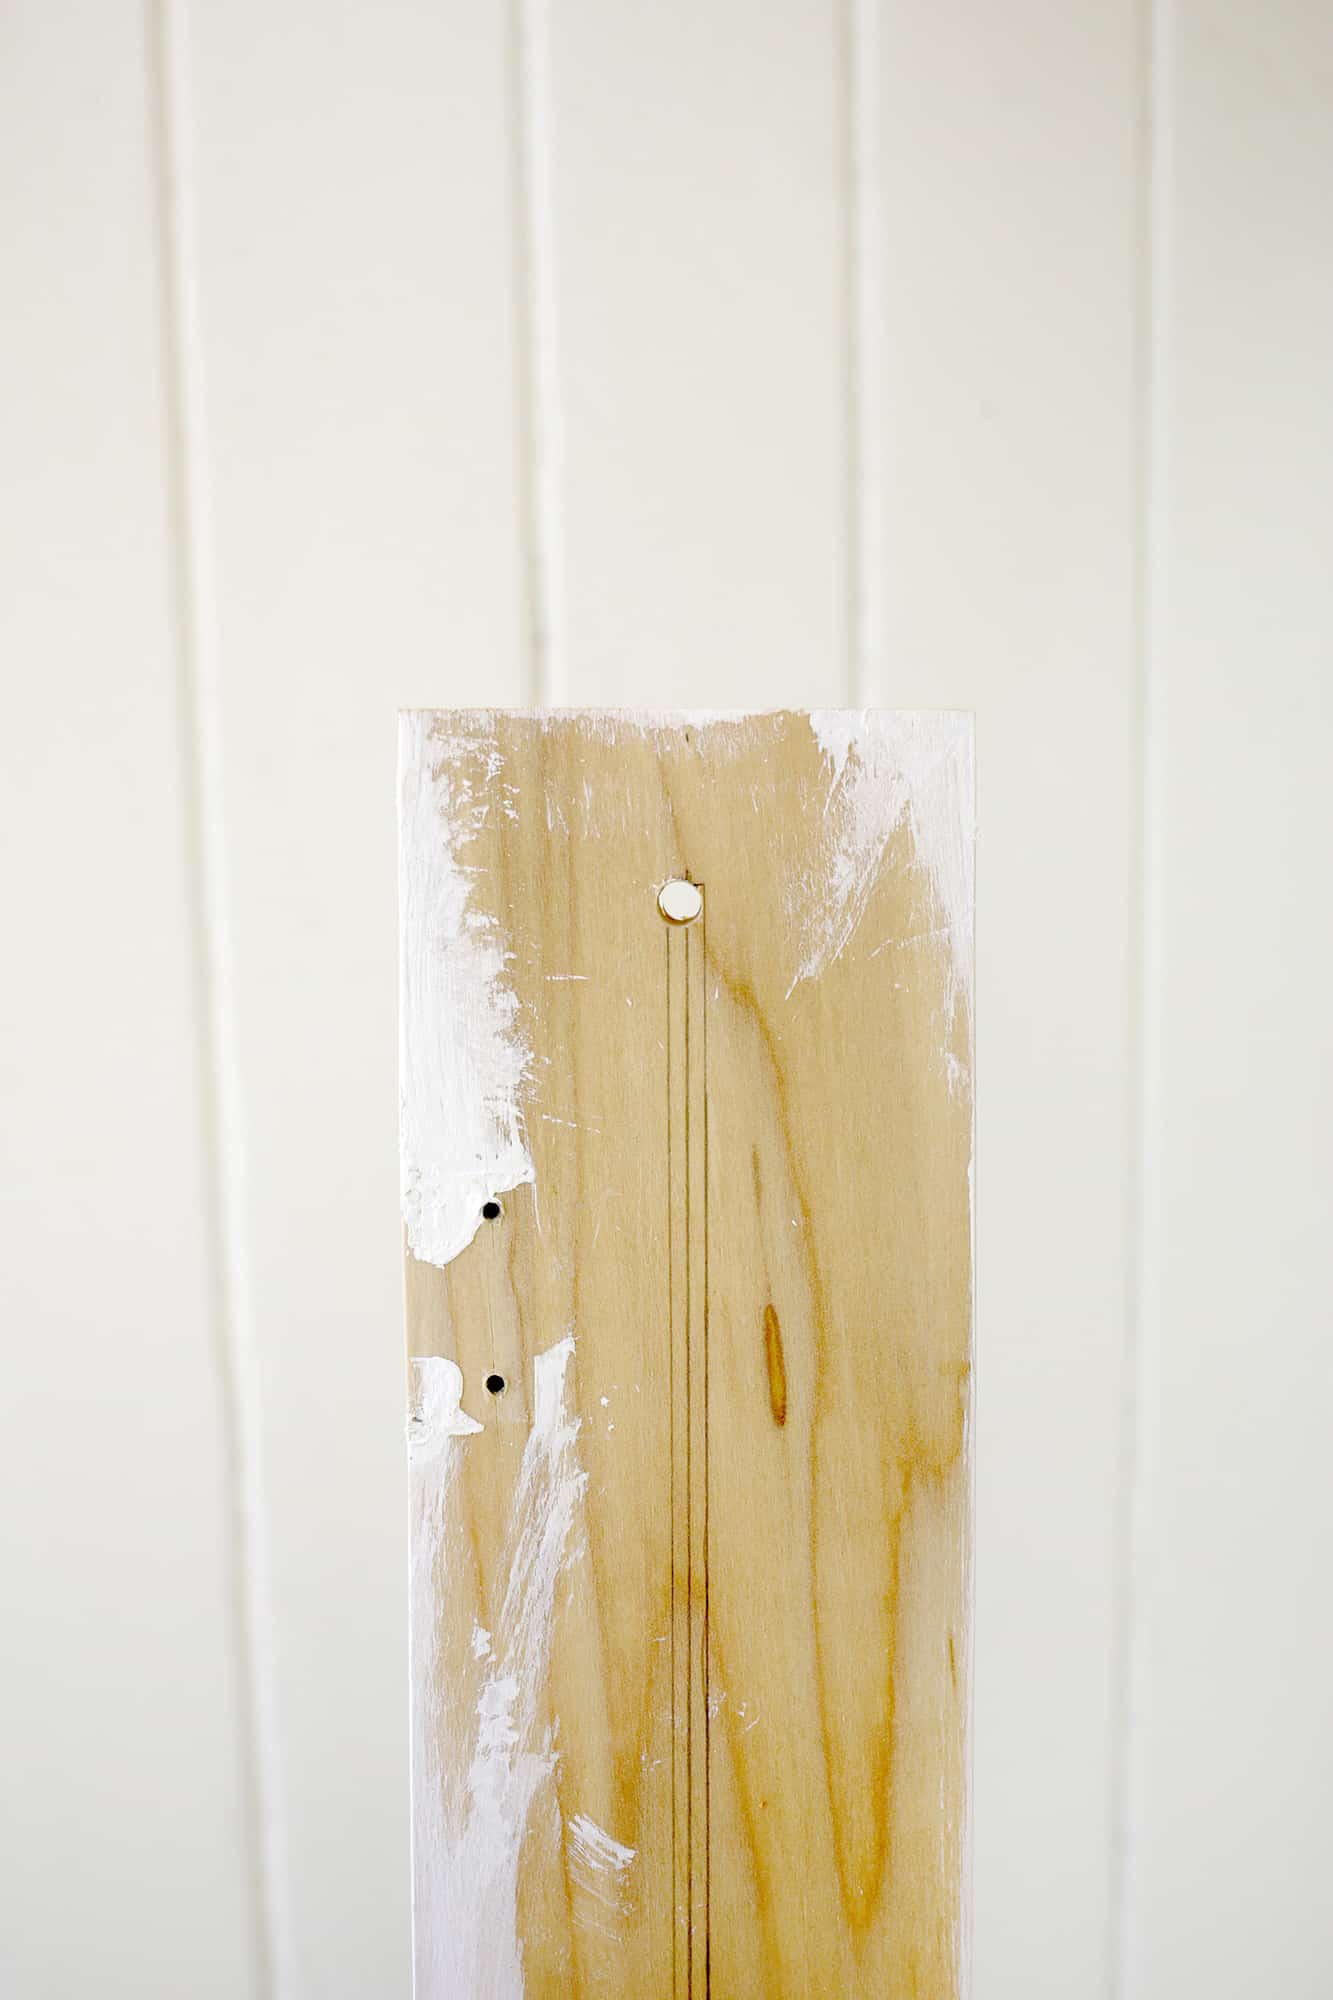
Once they were attached, I cut a piece of thick felt the same size as the lid and use a glue gun to attach it to the bottom of the lid to cover over the wires and staples so it would look cleaner and not be a safety issues when Lola opens the lids. I also added small knobs in opposite corners of the lid so that you can pick up the lid by the knobs to pull it off and put the lid back in place when done.
Now your hard work has paid off and your planters are ready to use!

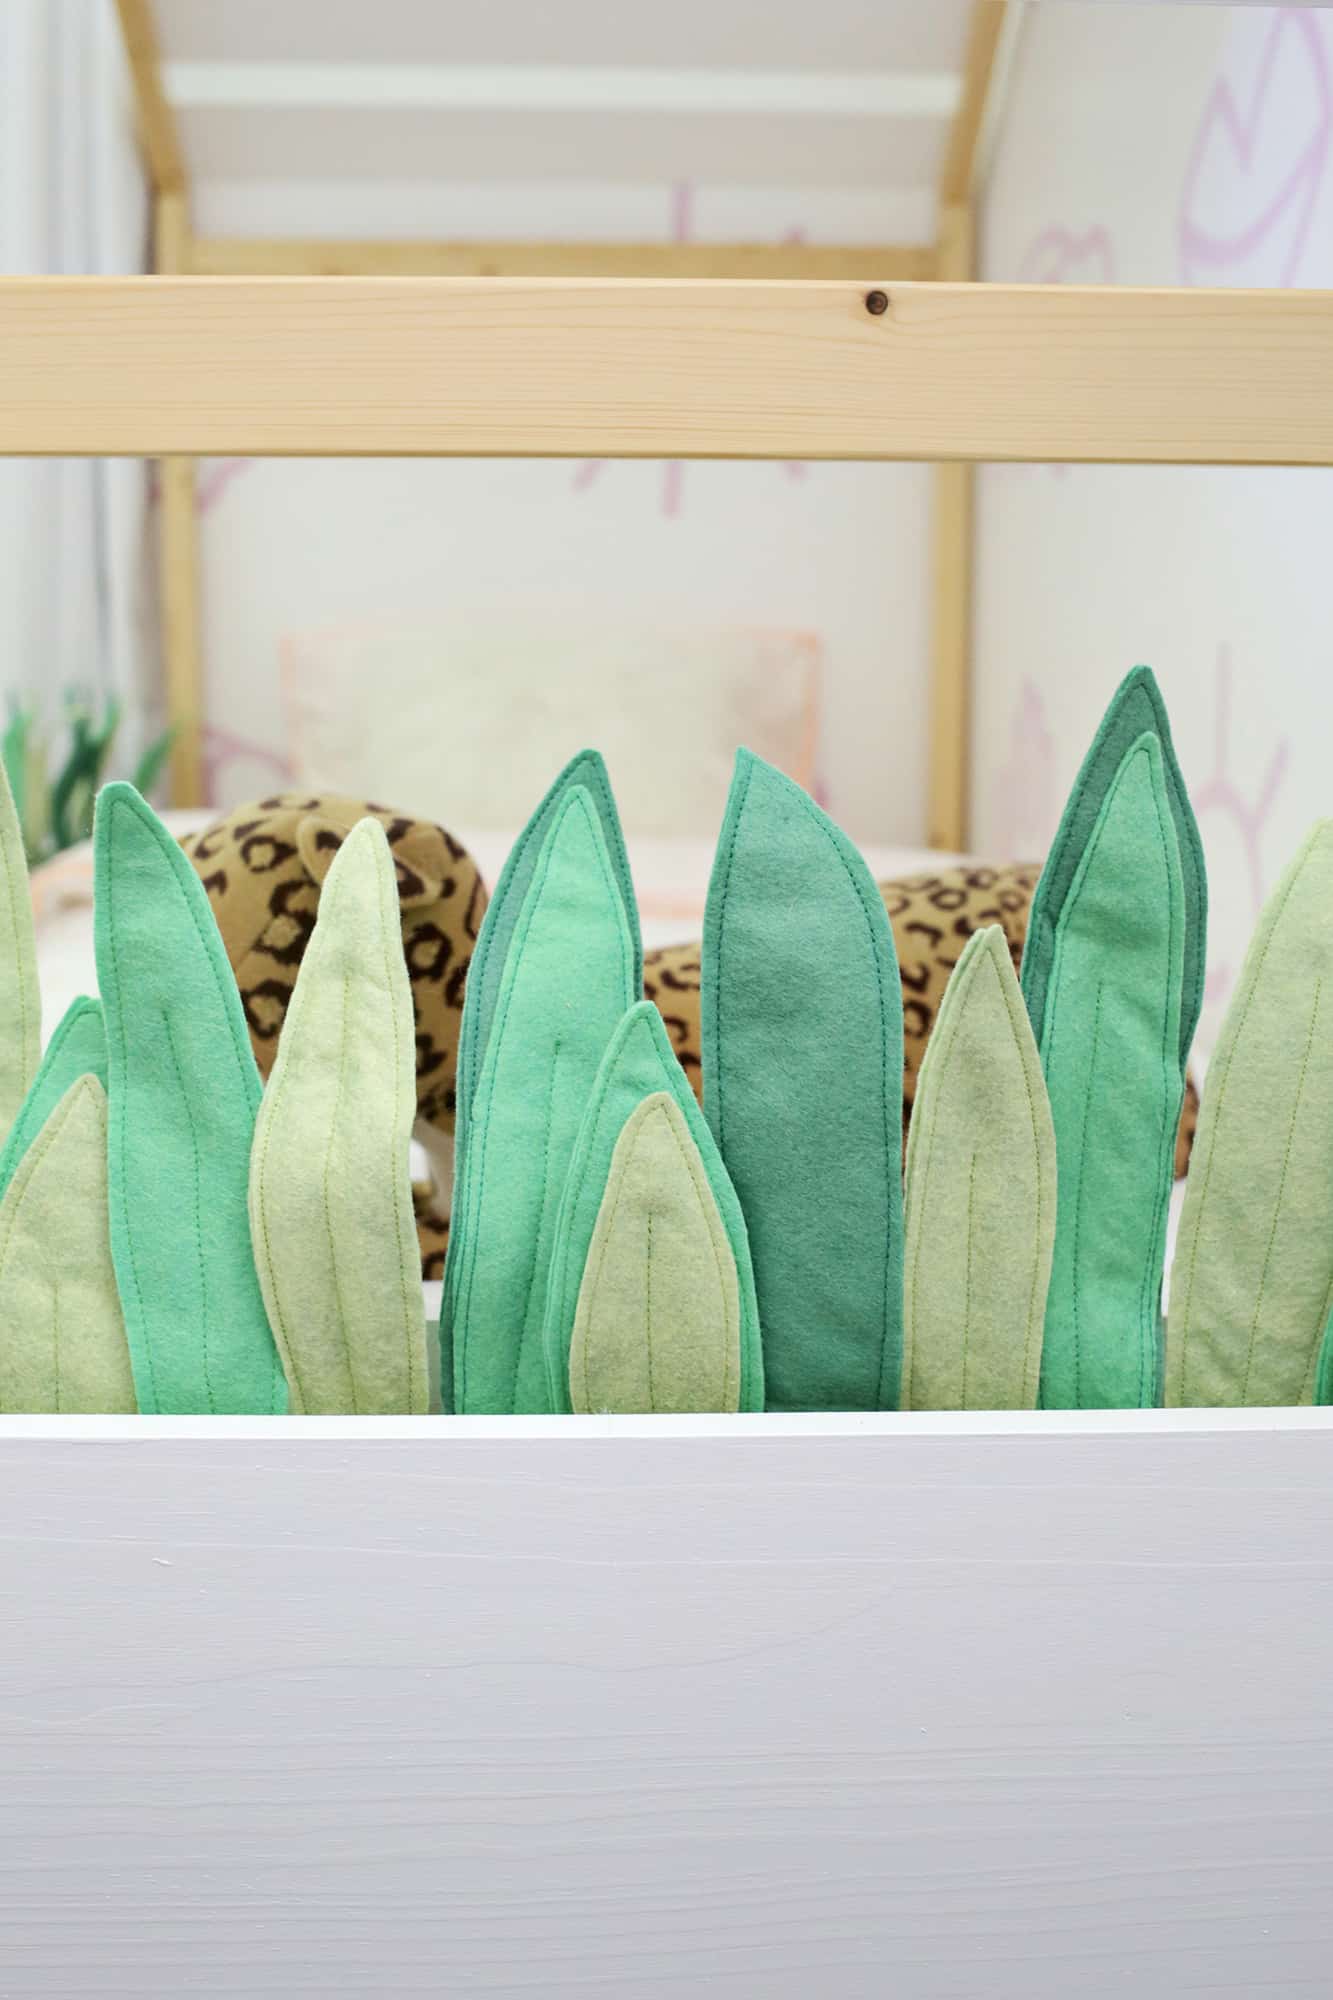
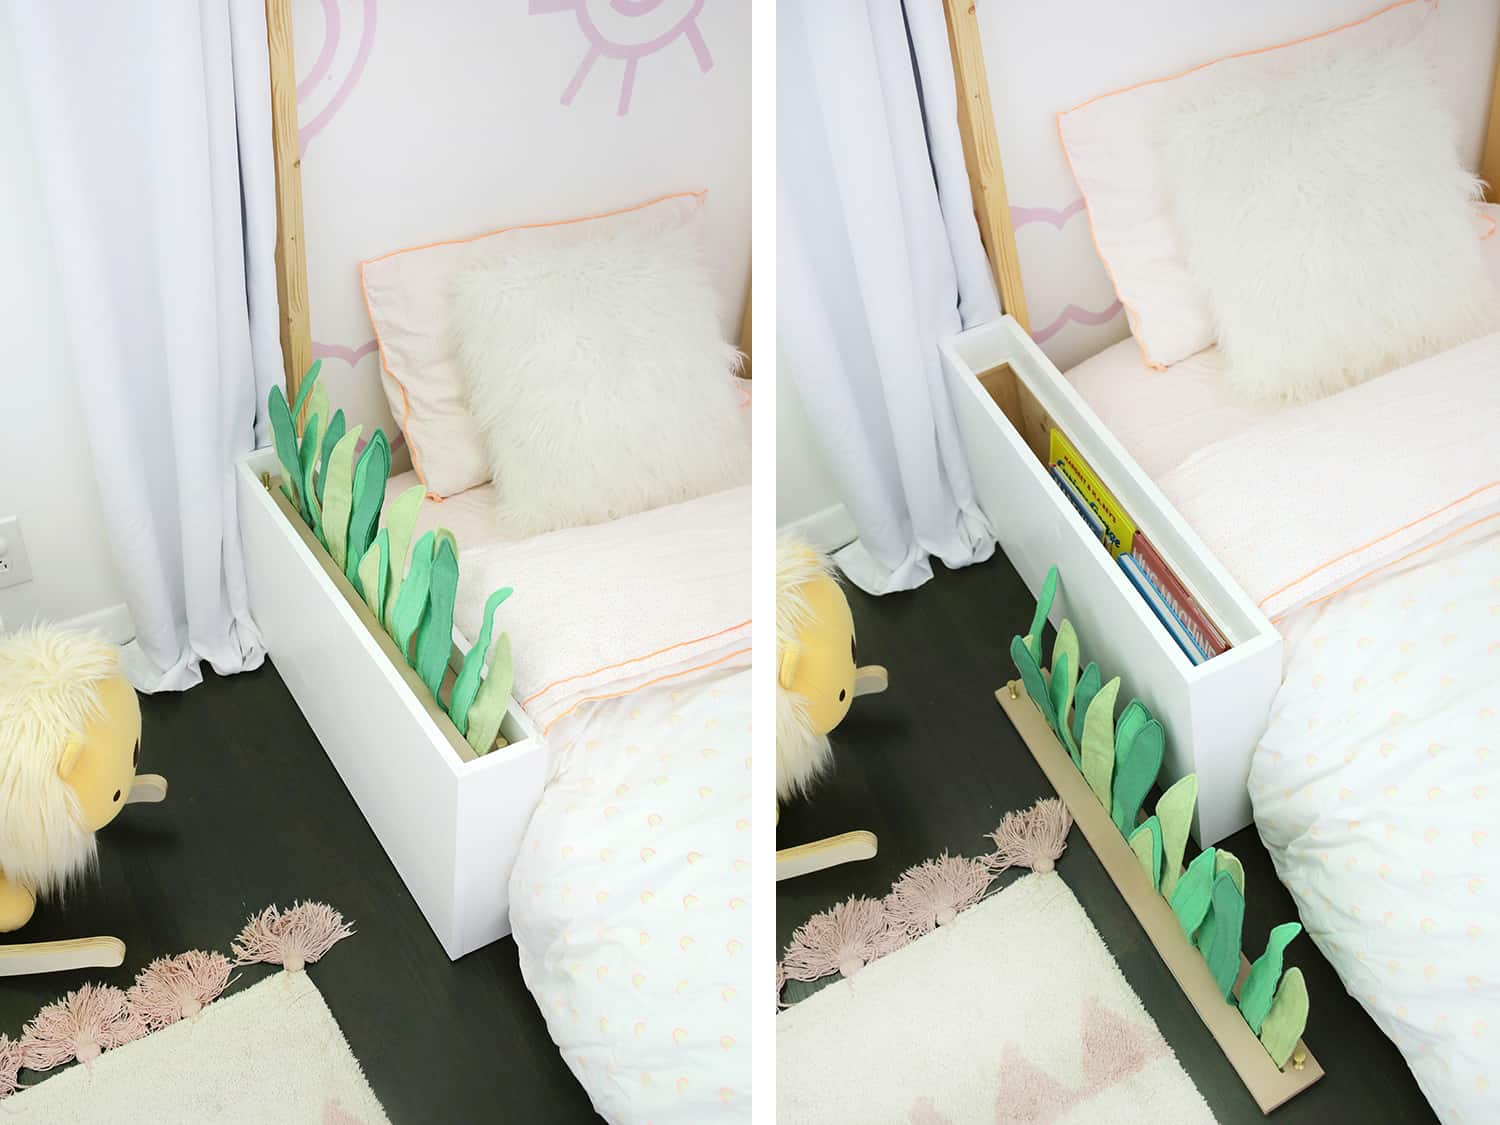
I can’t believe how cute these are—they are exactly what I was imagining in my head and the floral wire makes them able to stand up on their own. Yet any time they are flattened you can bend them back right into place, and they look fresh as a daisy again! Lola thinks it’s so cool that she can hide things in them and I love how it looks like the leopard on her bed is sleeping in the jungle behind the leaves. I love it when ideas come to life and while it took a little bit of trial and error to find the best way to make these, I really love how they turned out! xo. Laura
Love this post? Sign up for our newsletter for more ideas!

Get creative ideas for recipes, crafts, decor, and more in your inbox!
 Get the How-To

Supplies
Items for planter boxes
- 4 20″ x 4′ x 3/4″ boards
- 6 3.5 x 3′ x 3/4″ boards
- 4 1/2″ x 1/2″ x 3′ wooden dowels
- circular saw or jigsaw
- wood glue
- 1/2″ wood screws or nail gun
Items for felt plants
- plant template (right click to download)
- green felt in different shades (I got 1/2 a yard each of geranium, clover, and pistachio)
- felt for bottom of planter lid
- hot glue gun
- floral wire
- fabric scissors
- staple gun and staples
- small knobs (I used two of these per lid)
Instructions
How to make the planter boxes
- For the planters, you’ll want to create a box that fits whatever dimensions you’d like, but I’ll give you the dimension we made mine. I wanted the finished boxes to be 15″ high, 5″ deep, and 30″ long for the planter near the top of the bed and 37.75″ long for the other planter at the bottom of the bed. For the 30″ wide box, you’ll need to cut your wood so that you have two side panels that are 15″ x 3.5″ (the two 3/4″ thick front and back panels will make it 5″ deep overall once added), one bottom panel that is 28.5″ x 3.5″, and two panels for the front and back that are 15″ x 30″. Use wood glue and screws (or a nail gun) to attach the side panels to your bottom panel, and then attach your back panel to the sides and bottom.
- Repeat the measurements for your 37.75″ wide box if you are making one of those, but just make the length of the front and back board 37.75″ instead of 30″, and your bottom board length 36.25″ instead of 28.5″.
- Once you have the sides and back of your board together, cut and add a strip of dowel rod to sit about 2″ from the top of your planter box all the way around. This will be the shelf your lid sits on. It’s easier to glue and nail the dowel rod in before you add the front panel as it gets to be a tight space in there once all sides are on, so that’s why I would attach them on before you finish assembling your box. Attach a strip of dowel rod to the front panel as well in the same spot so it will be a continuous shelf all the way around when attached. Just cut it 1/2″ shy of the edges on both sides so it will have room to sit flush with the side dowels once attached.
- Add your front panel with glue and screws/nails and you’re ready to paint your planter! Paint the box whatever color you like.
- For the lid, measure the inside of your planter box and cut a piece of wood that fits the exact dimensions of the inside (make it a little smaller, if anything, so it goes in and out easily). Use a drill and a jigsaw to cut a small 1/4-1/2″ wide slit down the middle of your planter box lid to make an opening for your plants to “grow” through (should be centered on the board and about 2″ away from each edge). I drilled a hole big enough for my jigsaw blade to fit into on each end (that gives you a point of entry for your saw blade) and then used a ruler to draw straight lines to follow with the saw to the other end. Once the slit was cut, I painted the top of the lid a light brown to be the “dirt” that the plants are growing from.
How to make the felt plants
- Download the plant template and cut out shapes for as many leaves as you want! You’ll need at least a front and a back piece for each leaf, but you can also add a third piece by cutting a second piece for the front side a little smaller and in another shade of green to give you some more dimension.
- If using only two layers, pin them together and sew around the edge with 1/4″ seam allowance, leaving 1″ of the bottom open. If making a three layer multi-tone one, first sew your smaller different tone onto the front layer, then pin that whole front layer to the back layer and sew again all the way around the edge, leaving the bottom open. Fold your floral wire in half and insert into the leaf with the two ends coming out the bottom.
- Fold one wire one way and the other the opposite way so it creates a flat bottom for the plant.
- Keep repeating with all your leaves! I basically would line up the leaves next to my boxes as I sewed them so I could see how full I wanted the boxes to be and knew how many more I needed to make.
- It’s an optional step but you can see I also sewed a line up the center of some of the leaves and stopped right before I hit the middle bend in the wire (again skipping that 1″ on the bottom to keep it open). That will give the leaves a little more texture and keep the wire from moving around in the leaf as much.Once I had enough leaves, I placed them where I wanted them to go in order and overlapping as necessary about the width of the lid opening and used painter’s tape to keep them together as I moved them.
- I threaded the ends of the whole lot through the slit and then folded back the tabs and wires in opposite directions.
- Then I used a staple gun to secure each wire/tab on both sides of the opening (you can trim any extra wire bits that are super long).
- Once they were attached, I cut a piece of thick felt the same size as the lid and used a glue gun to attach it to the bottom of the lid to cover over the wires and staples so it would look cleaner and not be a safety issue when Lola opens the lids. I also added small knobs in opposite corners of the lid so that you can pick up the lid by the knobs to pull it off and put the lid back in place when done.Now your hard work has paid off and your planters are ready to use!
Love this so much!! I think I’m going to attempt one for my toddler. I’ve been looking for the perfect big girl bed, and this is so adorable and clever!! Did you attach the planters to the bed by screwing through the inside of the bedframe?
The is so cute and clever! I love your diy posts. Can I put in a request for a cable management post? How do I hide cords or make them look good?
How cute is that!!!! Lola sure is one lucky girl to have such a creative mama! Love the felt snake plants! Or are they agave? Either way, super cute!!
Snake plants but you can make them an agave if you shape them differently 🙂
Laura
This so creative & cute. I love all the DYI projects.
So imaginative and the hidden storage is awesome.
Thank you!
Laura 🙂
Oh my gosh, so adorable and creative. I kinda want one In my bedroom now 🙂