 Shibori is a much more exciting and ancient version of the tie-dye fun we all had at summer camp. It’s the process of binding your fabric with twine, rope, clips, and clamps as well as cardboard, rocks, poles, etc. and hand-dyeing it for a beautiful dye-resist pattern.
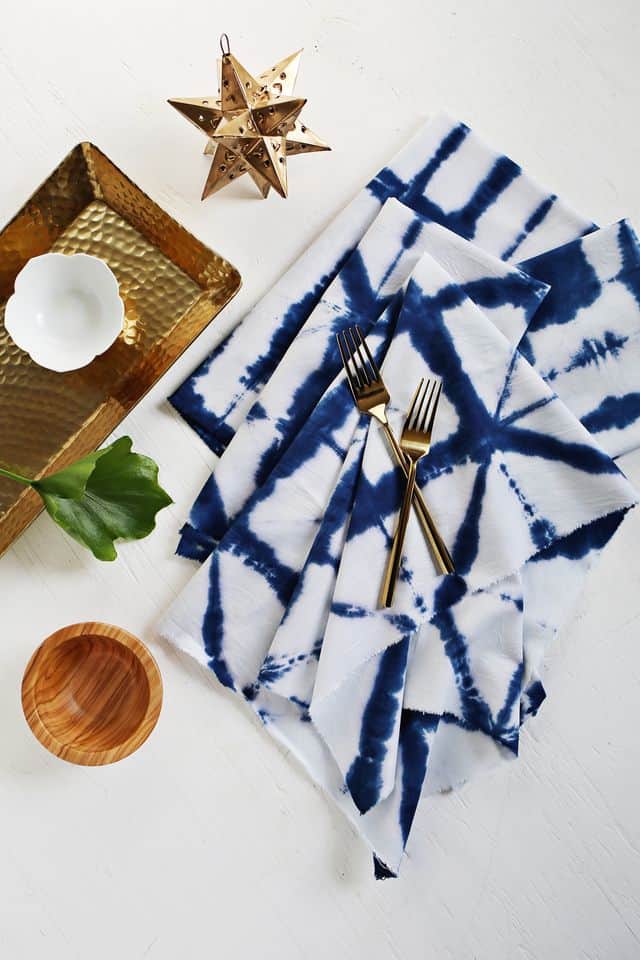
The end result is a unique, one-of-a-kind patterned textile that you can then turn into a beautiful bolster pillow for your bed, a light summer scarf, or some fun cloth napkins for your next gathering.
That’s exactly what we’ll be making with this project, and I know you’ll be just as thrilled with your end result as I was with mine!
Related: How to Tie-Dye – Beginner’s Guide
Shibori is traditionally used with indigo dye, but you can get a similarly lovely effect with a much simpler technique thanks to some pre-made dye packs on the market.
I used a dye pack that can be mixed with cold water and squirted directly onto the fabric instead of having to boil water and submerge the cloth.
Indigo dyeing is worth the effort, but if you’re not comfortable with that process or don’t have easy access to all of the supplies, this is a great alternative with stunningly similar results.
There are a few things to consider when choosing fabric for your shibori tie-dye project. Anything that is 100% cotton will work best for absorbing and holding the dye.
A cotton gauze (think a light summer scarf) is going to be just as lovely as a combed cotton fabric—it just depends on the texture you want. Linen is also an excellent choice because of its beautiful texture and drape.
Be sure to pre-wash all of your fabrics before dyeing to make sure they’re free of any factory chemicals.
Working on smaller cuts of cotton at a time will help you achieve smaller pattern designs because you won’t have as much bulk between layers. If you want to work on a larger cut of cloth to make a tablecloth or picnic blanket, scale up the size of your cardboard for a larger pattern and you’ll still get great results.
You will learn the most from experimenting with the process, so think about cutting up a few more napkins than you’ll need in order to get creative with a few of the designs and see which folding techniques you prefer.
Below I’ve shared what kinds of patterns you can get using a set of triangles, a set of rectangles, and a set of squares. These are not the only folding techniques out there by any means, but I do love the bold shapes they produce.
Supplies:
-pre-washed cotton fabric measuring about 18″ x 18″ per napkin
-cardboard to cut dye-resist shapes
-tie-dye powder and mixing bottle (must be cold water dye)
-twine or rubber bands
-something to keep your surface from getting stained
-scissors
-plastic wrap
-sewing machine (optional)
Step One: Cut your fabric down to 18″ x 18″. Pull out extra strings to leave a frayed edge. You can hem these or leave them as is. Cut a set of triangles that are about 3.5″ long on two sides. Fold your fabric in half to get a rectangle shape.
Step Two: Fold your rectangle shape into thirds lengthwise.
Step Three: Fold the short end on the left down as shown to create a triangle.
Step Four: Fold that triangle underneath to create a flat edge.
Step Five: Fold the folded part back again as shown.
Step Six: Fold back under again. Continue this until you get to the end of your fabric for a triangle sandwich.
Step Seven: Place cardboard triangles on either side of the fabric sandwich like pieces of bread and tie tightly with twine or add a ton of rubber bands.
The triangles will help create a barrier so the dye won’t seep through. The larger your cardboard shape, the more white space you’ll have in your design.
Step One: Cut cardboard into a set of rectangles that measure about 1″ x 3.5″. Fold your cloth napkin square in half and then half again as shown to get a rectangular shape. Step Two: Fold your rectangle into thirds lengthwise. Step Three: Fold the left end back onto itself so that it’s just slightly longer than the length of your cardboard. Keep folding back and forth until you get to the end. It doesn’t have to be even. Step Four: Place the cardboard on each side and wrap with twine or rubber bands.
Step One: Cut your cardboard into a set of 2″ x 2″ squares. Fold your cloth napkin in half and then in half again lengthwise.
Step Two: Fold in half from the right side.
Step Three: Fold into thirds horizontally and then again.
Step Four: Add cardboard squares and tie tightly with twine or rubber bands.
Run each bound piece under the faucet until it’s absorbed a little water. You don’t want it dripping wet but enough for it to absorb the dye a little easier. Squeeze it out a bit.
Place your bound napkins onto a safe surface such as a curtain liner, trash bag, or in a plastic tub so you won’t ruin your surface. Prepare your dye according to manufacturer’s directions. If you are using dye powder already in a bottle, just add water and shake carefully until stirred.
If you’re using dye from a packet, add to a bottle and fill with cold water. It’ll disintegrate into your water as you shake it up. Make sure all of your fabric is prepared before you add water to your dye as your dye will only be good for a short amount of time.
For a really defined pattern, soak your edges with dye so that there is no white showing at all. There will be plenty of white from the spaces that are covered and pushed tightly together, so this will make for a lovely contrast. If you want a splotchy look, drip it all over but don’t fill it in completely.
Wrap each piece in plastic wrap and let it sit for about eight hours to let the dye work its magic. Then unwrap and rinse in cold water until the water runs clear. Follow manufacturer’s directions for washing in the washing machine so your dye doesn’t bleed.
Above are the three different outcomes after they’ve been rinsed, dried, and ironed. The far left napkin is from the set of triangles, the center napkin is from the set of rectangles, and the right napkin is from the set of squares.
Even if I folded another set with the same folds, it’s not likely I’d get the same exact pattern each time, but this is the general idea on how your edges take the dye and how the insides that are pressed together resist the dye.
It’s kind of like putting your quarters in the sticker machine at the arcade. You generally know what you’re getting, but it’s still a surprise when you open it up!
Feel free to hem your edges by ironing them over 1/4″ and again 1/4″ before stitching a line down the edge. Repeat on the next three sides. Otherwise, enjoy the slightly frayed look.
Tie-dyeing your own cloth napkins is a really fun way to add more pattern and color to your table and is sure to make your mealtime or next party a little more special! –Rachel.
Hi! So cool, I’m planning on doing this for my wedding napkins. What would happen if I used Rit dye for this? I love their tan color. If that won’t work, do you have a recommendation for a cold water dye that’s a similar tan color as Rit offers?
Thank you!!
This is a very great idea…i really love this tutorial… thank you…..
Such types of tutorials are something I love the most because they are easy to follow.
I will try this at home and see If I am able to make it.
I love this and want to do it for the napkins for my wedding! The only thing holding me back is finding the napkins to be able to do it…any suggestions?
Loved this posting! IWhat a great idea! This will be a fun project to do when the grand kids come over.
I love this! The colours mixed with the copper are so pretty ????
What a great idea! This will be a fun project to do when the grand kids come over.
Loved this posting! I am about to do a white shower curtain and want to use the pattern you demonstrated first (triangular pattern). Do you have any advice for this concept being converted to a larger item? Additionally, do you think it will be an issue that I am not squirting but rather submerging?
Thanks, Rachel Denbow for sharing this cloth napkin tutorial, I’ll try it now.
Love the blue tie die look. I’m going to try this out myself!
These napkins are beautiful! They remind me of Nigerian Indigo dyed cloth. I spent some time in Oshogbo, where they have the Nike School of traditional Nigerian crafts.
Thanks for the tutorial. The designs are indeed interesting.
Meena Pahlajani
India
To make crisp edges, do a couple of things:
1. Starch your fabric.
2. Fold over the hem and iron it so it is crisp before you sew.
3. At the corners, cut diagonally at a 45 degree angle to reduce bulk, or the corner will be twice as thick as the edge (since 2 sides meet there).
4. If you are not a super-experienced seamstress, you can put a piece of masking tape to the right of your presser foot and guide along that line.
5. It helps to keep the stitch line from wobbling if you focus on a place a few inches in front of the presser foot and sew in a smooth, continuous line.
6. Feel free to rip it out and start over.
7. If the thread matches, people will not notice your stitch line much. Especially if your napkins have a great design.
If you can do a napkin, you can do a pillowcase, a duvet cover, a cafe curtain, a tote bag, and many other useful flat objects.
Genius. And so so pretty, nice work Rachel!
This looks so nice! It creates a pattern on the fabric! First time I heard about it. Though I am not a big tie dyeing fan but this looks like something I would enjoy doing 😀
Really, what an exciting work! Tie dyeing done with fantastic creativity and efficacy is truly fun. Depending upon the type of tie fabric being dyed, it’s one’s sole expertise to make it better. Quality of dyeing acts well on delivering the best results too!
Any suggestions on natural/around-the-house dyes?
It’s beautifull, I’ve never doen this, but it looks easy?.
This is a great idea! http://www.hannamarielei.com
I love these napkins! I totally want to try making some!
Paige
http://thehappyflammily.com