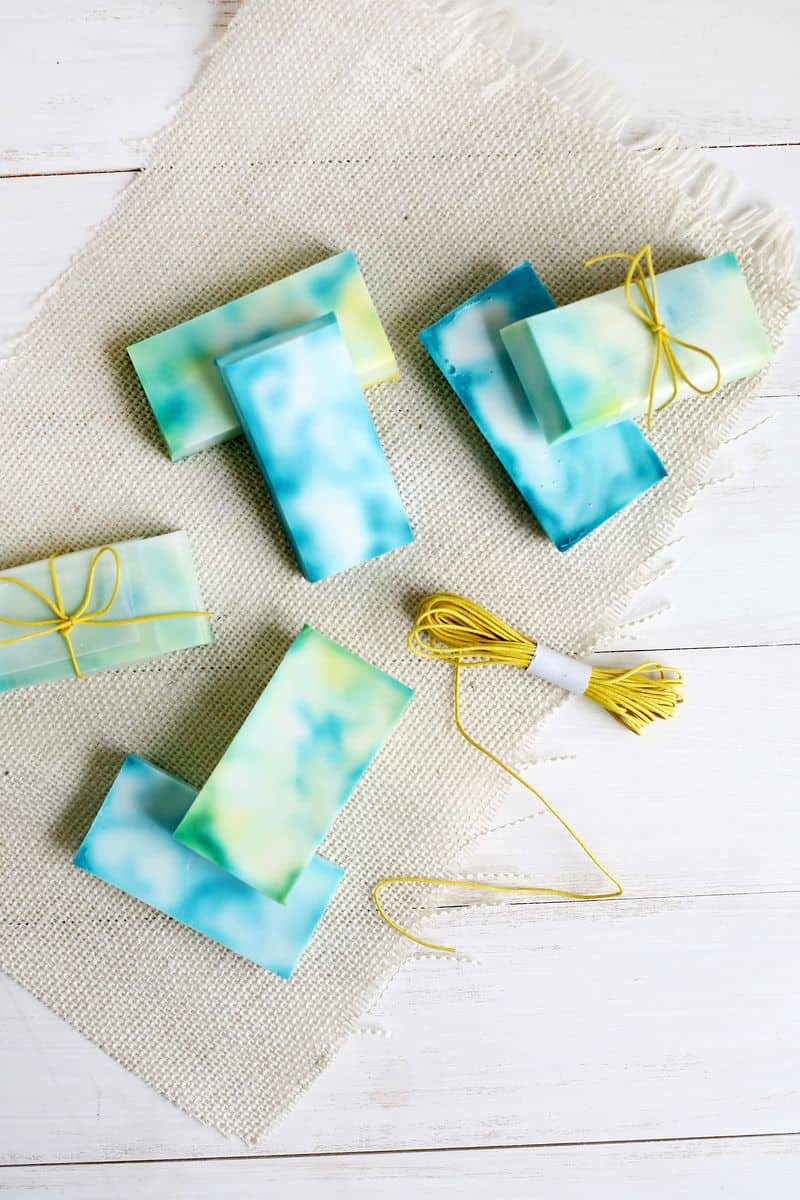
I’m a bit of a newbie to the soap game. I love the idea of making my own soaps (especially for gift giving and hostess gifts), but since I haven’t had much experience in the soap world yet, I thought I’d start off with a simpler idea for my first try. If you’re also a newbie but have been wanting to make your own, let’s do this one together!
Related: How to Tie-Dye – Beginner’s Guide
Supplies:
–white melt-and-pour soap
-microwave safe container
–essential oil of your choice
–soap dye
–soap thermometer
-plastic soap mold
–popsicle sticks for stirring
-spray bottle with rubbing alcohol
Cut your melt-and-pour soap with a sharp knife into 1/2″ cubes and place 2 cups of soap in a pourable microwave safe container. Heat for 30 seconds at a time, stirring at the end of each interval.
Once the soap is completely smooth and melted, allow the soap to cool a bit until it reaches 145° (use the soap thermometer to track the temperature). Once the soap has cooled, add the desired amount of essential oil and stir until combined.
Use the dye droppers to drop dots of dye onto your empty soap molds, spreading out the colors if using more than one.
Pour the soap into the molds. Stop pouring when the mold is halfway full and spray some alcohol on the soap to spread the color. Repeat with another spray of alcohol once the mold is full and use your popsicle stick to move the color around the mold.
Keep swirling until you like the pattern you have, and then let your soap harden. Once it’s set, pop the soap out of the mold, and you’re done!
I will say that marbling and tie dye can be a bit of a hit or miss process (even though you may do the same exact thing both times).
You may have a dud soap that just doesn’t spread the color like you want, but keep making them! You’ll still get several good ones in, I promise! You can even get a fun mold to make a cool shape with your soap as well.
I like to cut the sides of the soap with a knife after popping them out of the mold to give them even more of that handmade look. I love marbled/tie dye look on just about anything, so I’m excited to add these to my bathroom and give a few out as gifts too (maybe with a pretty soap dish!).
We’ve got lots of soap DIYs in our archives as well, so take a look and see which you want to make! Hope you’ll jump into soap making with this project if you haven’t already! xo. Laura
Love this post? Sign up for our newsletter for more ideas!

Get creative ideas for recipes, crafts, decor, and more in your inbox!
 Get the How-To
Supplies
- white melt-and-pour soap
- microwave safe container
- essential oil of your choice
- soap dye
- soap thermometer
- plastic soap mold
- popsicle sticks for stirring
- spray bottle with rubbing alcohol
Instructions
- Cut your melt-and-pour soap with a sharp knife into 1/2″ cubes and place 2 cups of soap in a pourable microwave safe container. Heat for 30 seconds at a time, stirring at the end of each interval. Once the soap is completely smooth and melted, allow the soap to cool a bit until it reaches 145° (use the soap thermometer to track the temperature).
- Once the soap has cooled, add the desired amount of essential oil and stir until combined.
- Use the dye droppers to drop dots of dye onto your empty soap molds, spreading out the colors if using more than one.
- Pour the soap into the molds. Stop pouring when the mold is halfway full and spray some alcohol on the soap to spread the color. Repeat with another spray of alcohol once the mold is full and use your popsicle stick to move the color around the mold.
- Keep swirling until you like the pattern you have, and then let your soap harden. Once it’s set, pop the soap out of the mold, and you’re done!


Hi, does the alchohol remain in the soap after 5 weeks?
The soaps are beautiful love the colors gave me an idea.
Love it!!!
Luv, luv your article. I too am a newbie and I am thrilled you shared this simple but beautiful design. Here’s wishing you continued success. Regards
Thank you for this. I find using silicone moulds are easier than plastic ones, the soap is easier to pop out.
Thank You for sharing, especially being a newbie (me too). All these soap making tutorials are so intimidating and are just way to difficult when you’re just learning. I like that there are a few of you still left that understand that it’s not always as easy as it seems.
I’ve been wanting to make some soap for so long, and this is so easy it would be rude for me not to start! They look gorgeous xx
dahliariver.blogspot.com
Yaaay I love love love this soap how to! The colour effect adds so much fun!
Hannah x
http://crafternooncabaretclub.com
What an awesome idea! I love the tie-dye effect – thanks for the tips! I’ll be putting this on my to-do list 🙂
Lindsay / myhouseoflove.com
This is such a cool idea!! 😮 thanks for sharing
Dorky-and-weird.blogspot.com
Xoxo Jessy
This is such a great idea! I always wanted to make my own so but the tie-dye aspect is genius. Love it!
Wow! Thanks for the idea! Going to make it into a kid project, my kids will LOVE it.
Apryl
@paperplanelaneboutique
HI! I don’t think it would be the same and the soap dye is specially made to not stain your hands. I would try looking online to see if you can get some shipped to you, good luck!
Laura 😉
Amazing tie-dye and colour combination! Love to try this sometimes.
http://www.kinikunormal.blogspot.com/
I’ve never tried making soap, but it seems like such a fun thing to do! It really would make a great gift. 🙂
This looks so cool! I think it’s time to hit up Michaels for a few crafting supplies 🙂
How fun! Didn’t know you can just buy soap blocks ready to be melted!
Juju Sprinkles
http://www.jujusprinkles.com
These soap bars are so cute! They would make great gifts!
Paige
http://thehappyflammily.com
These look so cute and fun for summer! would love to give this a go! xx
www.krystelcouture.com
I just fell in love with your blog!