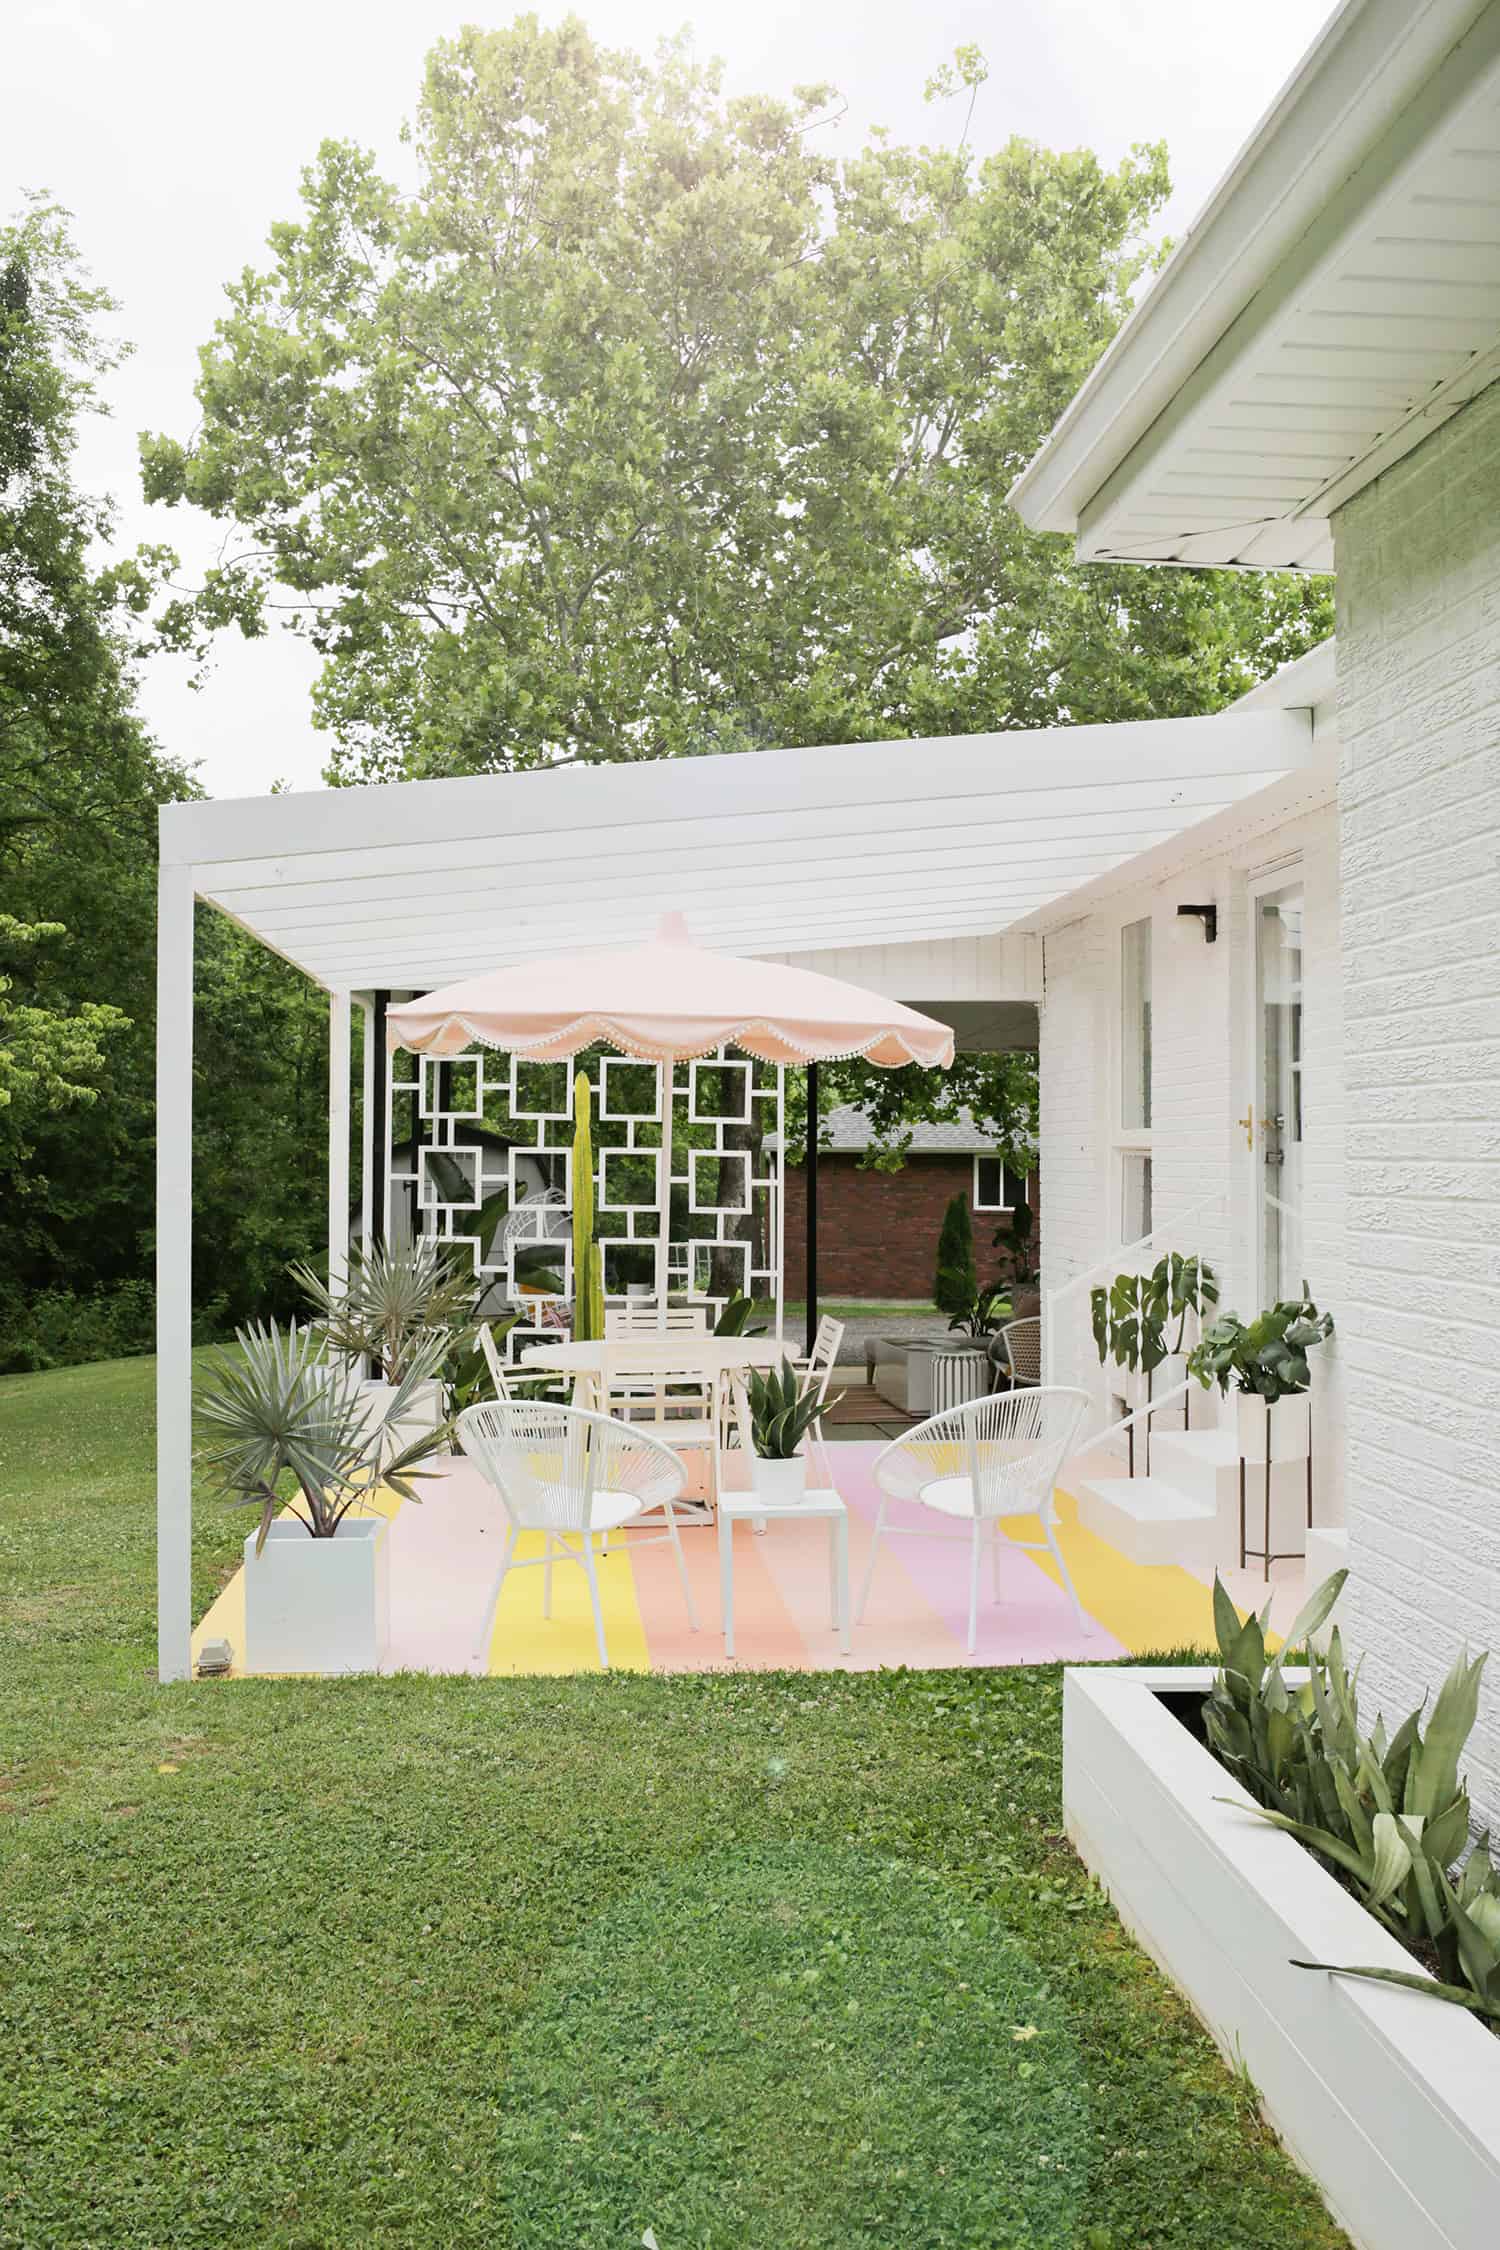
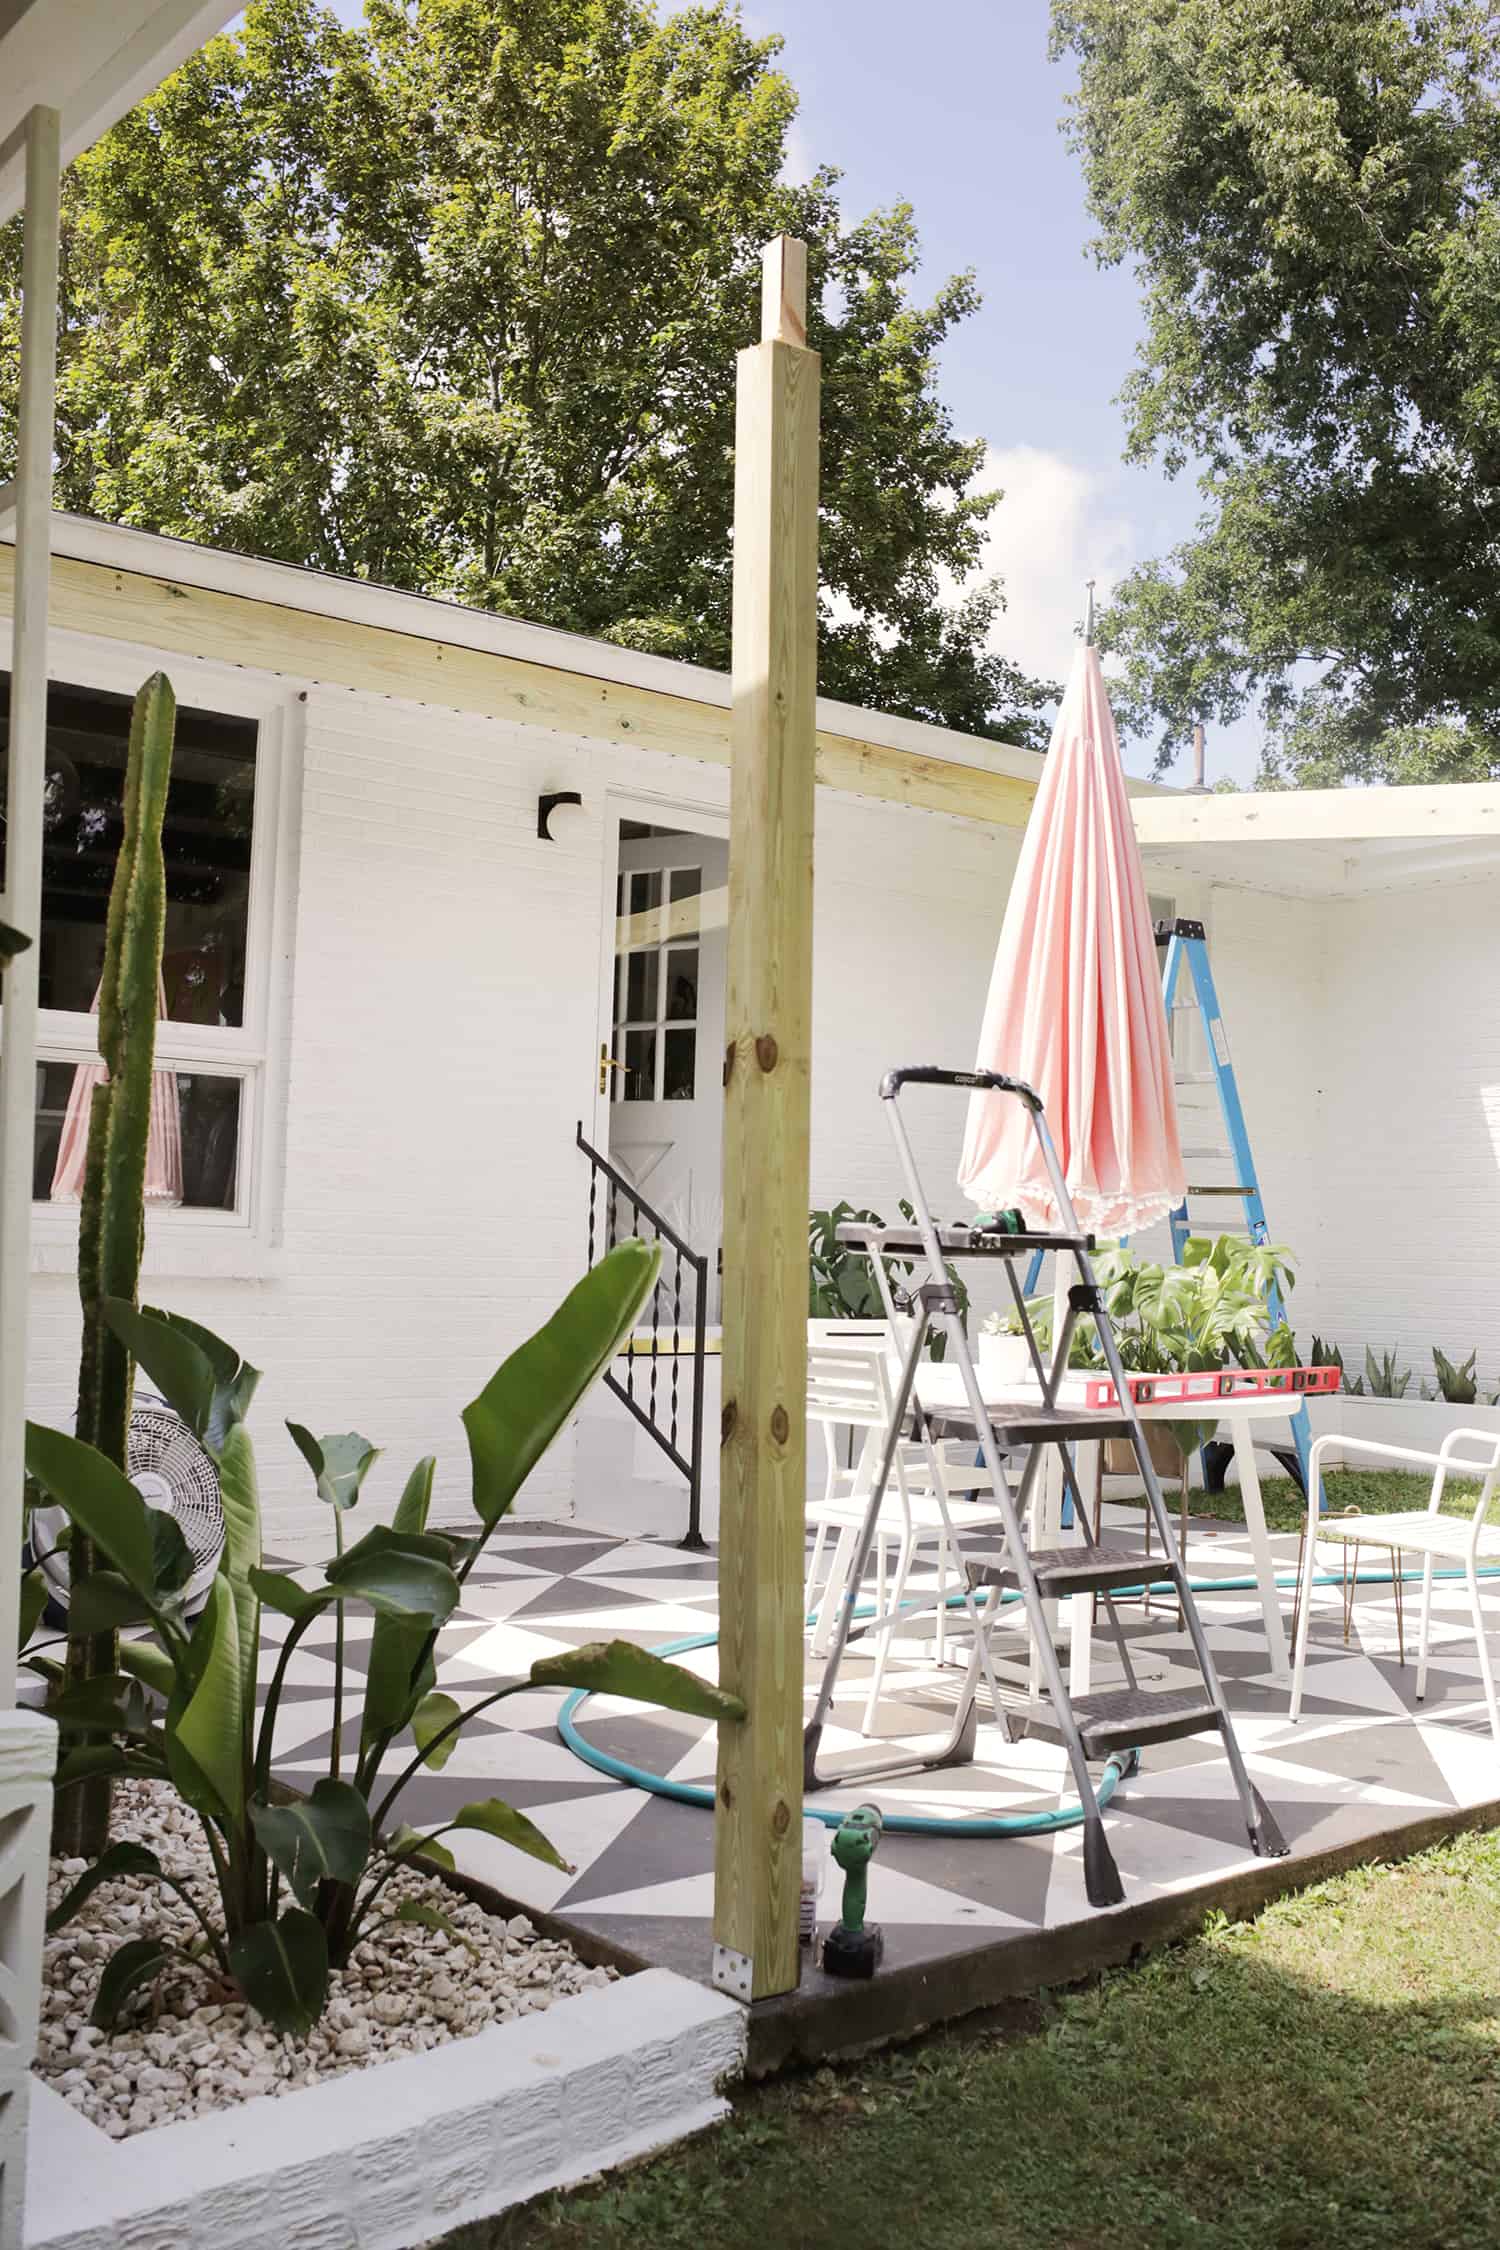
 Sometimes, you can just feel that a space is missing a little something. While we’ve been slowly adding things here and there to our back deck, I kept thinking that it would feel a lot more complete if it had a simple pergola over the floor to tie that area into the house a bit more.
I love the super clean lines of pergolas that I see in vintage photos, so I wanted to do something that would blend in with the era of our mid century home. It sounds like a daunting task, but it actually wasn’t that hard to build once we had a plan together—I’ll show you what we did:
Supplies:
-2″ x 8″ pressure treated boards in different lengths for the front, back, and two sides of your pergola (plus however many boards you need to create your divided sections)*
-4″ x 4″ posts (you’ll need two of these, I got 10′ tall posts)
-4″ x 4″ post brackets for wood to concrete (you’ll need 2)
–concrete anchors
–circular saw and miter saw (miter saw is helpful but optional)
-drill
–deck tape (optional)
–6″ star drive washer head structural screw
–3″ star drive deck screws
– T-25 and T-30 star bits
–Kreg pocket hole system & clamp
*You’ll need 2 boards a little longer than the width of your desired pergola for the front ledger board and back header board and 2 boards a little longer than the depth of your pergola to make the side joists of your rectangular structure.
I wanted my rectangle divided into 8 equal sections, so I got 7 more boards a little longer than the depth of the pergola to create those sections.
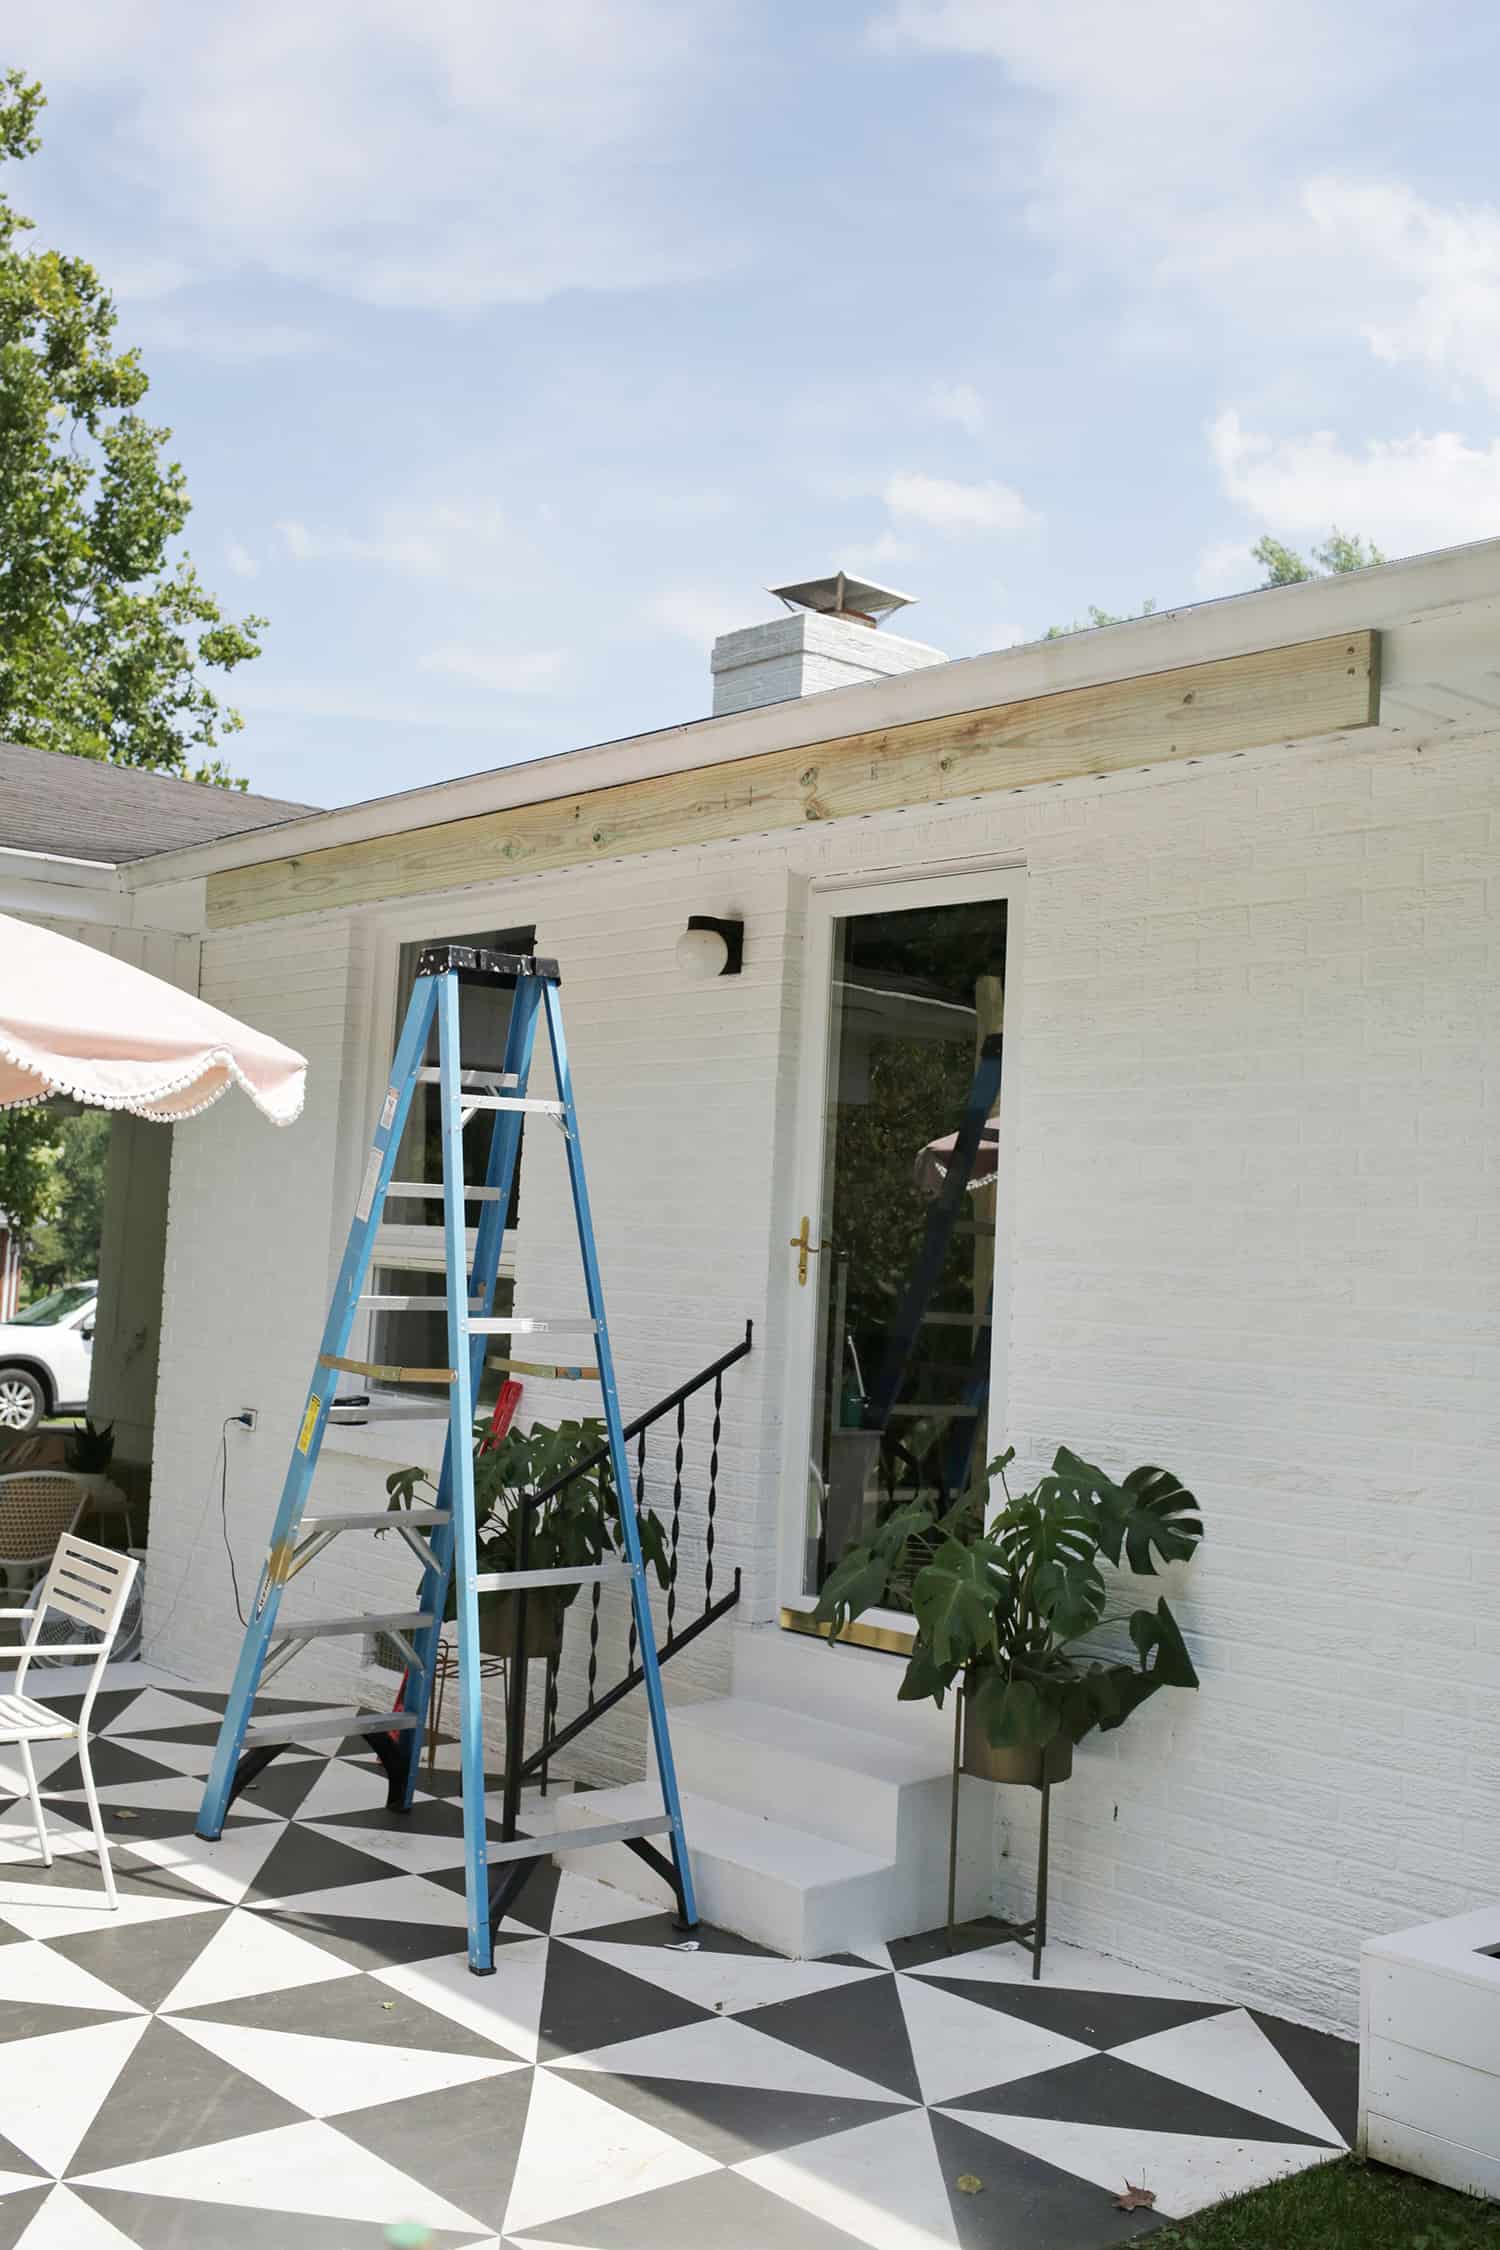
OK! First, we measured how wide we wanted the pergola to be and cut a 2″ x 8″ board 3″ shorter than that total width to be the header board that attaches to the house (I’ll explain why we cut it 3″ shorter in a second).
We centered the board to the middle of the patio concrete slab for placement and used the 6″ star drive washer head structural screws to attach the header board to our fascia.*
You’ll want to place your bolts every 24″ or so for stability. I would also suggest adding some deck tape to the top edge of your header board before attaching to protect the header board from rot over time.
*NOTE: You’ll want to find out if your fascia board has enough wood behind it to take the weight of your header board before mounting, so I would have a roofer or someone in that category take a look behind outside fascia board to see how much wood you have to drill into.
We had some roof work done a few months before building, so we just asked them while they were here and they said there was several inches of wood back there so we were good to drill anywhere in the fascia area.
If you have a thin fascia board, you can still attach the header but you’ll need to figure out where the rafter beams are located and drill into them for full support (basically like how you would find a stud in a wall if hanging something heavy rather than just screwing into drywall only that couldn’t support the weight).
If you need a visual, look at the rafter diagram on this page and that may help you visualize what your roof may look like. If your house has a totally different roof setup, I would consult with a contractor and see what they recommend for your header placement.
 Measure out where you want your posts to sit and mount your post brackets to the concrete with a concrete anchor. Mark the center hole of your bracket onto the concrete and drill with an appropriate sized masonry drill bit. The size of your drill bit will need to be the same size of the width of your anchor.
 Insert the anchor into the hole and hammer it into the concrete until just the threads of the bolt are visible and tighten the supplied washer and nut to mount your post bracket.
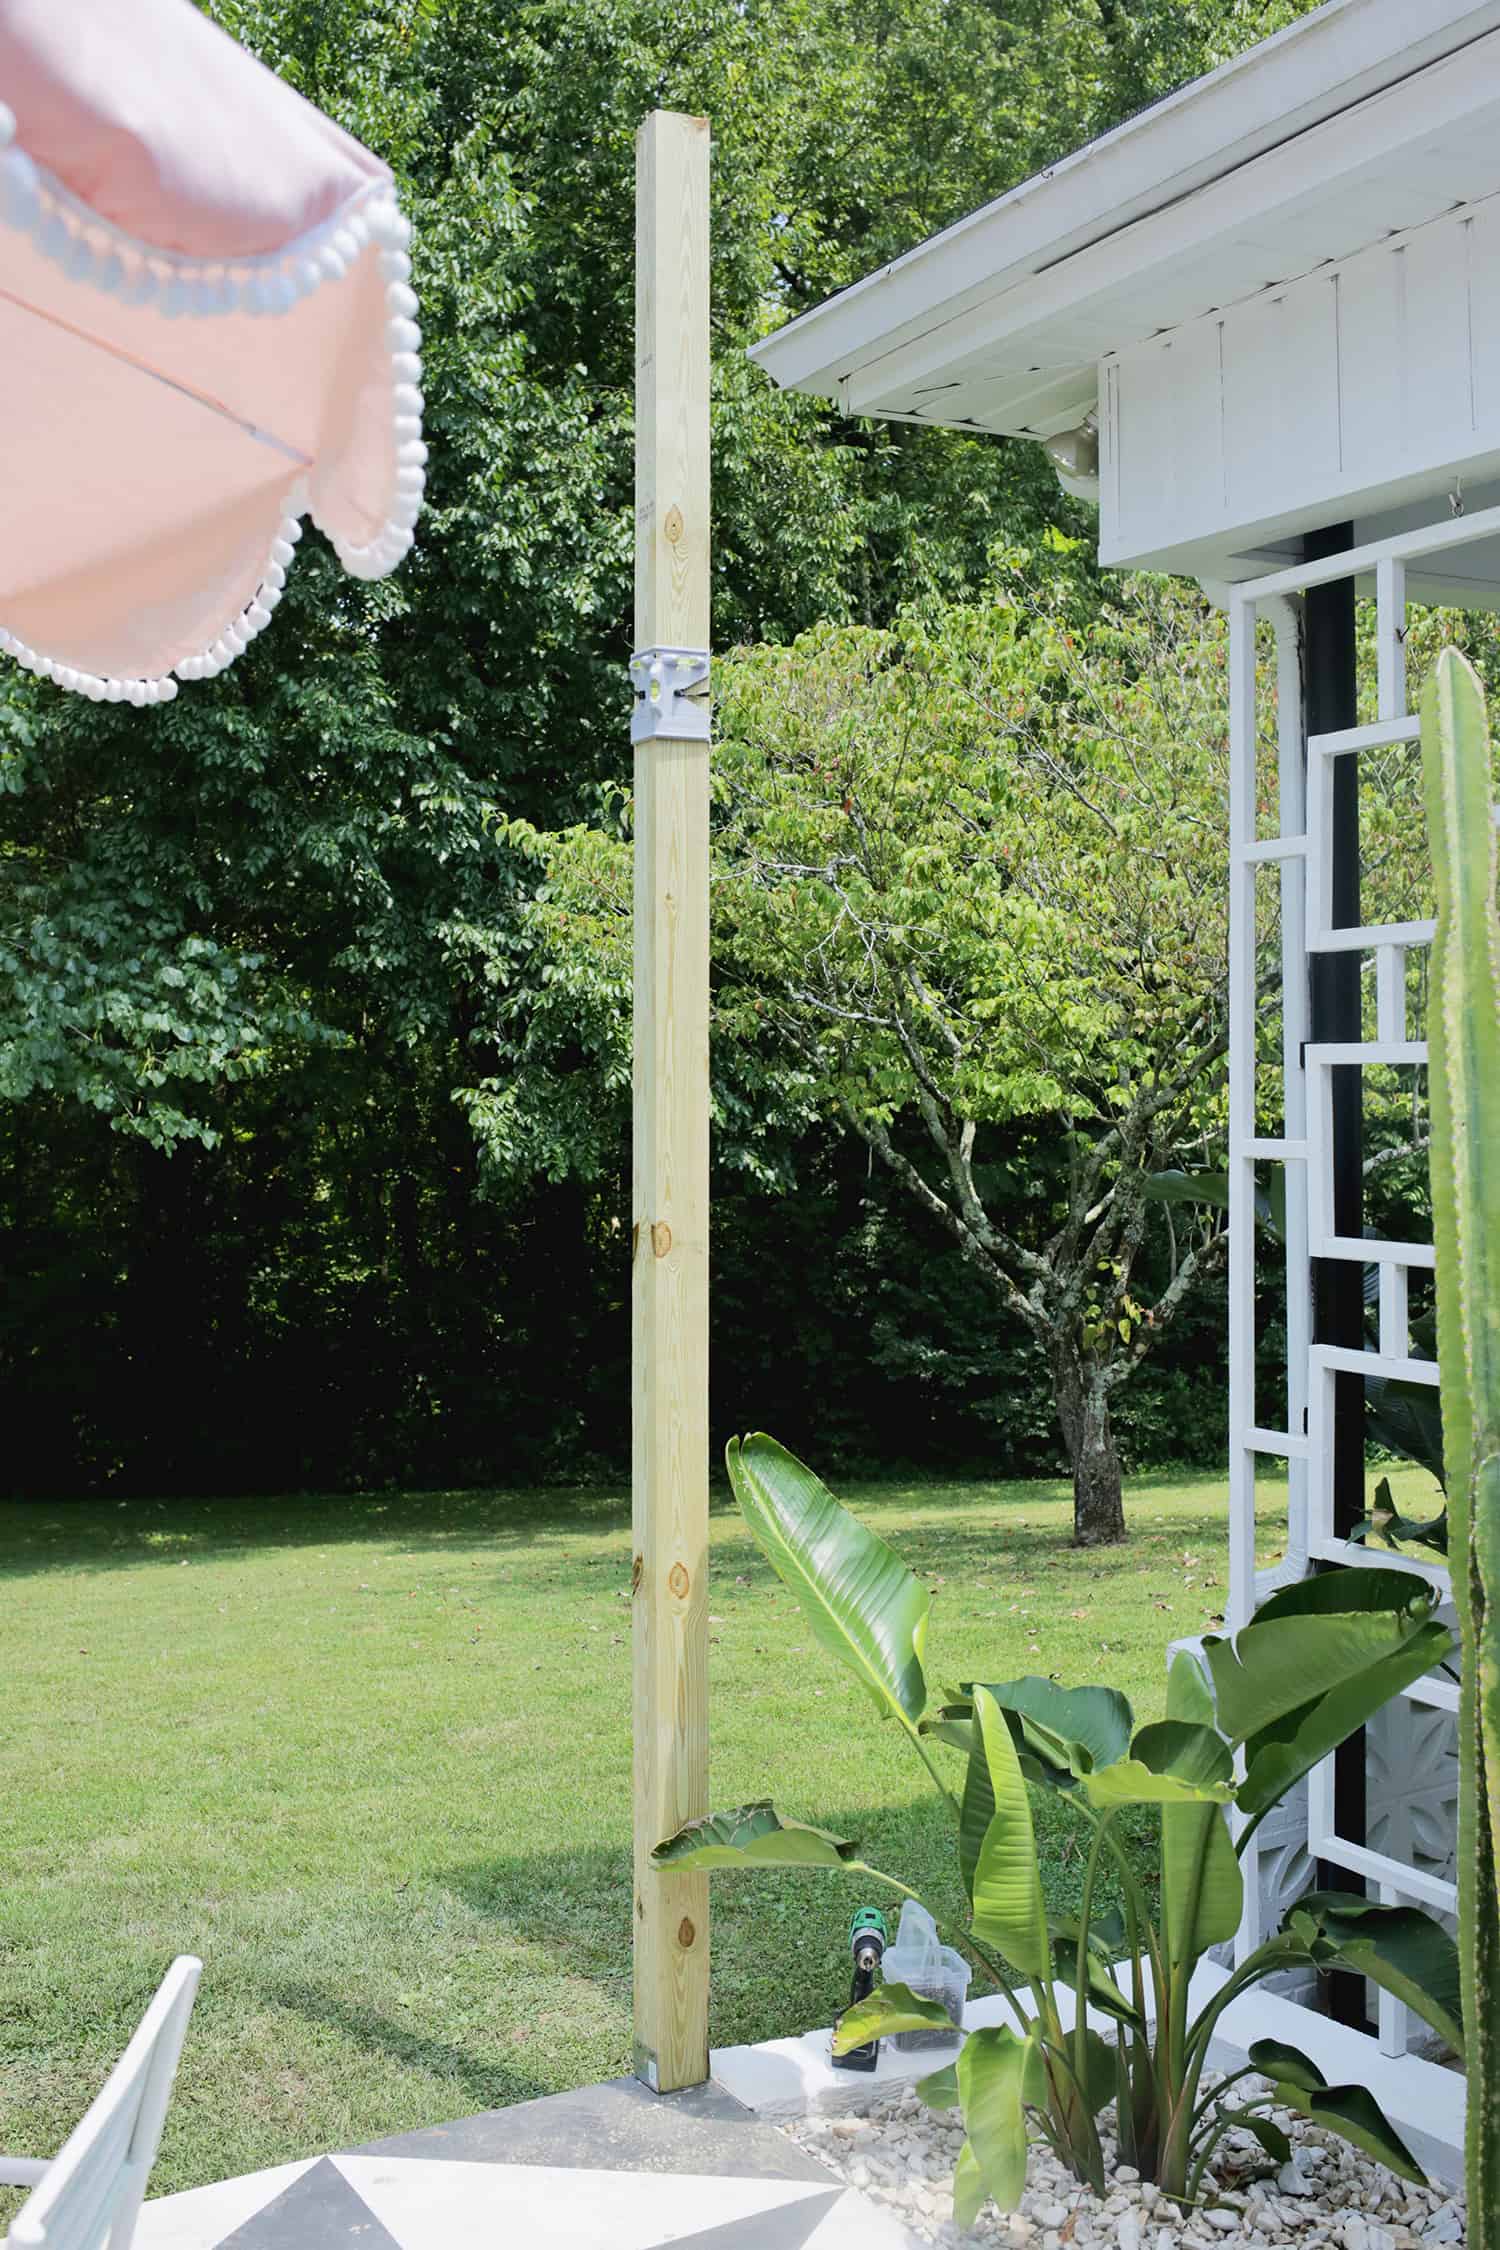 The post brackets have 2 screw holes on either side of each bracket. Have someone place and hold one of the posts into the bracket while another person attaches it to the bracket with screws, using a post level to make sure it is level on all sides. Repeat the process with the opposite pole.
Now we are going to figure out where the joist beams should sit on the posts while they are standing upright in the bracket.
We want to do a few extra steps to notch the posts so that the 2″ x 8″s fit more seamlessly into the post in each corner—this is for extra stability and also it looks a lot better than mounting the side boards onto the outsides of the posts!
We held an outer joist board in place from the header beam down to/against the outside edge of the post to see the angle we wanted the beams to be slanted at. Once the angle looked like what we wanted, we traced the line on the outside edge of the corner post with a pencil so we could see what angle to cut.
If you aren’t cutting an angle, then just trace a straight line across the post where you want the bottom of your outside joist to hit the post (I would have a few strong people hold up a joist with a level on it so you can make sure it’s level with your header beam that’s already attached).
Set your saw blade to be 1 1/2″ deep (that’s the depth of your wooden joists that will sit in the space). The first cut was made 7 1/4″ deep down into the post and that cut was 1 1/2″ from the edge. We then rotate the post once and do a cut straight across the board 7 1/4″ down from the top.
The next cut is the angle that we want our pergola beams to sit at, the one we traced onto the pole for reference, also cut at 1 1/2″ deep. Turn the post again and cut down 1 1/2″ away from the edge until you reach your cut line from the previous cut.
We did one more cut on that first cut line a tiny bit deeper to make sure the piece was fully cut and could be hit off the post and then simply used a hammer to knock the piece out of place.
Now you have a post that’s notched with one angled side for your outermost joist beam and one that’s a straight angle for your front ledger beam. You’ll want your notched posts to mirror each other so make sure the angled side is on the outside of each post.
If you are not doing an angled pergola, then just do straight cuts 7 1/4″ down on both of the notched sides and you don’t have to worry about tracing the right angle on a board.
 Put your pole back in the bracket and make sure the angled edge is on the outside and the straight edge is in front. The pole on the other side should mirror this one.
 Your side board will fit into the notch like above once cut to the right length! Here’s how to find the angle you’ll need to cut into the ends of your joist boards if doing an angled pergola:
To make yourself an angle template to trace onto boards, place a scrap piece of joist into the outside angled notch of your post and trace where it hangs over the front side of your post.
Find what that angle is on your chop saw and cut along that line—that will be the angle you cut both ends of all your joists to so it fits in between the back header and front ledger board.
Now, to get the side joist to fit perfectly into the notch, we cut the header end of our joist board at our angle. Then, hold the board touching the facia next to the end of the header board and placed the other side of the joist in the notch to see how much it hung out past the post when it fit into the notch.
We marked where it hung over with a pencil and cut the board at our angle in that spot.
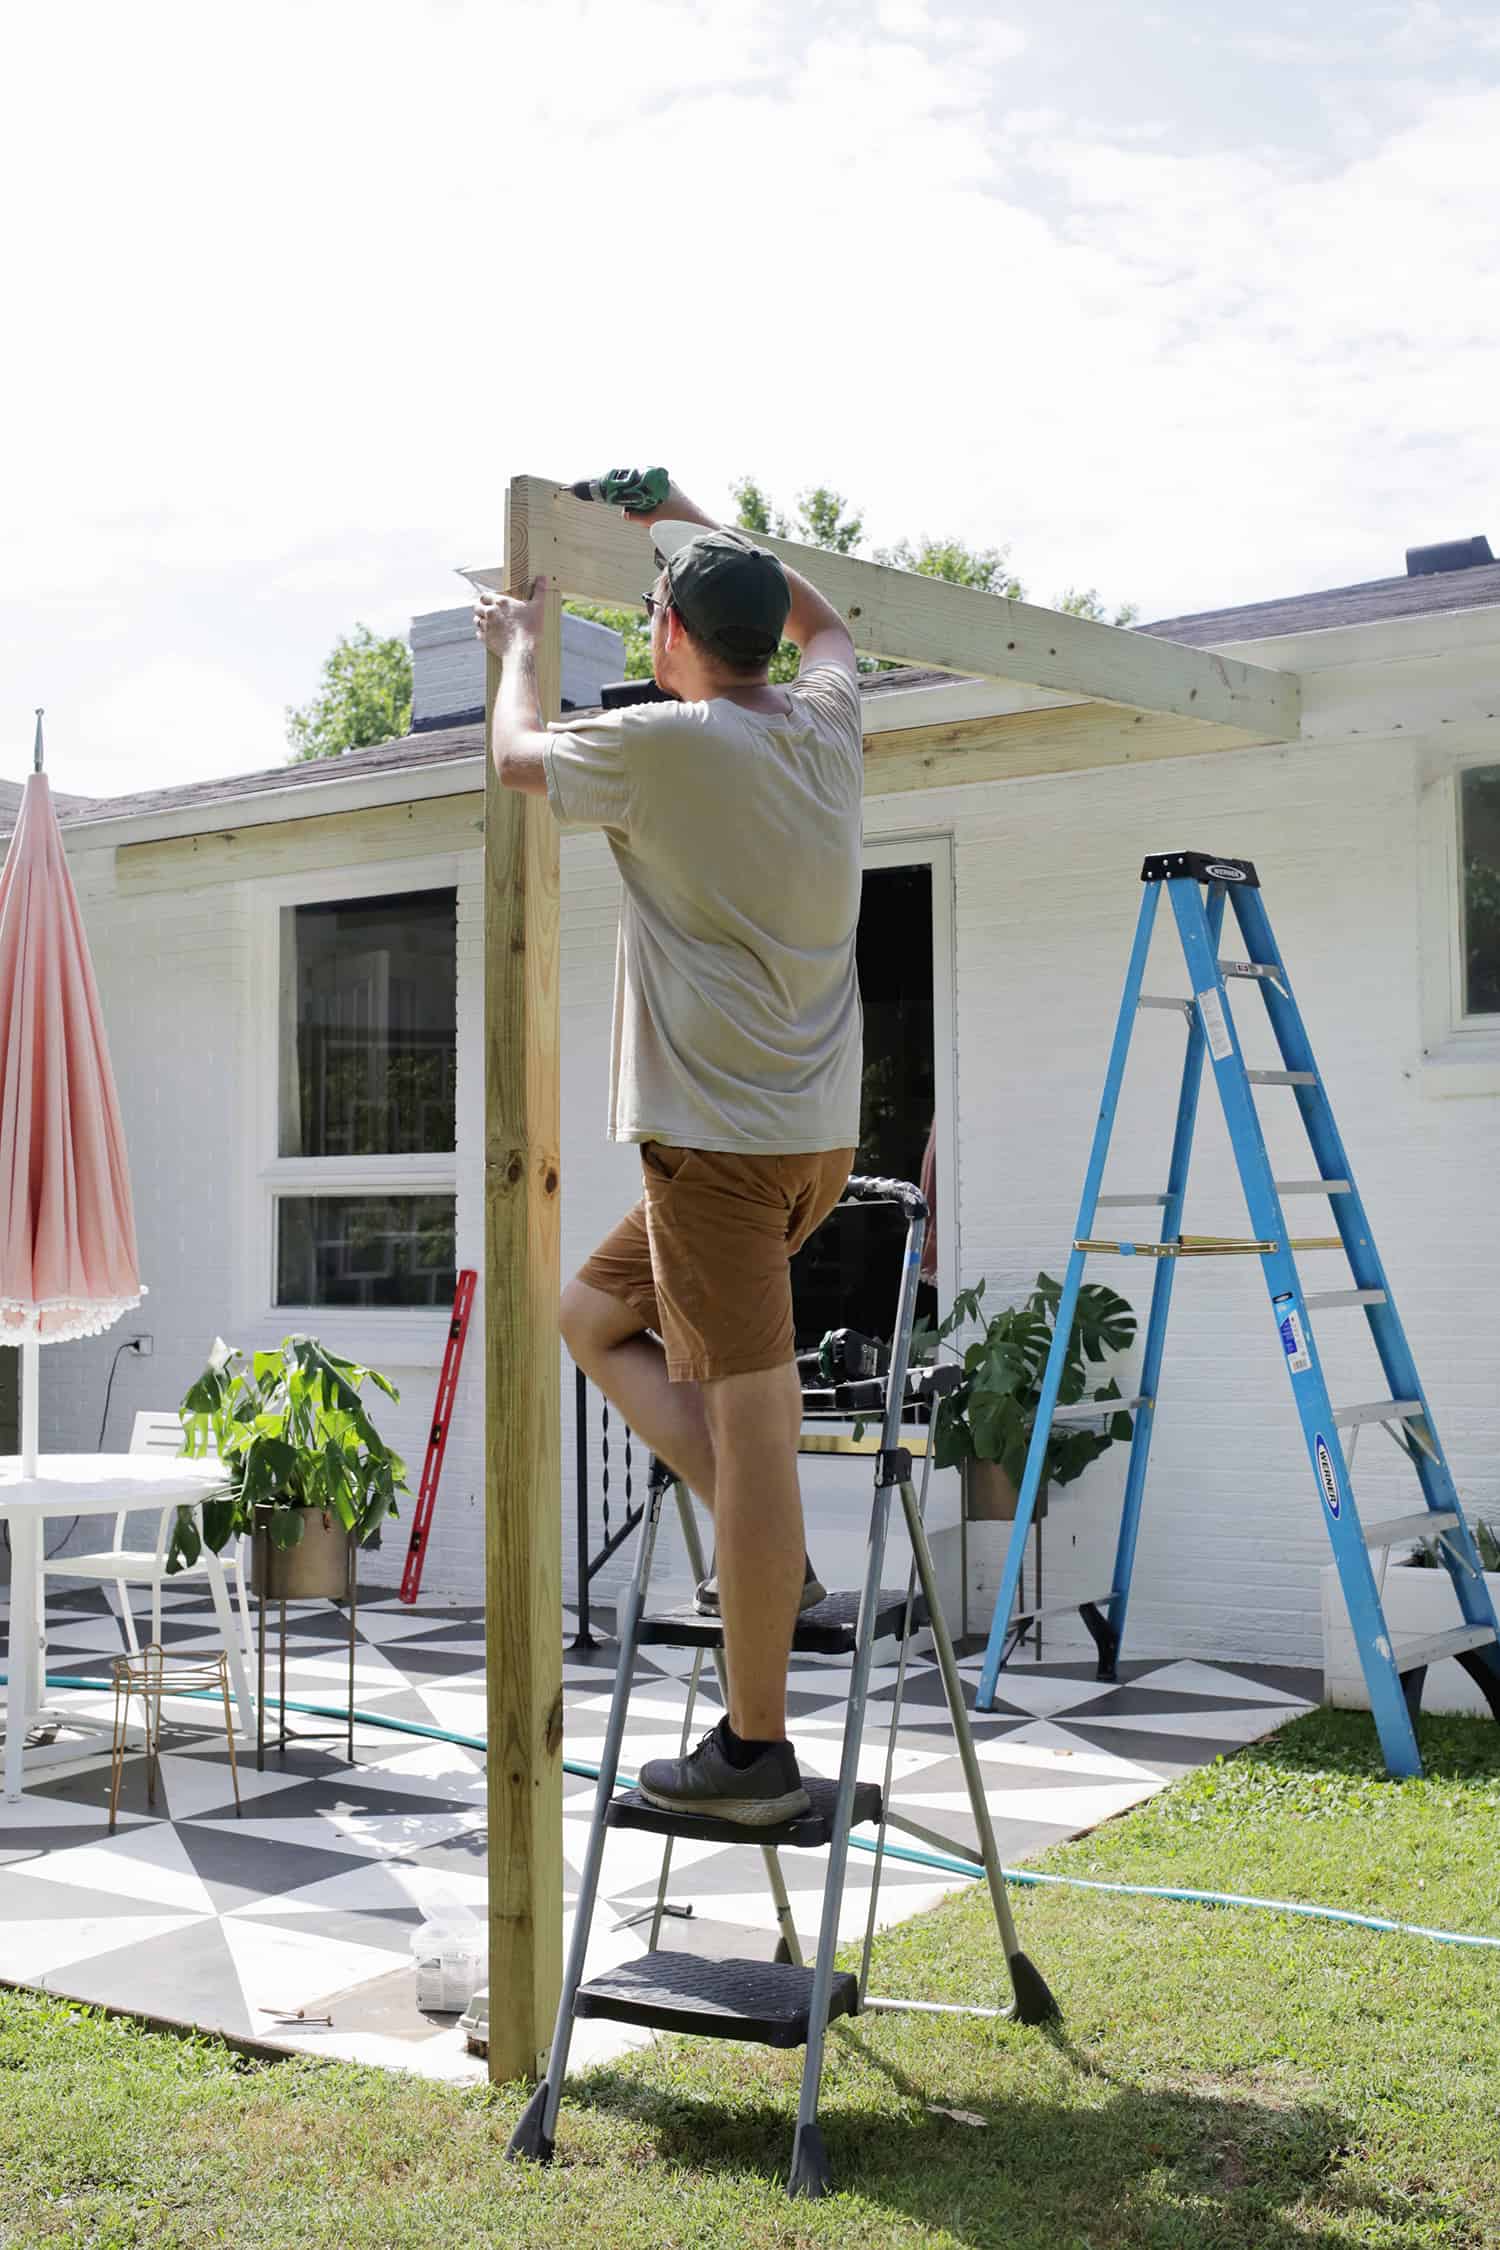
Use your screws to attach your side post into the notch on your post on one end and directly into the side of the header board at the top.
Since you do this on both sides, that’s why you make the header board 3″ shorter than your overall pergola width measurement—the two 1 1/2″ joist boards on both sides of the header will add 3″ and make it your total width.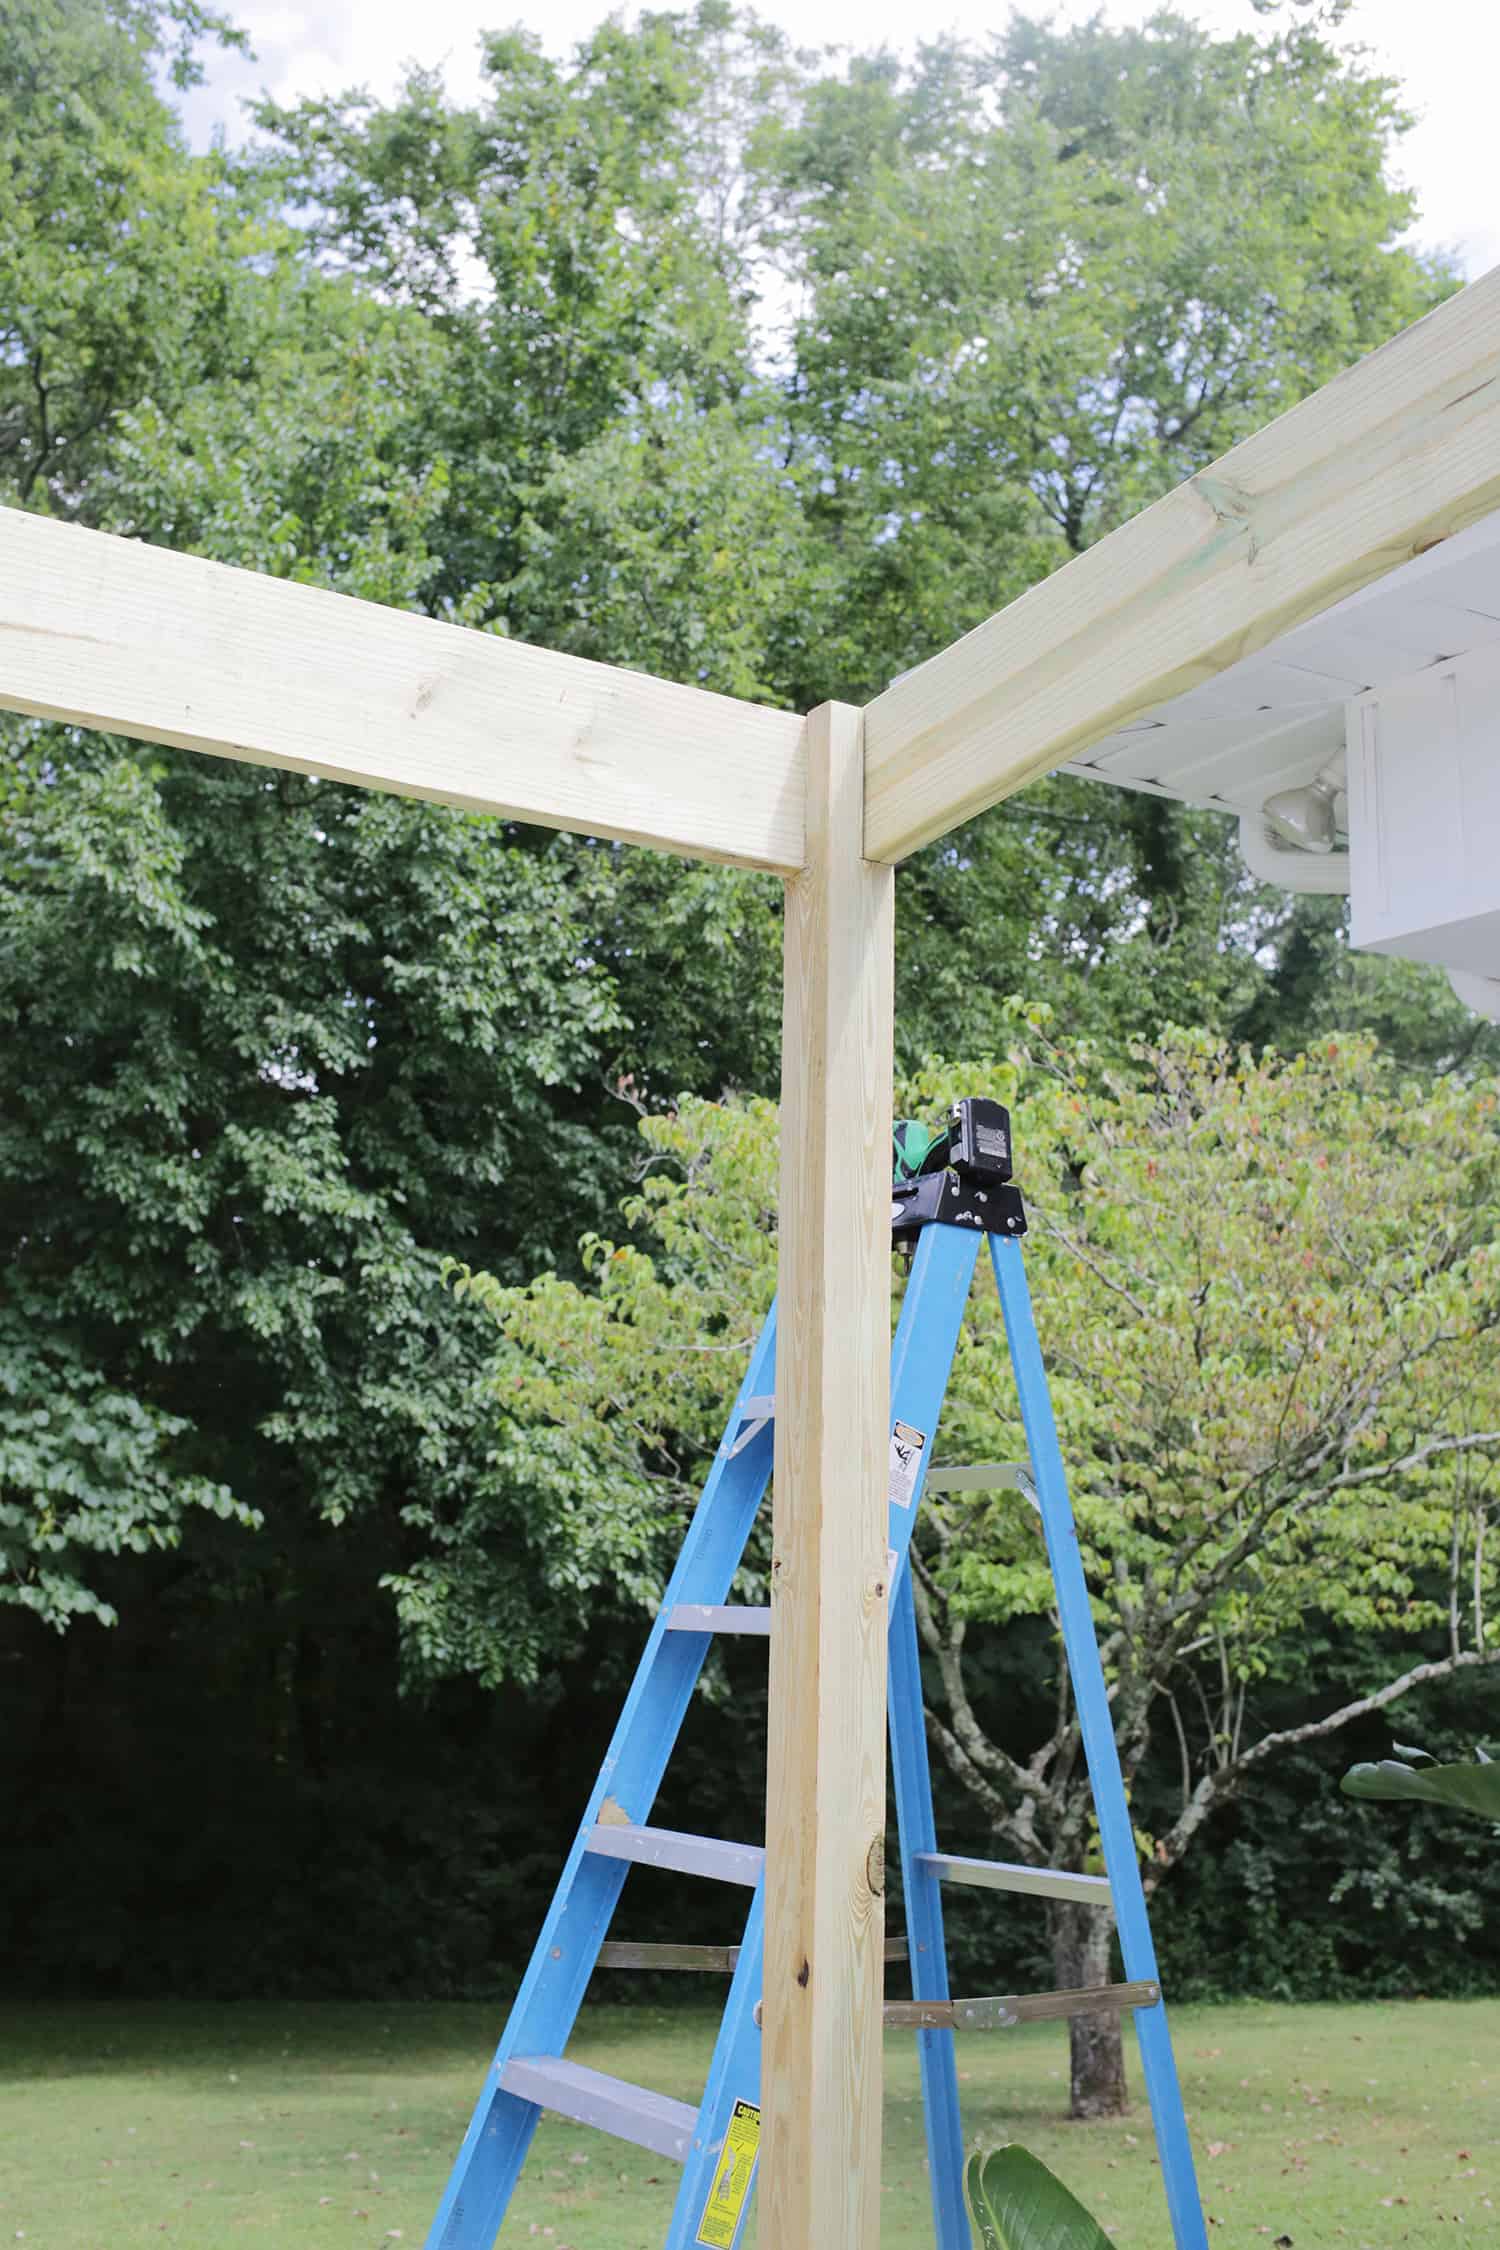 Once both sides are fitted, cut, and attached, you can measure to see how long your front ledger board needs to be and cut and attach that board to the front of your notched post.
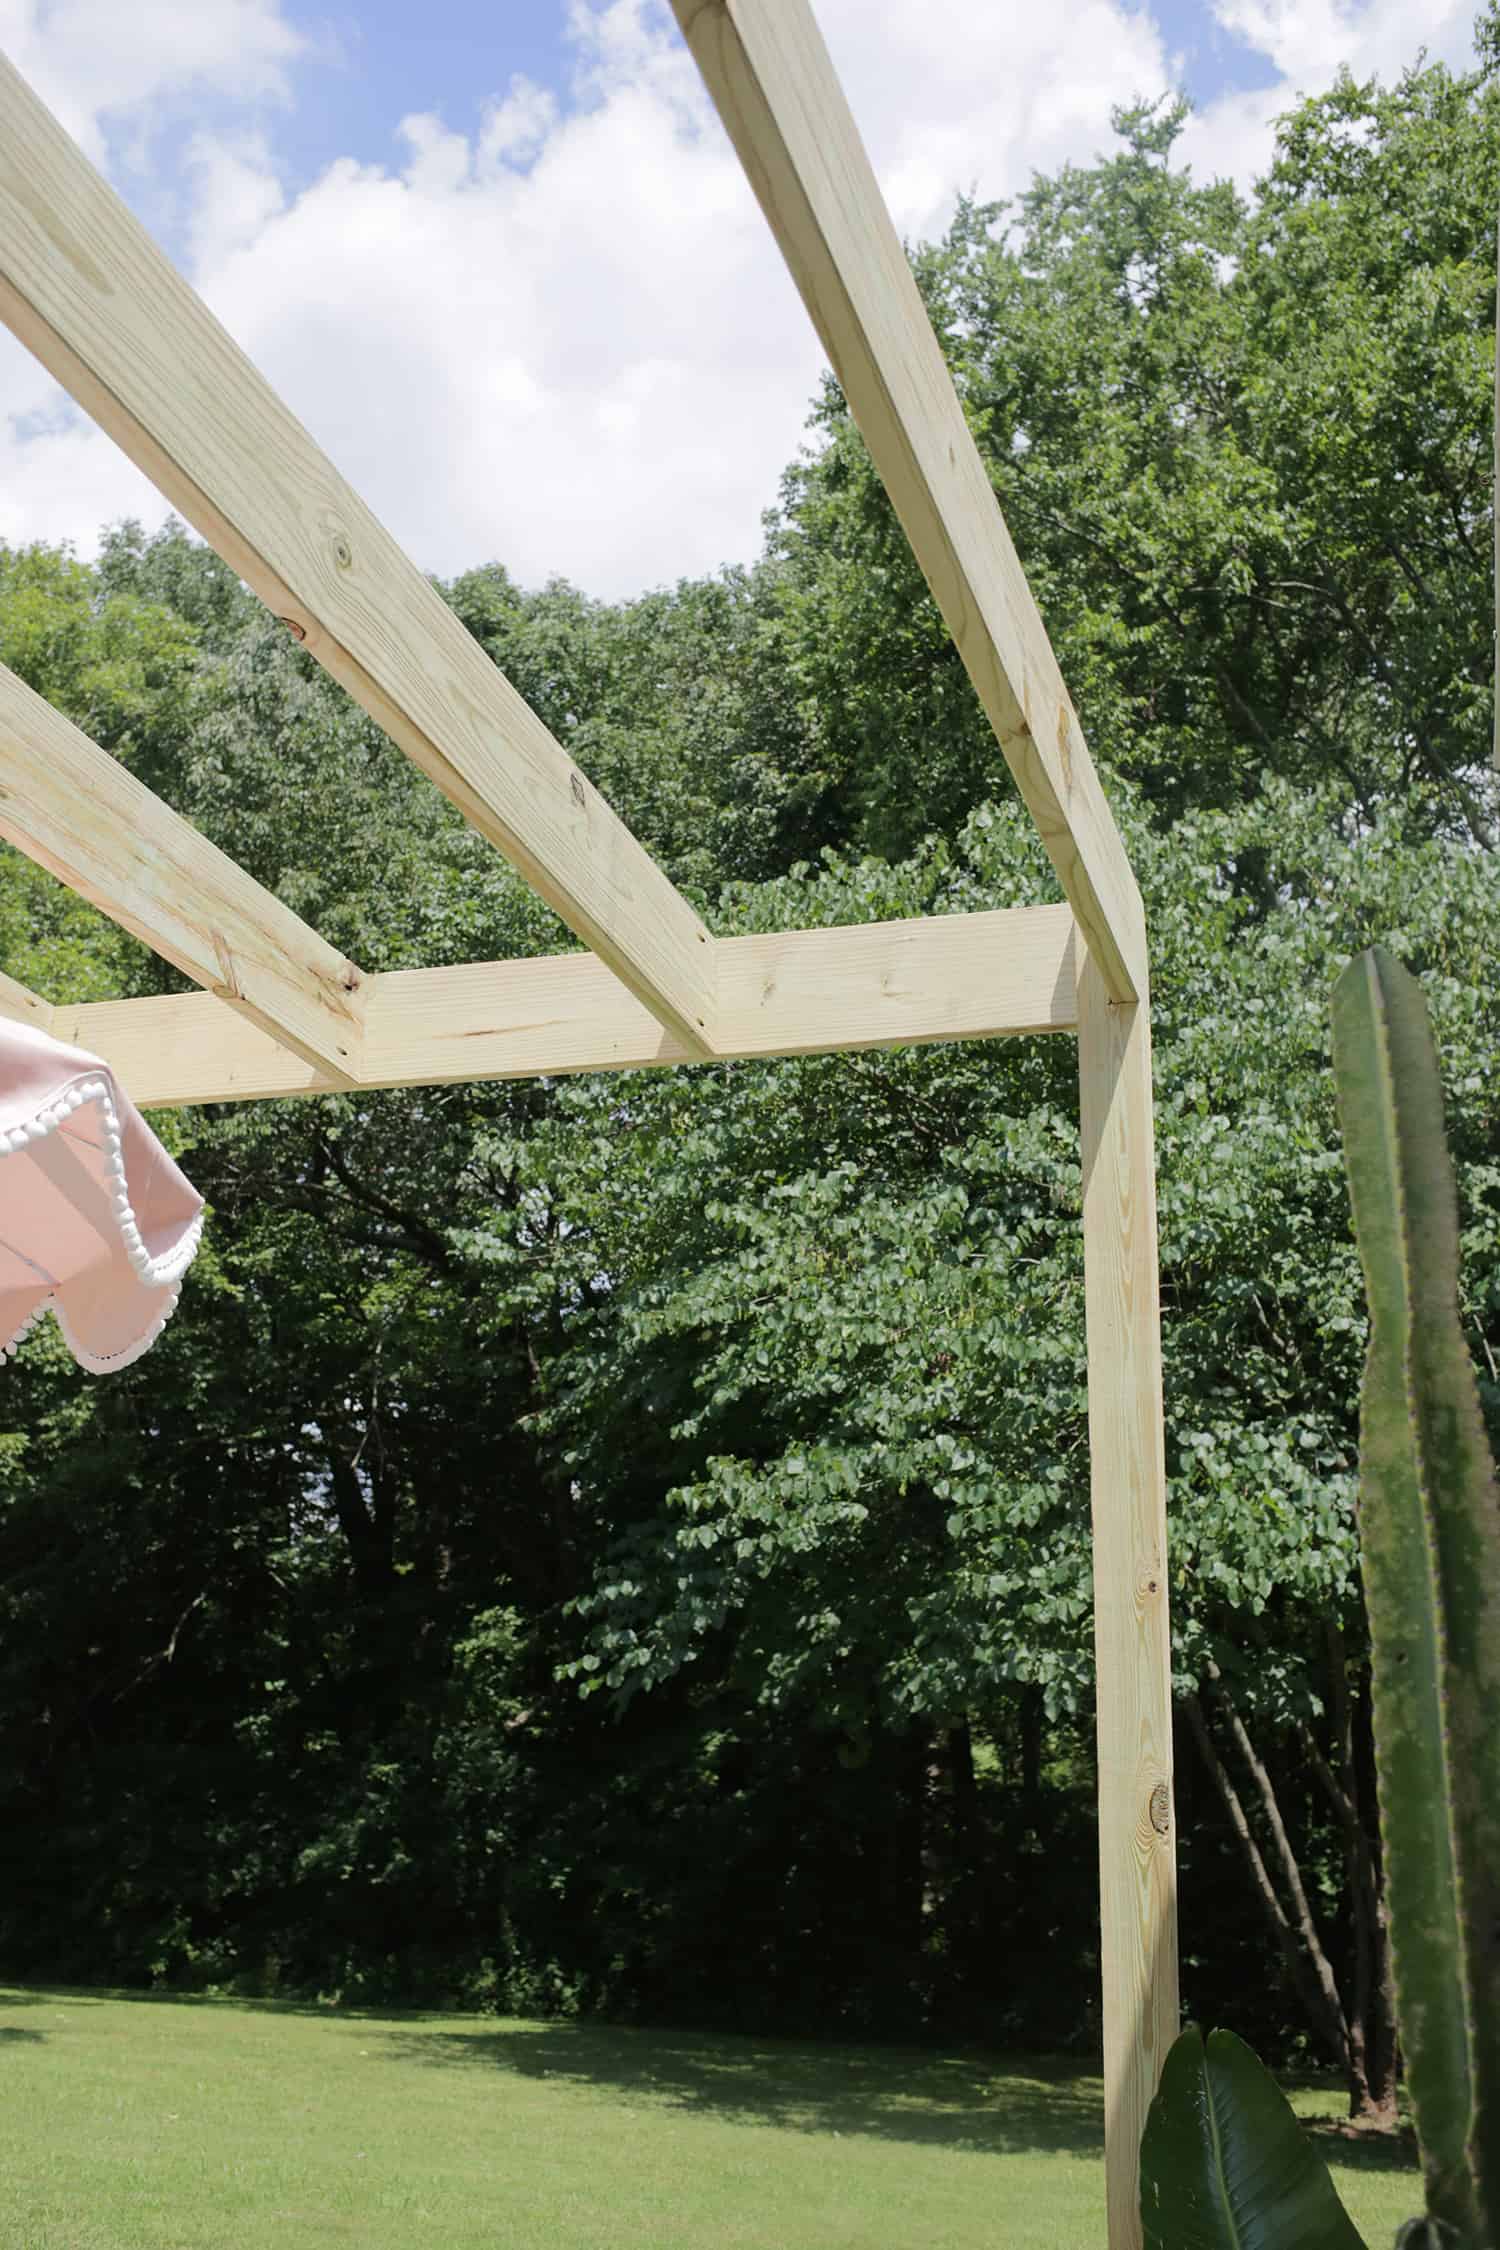
Note: you will need at least 2 people to attach all of these boards moving forward, they are very, very heavy! Take your time, and be safe!
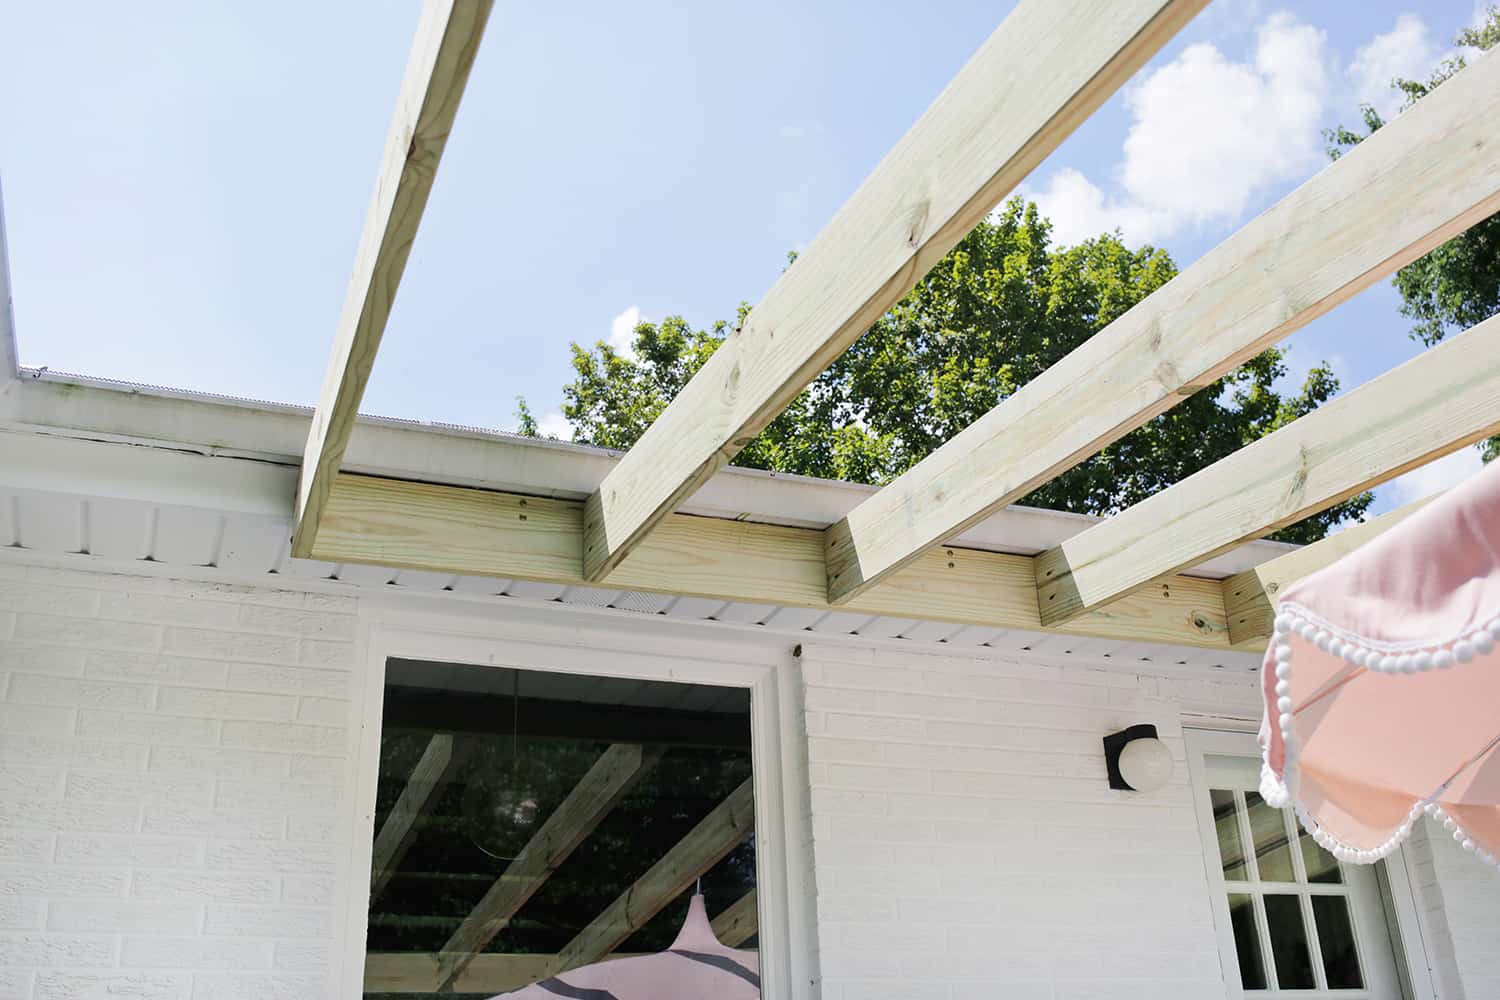
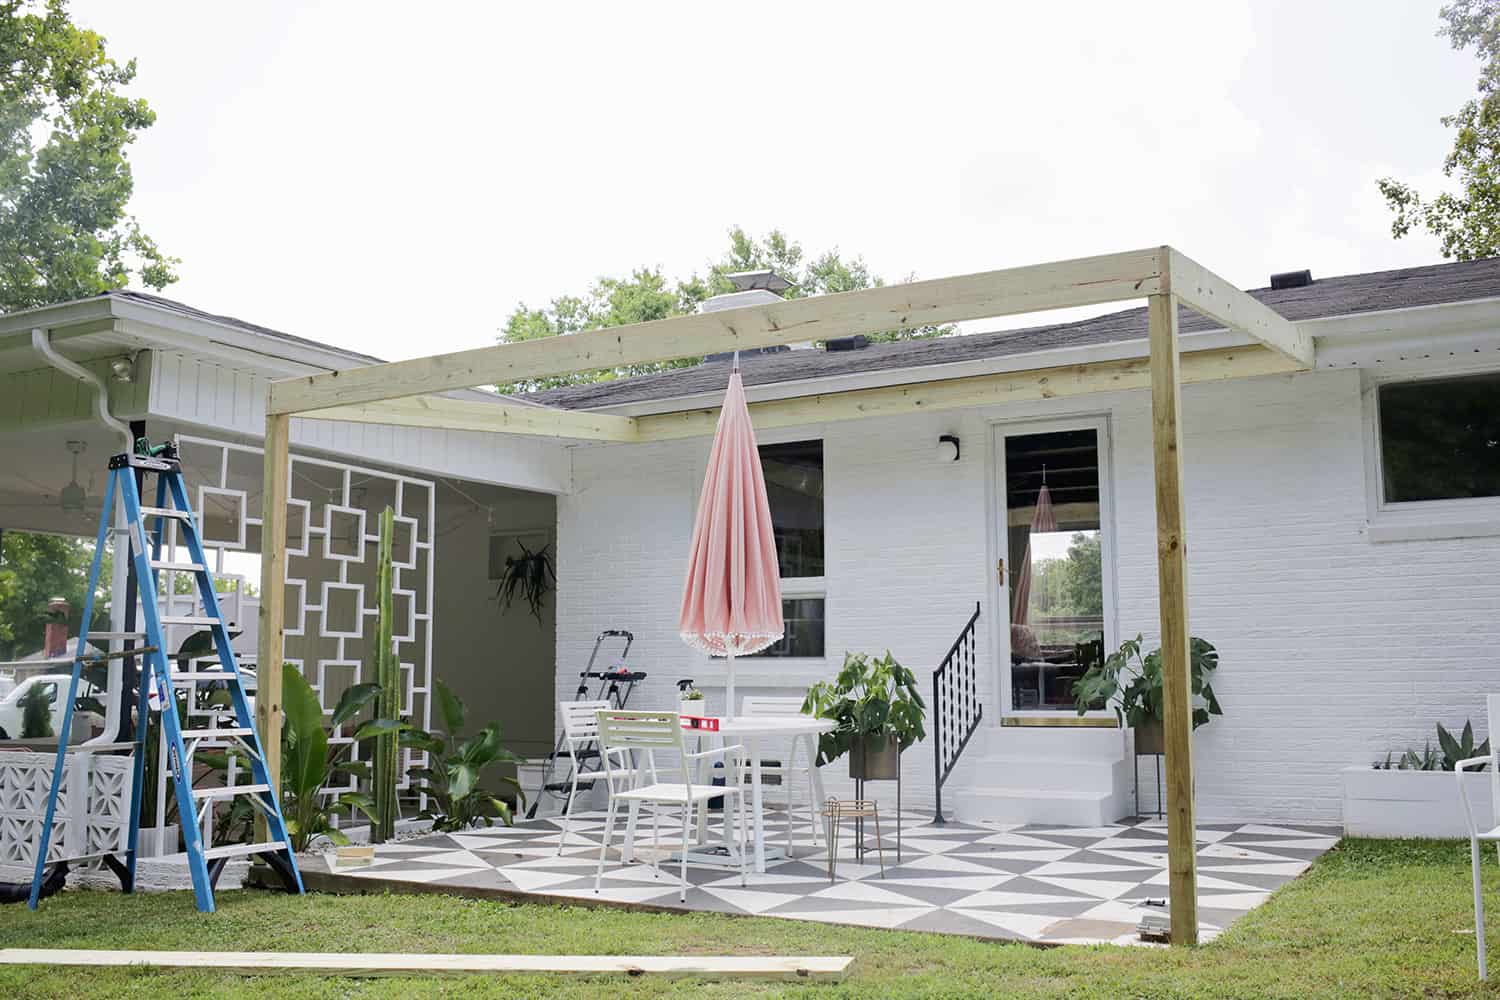 Now you have something that kind of looks like a pergola!
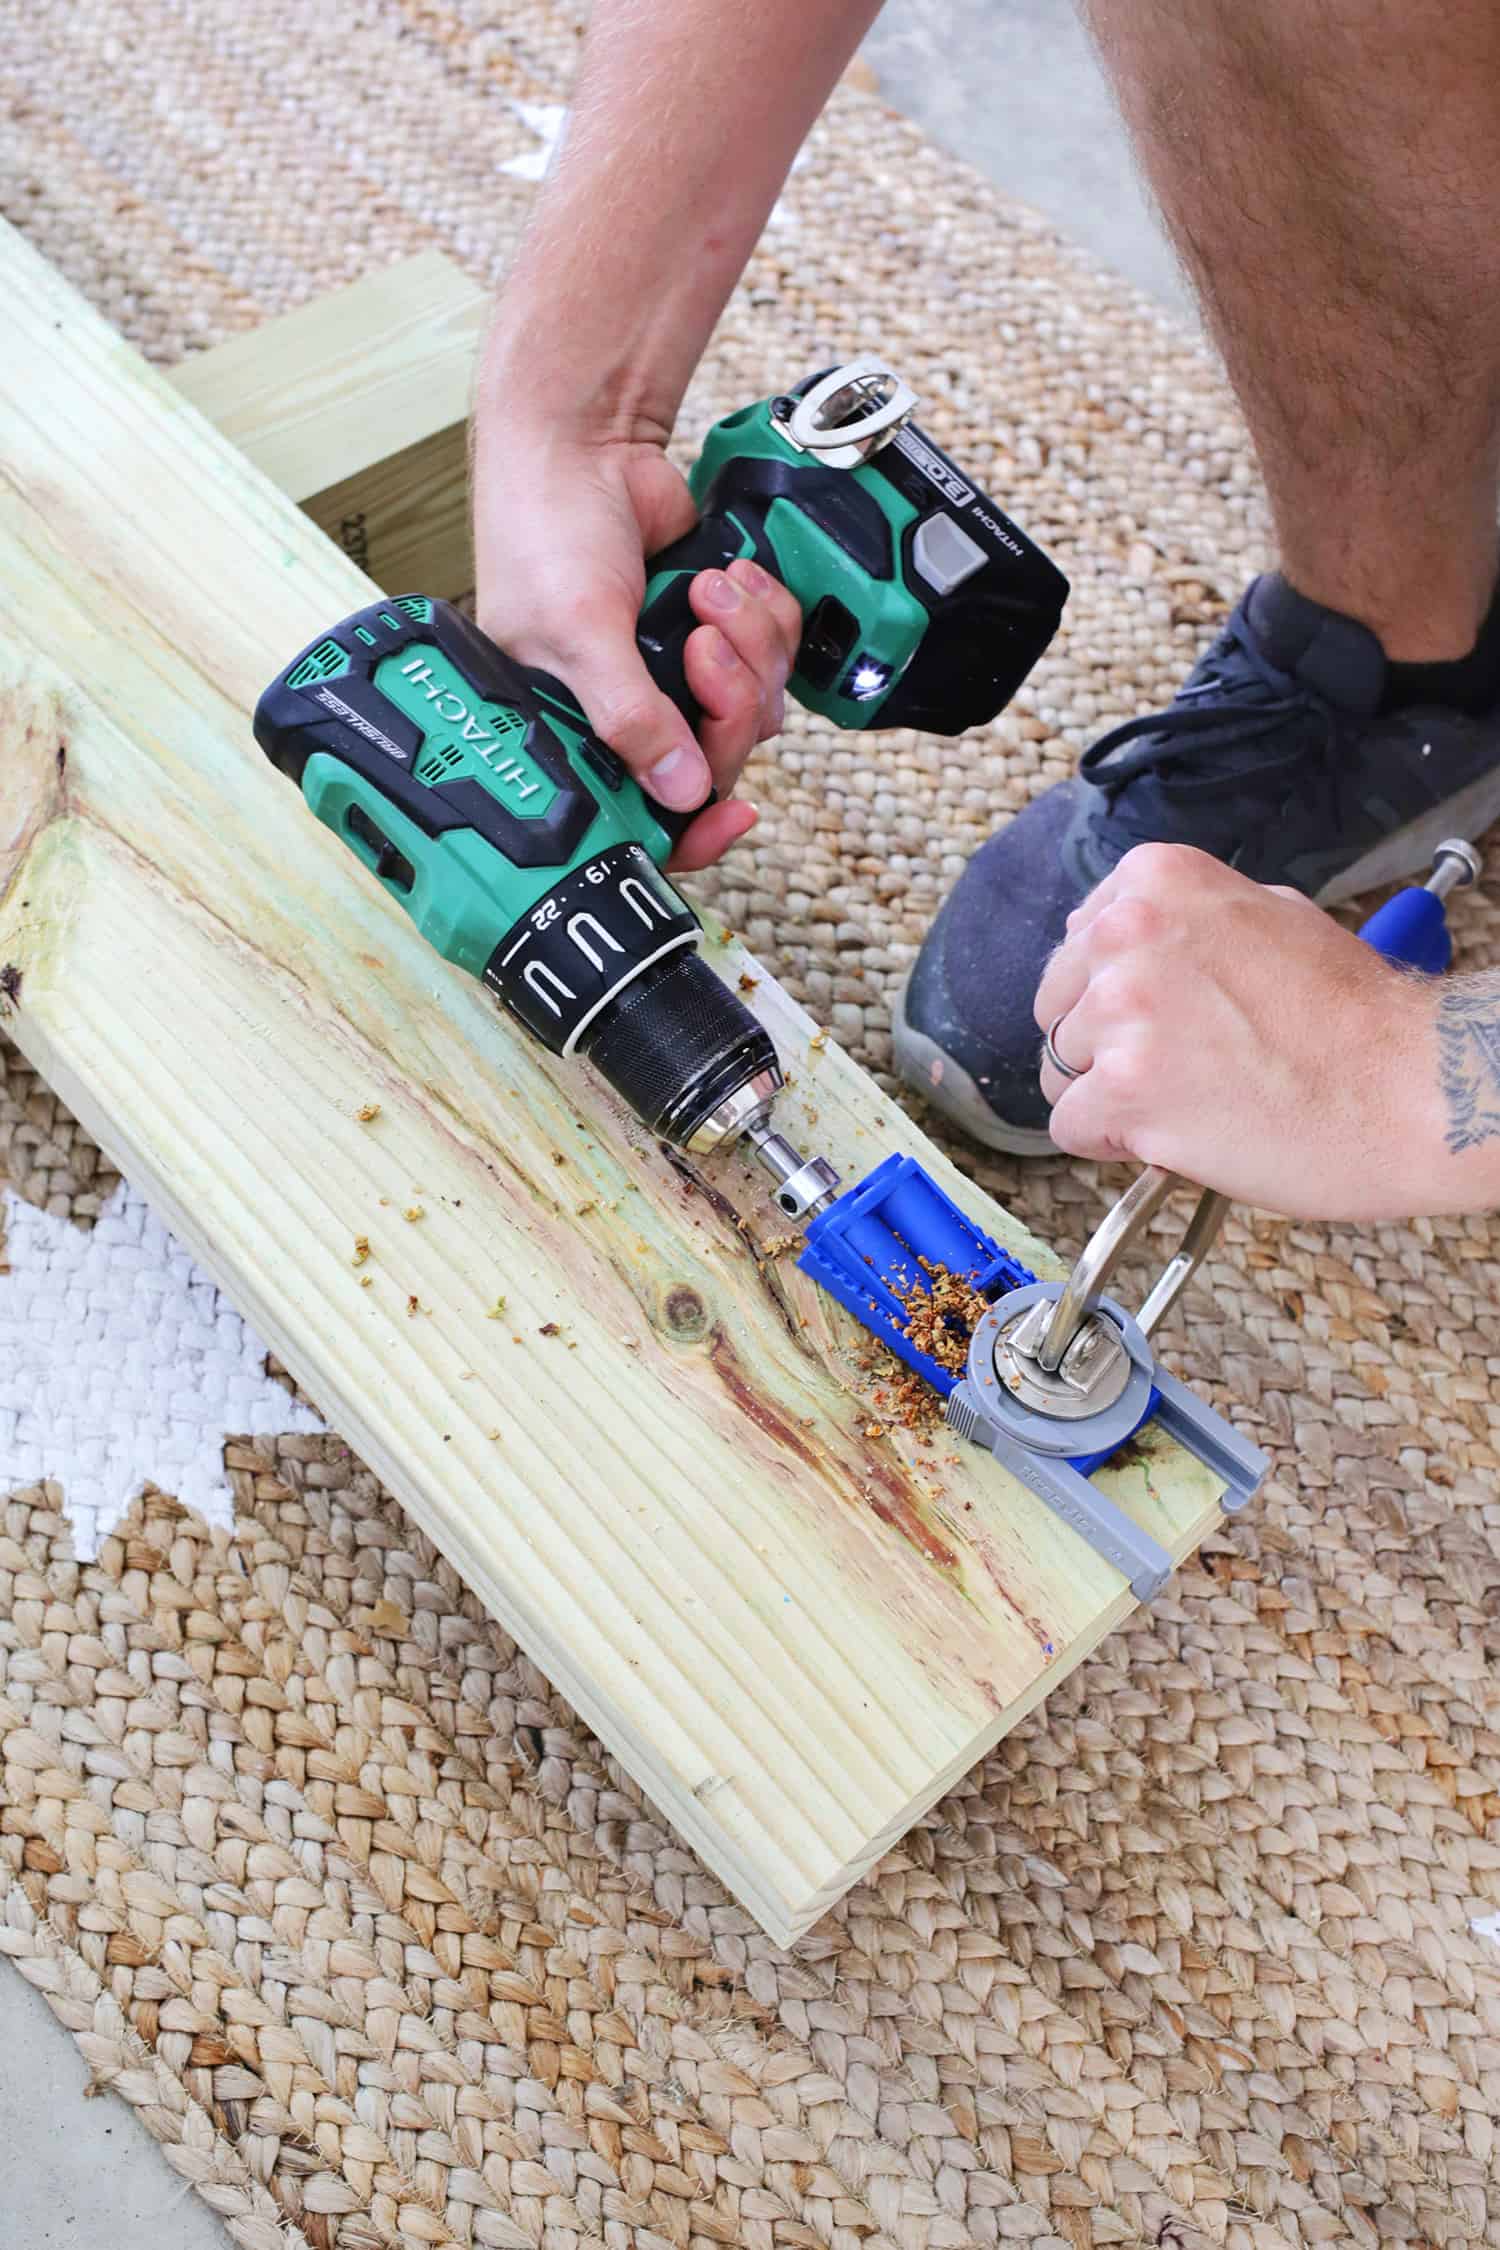 For the middle joist boards, figure out how many you want for the size of your pergola and space them evenly. Mark where they should attach on both the back header board and the front ledger board. Cut the boards to length (use your angle template scrap piece to trace your angles as needed) and pre-drill 2 pocket holes with a pocket hole jig in both sides of each end of each board.
 Have two people hold up each end of the boards where you made your marks and attach them into the header and ledger with screws.
 At first, we cut and tried angled braces where the posts are like above, but it made the structure look pretty rustic, so we took them off and added these 24″ x 24″ brackets to the front corners that made the lines look a little cleaner. So you can do whichever option you prefer.
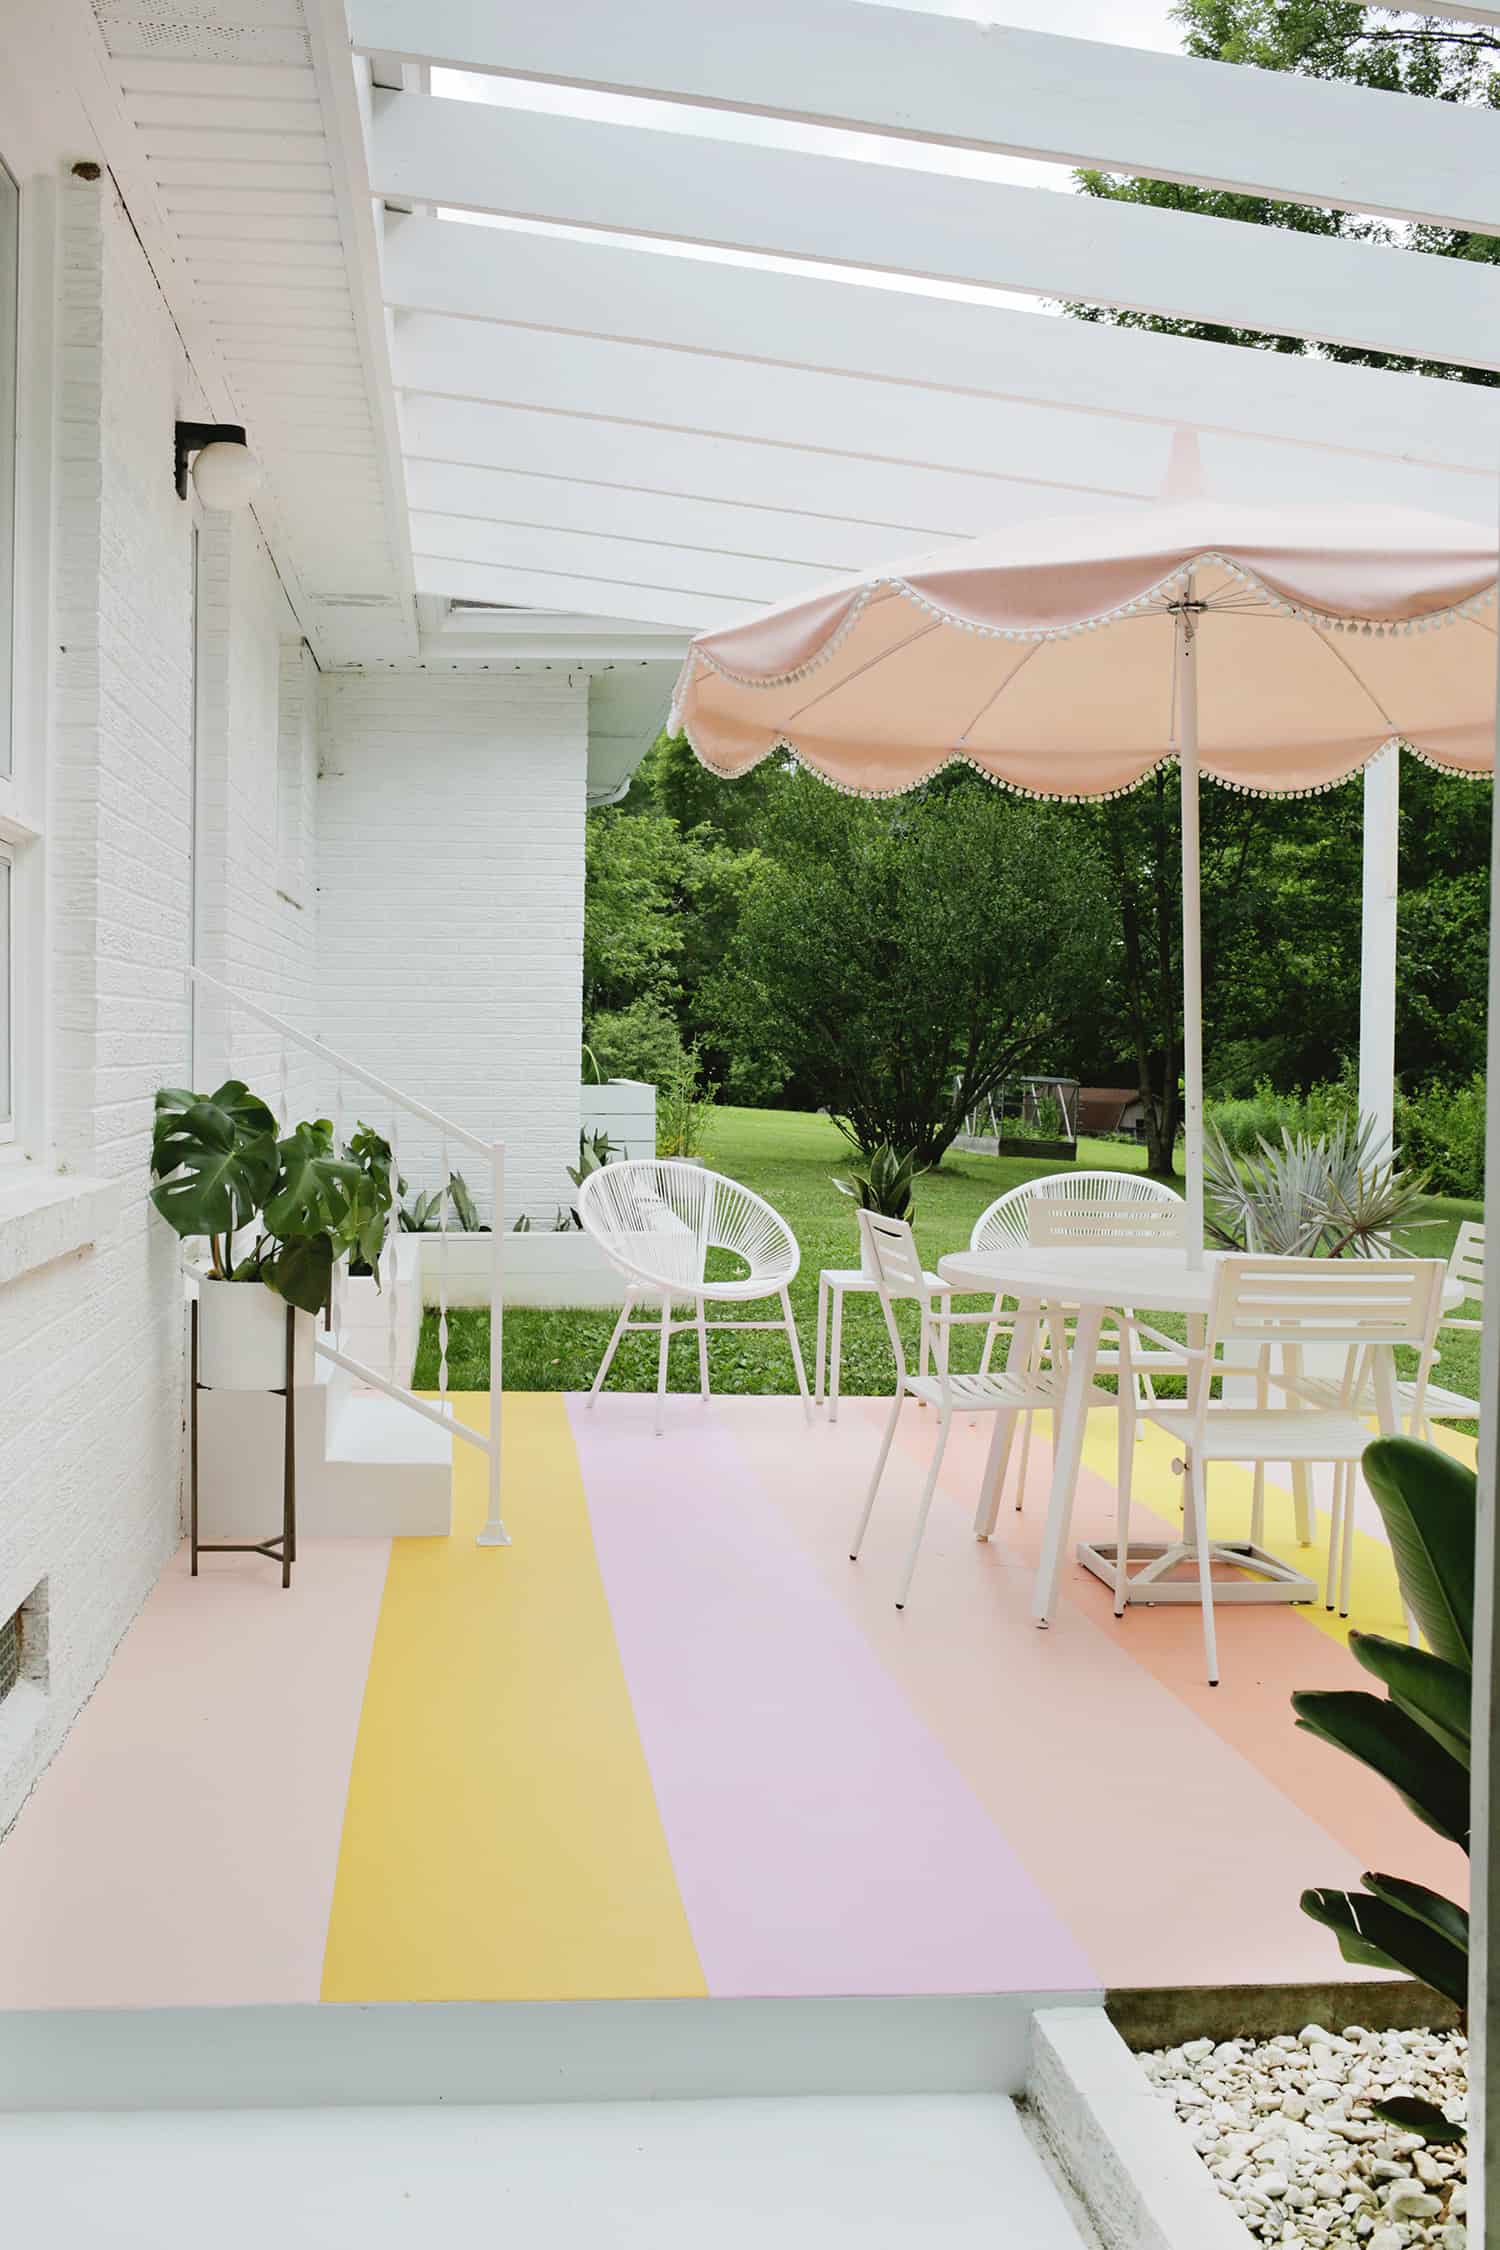
Fill any screw holes and paint or stain your pergola the color of your choice and it’s ready to use!
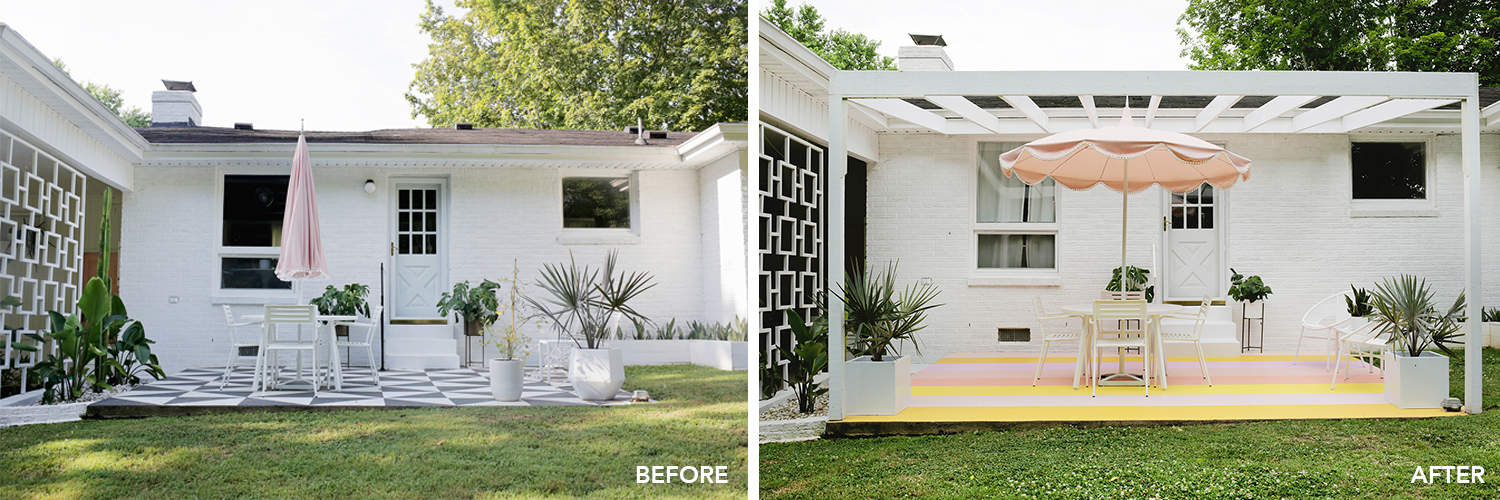

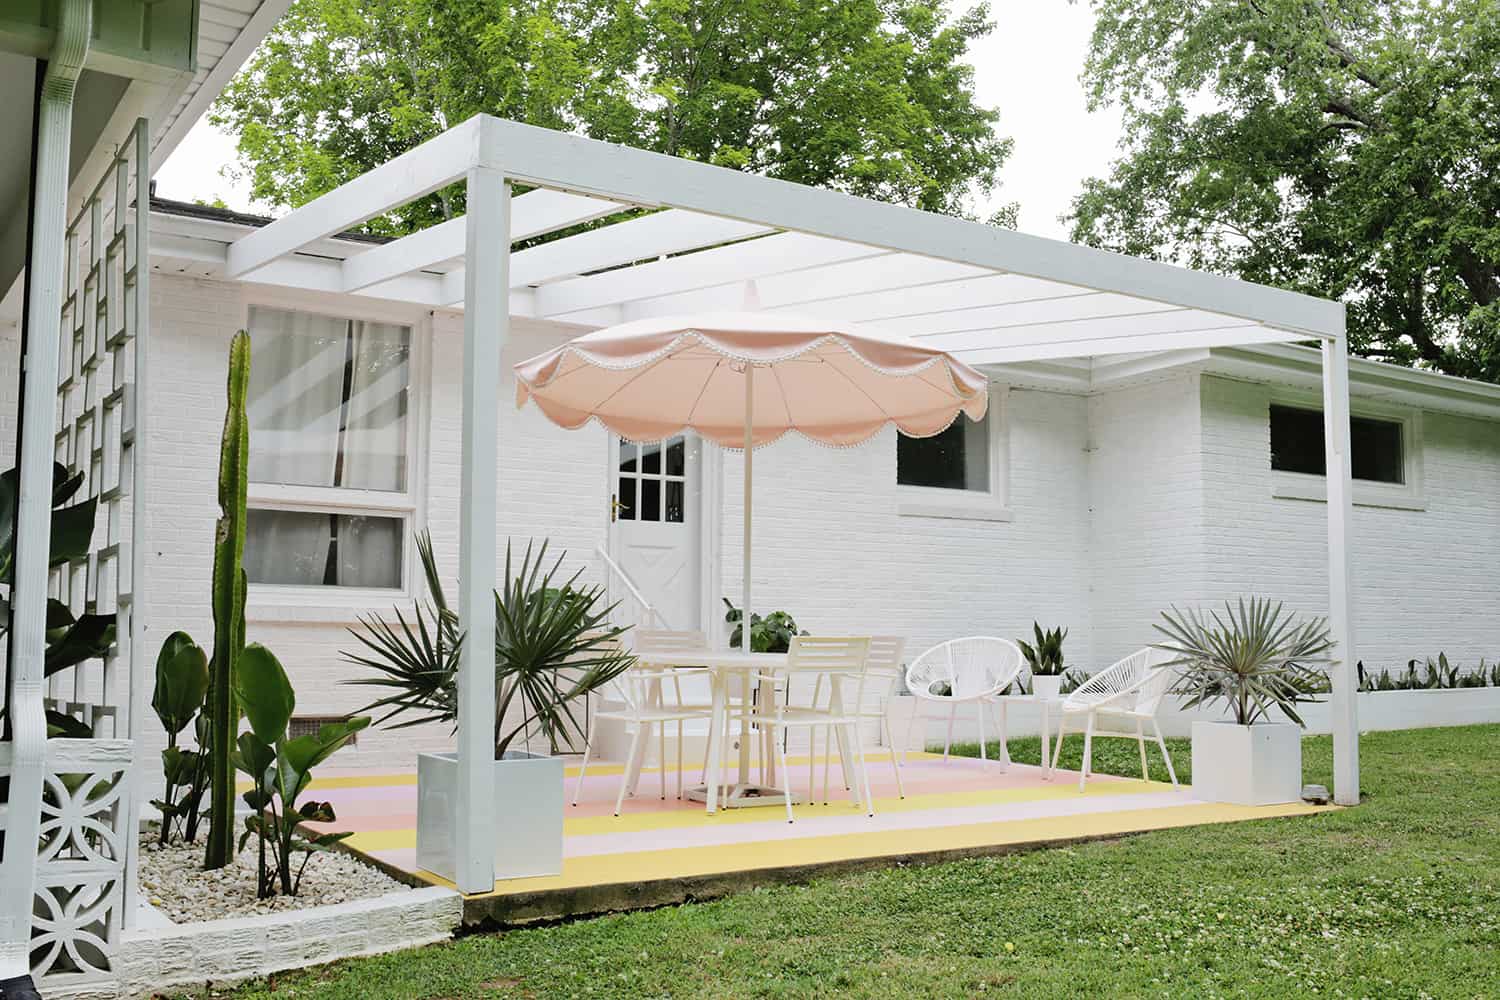

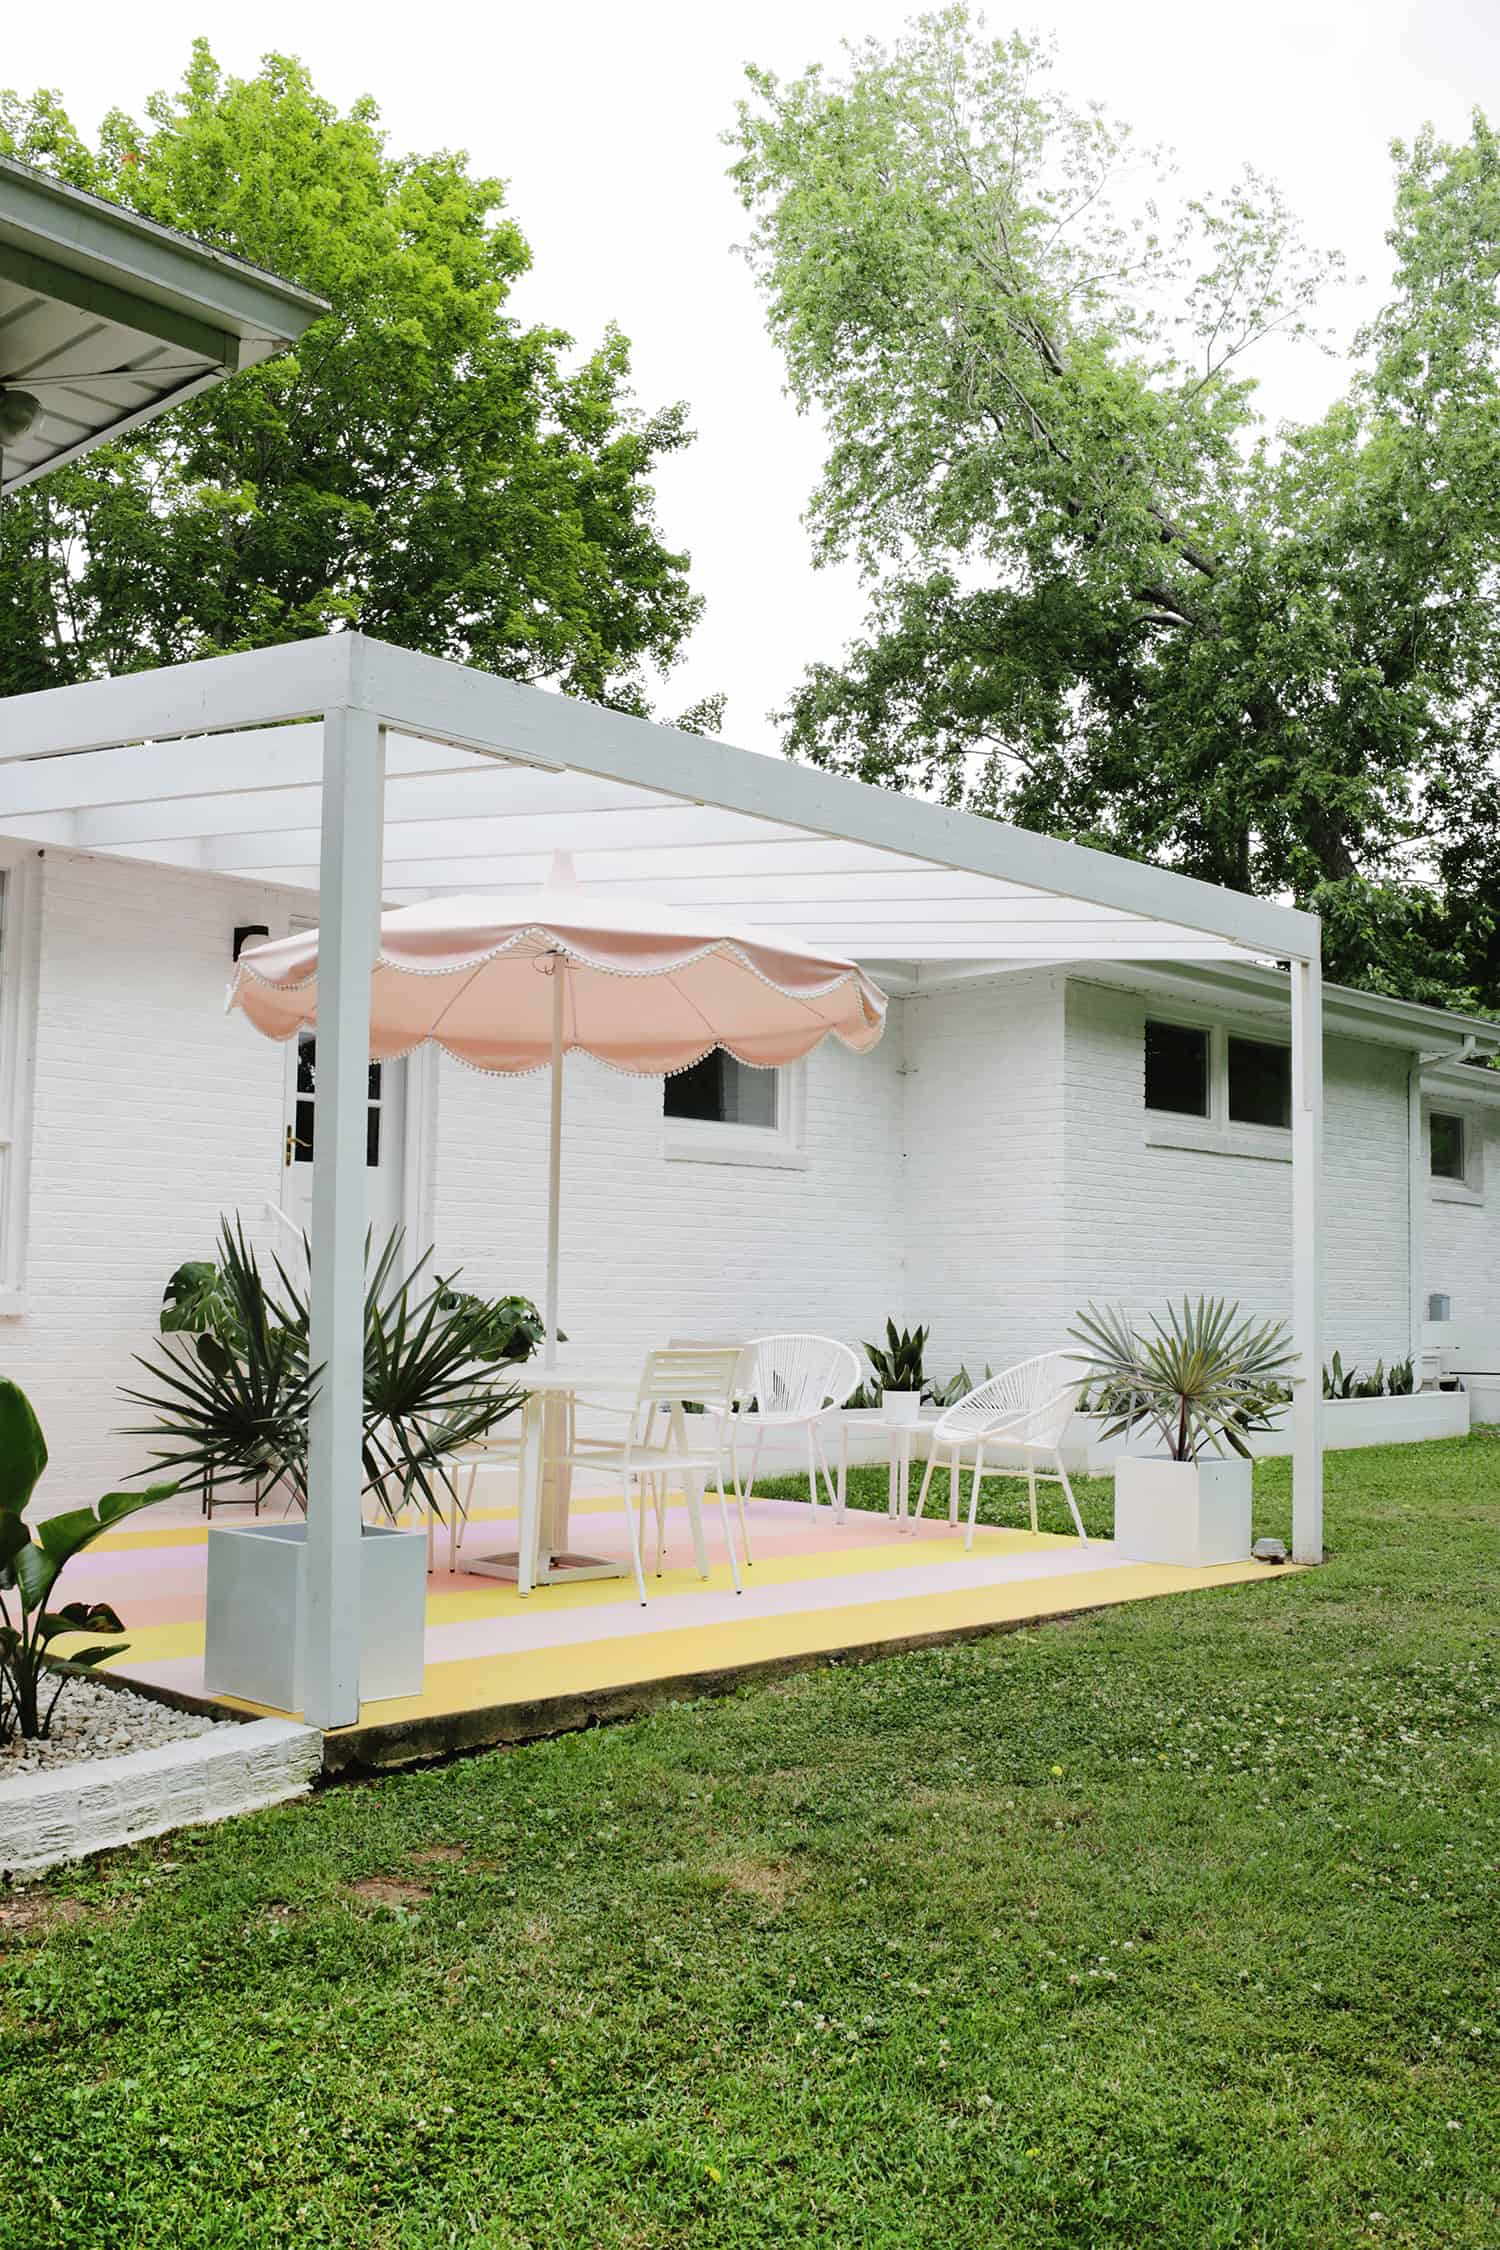
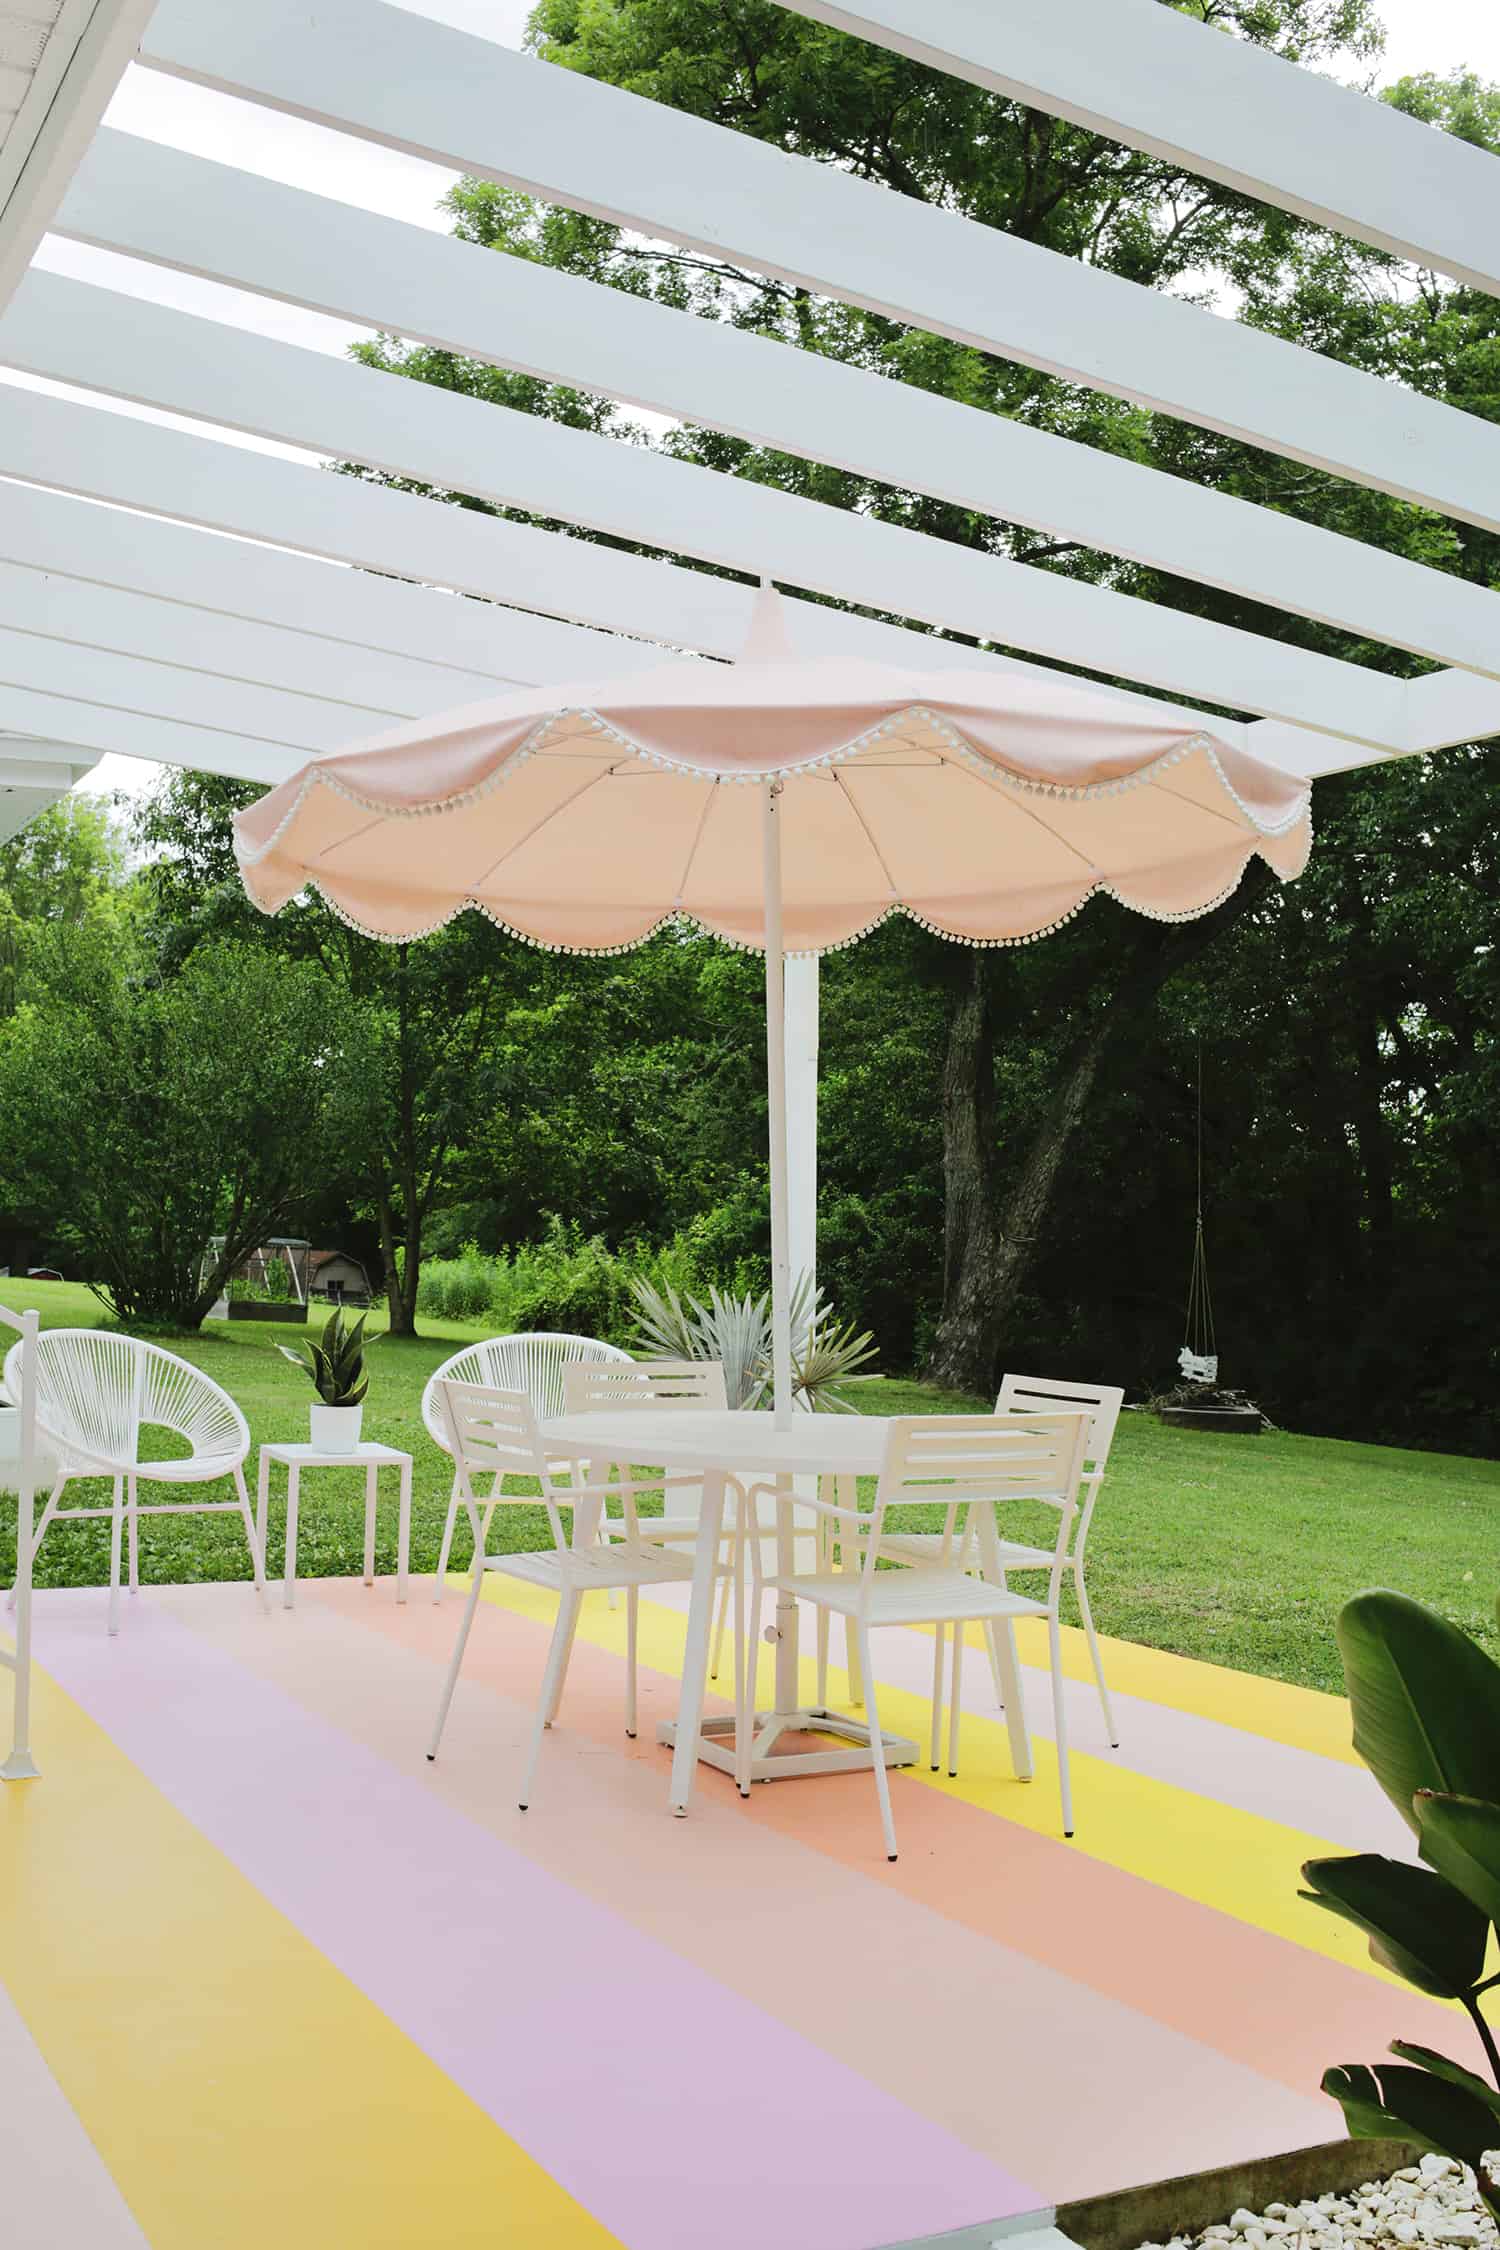
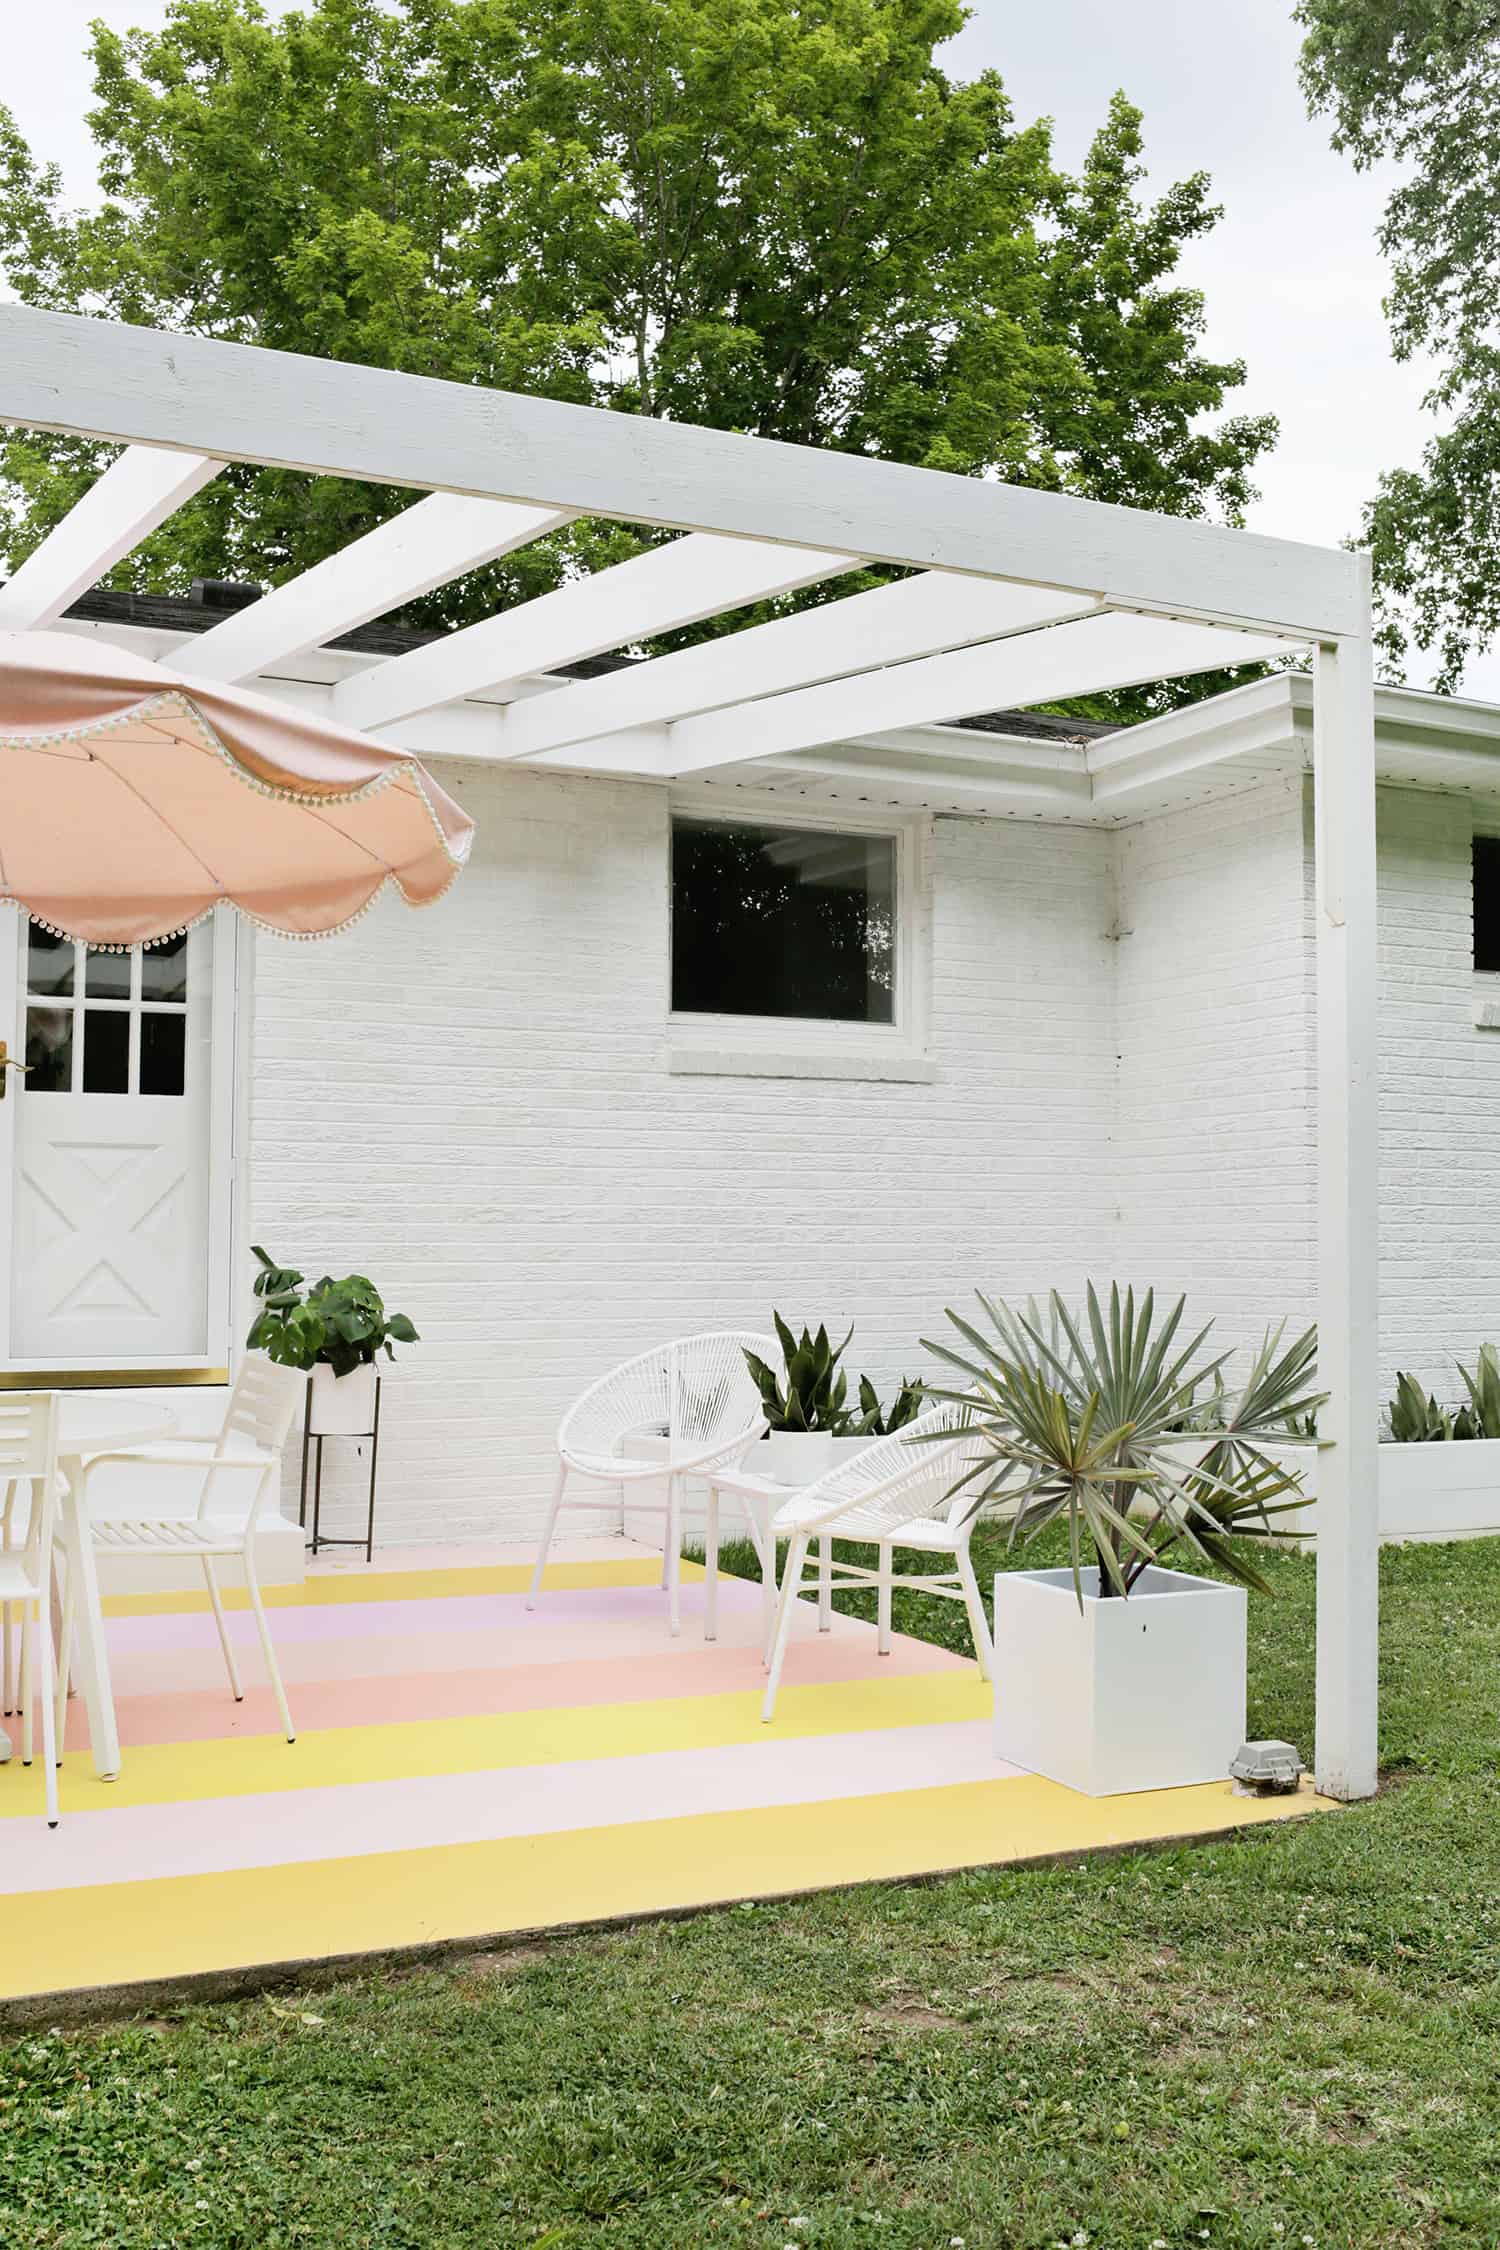

So worth it! Overall, I love how this clean, simple structure connects the patio to the house and makes it feel like it’s a part of all that’s going on.
It’s fun for me to get to learn how to do bigger projects too so I can expand my builder skills, so I do feel proud that Collin and I built it ourselves (and shoutout to our builder buddy Taylor for helping us get a plan together!).
I was thinking that you could also weave some outdoor fabric through the slats if you wanted to create some shade and then take it off in the months where it feels good to sit in the sun (July is not one of those months here in Nashville, haha!).
Hope this inspired you to tackle a big project at your house this summer! xo. Laura
Love this post? Sign up for our newsletter for more ideas!

Get creative ideas for recipes, crafts, decor, and more in your inbox!
 Get the How-To

Supplies
- 2″ x 8″ pressure treated boards in different lengths for the front, back, and two sides of your pergola (plus however many boards you need to create your divided sections)*
- 4″ x 4″ posts (you’ll need two of these, I got 10′ tall posts)
- 4″ x 4″ post brackets for wood to concrete (you’ll need 2)
- concrete anchors
- circular saw and miter saw (miter saw is helpful but optional)
- drill
- deck tape (optional)
- 6″ star drive washer head structural screw
- 3″ star drive deck screws
- T-25 and T-30 star bits
- Kreg pocket hole system & clamp
Instructions
- OK! First, we measured how wide we wanted the pergola to be and cut a 2″ x 8″ board 3″ shorter than that total width to be the header board that attaches to the house (I’ll explain why we cut it 3″ shorter in a second). We centered the board to the middle of the patio concrete slab for placement and used the 6″ star drive washer head structural screws to attach the header board to our fascia.* You’ll want to place your bolts every 24″ or so for stability. I would also suggest adding some deck tape to the top edge of your header board before attaching to protect the header board from rot over time.*NOTE: You’ll want to find out if your fascia board has enough wood behind it to take the weight of your header board before mounting, so I would have a roofer or someone in that category take a look behind outside fascia board to see how much wood you have to drill into. We had some roof work done a few months before building, so we just asked them while they were here and they said there was several inches of wood back there so we were good to drill anywhere in the fascia area. If you have a thin fascia board, you can still attach the header but you’ll need to figure out where the rafter beams are located and drill into them for full support (basically like how you would find a stud in a wall if hanging something heavy rather than just screwing into drywall only that couldn’t support the weight). If you need a visual, look at the rafter diagram on this page and that may help you visualize what your roof may look like. If your house has a totally different roof setup, I would consult with a contractor and see what they recommend for your header placement.
- Measure out where you want your posts to sit and mount your post brackets to the concrete with a concrete anchor. Mark the center hole of your bracket onto the concrete and drill with appropriate sized masonry drill bit. The size of your drill bit will need to be the same size of the width of your anchor.
- Insert the anchor into the hole and hammer it into the concrete until just the threads of the bolt are visible and tighten the supplied washer and nut to mount your post bracket.
- The post brackets have 2 screw holes on either side of each bracket. Have someone place and hold one of the posts into the bracket while another person attaches it to the bracket with screws, using a post level to make sure it is level on all sides. Repeat process with the opposite pole.Now we are going to figure out where the joist beams should sit on the posts while they are standing upright in the bracket. We want to do a few extra steps to notch the posts so that the 2″ x 8″s fit more seamlessly into the post in each corner—this is for extra stability and also it looks a lot better than mounting the side boards onto the outsides of the posts! We held an outer joist board in place from the header beam down to/against the outside edge of the post to see the angle we wanted the beams to be slanted at. Once the angle looked like what we wanted, we traced the line on the outside edge of the corner post with a pencil so we could see what angle to cut.If you aren’t cutting an angle, then just trace a straight line across the post where you want the bottom of your outside joist to hit the post (I would have a few strong people hold up a joist with a level on it so you can make sure it’s level with your header beam that’s already attached).
- Take your post out of the bracket so we can cut the notch. We are cutting a notch to fit a 2″ x 8″ board but since the actual dimensions of a 2″ x 8″ board is actually 1.5″ x 7 1/4″, that’s the space we are cutting out (I know, it’s weird how wood isn’t the size it says).Set your saw blade to be 1 1/2″ deep (that’s the depth of your wooden joists that will sit in the space). The first cut was made 7 1/4″ deep down into the post and that cut was 1 1/2″ from the edge. We then rotate the post once and do a cut straight across the board 7 1/4″ down from the top. The next cut is the angle that we want our pergola beams to sit at. The one we traced onto the pole for reference also cut at 1 1/2″ deep. Turn the post again and cut down 1 1/2″ away from the edge until you reach your cut line from the previous cut. We did one more cut on that first cut line a tiny bit deeper to make sure the piece was fully cut and could be hit off the post and then simply used a hammer to knock the piece out of place.Now you have a post that’s notched with one angled side for your outermost joist beam and one that’s a straight angle for your front ledger beam. You’ll want your notched posts to mirror each other, so make the angled side is on the outside of each post. If you are not doing an angled pergola, then just do straight cuts 7 1/4″ down on both of the notched sides and you don’t have to worry about tracing the right angle on a board …
- Put your pole back in the bracket and make sure the angled edge is on the outside and the straight edge is in front. The pole on the other side should mirror this one.
- Your side board will fit into the notch like above once cut to the right length! Here’s how to find the angle you’ll need to cut into the ends of your joist boards if doing an angled pergola …To make yourself an angle template to trace onto boards, place a scrap piece of joist into the outside angled notch of your post and trace where it hangs over the front side of your post. Find what that angle is on your chop saw and cut along that line—that will be the angle you cut both ends of all your joists to so it fits in between the back header and front ledger board.Now, to get the side joist to fit perfectly into the notch, we cut the header end of our joist board at our angle. Then held the board touching the fascia next to the end of the header board and placed the other side of the joist in the notch to see how much it hung out past the post when it fit into the notch. We marked where it hung over with a pencil and cut the board at our angle in that spot.
- Use your screws to attach your side post into the notch on your post on one end and directly into the side of the header board at the top. Since you do this on both sides, that’s why you make the header board 3″ shorter than your overall pergola width measurement—the two 1 1/2″ joist boards on both sides of the header will add 3″ and make it your total width.
- Once both sides are fitted, cut, and attached, you can measure to see how long your front ledger board need to be and cut and attach that board to the front of your notched post. Note: you will need at least 2 people to attach all of these boards moving forward, they are very, very heavy! Take your time, and be safe!
- For the middle joist boards, figure out how many you want for the size of your pergola and space them evenly. Mark where they should attach on both the back header board and the front ledger board. Cut the boards to length (use your angle template scrap piece to trace your angles as needed) and pre-drill 2 pocket holes with a pocket hole jig in both sides of each end of each board.
- Have two people hold up each end of the boards where you made your marks and attach them into the header and ledger with screws.
- At first we cut and tried angled braces where the posts are like above, but it made the structure look pretty rustic so we took them off and I found these 24″ x 24″ brackets instead to add to the front corners that made the lines look a little cleaner, so you can do whichever option you prefer.Fill any screw holes and paint or stain your pergola the color of your choice and it’s ready to use!

I am very interested in the floor of your beautiful pergola , is this painted cement? We have a carport at our new home that I would like to convert it into a beautiful covered patio, the floor surface is somewhat damaged painted cement (damaged from cars leaking onto the cement). I’m wondering if the cement can be successfully repaired/smoothed out and then painted over with a great design?
Love the patio! Can give any details about the painting of the porch and paint used?
Pocket-hole joinery is inadequate to hold up the weight of a 10′ 2×8 (especially when you use the wrong screws). This is dangerous and should be taken down.
It looks beautiful! Didn’t one of you paint the inside of your backyard fence black? I can’t find it and it’s driving me crazy.
Laura you never cease to impress me with these types of projects! This is awesome!
This is amazing!!
Scrolling through the photos, I was imagining fabric swagged (swagging?) through the rafters. Maybe for a party. Of course you saw that too. I always find your posts inspiring.
Yes, I’ve thought that too! Or some fabric that’s shady for during the hottest months when you might want some sun cover…
Laura
So beautiful!!! Woweeee!