
") Pillows make spaces fun. They add so much personality to the different rooms of our homes, but sometimes they get overlooked as an outdoor addition because we can get a little nervous about making sure pillows are properly weatherproofed. Well, have no fear! Here are three options you can try to feel confident about decorating your outdoor space. You actually probably have most of the items you need sitting around your house right now.
Pillows make spaces fun. They add so much personality to the different rooms of our homes, but sometimes they get overlooked as an outdoor addition because we can get a little nervous about making sure pillows are properly weatherproofed. Well, have no fear! Here are three options you can try to feel confident about decorating your outdoor space. You actually probably have most of the items you need sitting around your house right now.
And once you know the different ways to create an insert for an outdoor pillow, you may want to customize your own weather-proof pillowcase to match your own personality and outdoor scheme. I’ll show you how to make a super easy envelope-style pillowcase so you can add your own insert and even remove the cover to throw it in the wash as needed (something I wish I could do with a lot of the outdoor pillows I’ve bought!).
") 1. Reuse your stash of plastic bags!
1. Reuse your stash of plastic bags!
Most of us have a reserve of plastic bags from different shopping trips, and they make the perfect (and super inexpensive) stuffing for an outdoor pillow. Just fluff each bag into a ball shape and keep stuffing until you have the right firmness for your pillow. You can either stuff each bag in one at at time, or you can put them all into one larger plastic bag first and then insert the bag into the pillow.
") 2. Cover an inside pillow insert with garbage bags to waterproof the pillow.
2. Cover an inside pillow insert with garbage bags to waterproof the pillow.
For this method, you’ll want to get garbage bags (or tall kitchen bags) to cover an insert that is usually meant for the indoors. Try and buy a bag that has a bit of thickness to it to prevent tearing, and purchase an indoor pillow insert that is mildew resistant. To cover the pillow, put the pillow inside one garbage bag and fold in all the excess material. Flip the pillow upside down and put inside another garbage bag for added protection. Fold the excess material in again and simply use a stapler to keep the folded edges in place.
") 3. Use an outdoor insert that is especially made for the outdoors.
3. Use an outdoor insert that is especially made for the outdoors.
This option may seem a bit obvious, but not everyone may be a fan of the slightly different feel that stuffing or covering your pillow with plastic brings, and you may just want an insert that was made for the elements. Unfortunately, it seems that a good outdoor insert can be hard to find! Even though we have multiple options for fabric stores in town, I was surprised that none of them sell outdoor pillow inserts, and so I had to spend some time online finding an affordable option. Thankfully, this outdoor insert was just what I was looking for, and it’s also pretty affordable as well. Easy peasy.
") Envelope-Style Pillowcase Tutorial
Envelope-Style Pillowcase Tutorial
Supplies:
-cotton fabric (either outdoor fabric or a thick cotton/twill that you can waterproof)
-fabric scissors
-standard sewing machine
-straight pins
–waterproofing fabric spray
") Cut your fabric into one 19″ square (for the front of the pillow) and two rectangles that are 19″ x 12″ (for the back of the pillow). Our pillowcase will end up 18″, but I added an extra inch for a 1/2″ seam allowance.
Cut your fabric into one 19″ square (for the front of the pillow) and two rectangles that are 19″ x 12″ (for the back of the pillow). Our pillowcase will end up 18″, but I added an extra inch for a 1/2″ seam allowance.
NOTE: I made an 18″ finished case for this tutorial, but you usually want to make your finished pillowcase dimensions 1″ smaller than the size of your insert so it fully fills out the case (so make a 17″ x 17″ case for an 18″ x 18″ insert, etc.). Adjust your dimensions as needed for your pillow.
") Take the two back pieces, and fold and pin a 1/4″ hem across the widest part of the rectangle on each piece. Fold the hem again another 1/4″, press the hem with your iron, and pin in place. Use your sewing machine to sew your hems flat with an 1/8″ seam allowance.
Take the two back pieces, and fold and pin a 1/4″ hem across the widest part of the rectangle on each piece. Fold the hem again another 1/4″, press the hem with your iron, and pin in place. Use your sewing machine to sew your hems flat with an 1/8″ seam allowance.
") Lay your front fabric square flat (with the right side facing up) and place your two back rectangles on top of the square so that the edges line up and the middle hems overlap a few inches. Make sure the right sides of the fabric are facing each other, and pin the fabric in place around the edges.
Lay your front fabric square flat (with the right side facing up) and place your two back rectangles on top of the square so that the edges line up and the middle hems overlap a few inches. Make sure the right sides of the fabric are facing each other, and pin the fabric in place around the edges.
") Use a sewing machine to sew all the way around the outside of the pillow with a 1/2″ seam allowance.
Use a sewing machine to sew all the way around the outside of the pillow with a 1/2″ seam allowance.
") Once you’ve sewn all the way around, snip the corners of the fabric so that the corners will appear less bulky once turned. Flip your pillow cover inside out, and you’re ready to add your insert!
Once you’ve sewn all the way around, snip the corners of the fabric so that the corners will appear less bulky once turned. Flip your pillow cover inside out, and you’re ready to add your insert!
") Slip your pillow insert through the envelope slot opening in the back of your pillow, follow the directions on your fabric waterproofing spray, and set your new pillow outside where it belongs!
Slip your pillow insert through the envelope slot opening in the back of your pillow, follow the directions on your fabric waterproofing spray, and set your new pillow outside where it belongs!
")
")
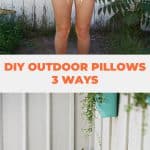
") Don’t you love the color and fun that the pillows bring to our outdoor patio? Hope you’ll make your own outdoor pillows to brighten up your outdoor space this summer! xo. Laura
Don’t you love the color and fun that the pillows bring to our outdoor patio? Hope you’ll make your own outdoor pillows to brighten up your outdoor space this summer! xo. Laura
Credits // Author: Laura Gummerman. Photos: Laura Gummerman and Sarah Rhodes. Edited with Stella from the Signature Collection.
Thank you so much for publishing this pattern. I made four pillows today and it was very straightforward and easy to understand.
I need to make some thin cushions for the chairs of a vintage iron patio set that I just got passed on. I wonder if the plastic bag filling would work on cushions that will be sit on. What do you think?
Thanks,
Gladys
http://sweetvintagelady.com
Oh, i just made some too. Mine are indoor pillow cases though, would love to try the outdoor ones!
www.miamoonloves.blogspot.com
such great ideas! I love how they look in your outdoor space!
http://wethinkthereforewecreate.blogspot.com
Hi Ashlee! They are from Target 🙂 – Jacki
How creative! Love you girls!
Those green pillows are JUST what I want for our future outdoor space! I have been having trouble finding the pillow inserts, so I might have to use your suggestion. I’m still searching for a cheaper alternative though! Thanks 🙂
Thank you so much for the tutorial! It’s winter here in Australia, but I’ve been planning what I want to do for our outdoor area once the weather warms up and have been sourcing fabric to make a stack of outdoor pillows. This is much easier than how I was going to make them with zippers!! 🙂
Where are those outdoor string lights from? I love them!!
This is my favorite way to make a pillow cover or sham! I use a little more fabric and make a very generous envelope closure so that the pillow can be used with either side showing without unsightly gaping open. This is handy when you use contrasting fabrics and want to change which side is up. I love how clearly your tutorial explains making these, too!
PS. Love your outside area! Those lights, that striped fabric, the wall plants… Swoon!!
I LOVE all of these bright colors! I’ve made these cases for inside pillows but never for the outside. What kind of waterproofing spray do you use? Does it work well? I never see outdoor fabric I like (plus its usually hella expensive) but with the spray, I might could make this work!
Looks awesome! Love the colour choice. I’m working on something similar for my patio and going with some sleek chevron prints. Great post!
www.thecrushworthy.com
These are brilliant ideas! The fabric you chose is also amazing. I want some even though it wouldn’t go with anything else in my house. HA! 😉
these are SO great!
xxoo,
nikki
www.dreaminneon.blogspot.com
I love the pops of color and the fabrics you chose! Looks like a fun project. I would love to try these for my patio.
-Sayeh, The Office Stylist
http://theofficestylist.com/
Stay tuned for a post on both of those things 🙂 – Jacki
Oh my goodness, the trash bag & plastic bag ideas are BRILLIANT!!!! Seriously been looking for an idea/post like this for over a year now! Can’t wait to do these!! THANK YOU!!
Pretty, pretty fresh summer colors! Pillows are easy to make and I love that these are re-purposed 🙂
Sincerely,
Laurali Star
http://www.thesecretsurprisinista.com
Amazing! Thanks for the DIY! Perfect for summer. 🙂