 So, you know when you’re a parent and you have a baby/kid need but you keep putting it off because all the options out there are ugly and you don’t want to have to look at them every day?
I know not every parents cares about that (e.g. my husband!), but my brain definitely does and that’s one reason I like to make as many custom baby things as I can (besides it just being fun!).
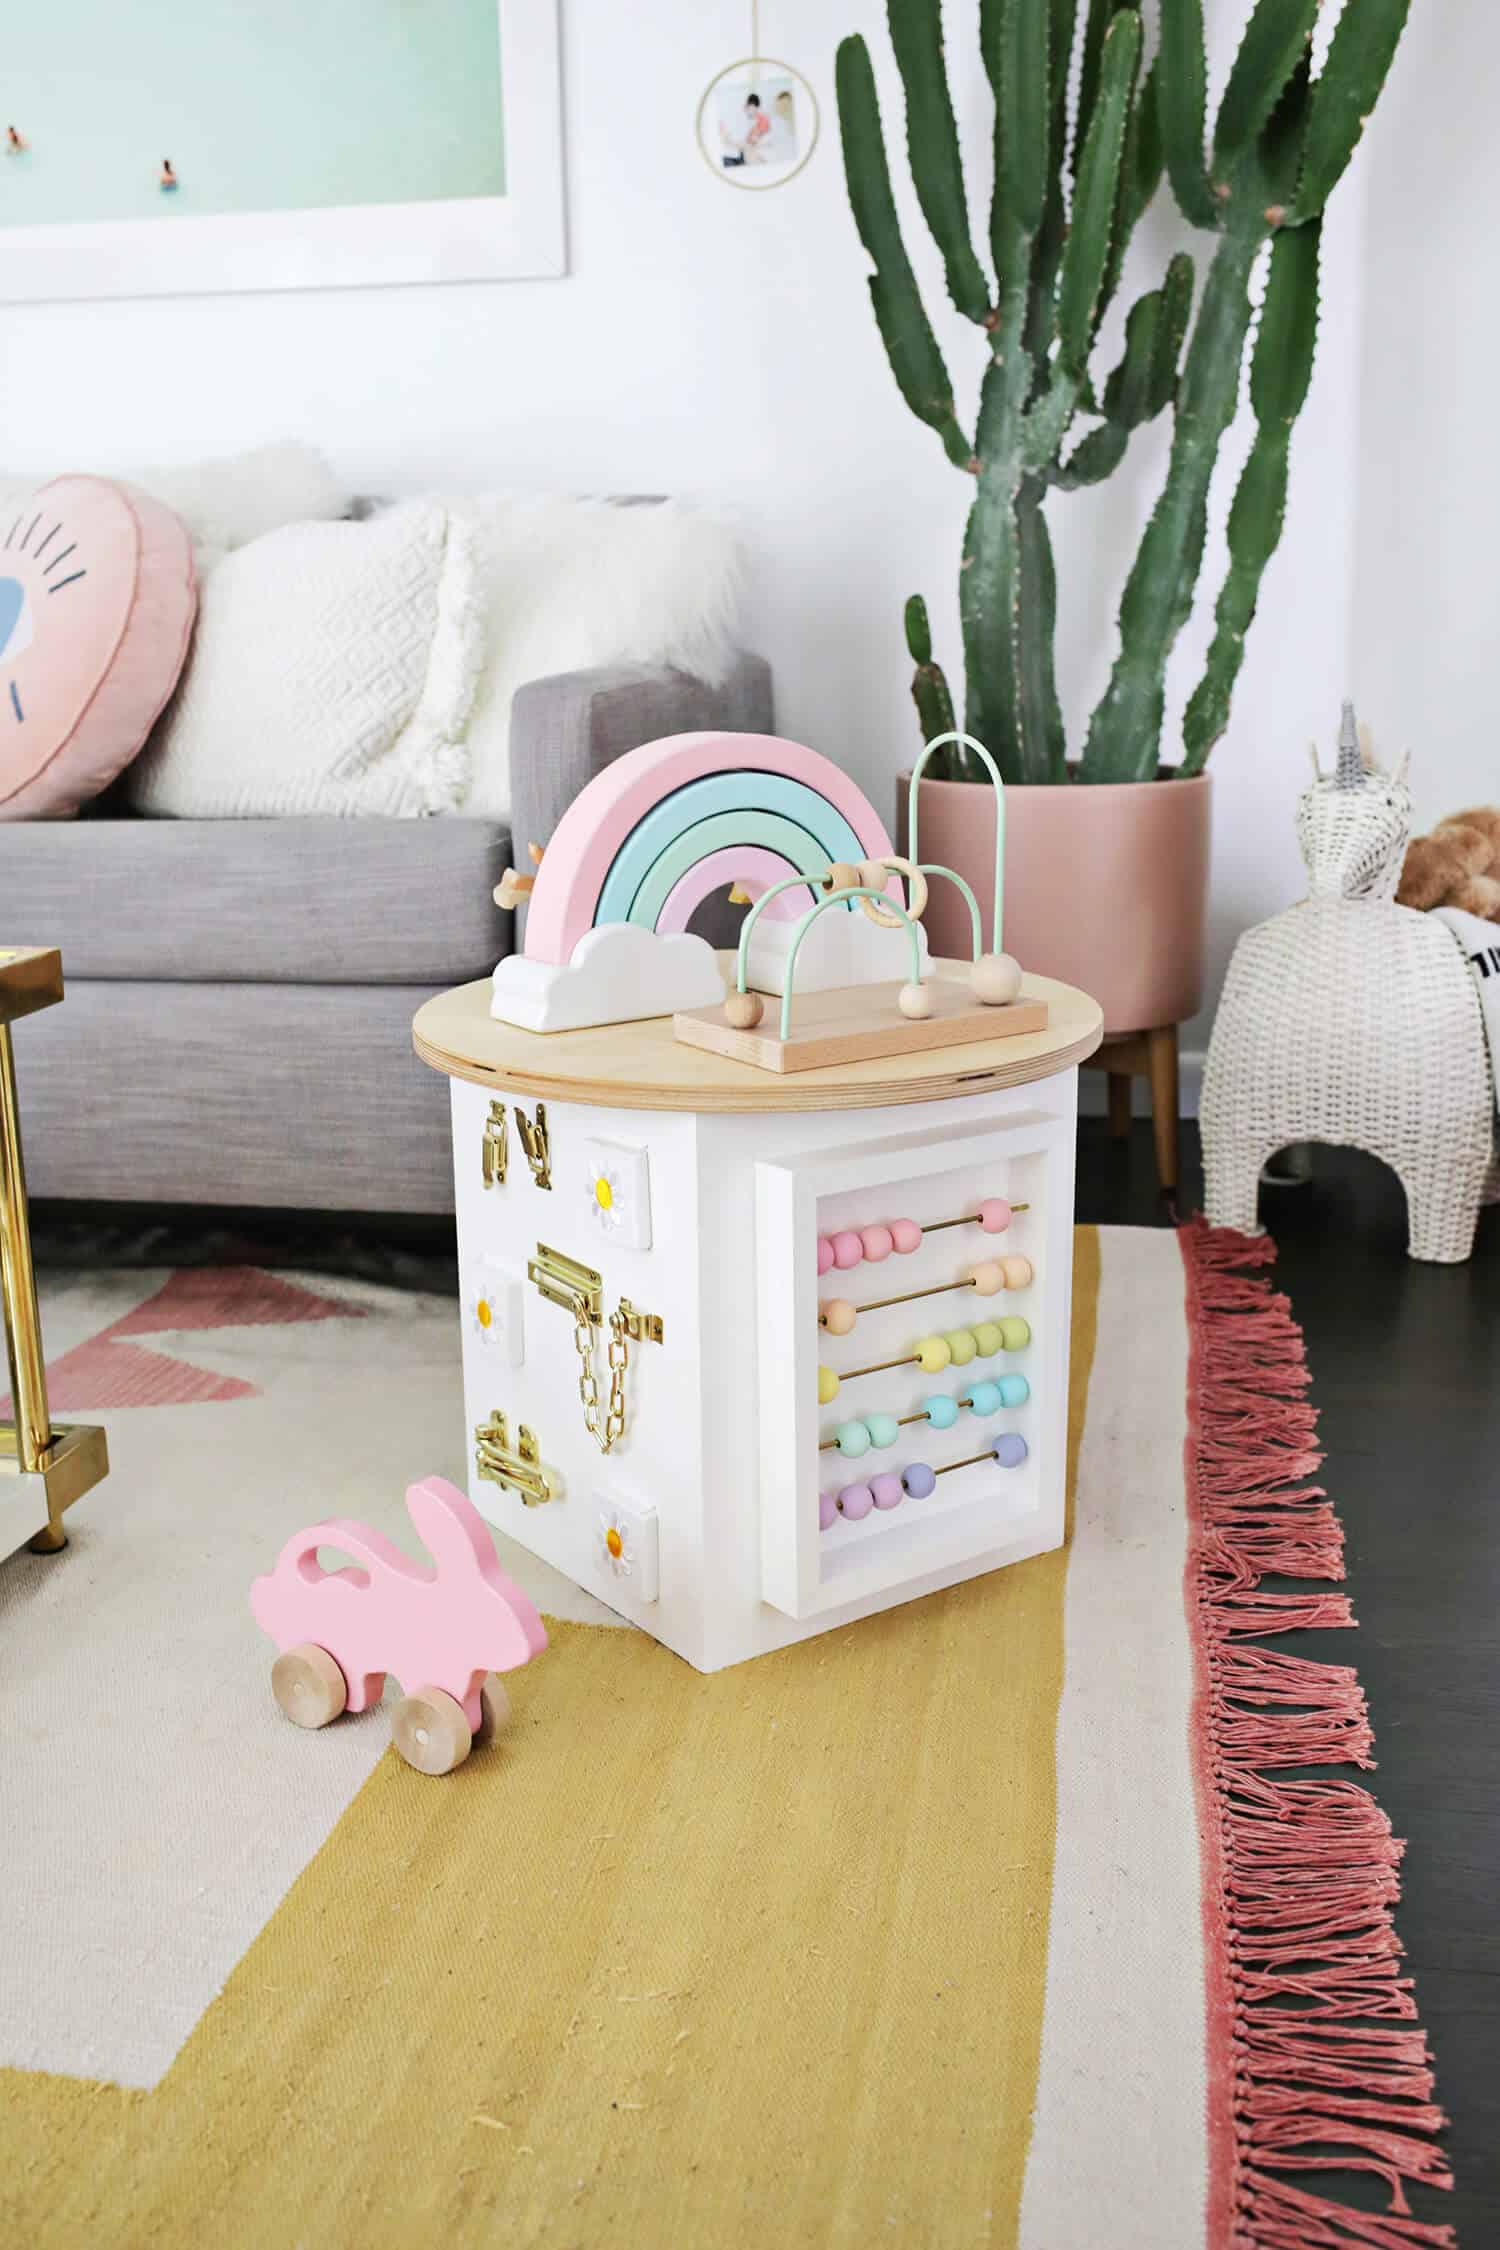
Todd watches Lola at home while I work and we realized that we could definitely use an activity center-type toy to keep her busy during certain times of the day while we cooked or folded laundry nearby. But I just couldn’t find any that fit in with our decor and color scheme, so I decided to make my own!
Lola has seen and played with a few different activity centers before at other houses and whatnot, so I kept an eye on what types of things she likes to do and added those elements into one for her (along with some new items, too!).
Depending on the age and interests of your toddler, you can tweak yours however you like, but this is what I added to hers!
Related: For more kids activities and printables check out Childhood Magic!
 General Supplies:
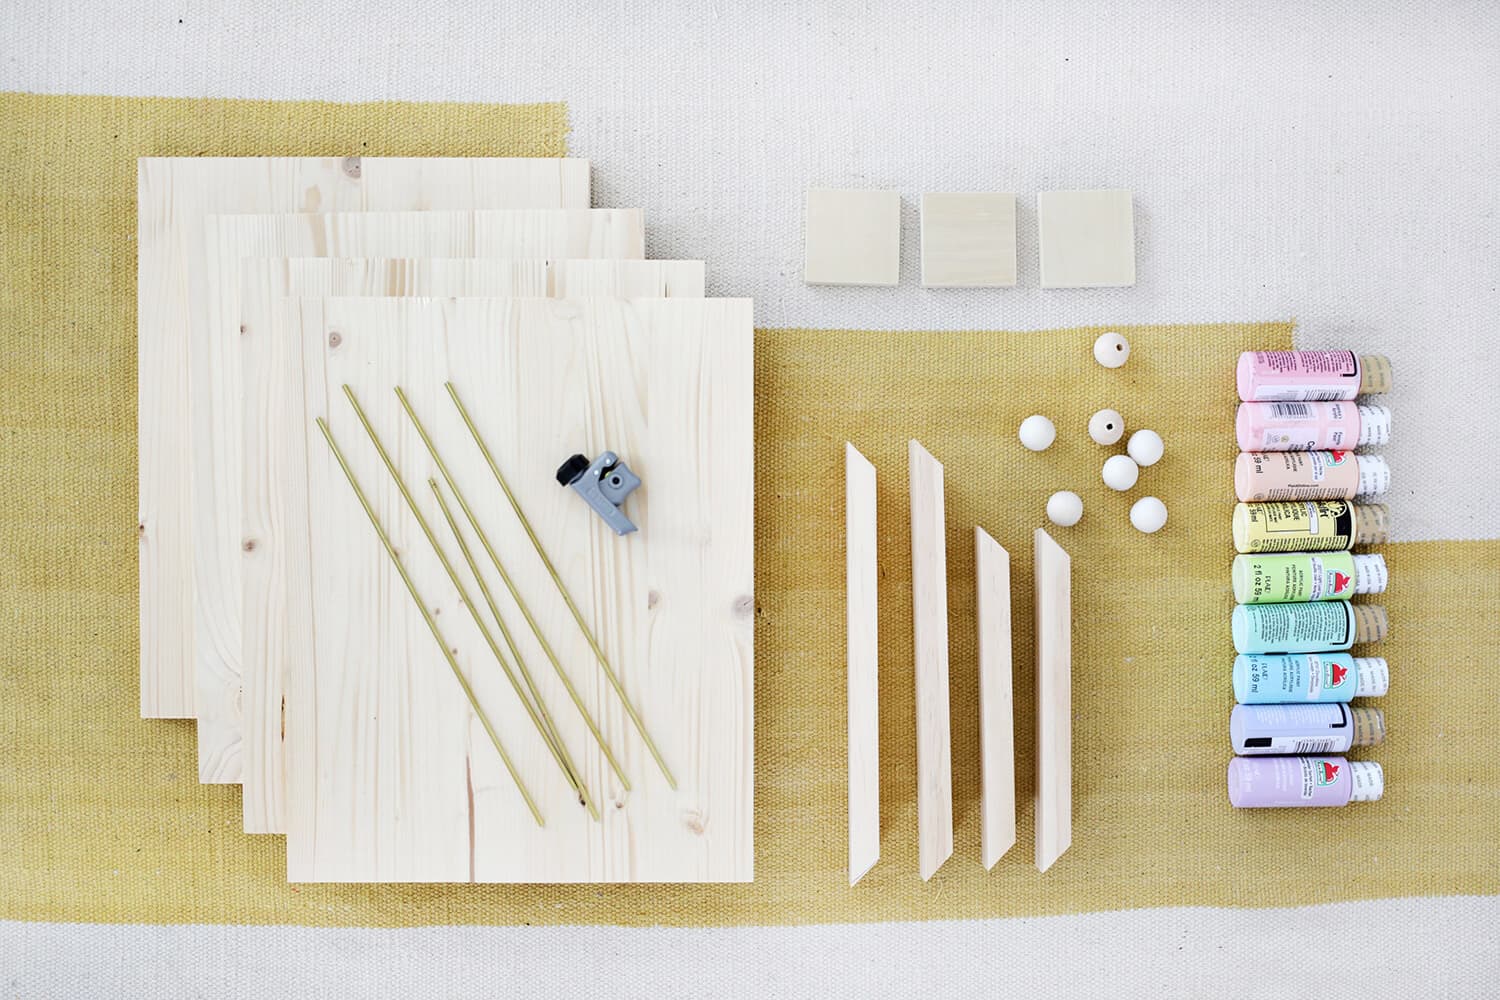
-12” x 3/4″ board cut into four 15” long pieces for the sides
–large round wooden circle (I got a baltic birch plywood 19″ x 3/4″ circle but this one would be good too)
–drill and drill bits
–wood glue
-nails and a hammer
Supplies for door and latch side:
-various door latches and hinges (check the hardware section of a Home Depot-type store)
-3-4 squares of wood about 3″ wide and about 1/2″ thick (these would work great)
–thin elastic cord
-patches or stickers to decorate doors
–sandpaper
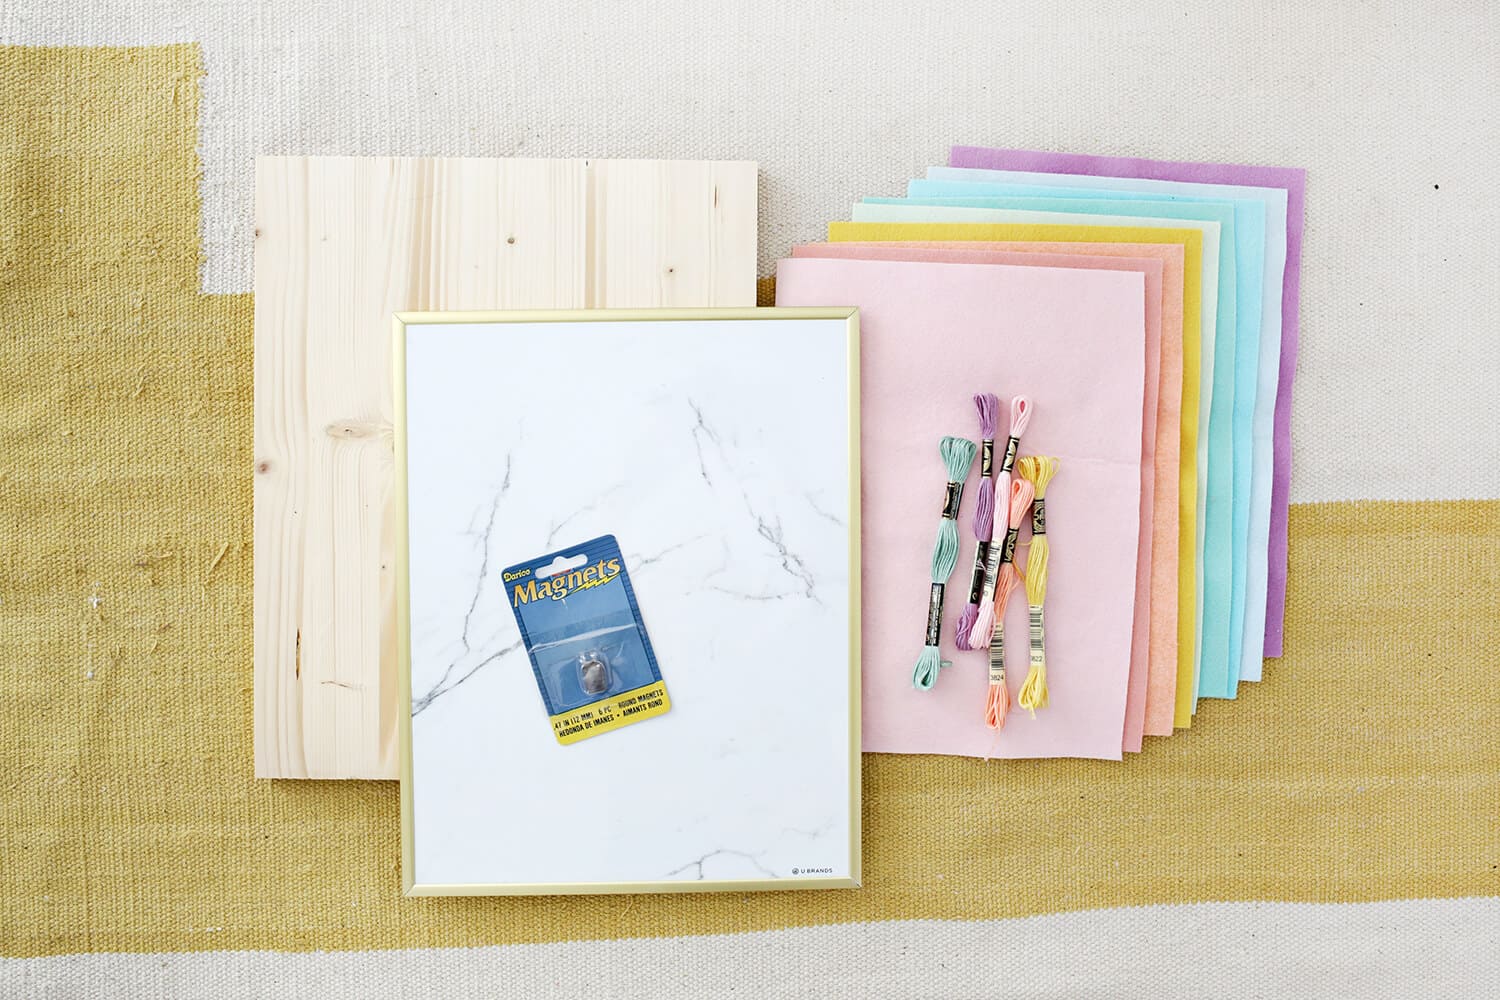
Supplies for magnetic board side:
–magnetic dry erase board
–felt and matching embroidery thread
–small magnets
–cotton stuffing or batting
Supplies for abacus side:
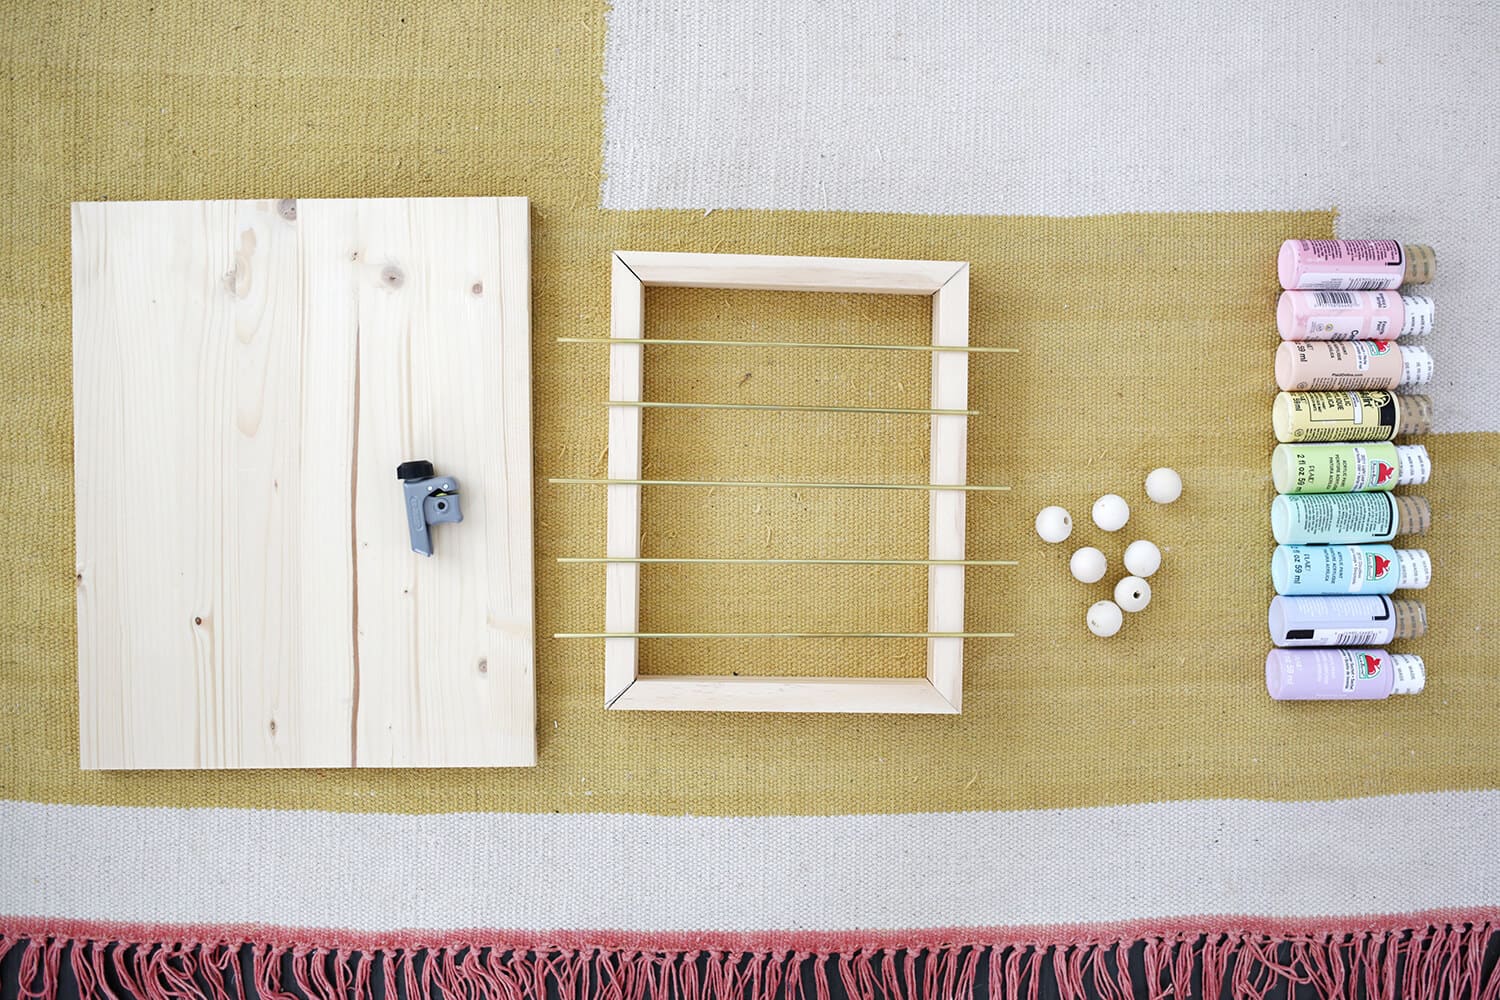
–1″ wooden beads
–1/8” brass tube (x5) and tube cutter
-non-toxic paints (check your local craft store or get some sample colors from this company)
-1 1/2″ x 3/4″ trim board for abacus frame
Supplies for spinner side:
-wooden shapes for spinners (I used these and these flowers)
-machine screws and corresponding sized bolts and washers (a 3/16″ x 1 1/2″ long screw should be a good size)
Supplies for top:
–small bead maze
-wooden pull-apart shape toy (something like this)
–small wooden animals that are about 1″ thick
–food-grade mineral oil
–spring doorstops
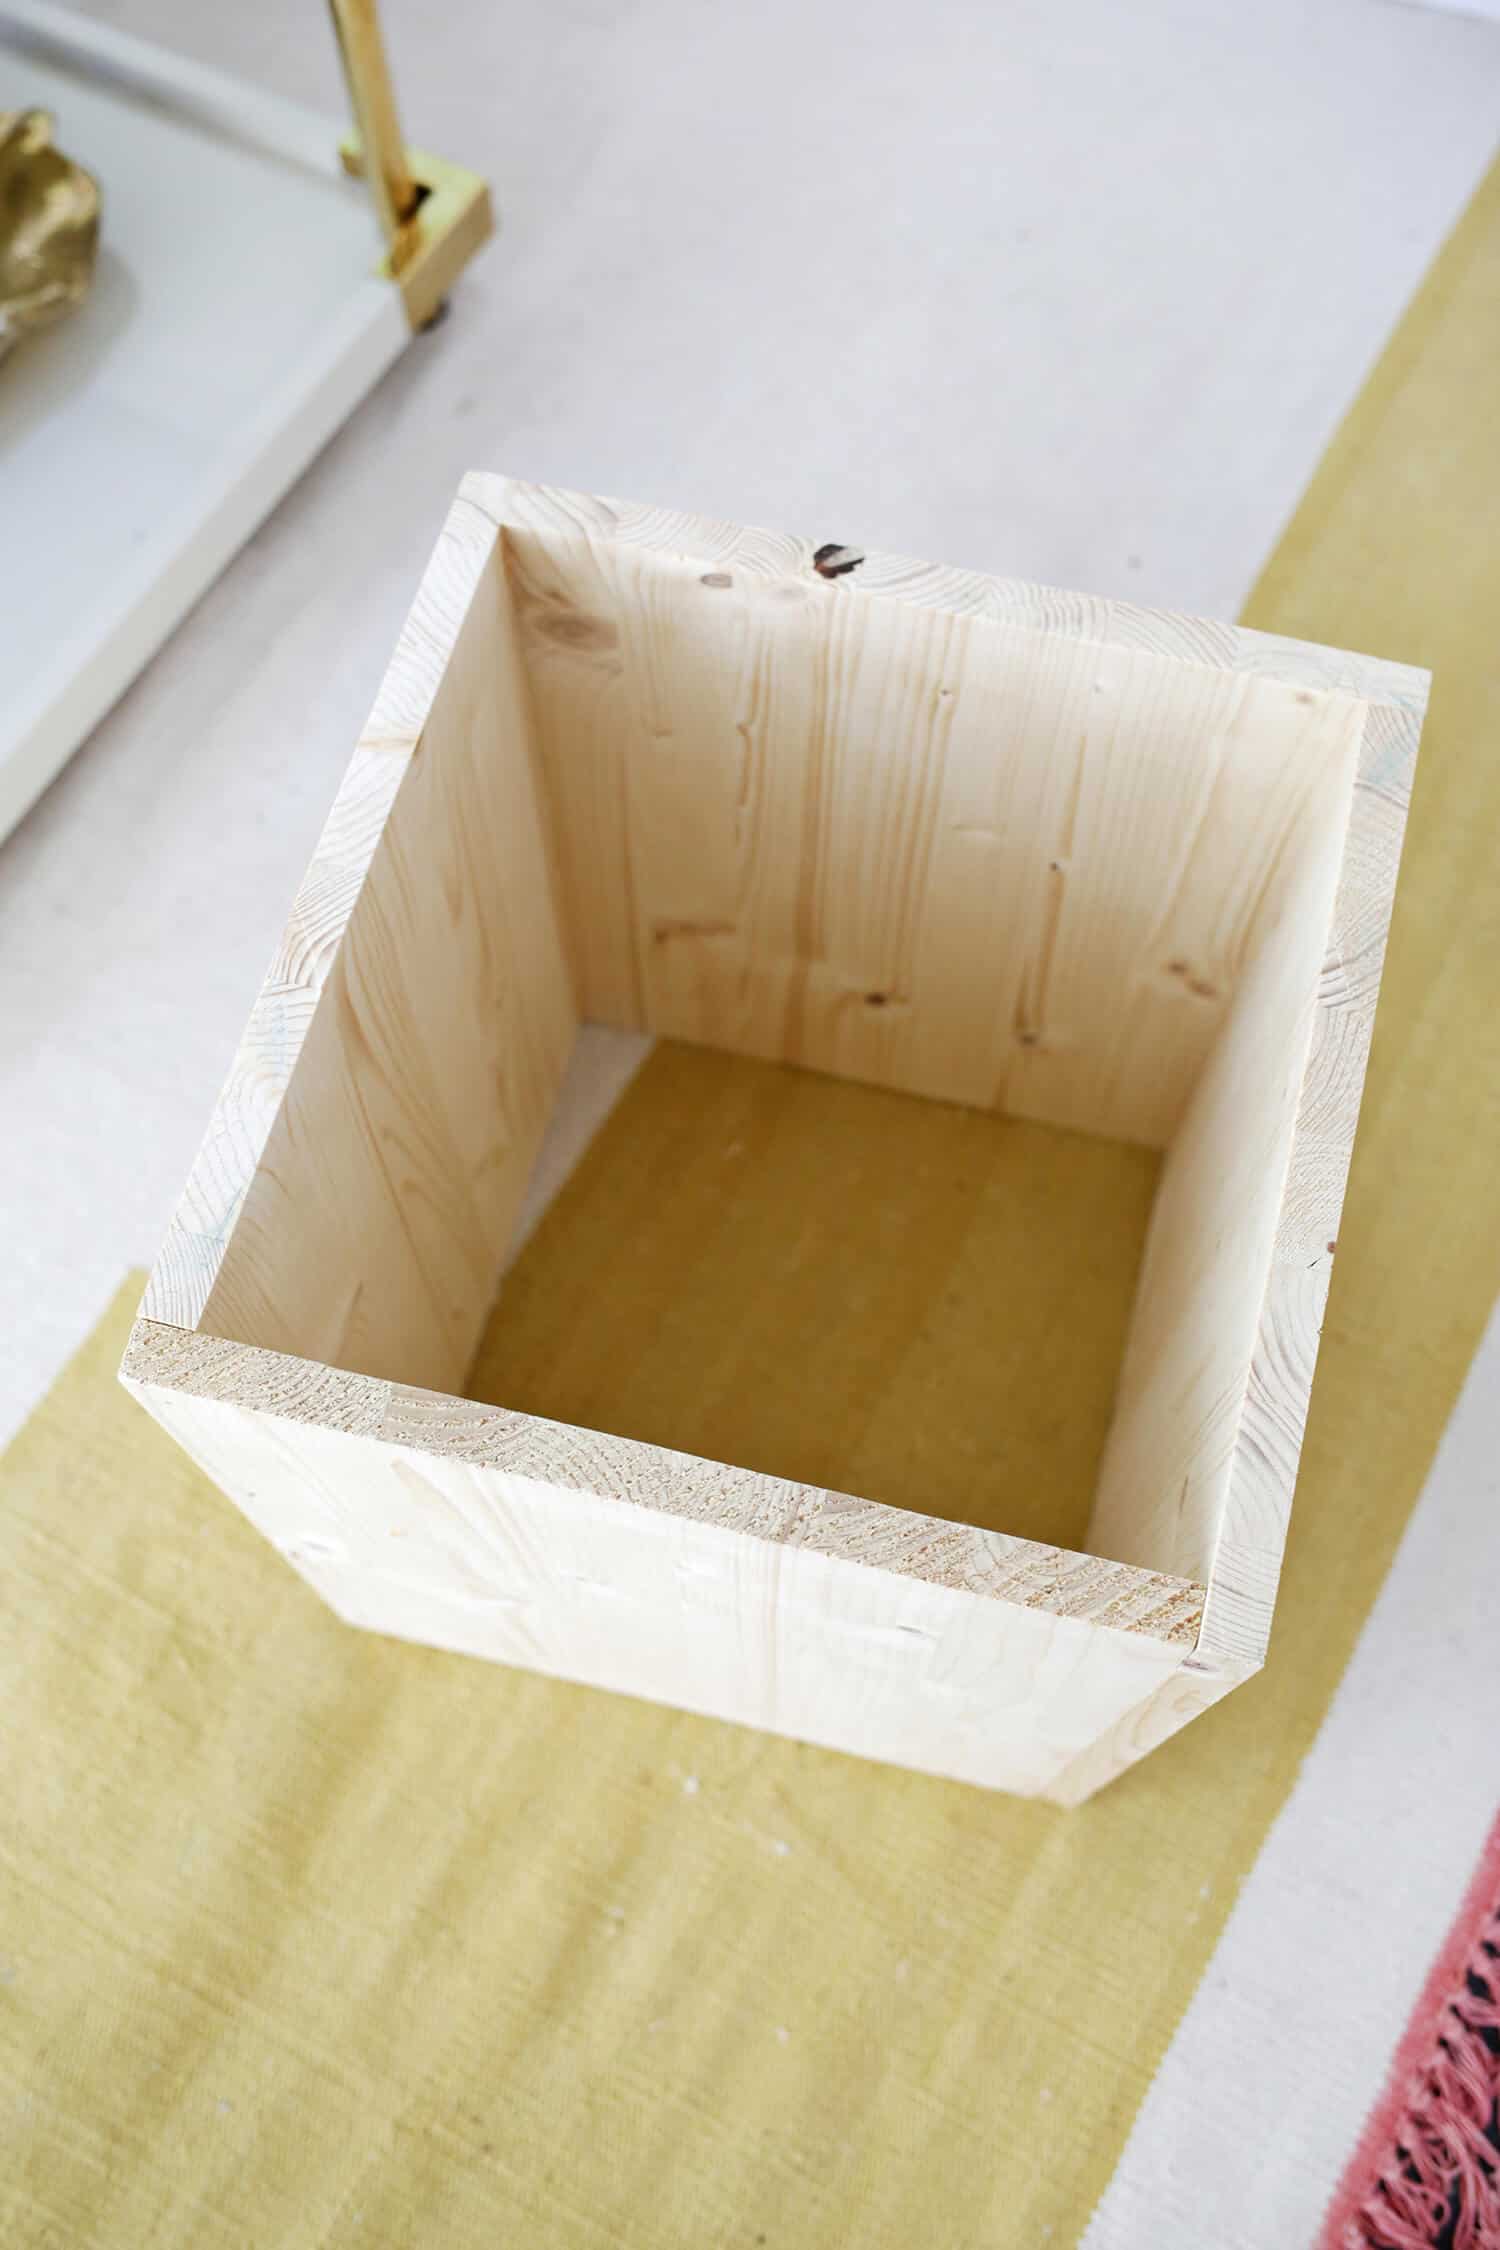 To make your base, stand up your four 15” tall sides to make a tall rectangle and wood glue and nail the sides together. Sand any rough or sharp edges to soften and paint the base your desired color.
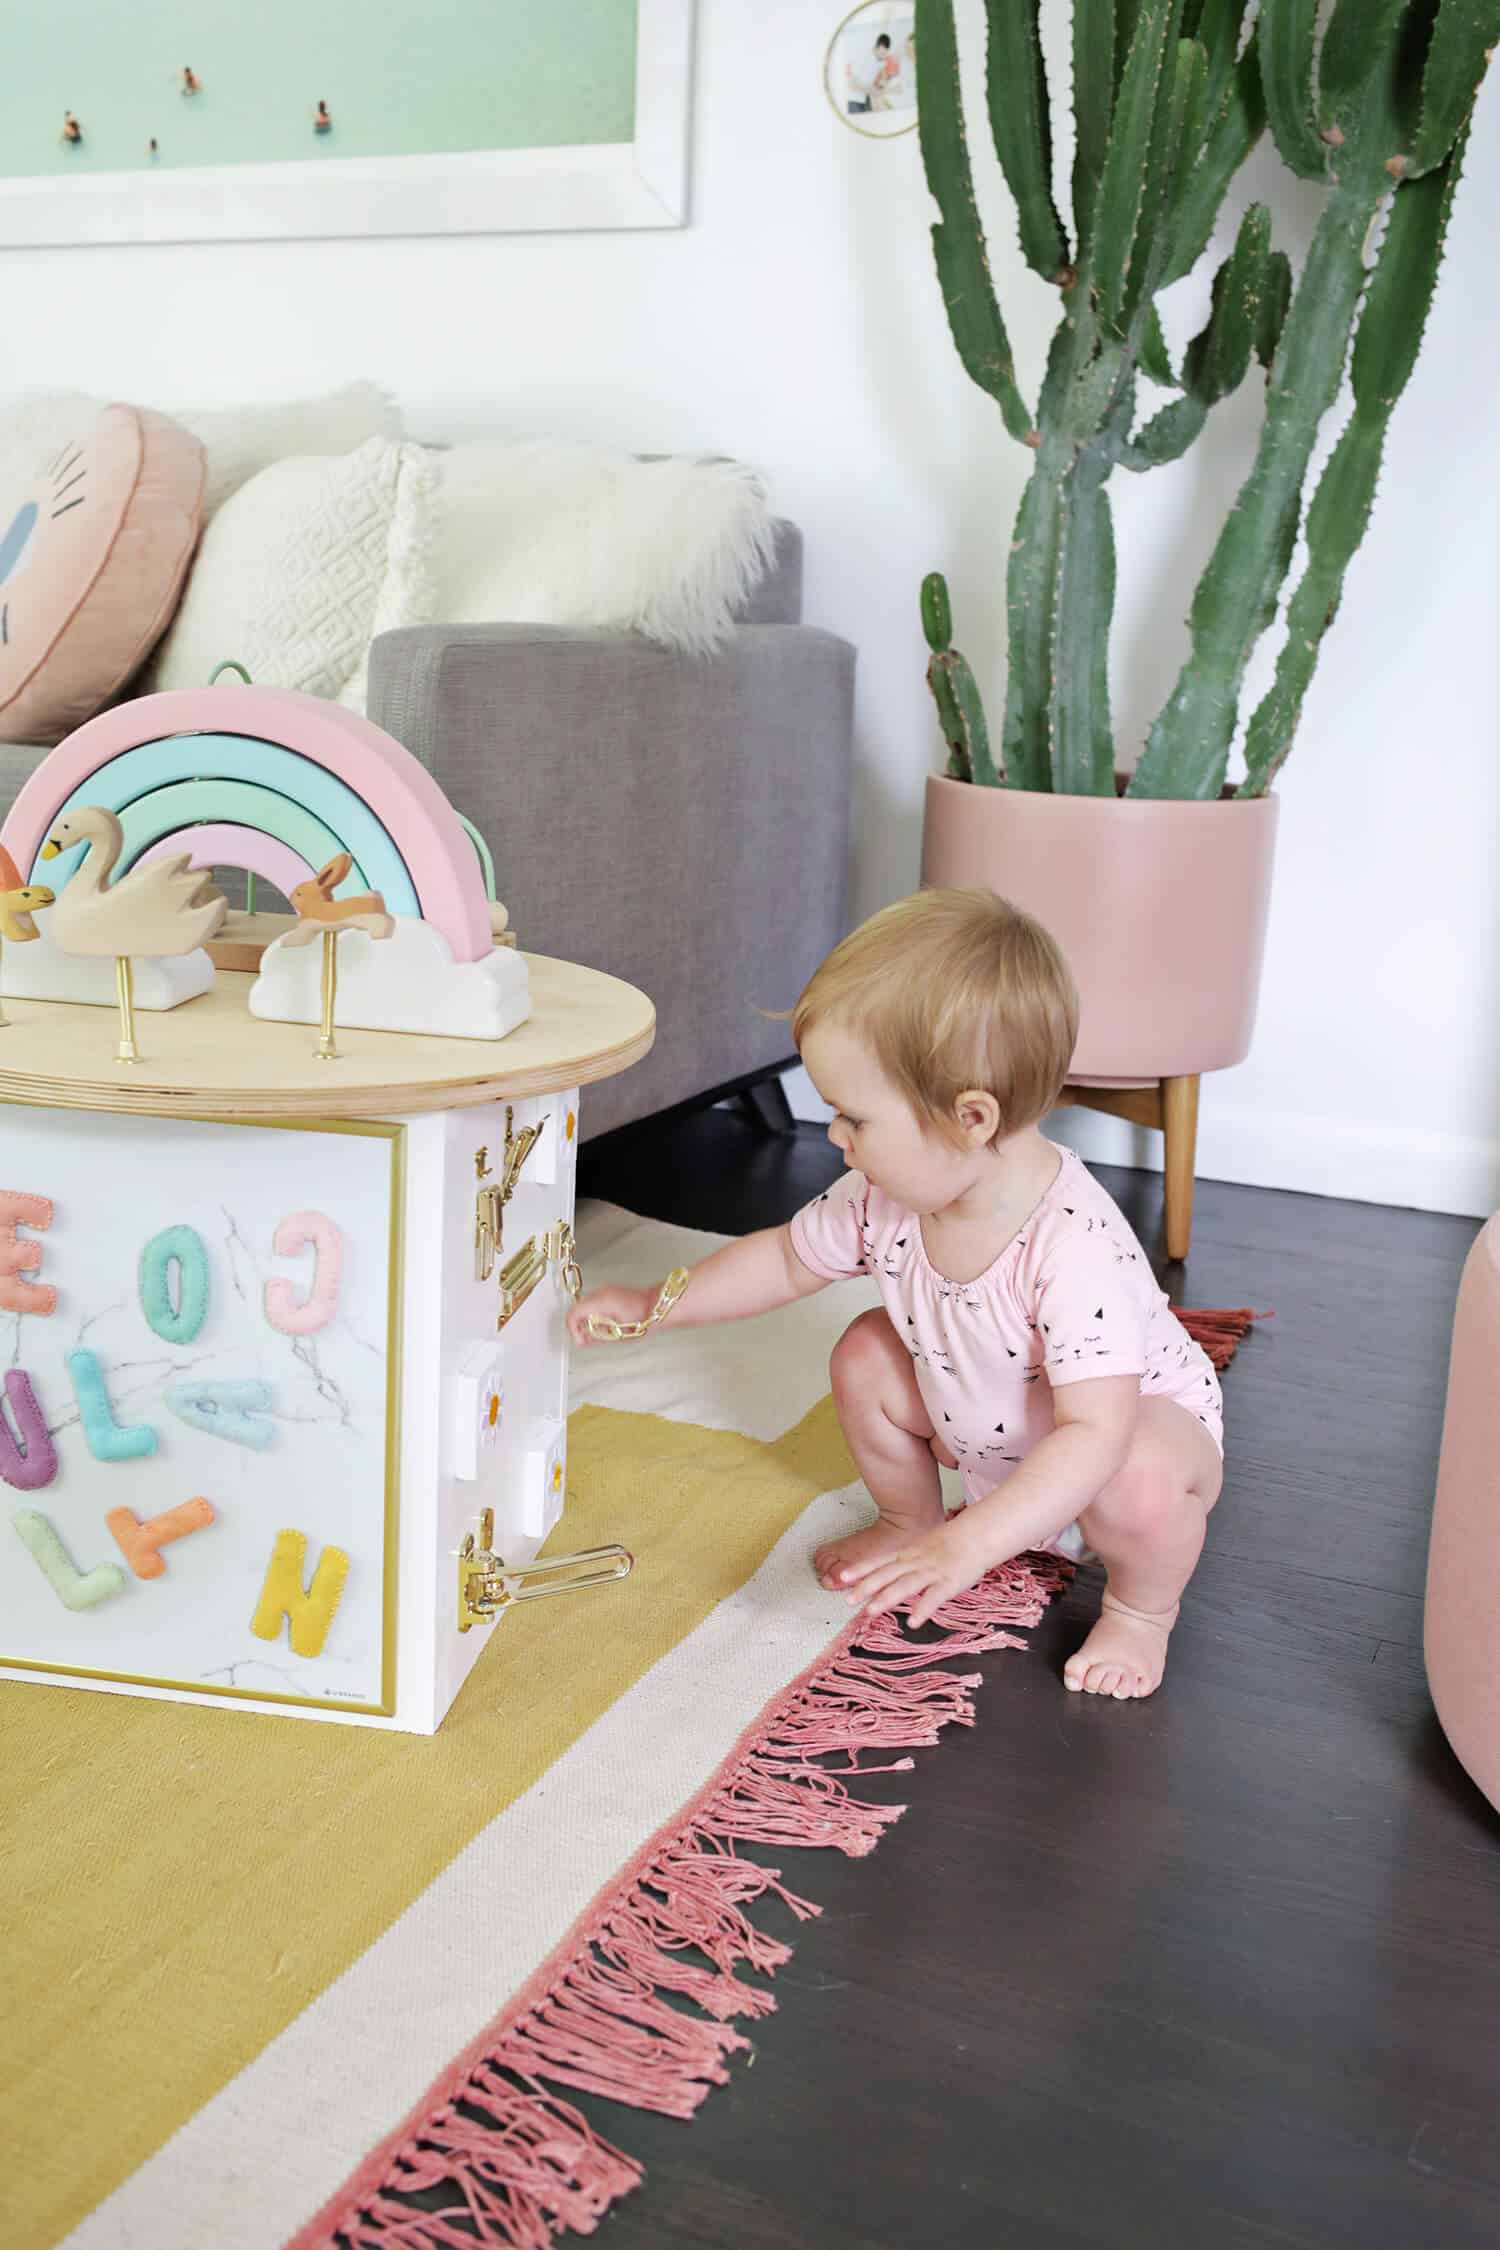
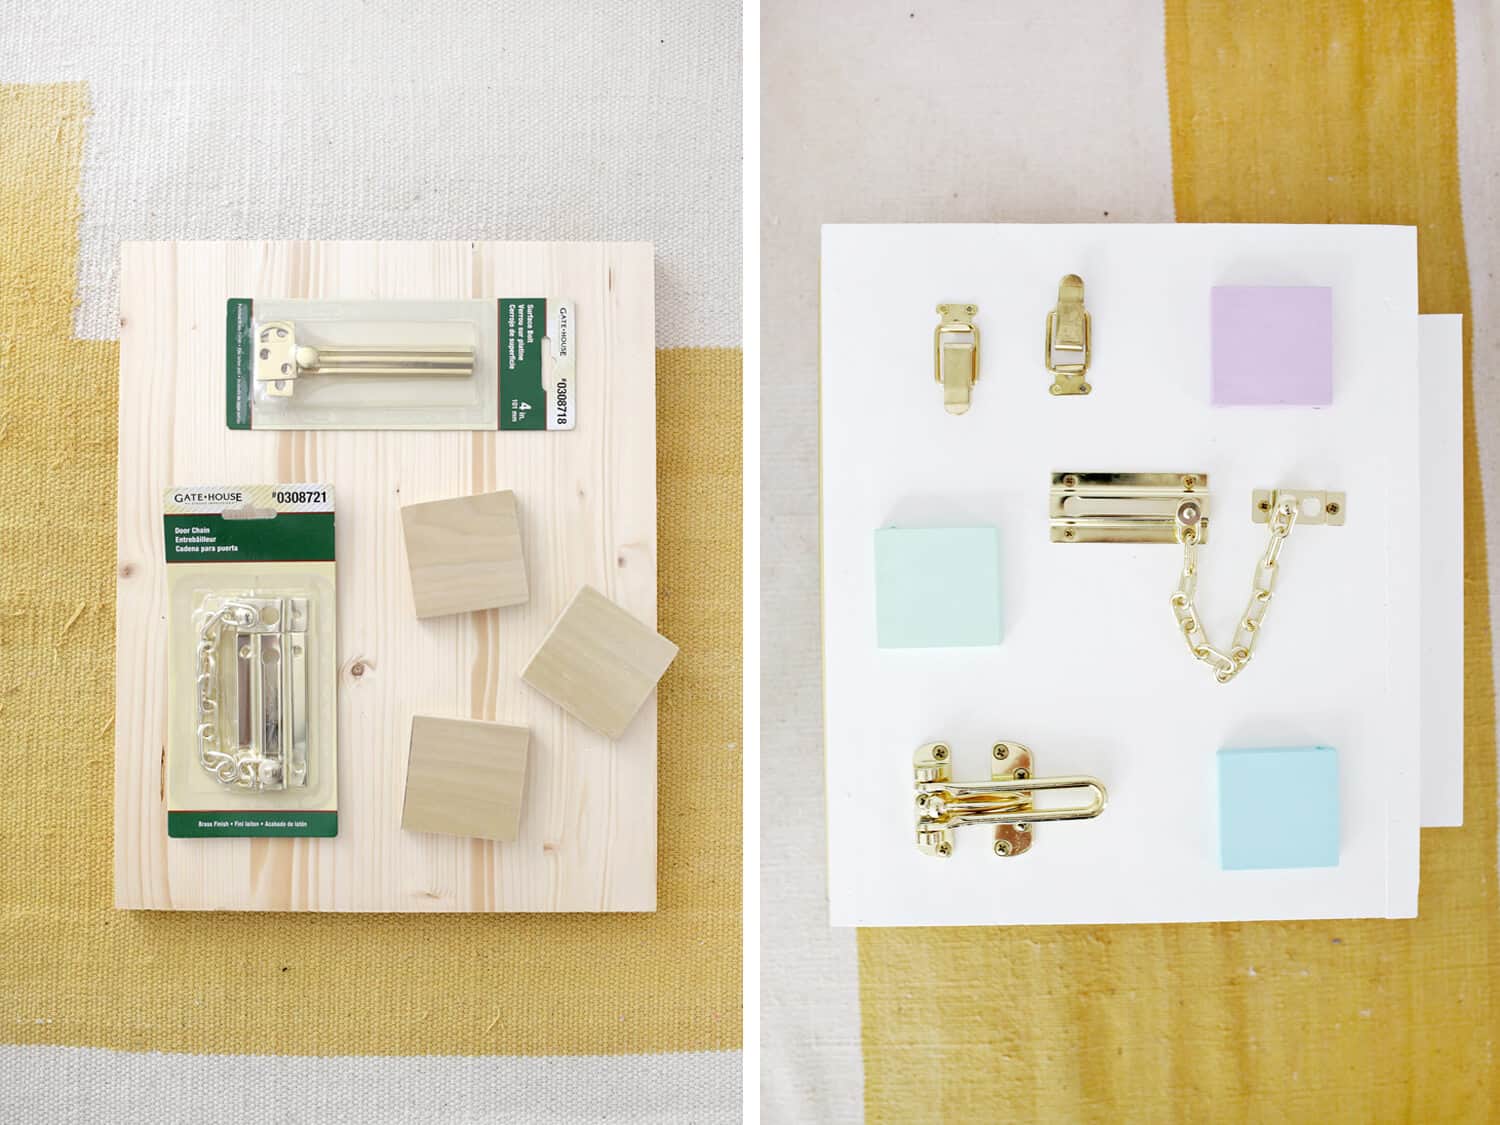 Steps for the door and latch side: Buy a few squares of wood that are 3-4” wide (or cut some to size yourself) and use your drill bit to drill a small hole all the way through one side of the wood about ¼” from the edge. If your drill bit isn’t long enough to go all the way through, measure and mark a hole the same distance from the edge on the top and bottom and drill from both sides to make a hole the whole way through. Place your doors and your desired latches and hinges on the designated side of your activity center where you want them to go and install the hardware in place.
 Then, using a small drill bit, drill a hole into your wood panel right above and below where the holes for your doors will sit, and thread a long piece of elastic cord from the back, through the wood, and back into the center of the cube.
Tie the cord so the elastic is tight enough that the door will open easily and snap back into place when closed (I repainted the doors for a different look after these photos).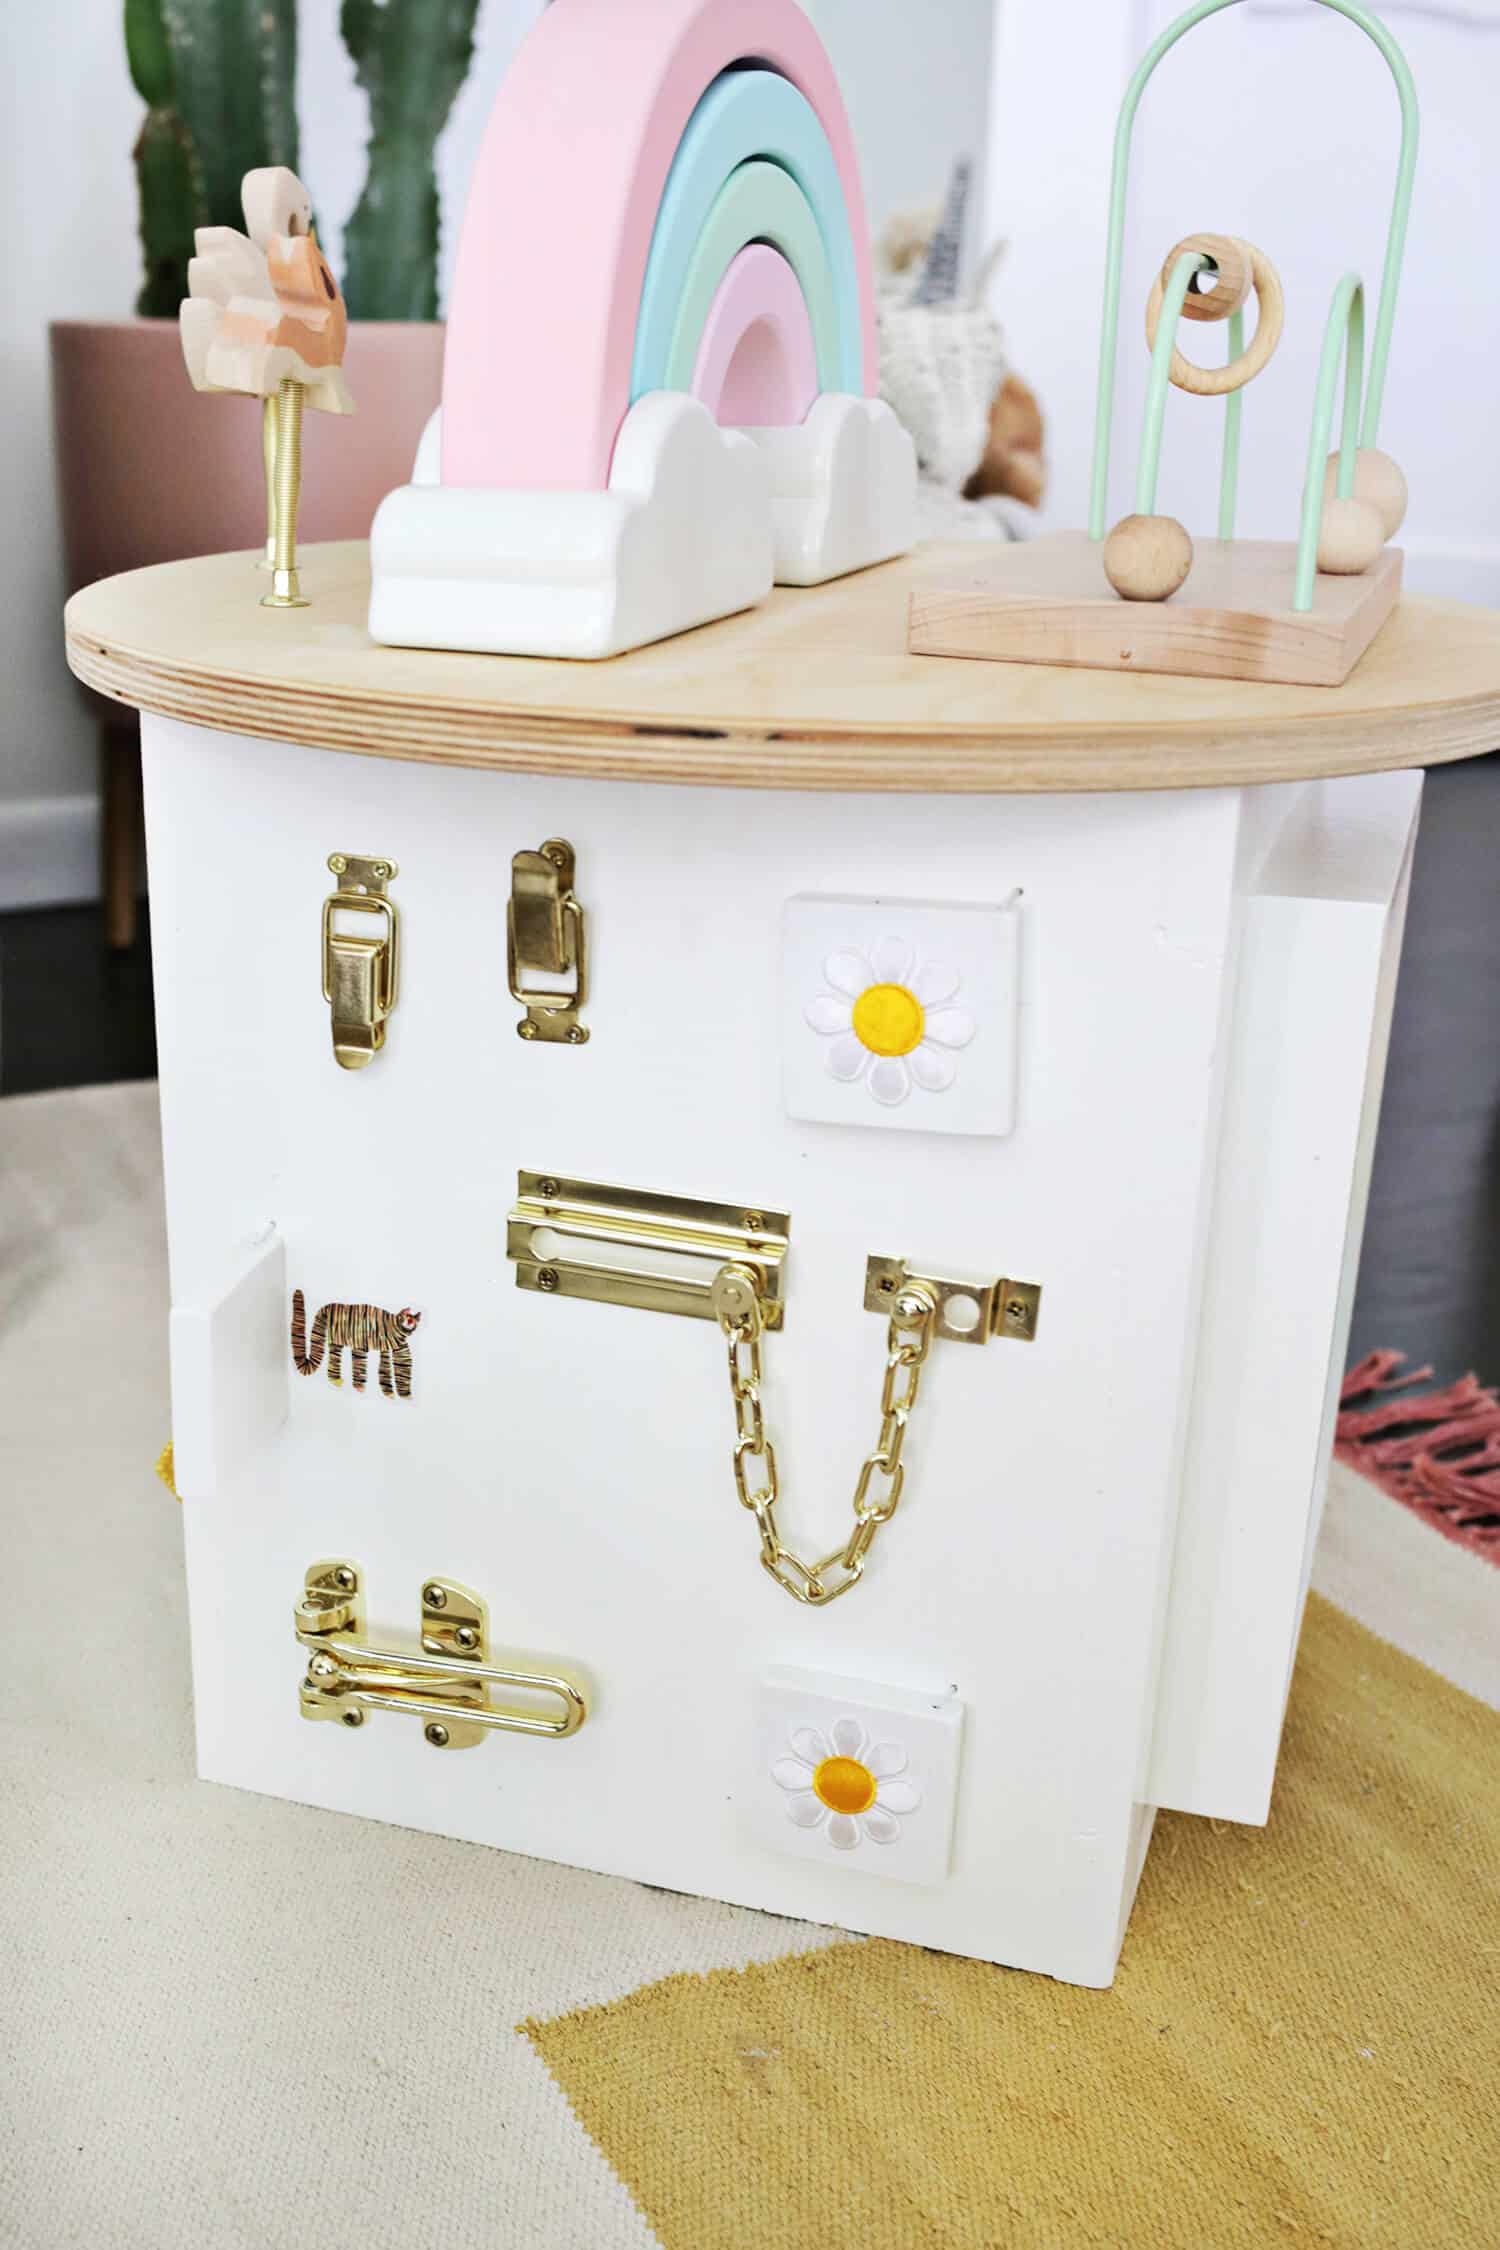 You can decorate the outside and inside of your doors with stickers or patches (I used a glue gun to attach flower patches on the outside of the doors) to give baby something to see when they open the doors!
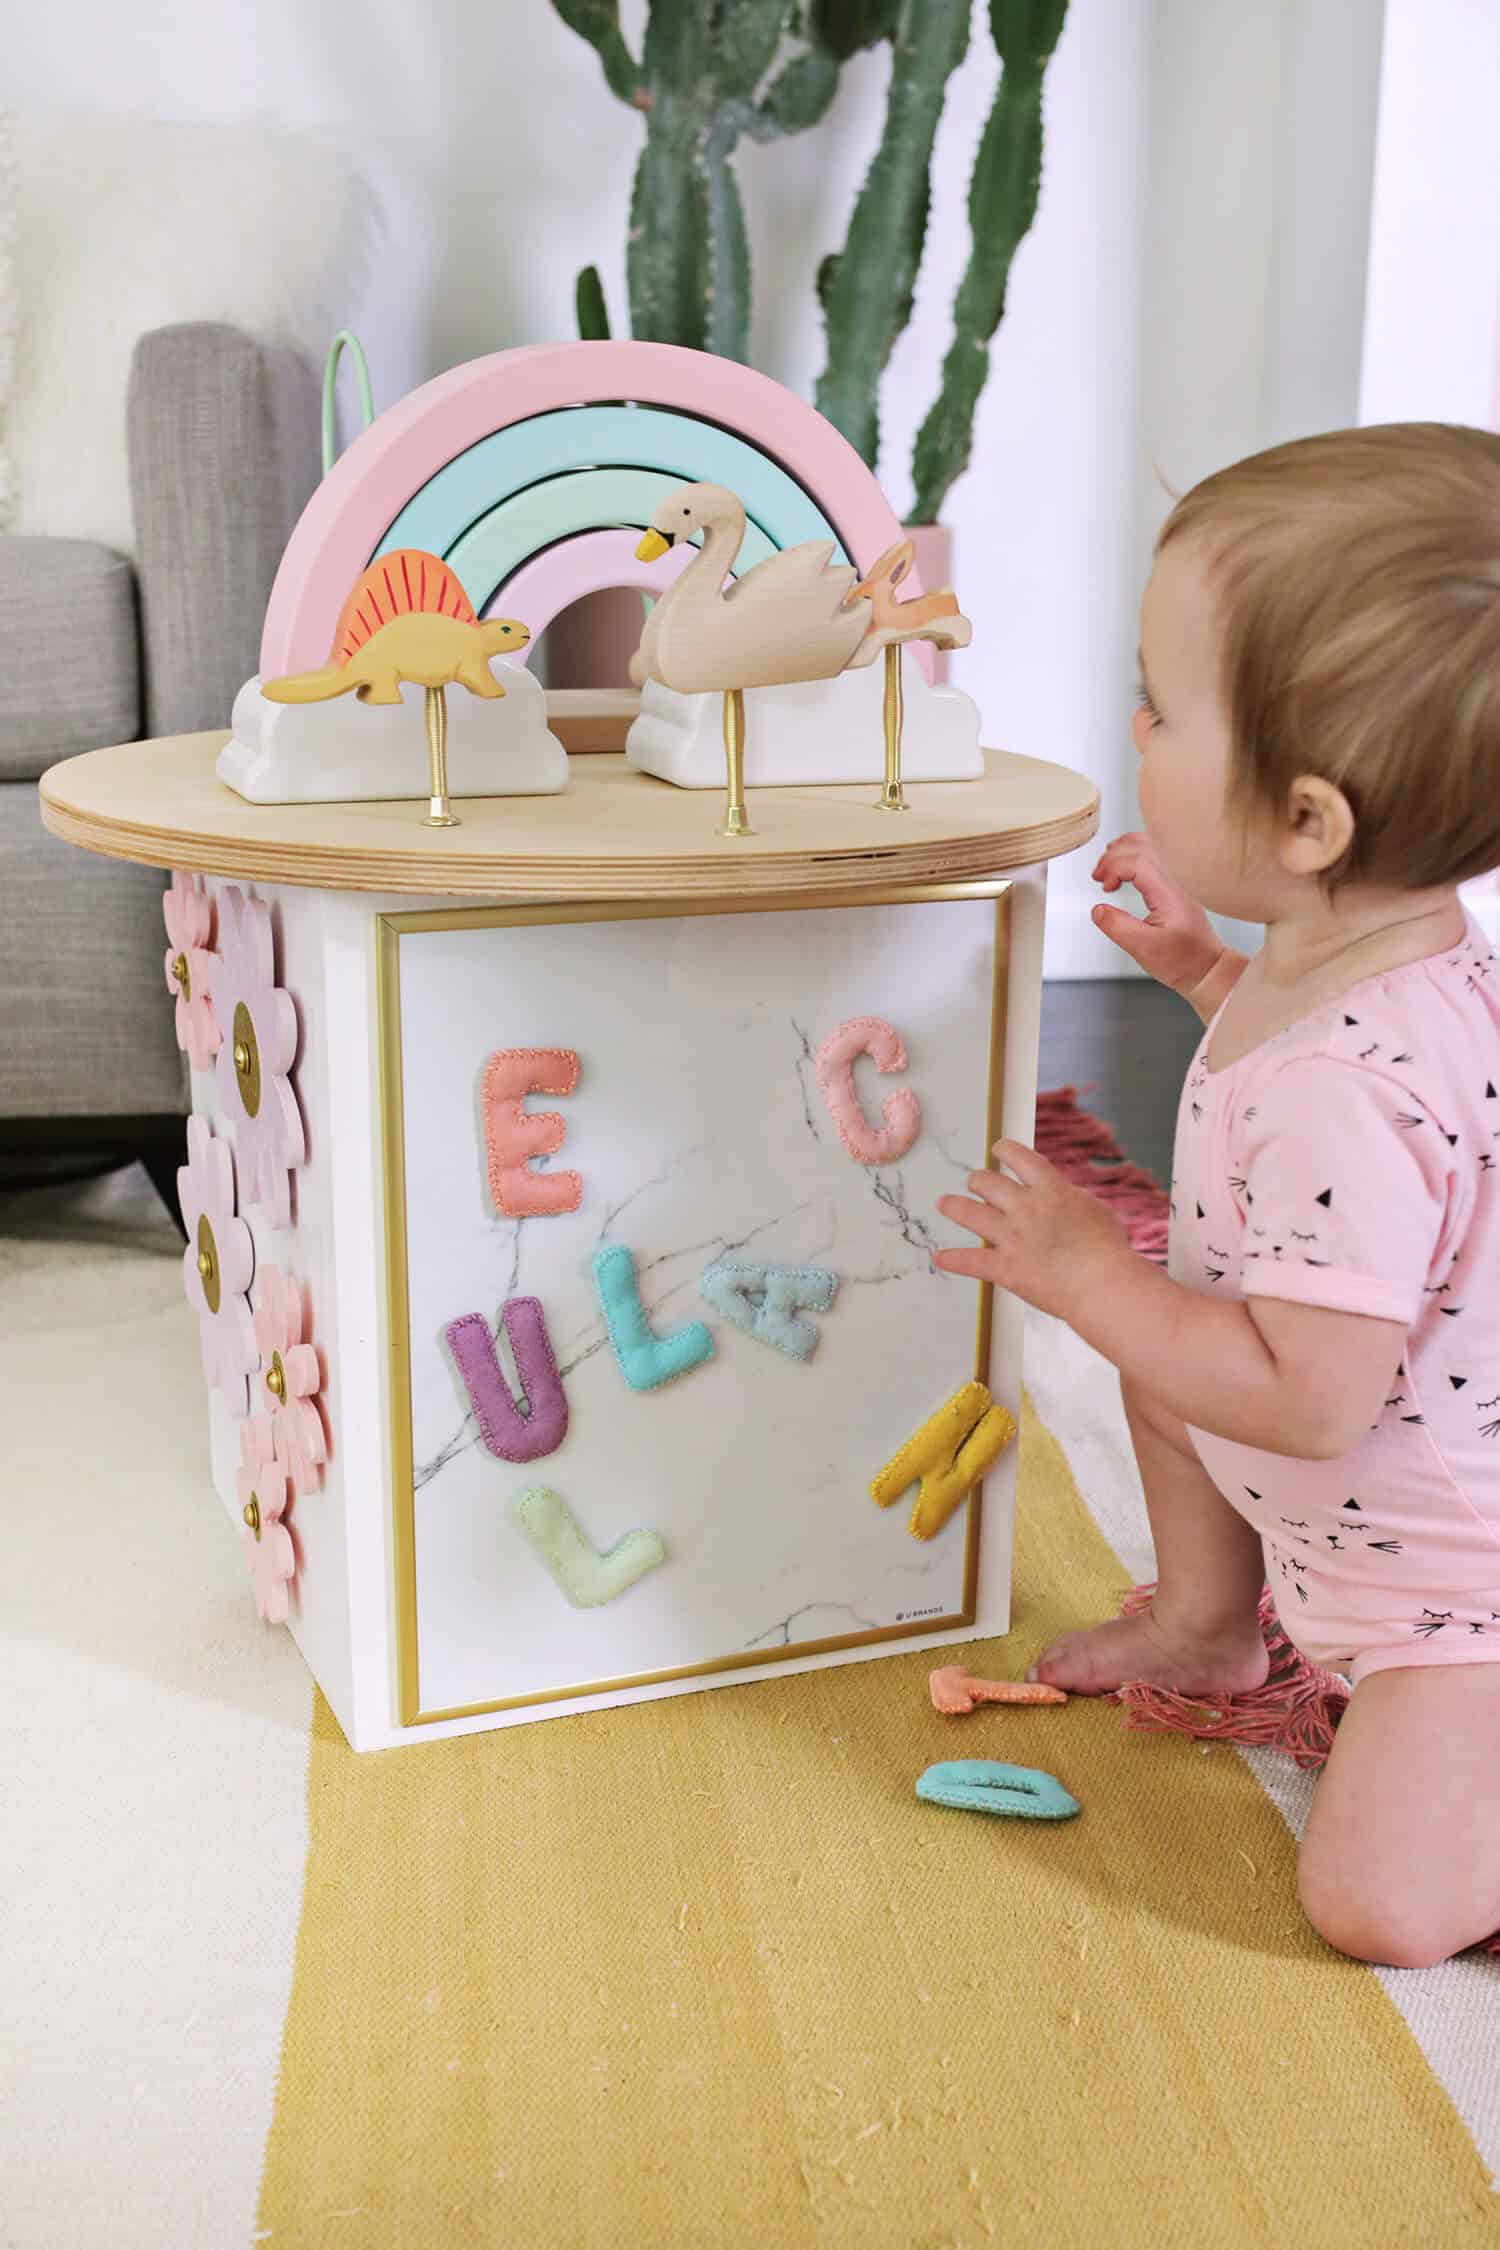
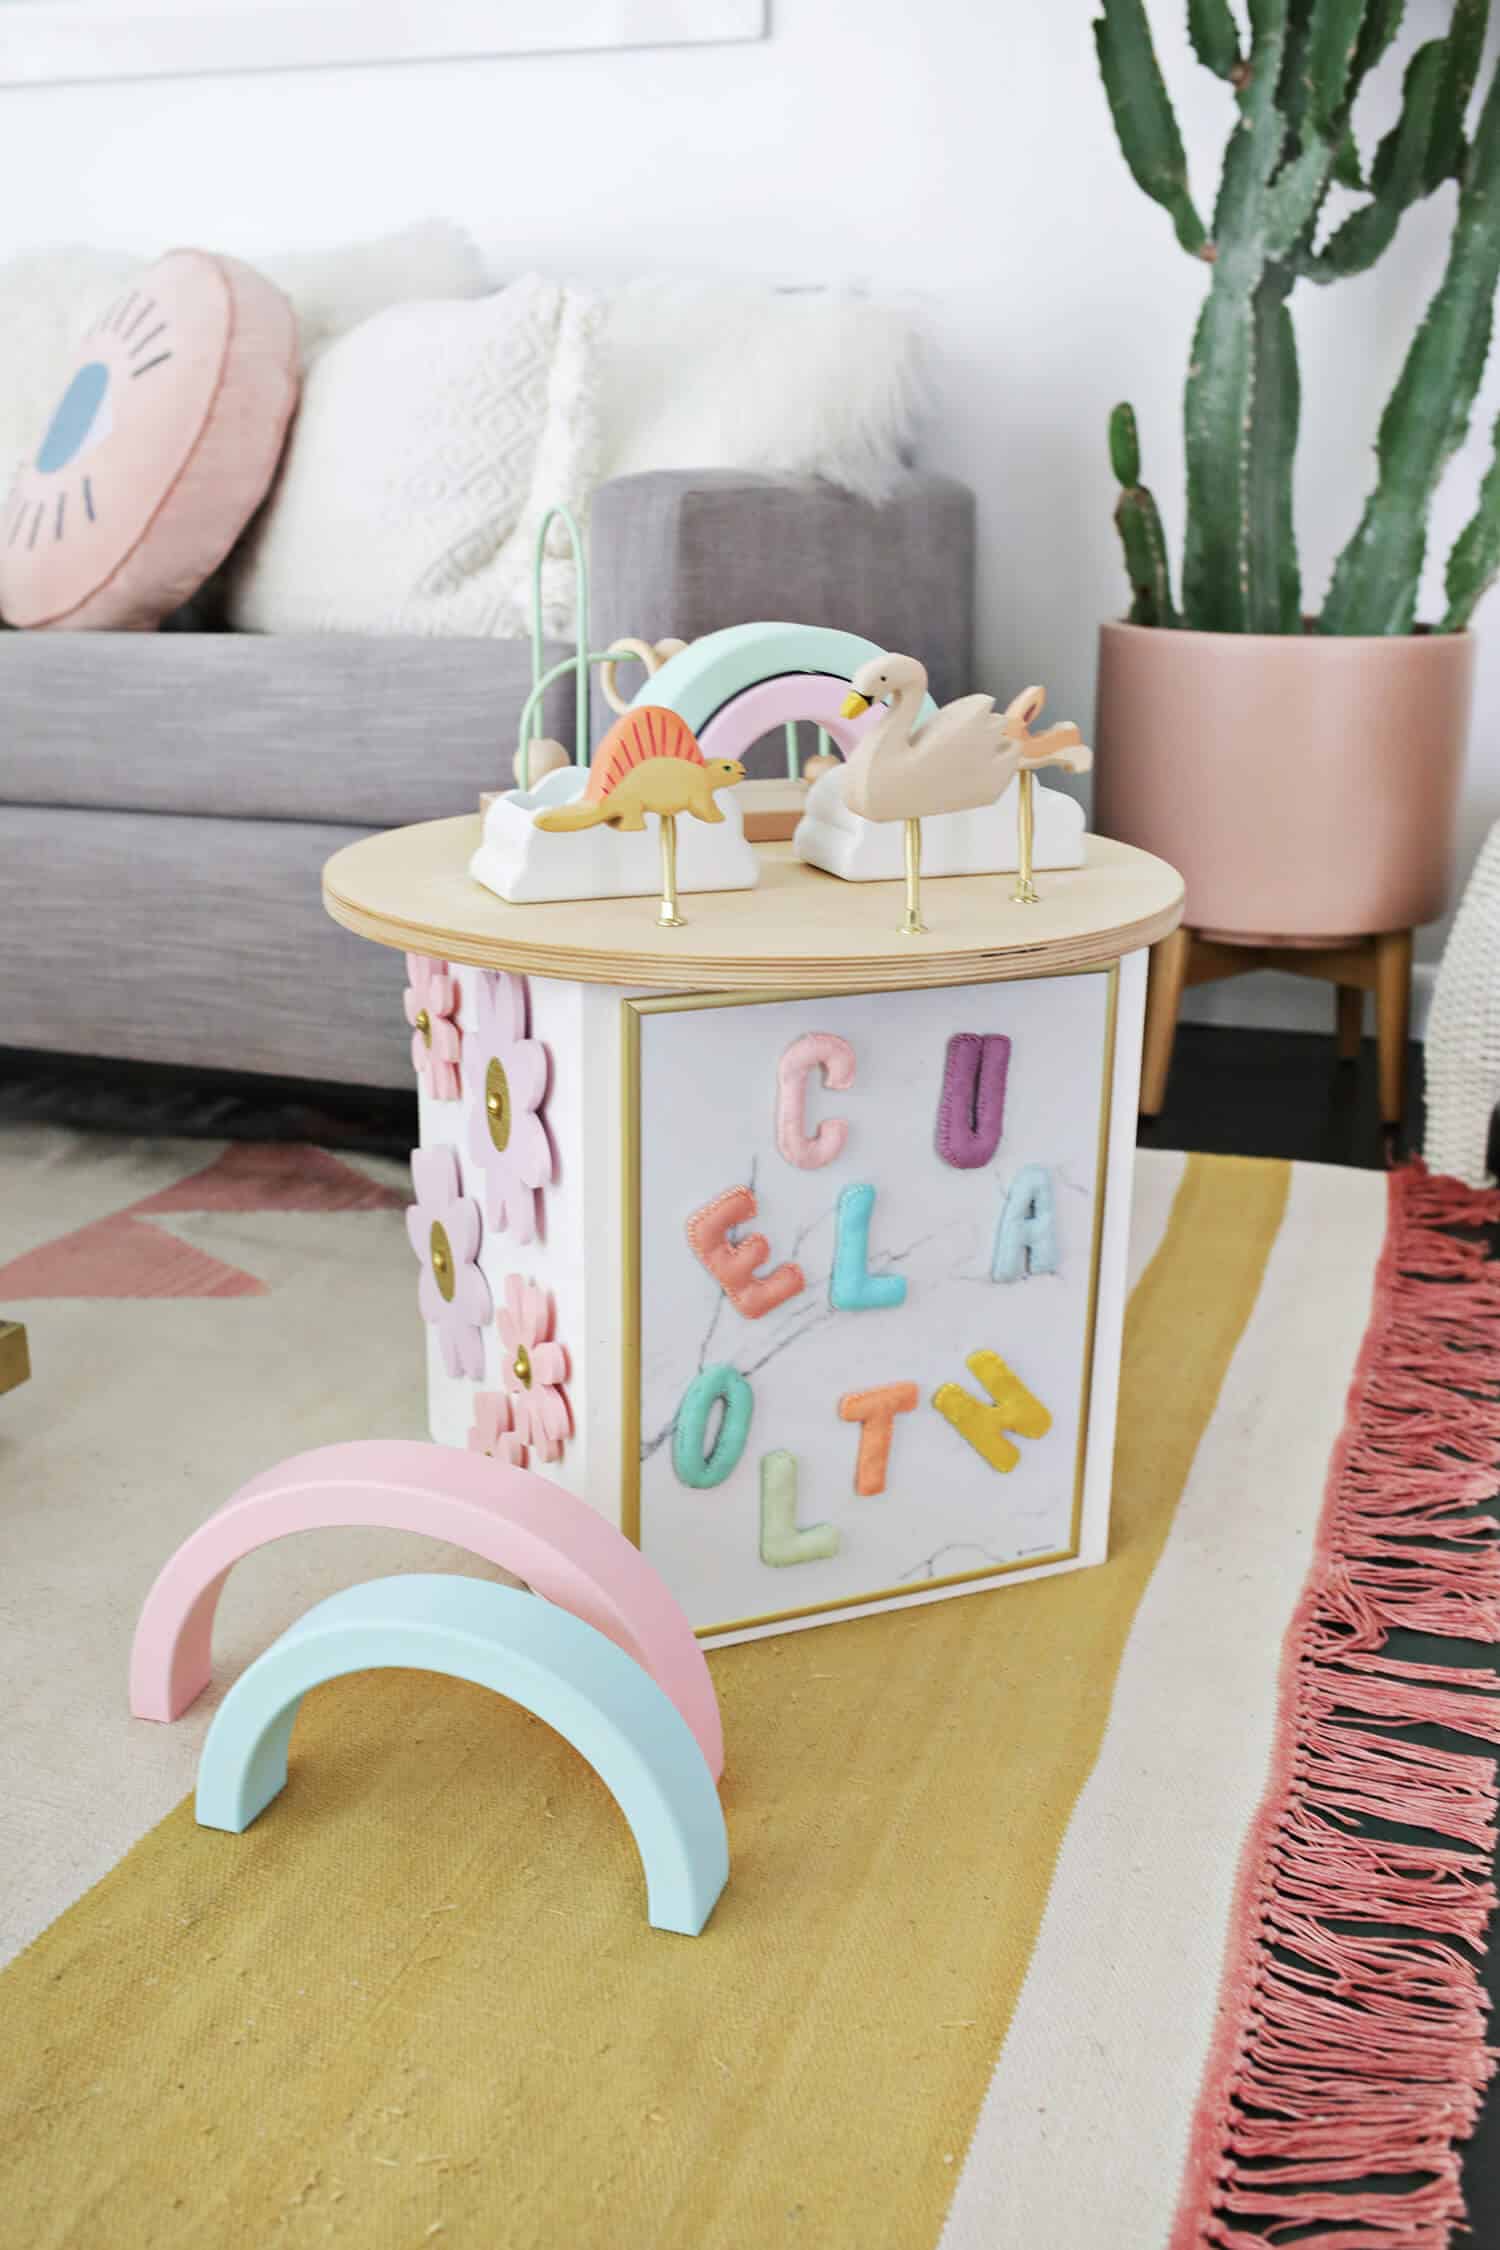
 Steps for the magnetic board side: Attach your board with glue or whatever adhesive pads your board may have come with to the cube.
 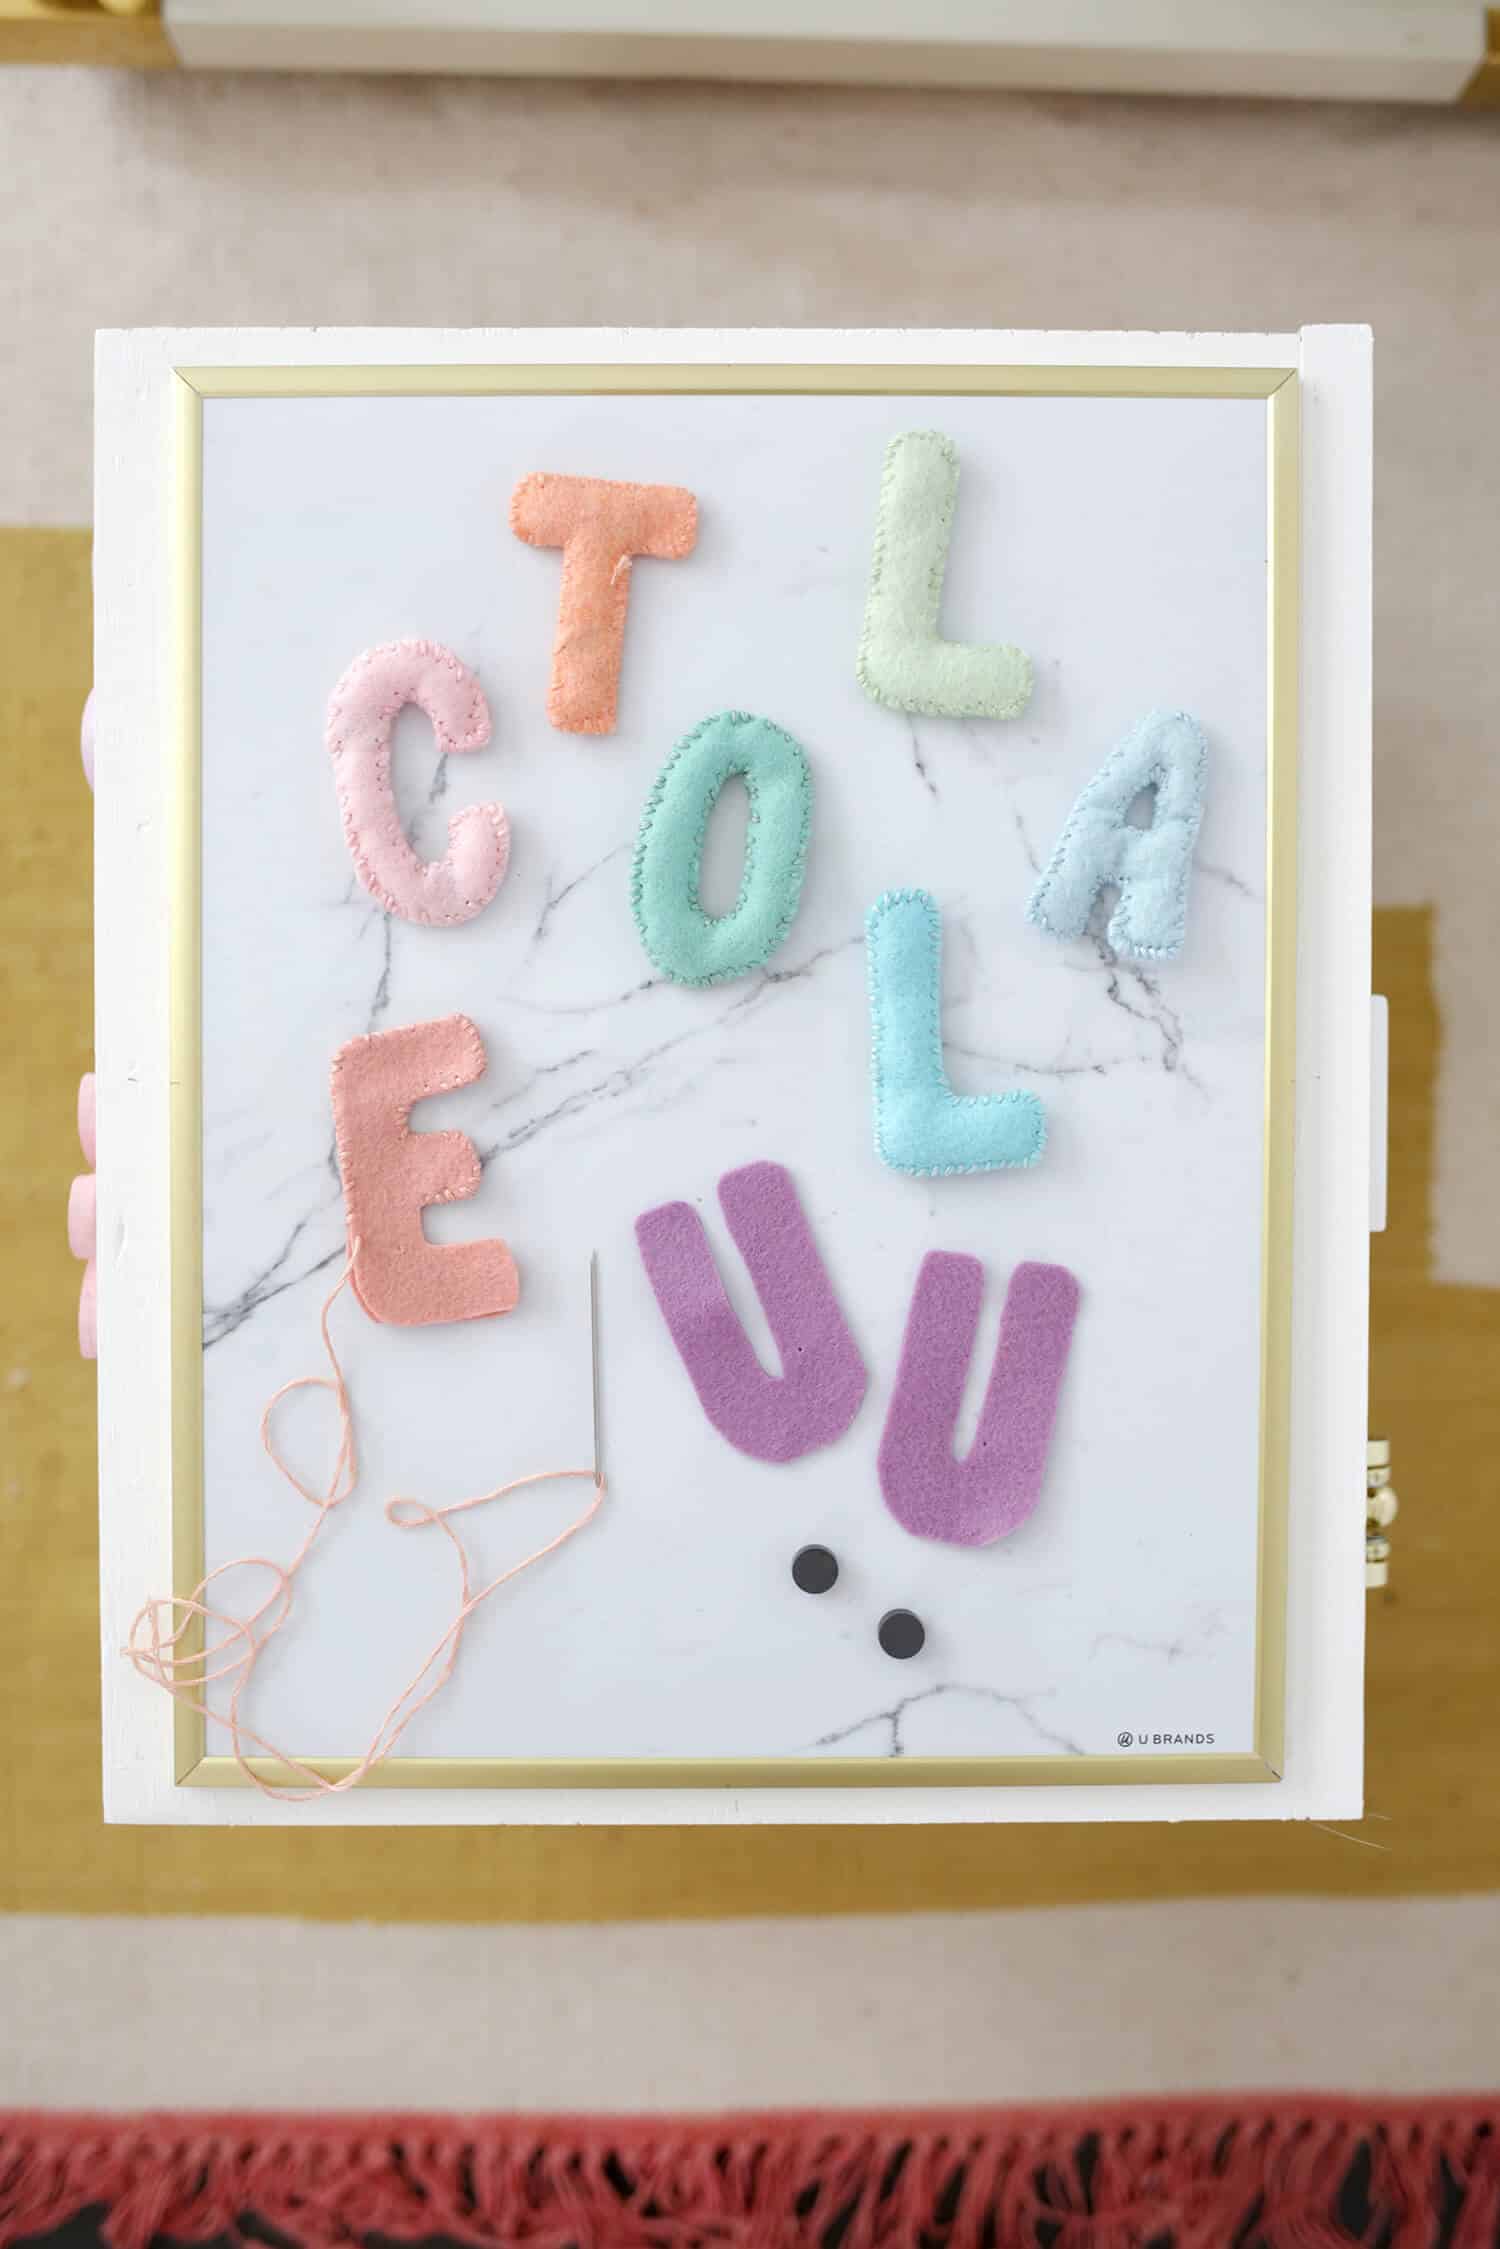 Fold your felt in half and cut out shapes or letters from your felt so you have two matching sides and stitch around the edge stuffing with cotton batting and 2-3 small magnets spread throughout so the 3D felt letter/shape will stick to the board.
I would recommend securing the magnets inside the felt letter rather than gluing them on the outside so they don’t come off and become a choking hazard. You can also buy a set of whatever kind of magnets you want to use as well! 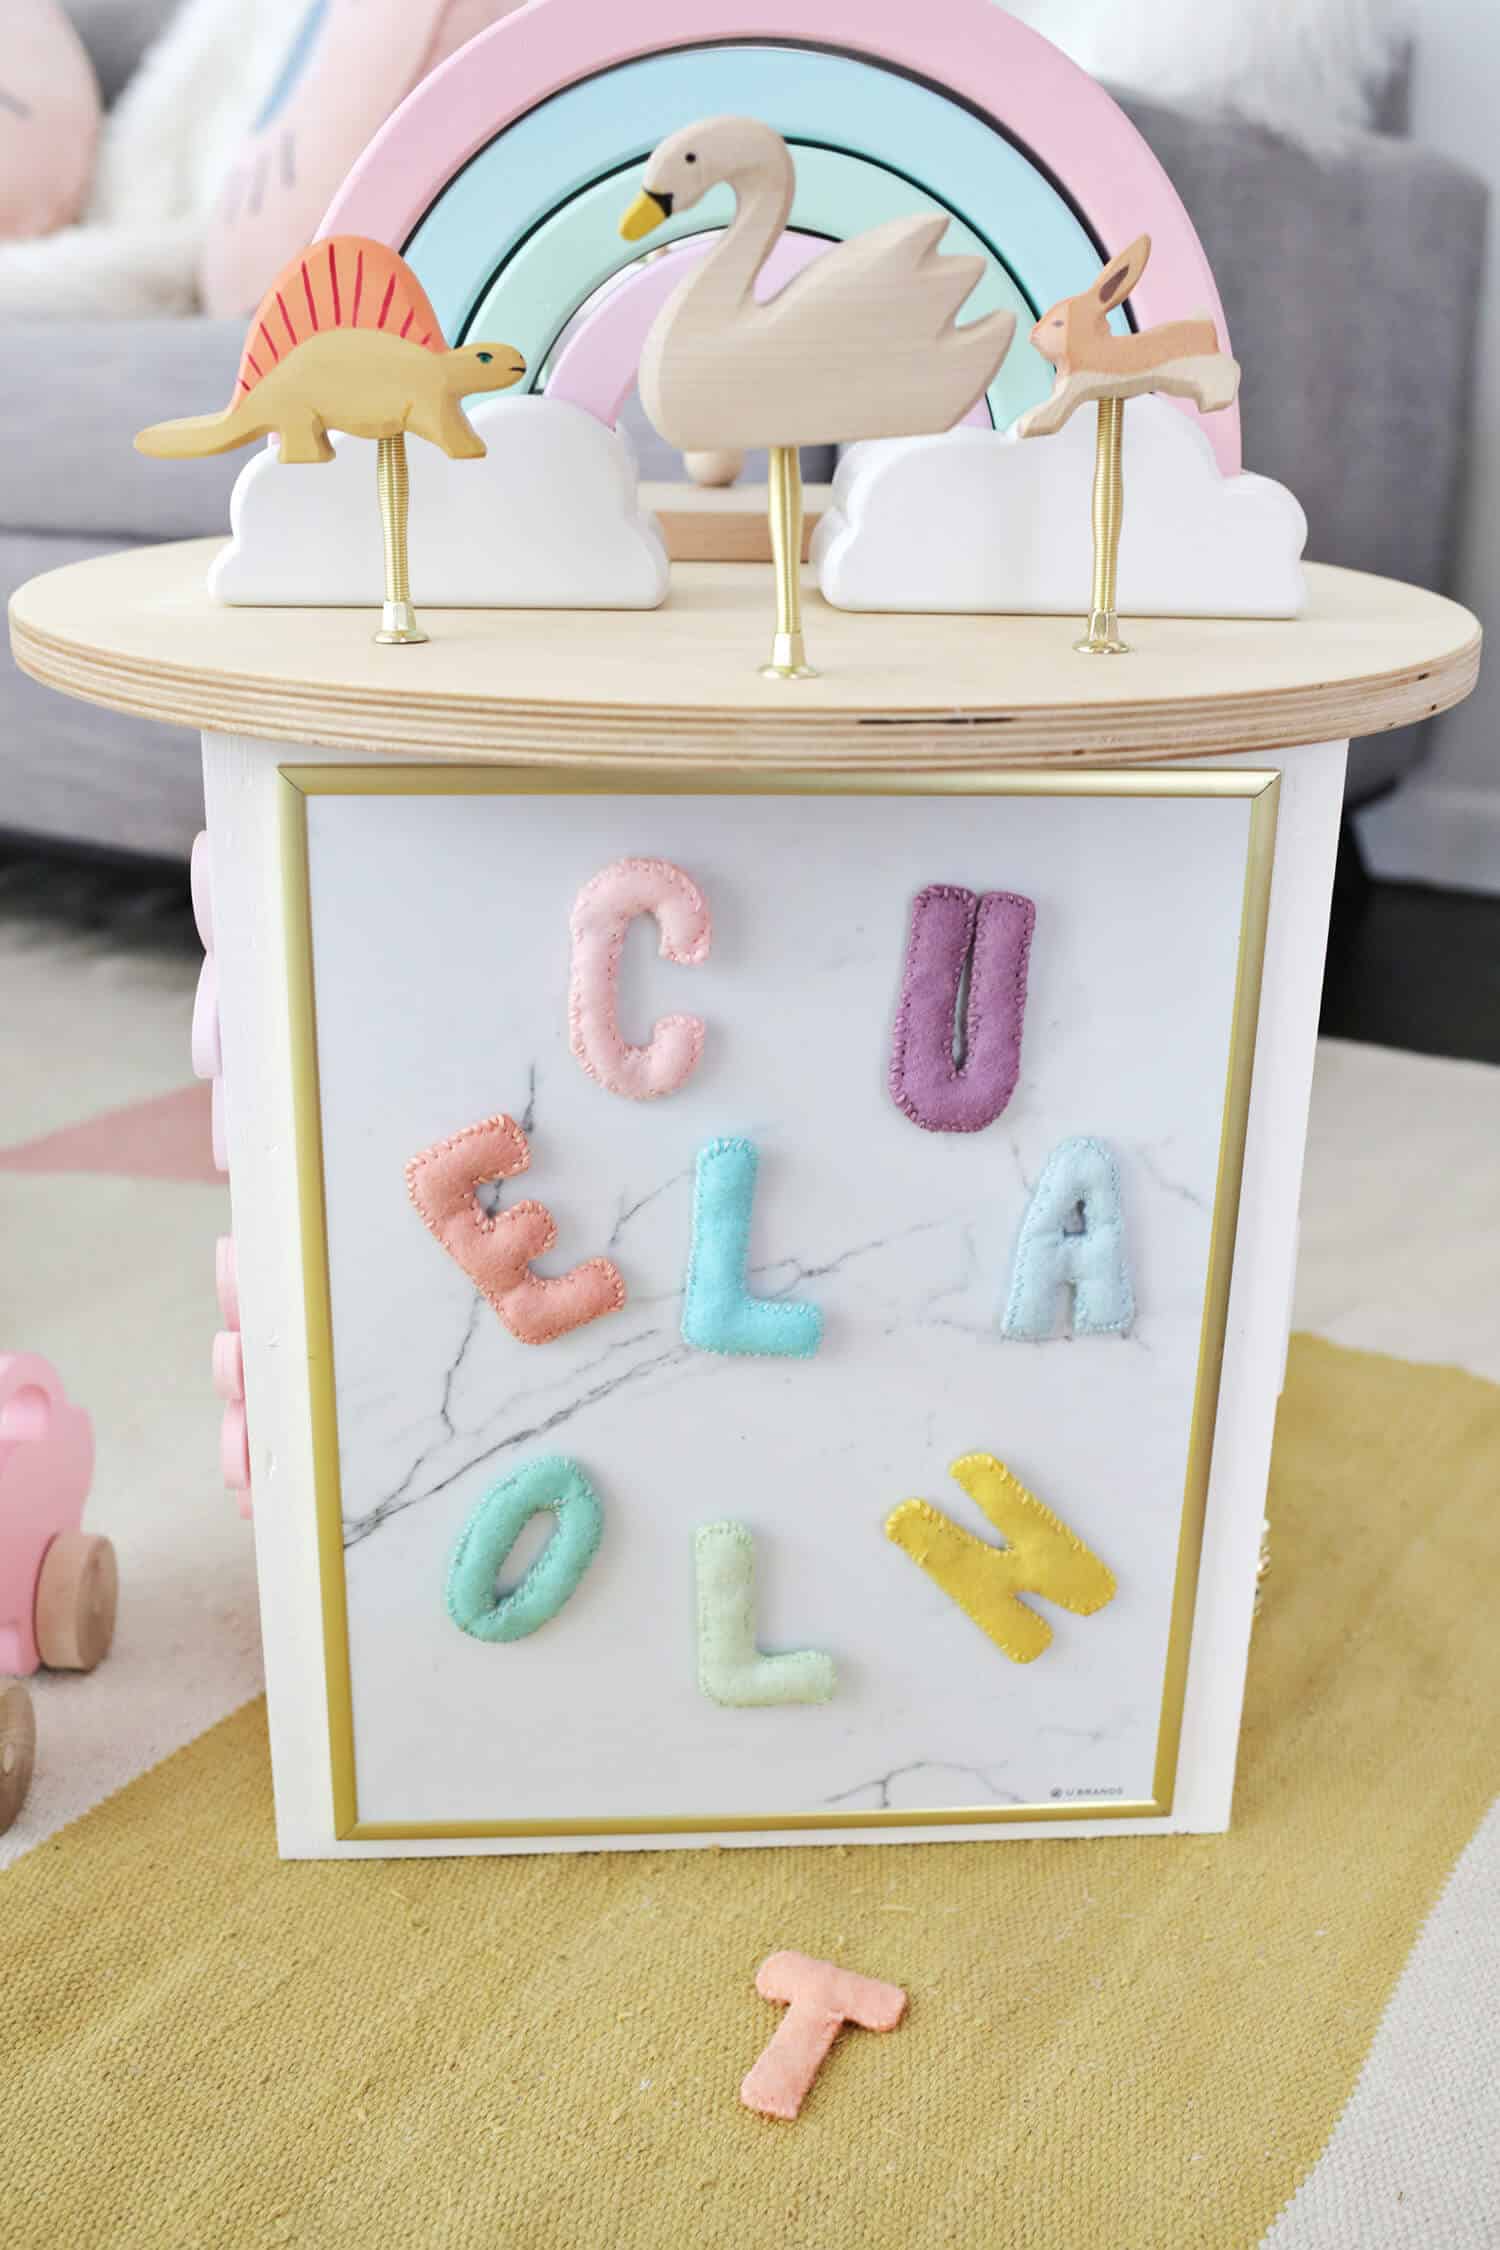 They do make a lot of play magnets that kids can use on the fridge, but I liked that I could make hers with custom colors if I went the felt route!
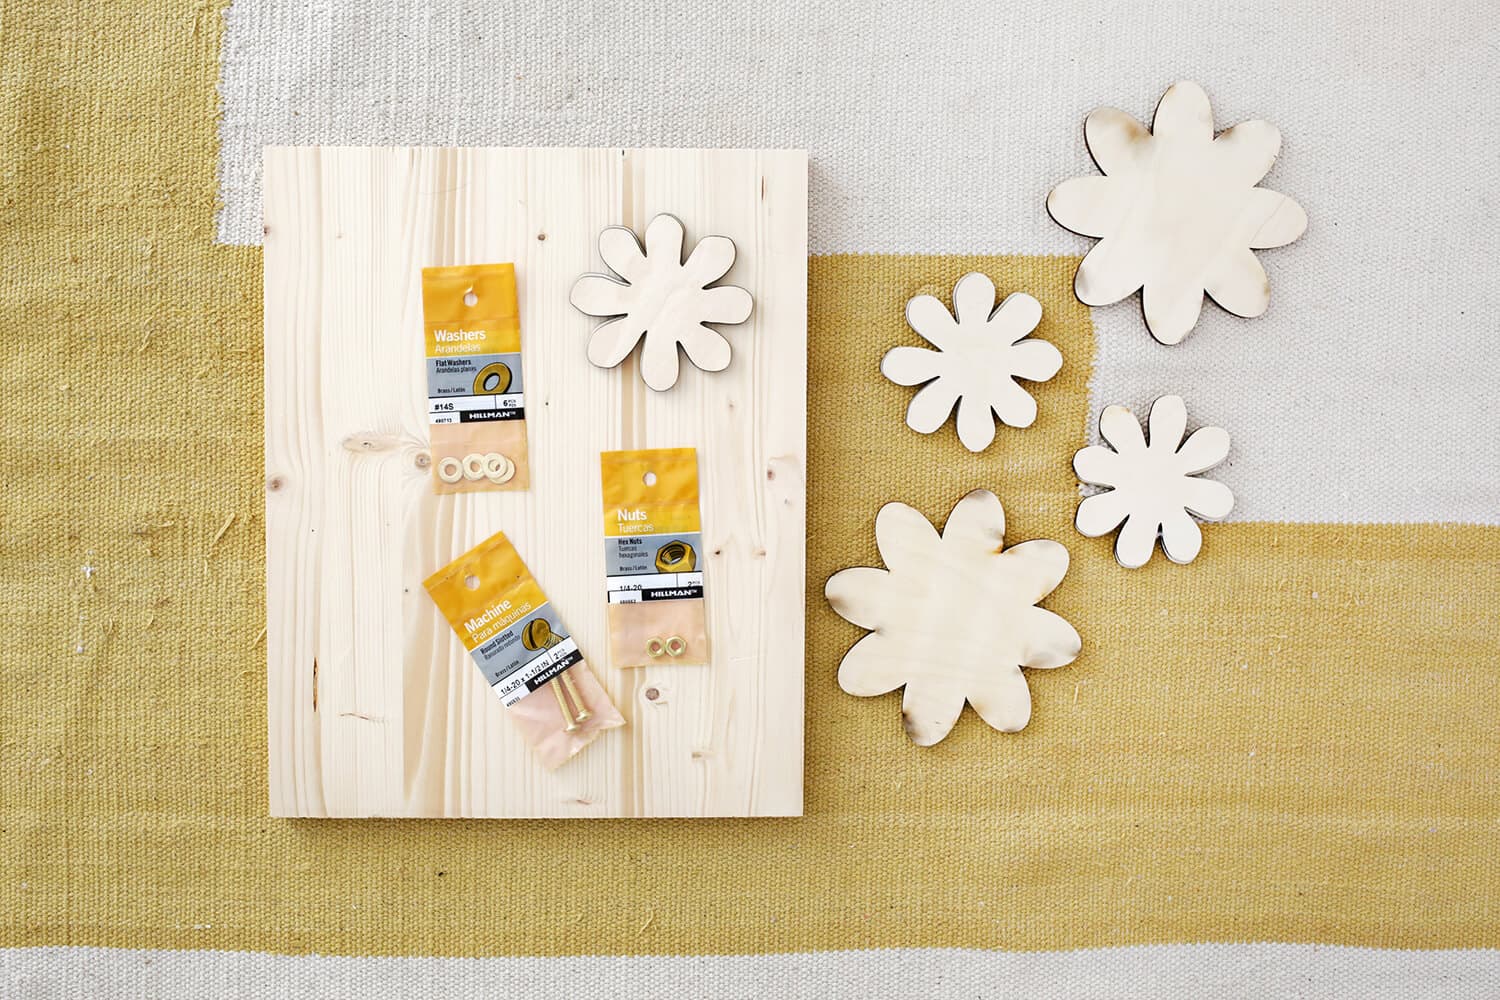 Steps for the spinner side: Take your wooden shapes and glue 2-3 of them together if your wood shapes are really thin to make them sturdier.
 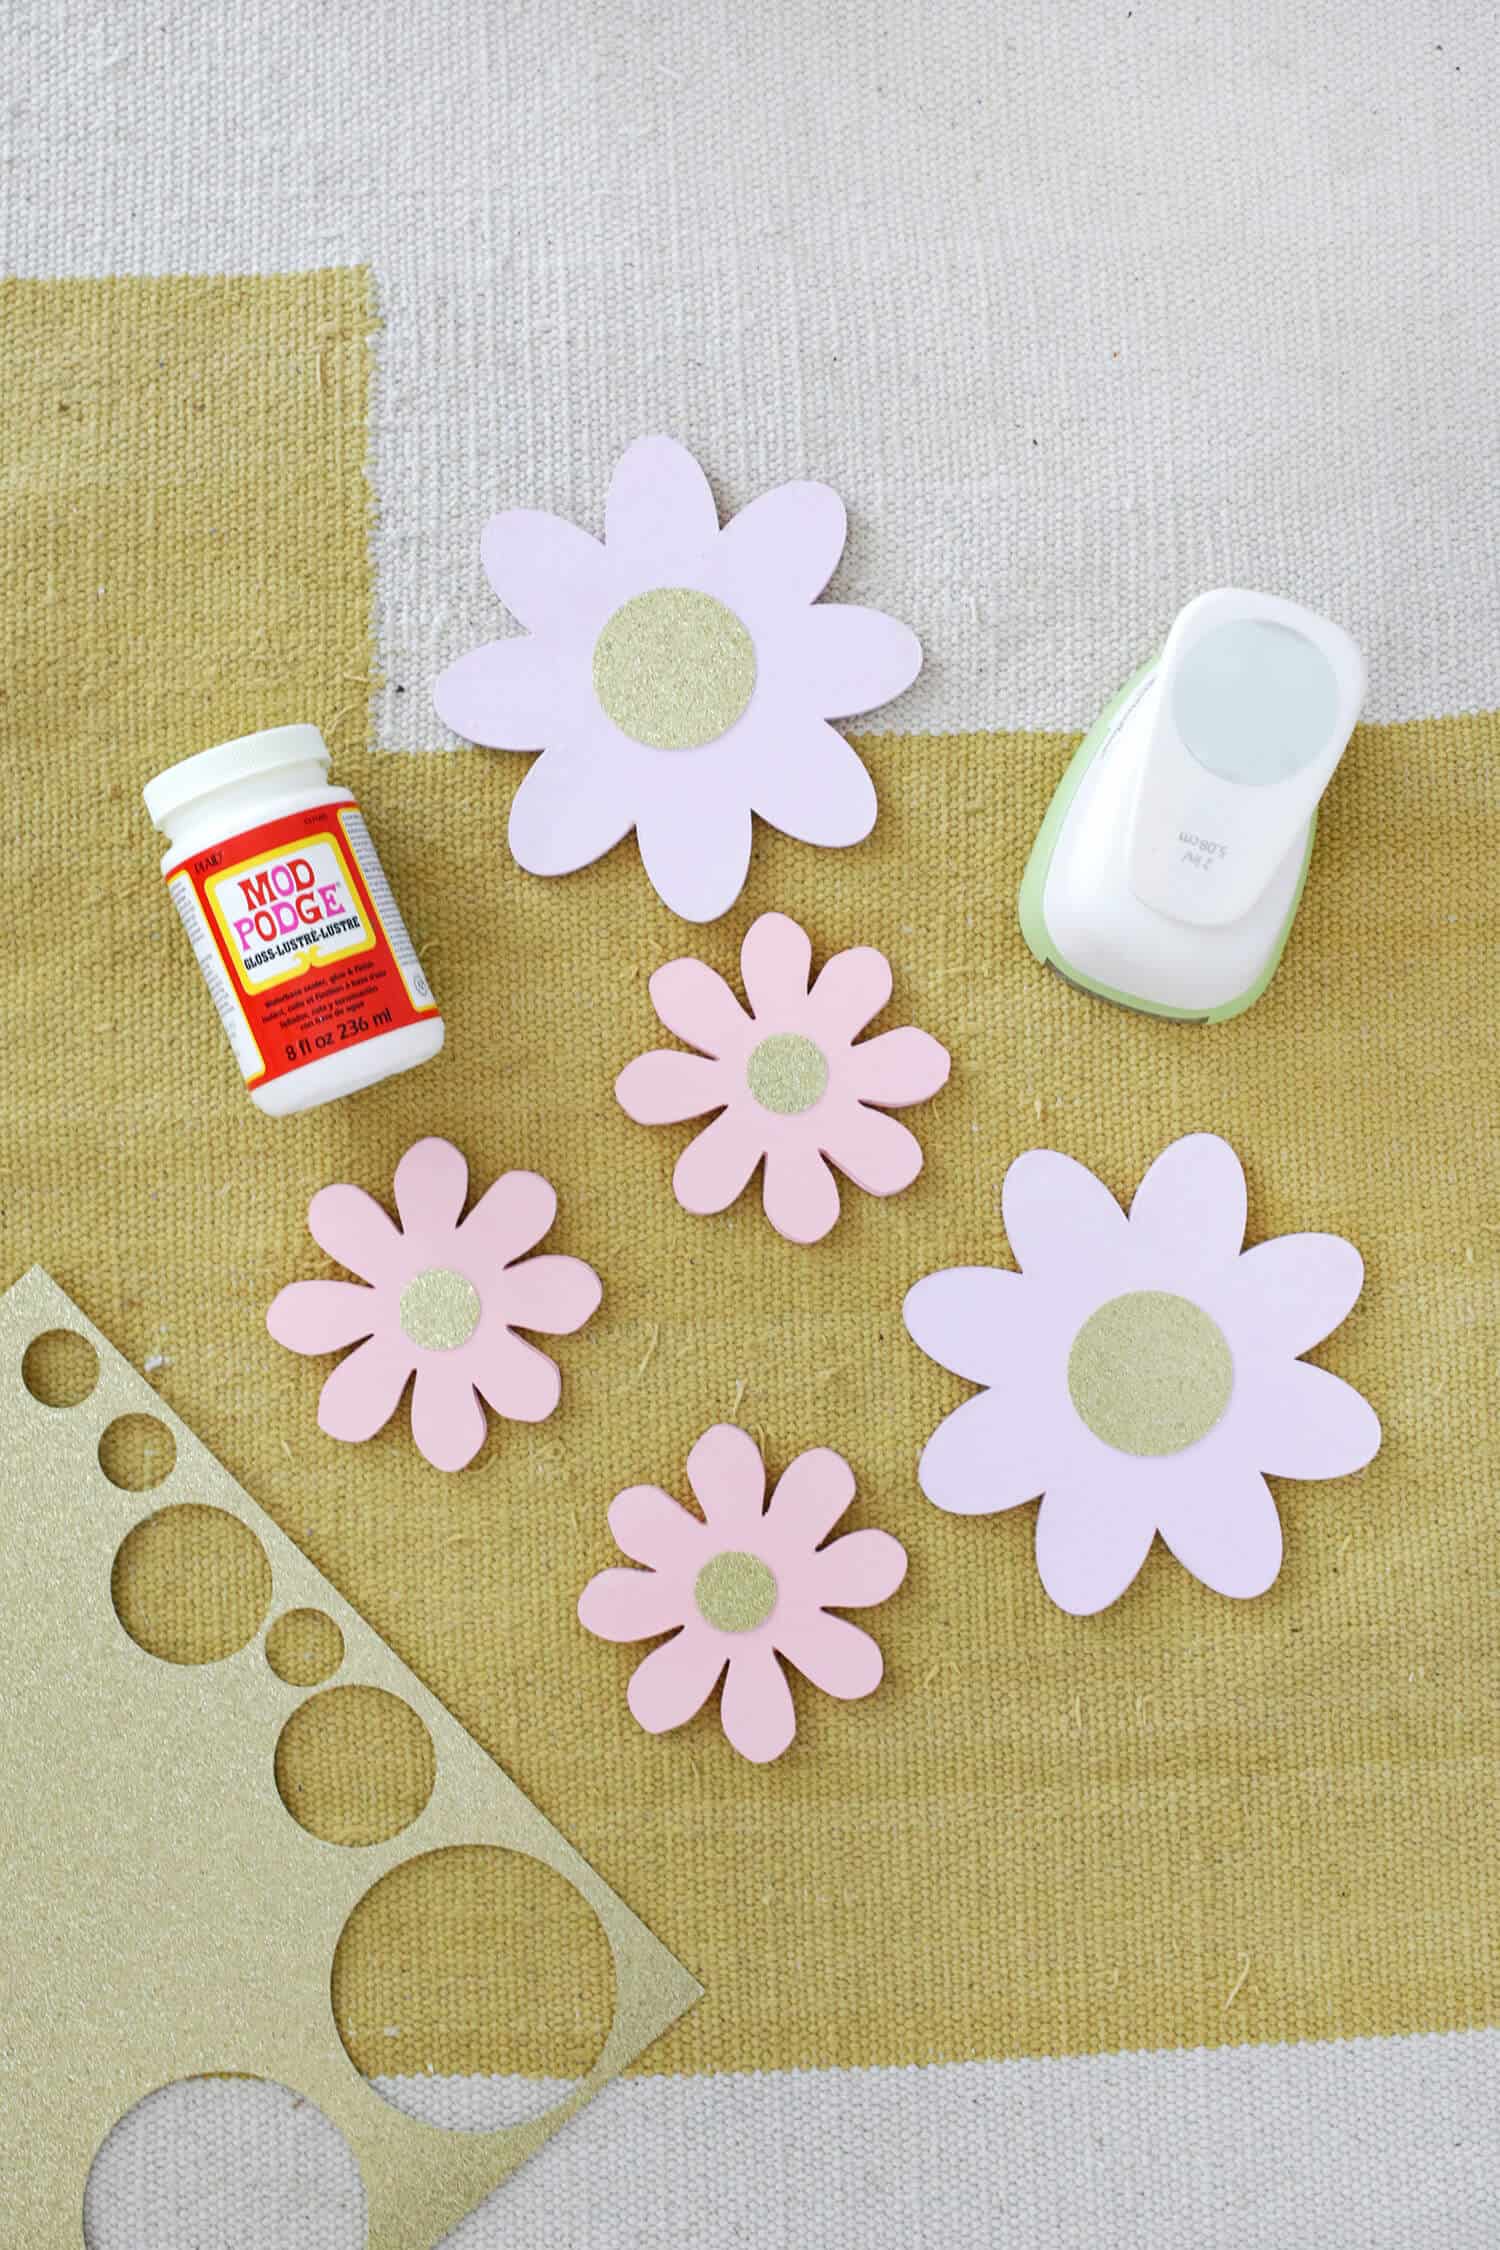 Paint the shapes your desired colors (I punched out glitter centers and used ModPodge to adhere them to the fronts with another coat on top to seal it).
Place your shapes onto the cube, making sure they all have enough room to spin and drill a hole into each shape and through the cube as well.  Place a washer onto your machine screw, then put on your wooden shape, and add a nut to the other side of the shape like above.
Place that into your hole in your cube and add another nut onto the other side to secure. Tighten the two nuts toward each other but leave a little room so that the shape can spin freely.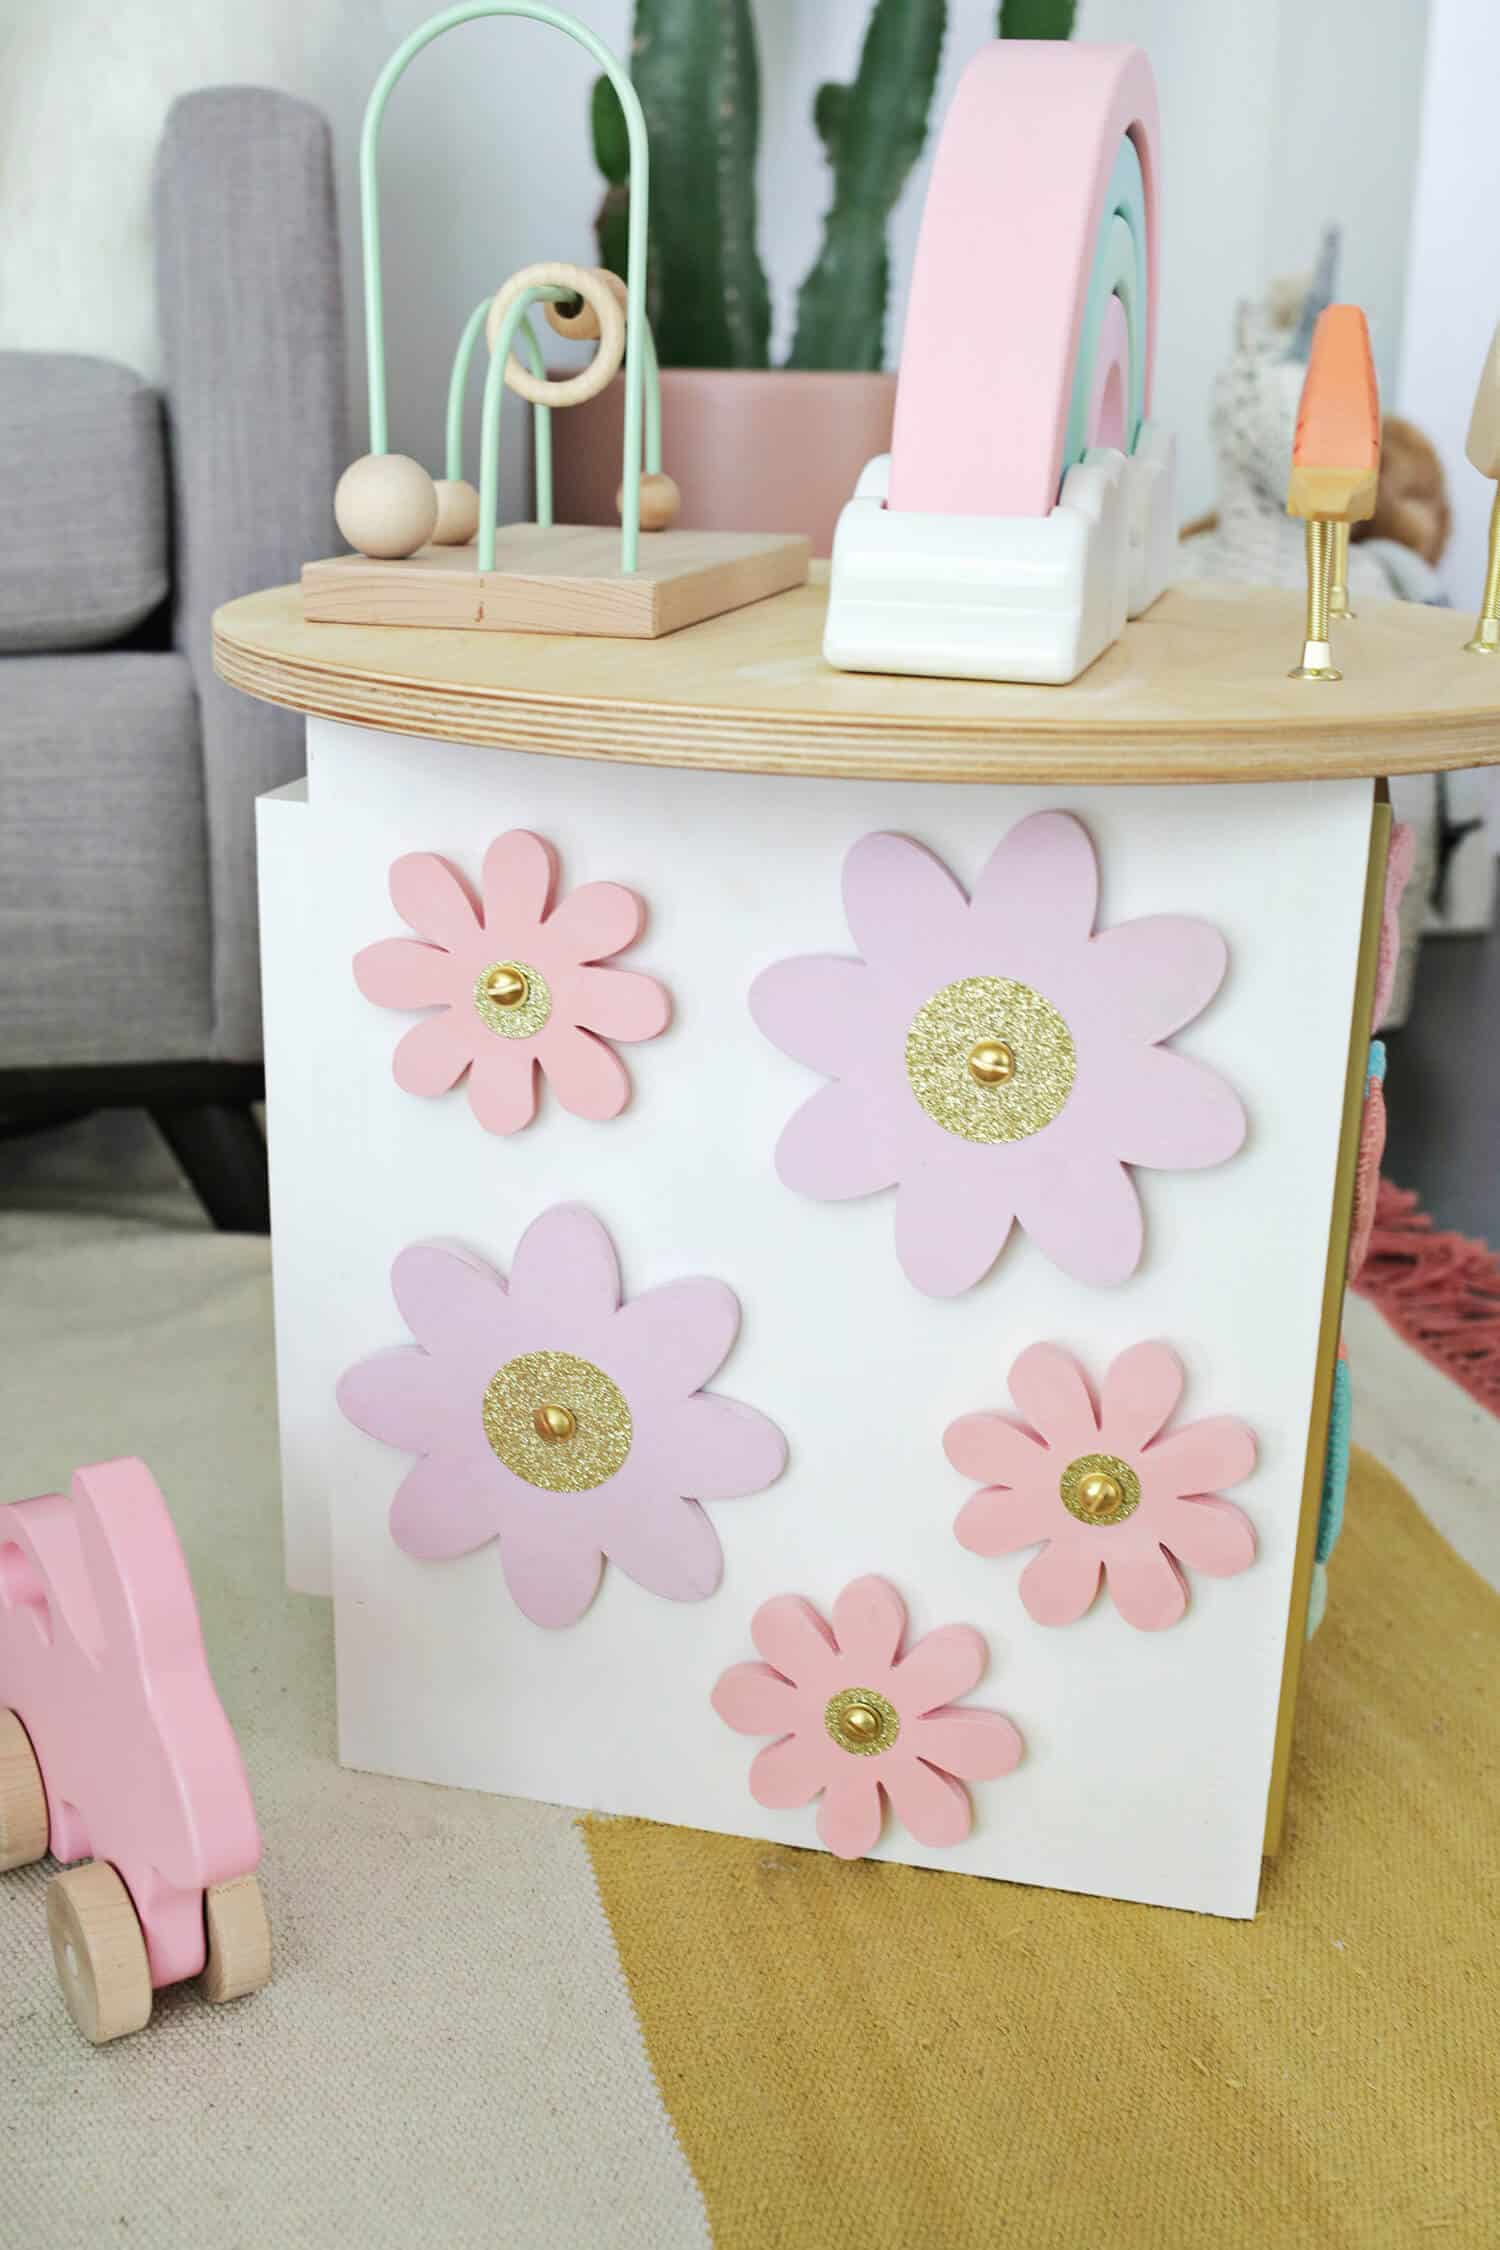 So sweet and they spin really well!
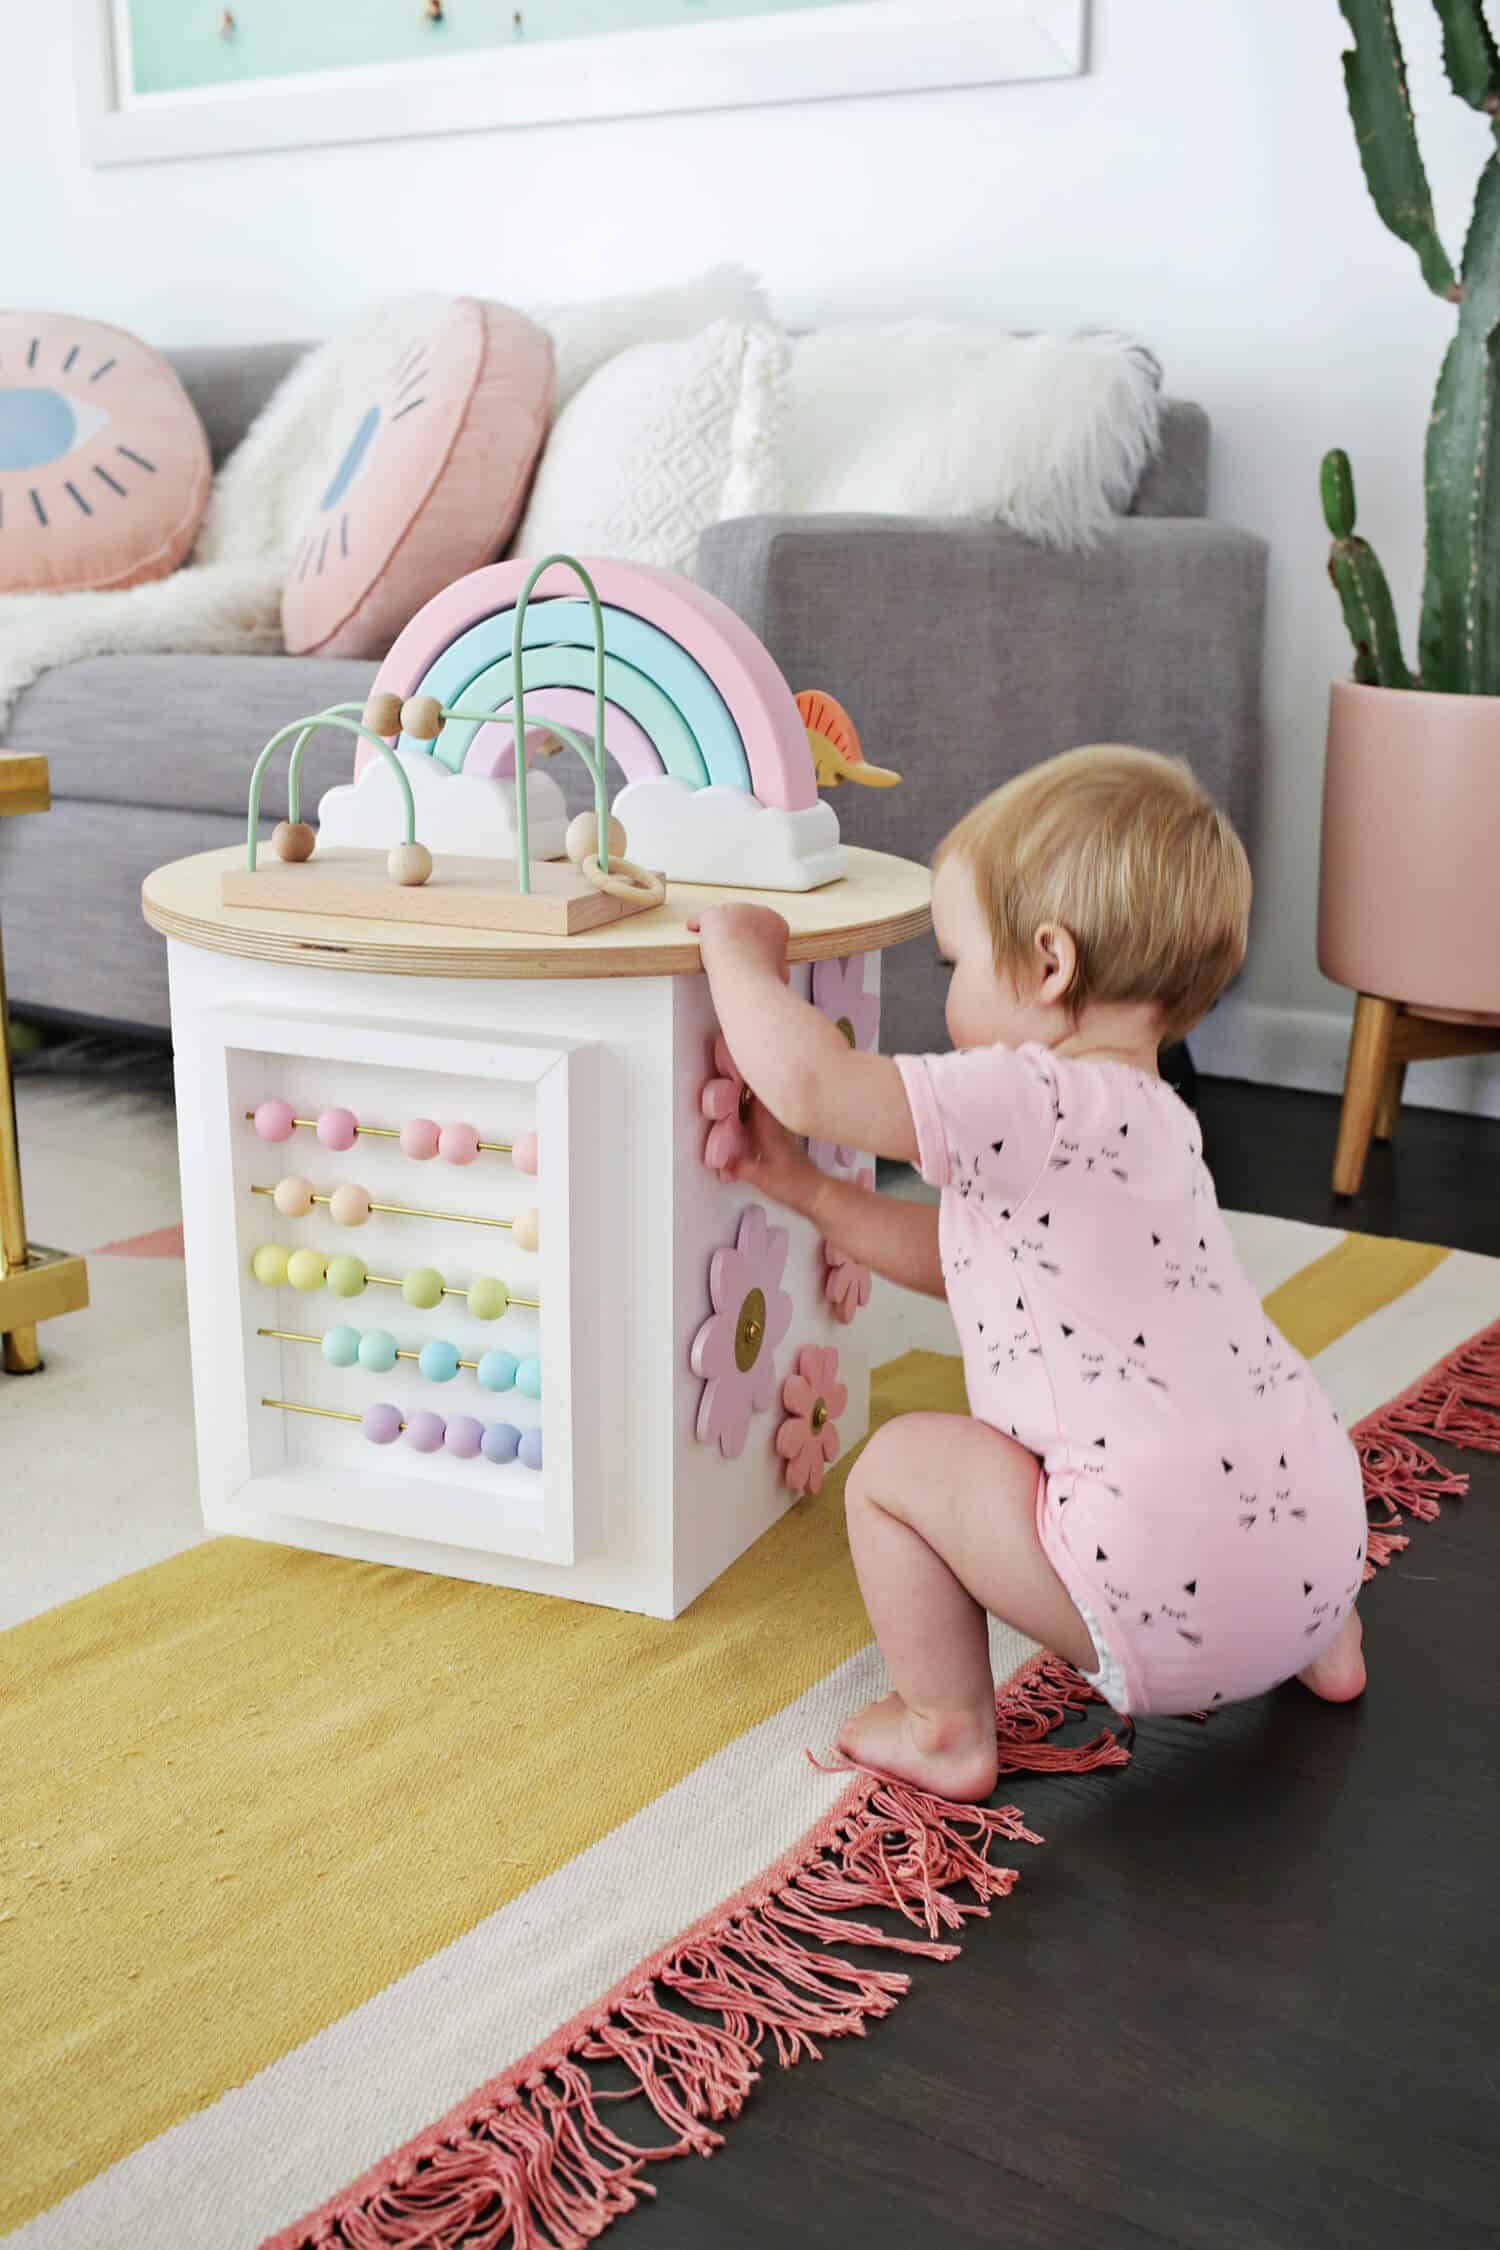
 Steps to make the abacus side: Cut 2 boards from your trim that are 7 1/2″ long and 2 that are 11 1/2″ long.
 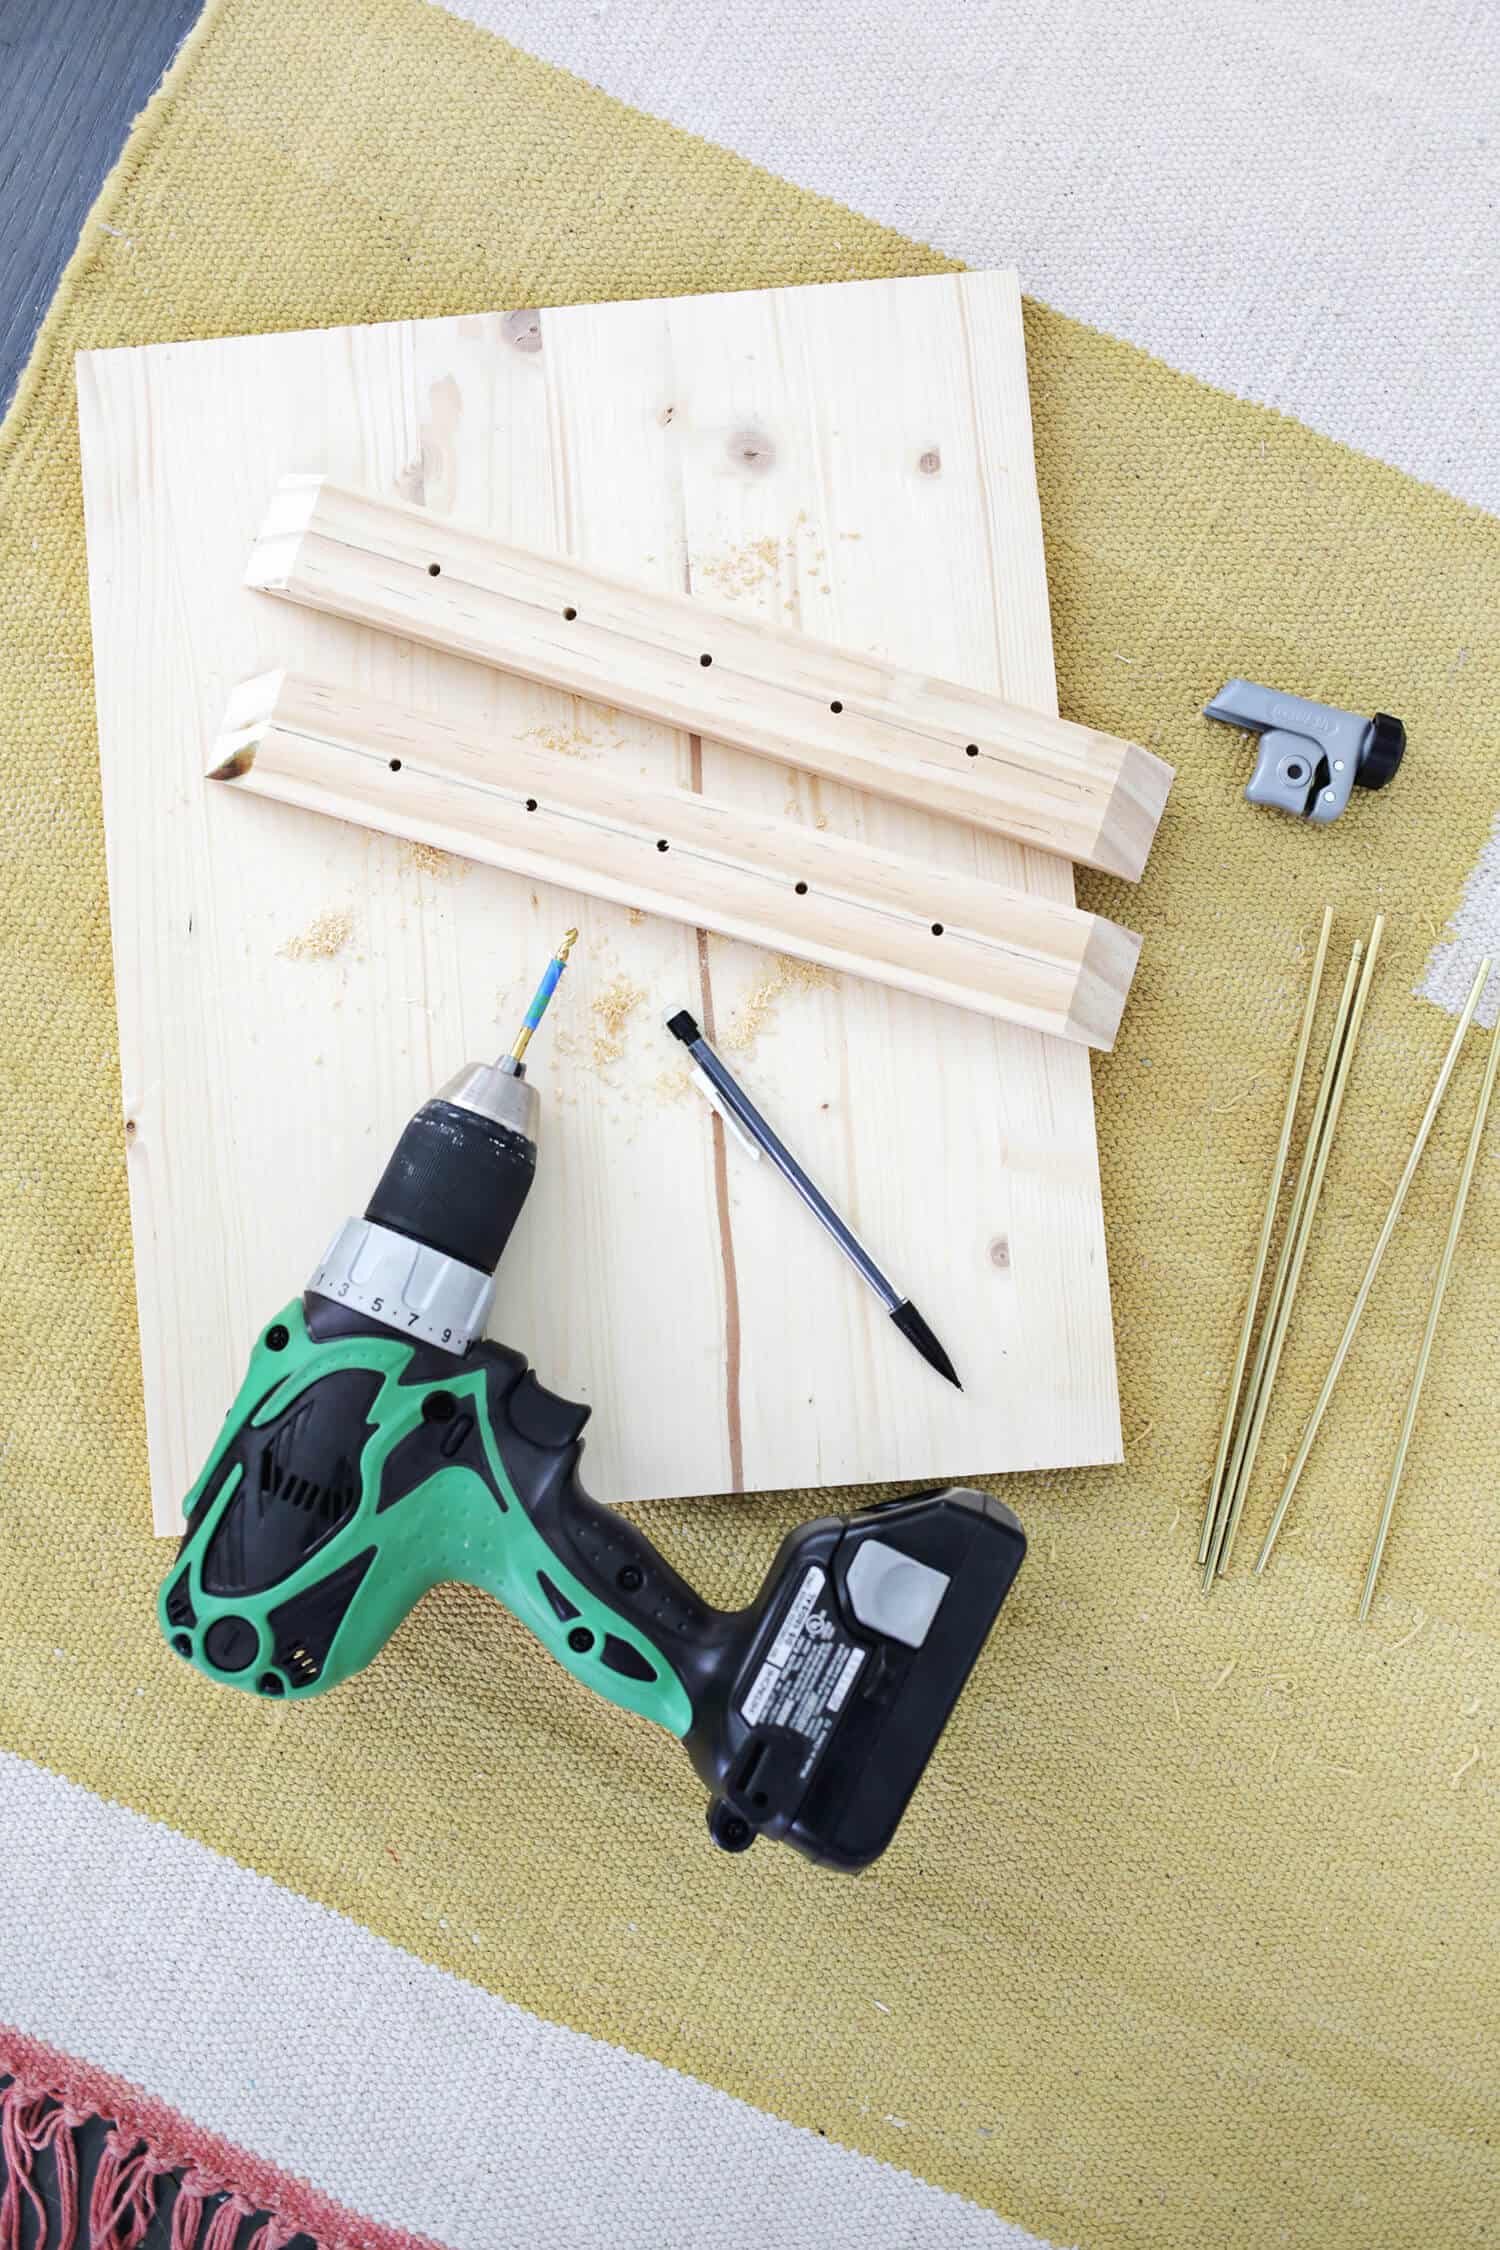 Place your longer pieces on the outside of your shorter boards to make a rectangle and mark 5 evenly spaced holes on the long sides of where to drill for your metal rods.
You can see that I cut my boards at a 45° angle to make them fit together like a picture frame, but if you don’t have a miter saw and are using a jig saw or a hand saw, you don’t have to do that part.
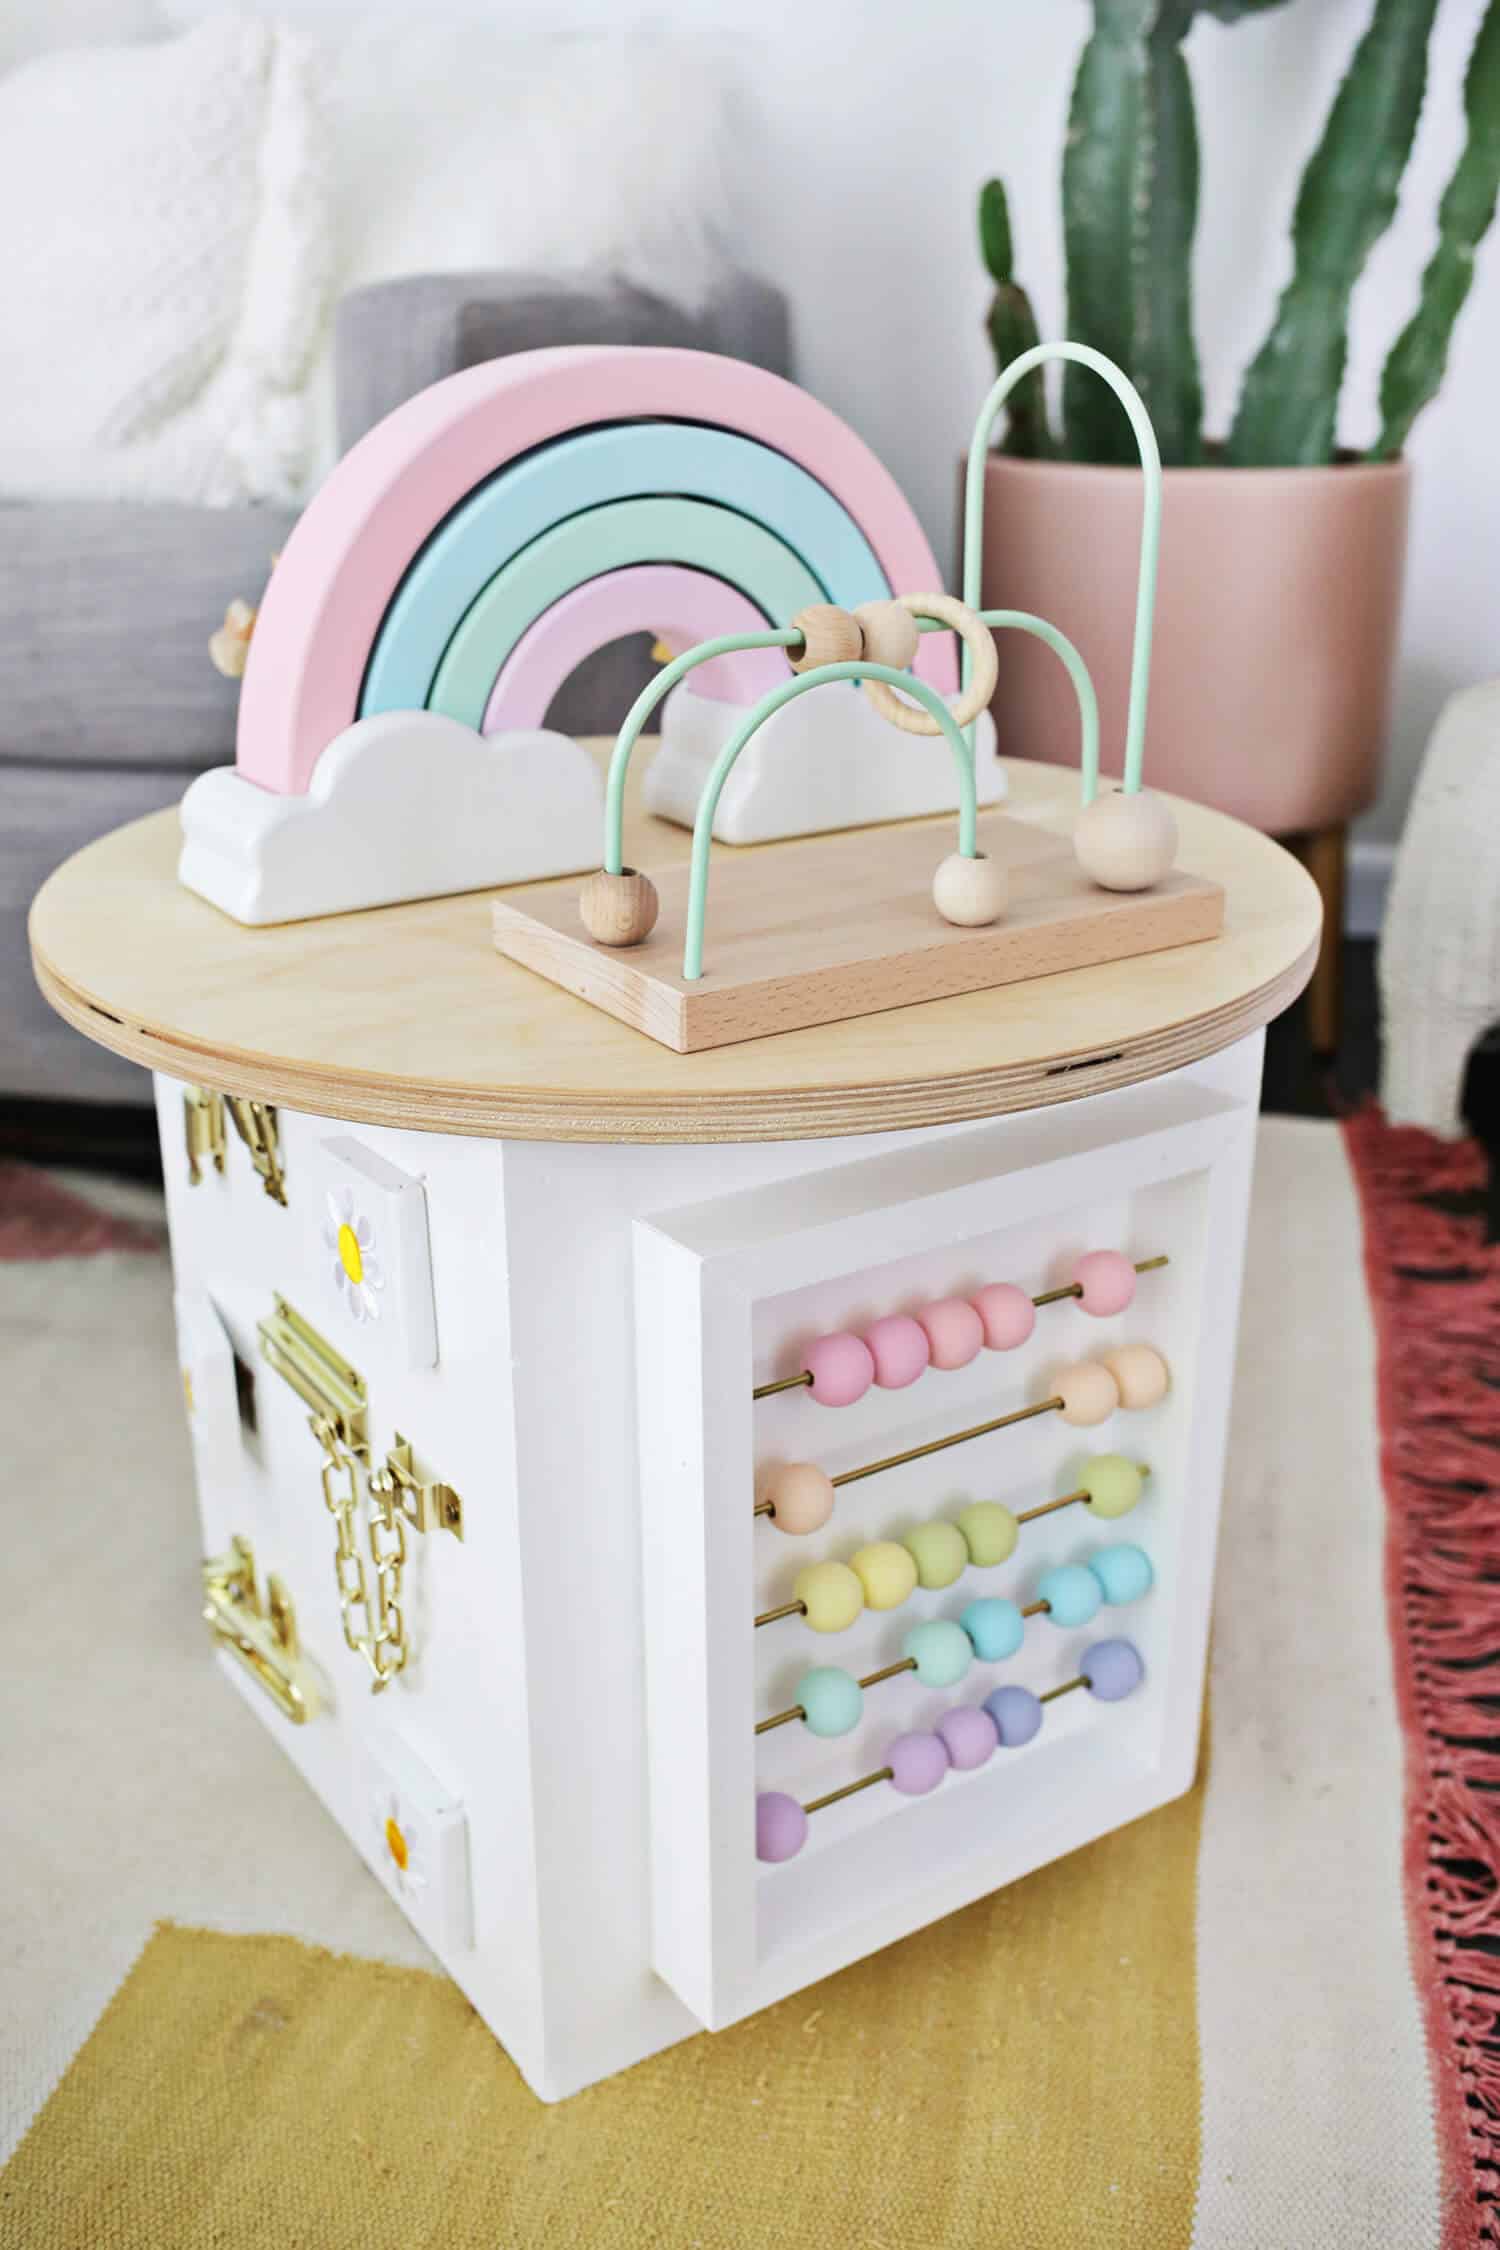
Use a 1/4″ drill bit to drill 1/2″ into each hole (you can wrap some tape 1/2″ up on your drill bit so you know how far to go in). Use the pipe cutter and cut your 5 rods 8 1/2″ long. 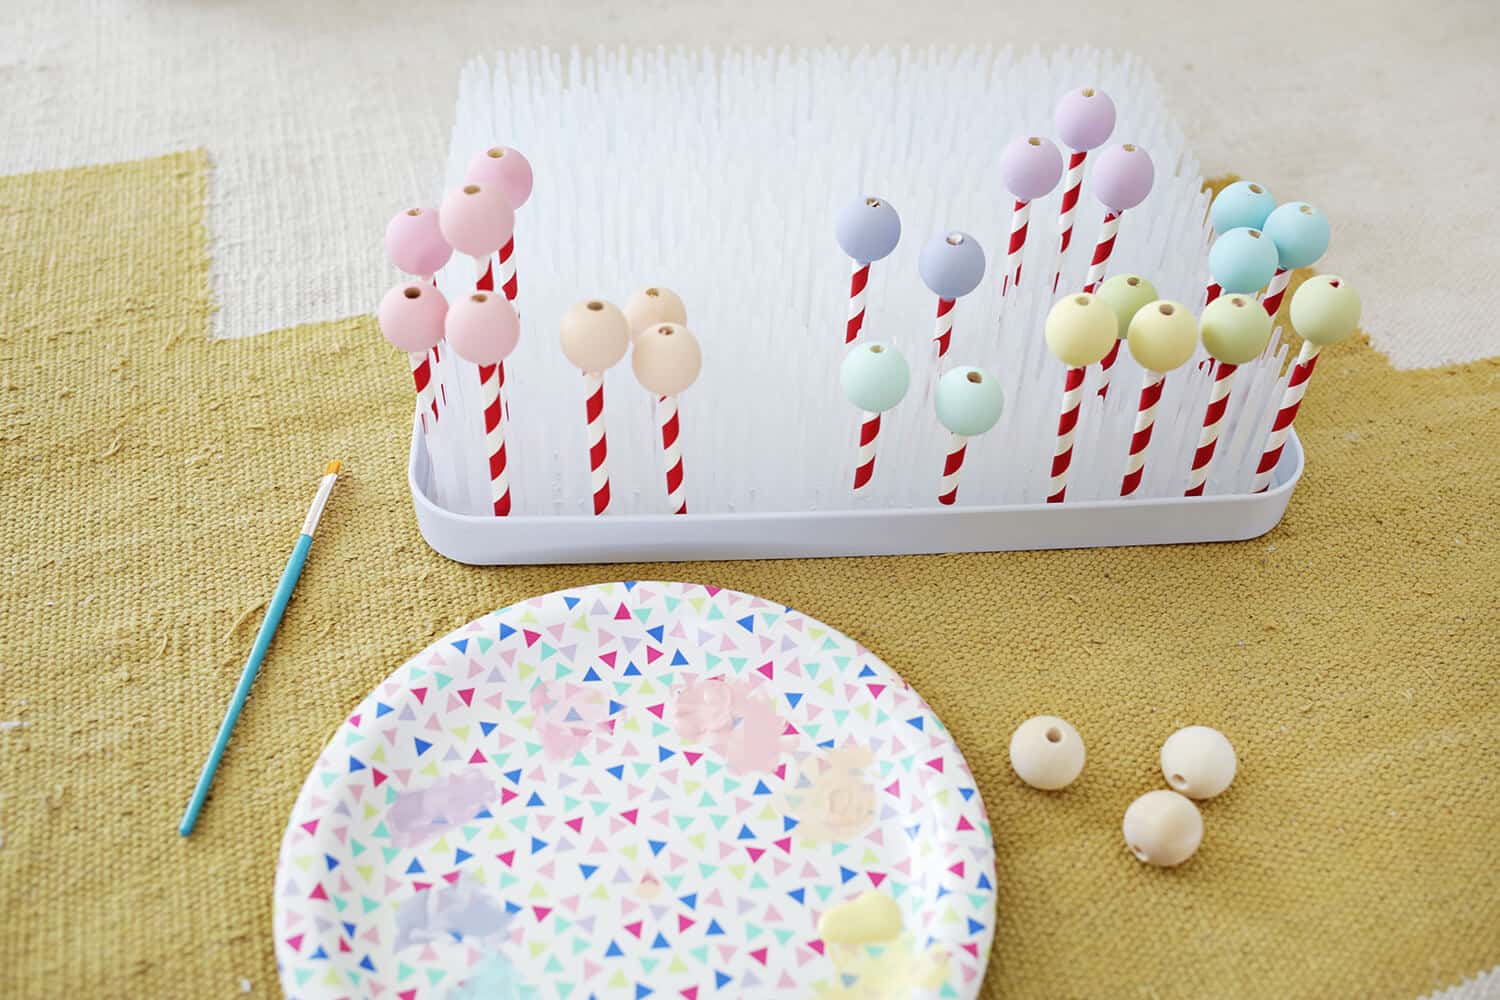 Paint your beads your desired colors (you can put them on straws to handle them more easily and I used my bottle drying rack to set them on while they dried) and your 4 frame boards white.
Place your beads onto the rods, slip the rods into the holes you drilled, and use wood glue and nails to attach your frame together. 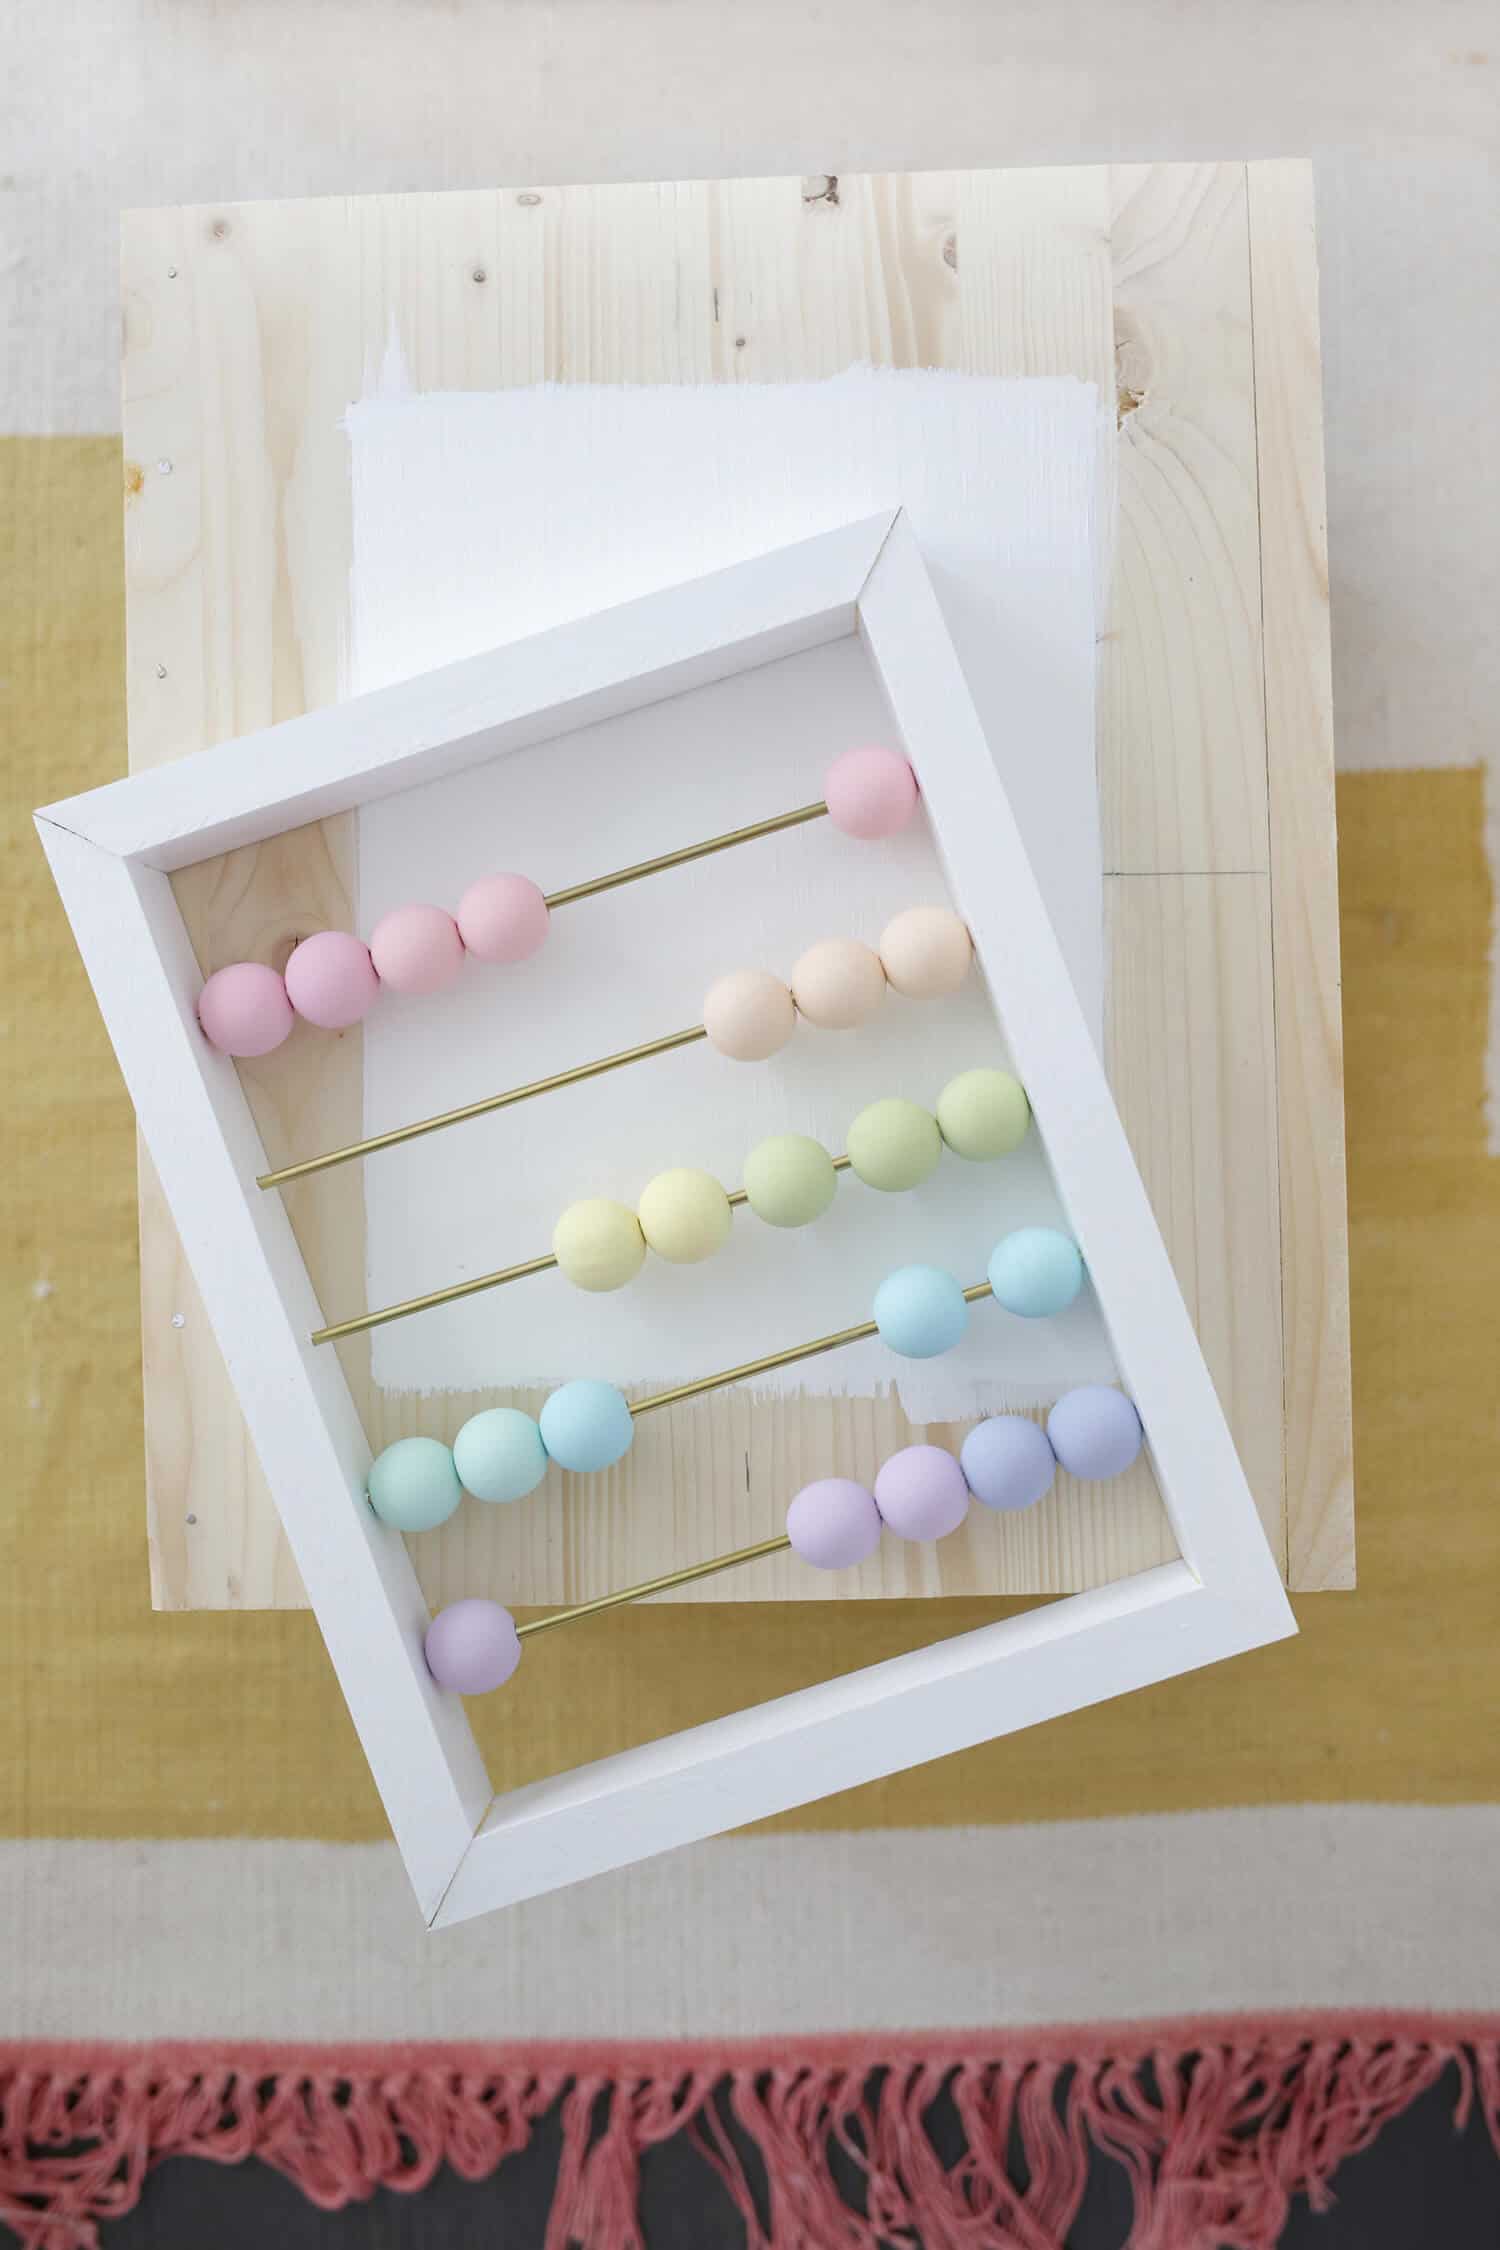 Wood glue usually bonds best when it’s bare wood touching bare wood, so I painted the inside area of the abacus first, glued the abacus on, and then painted around the outside to complete that side.
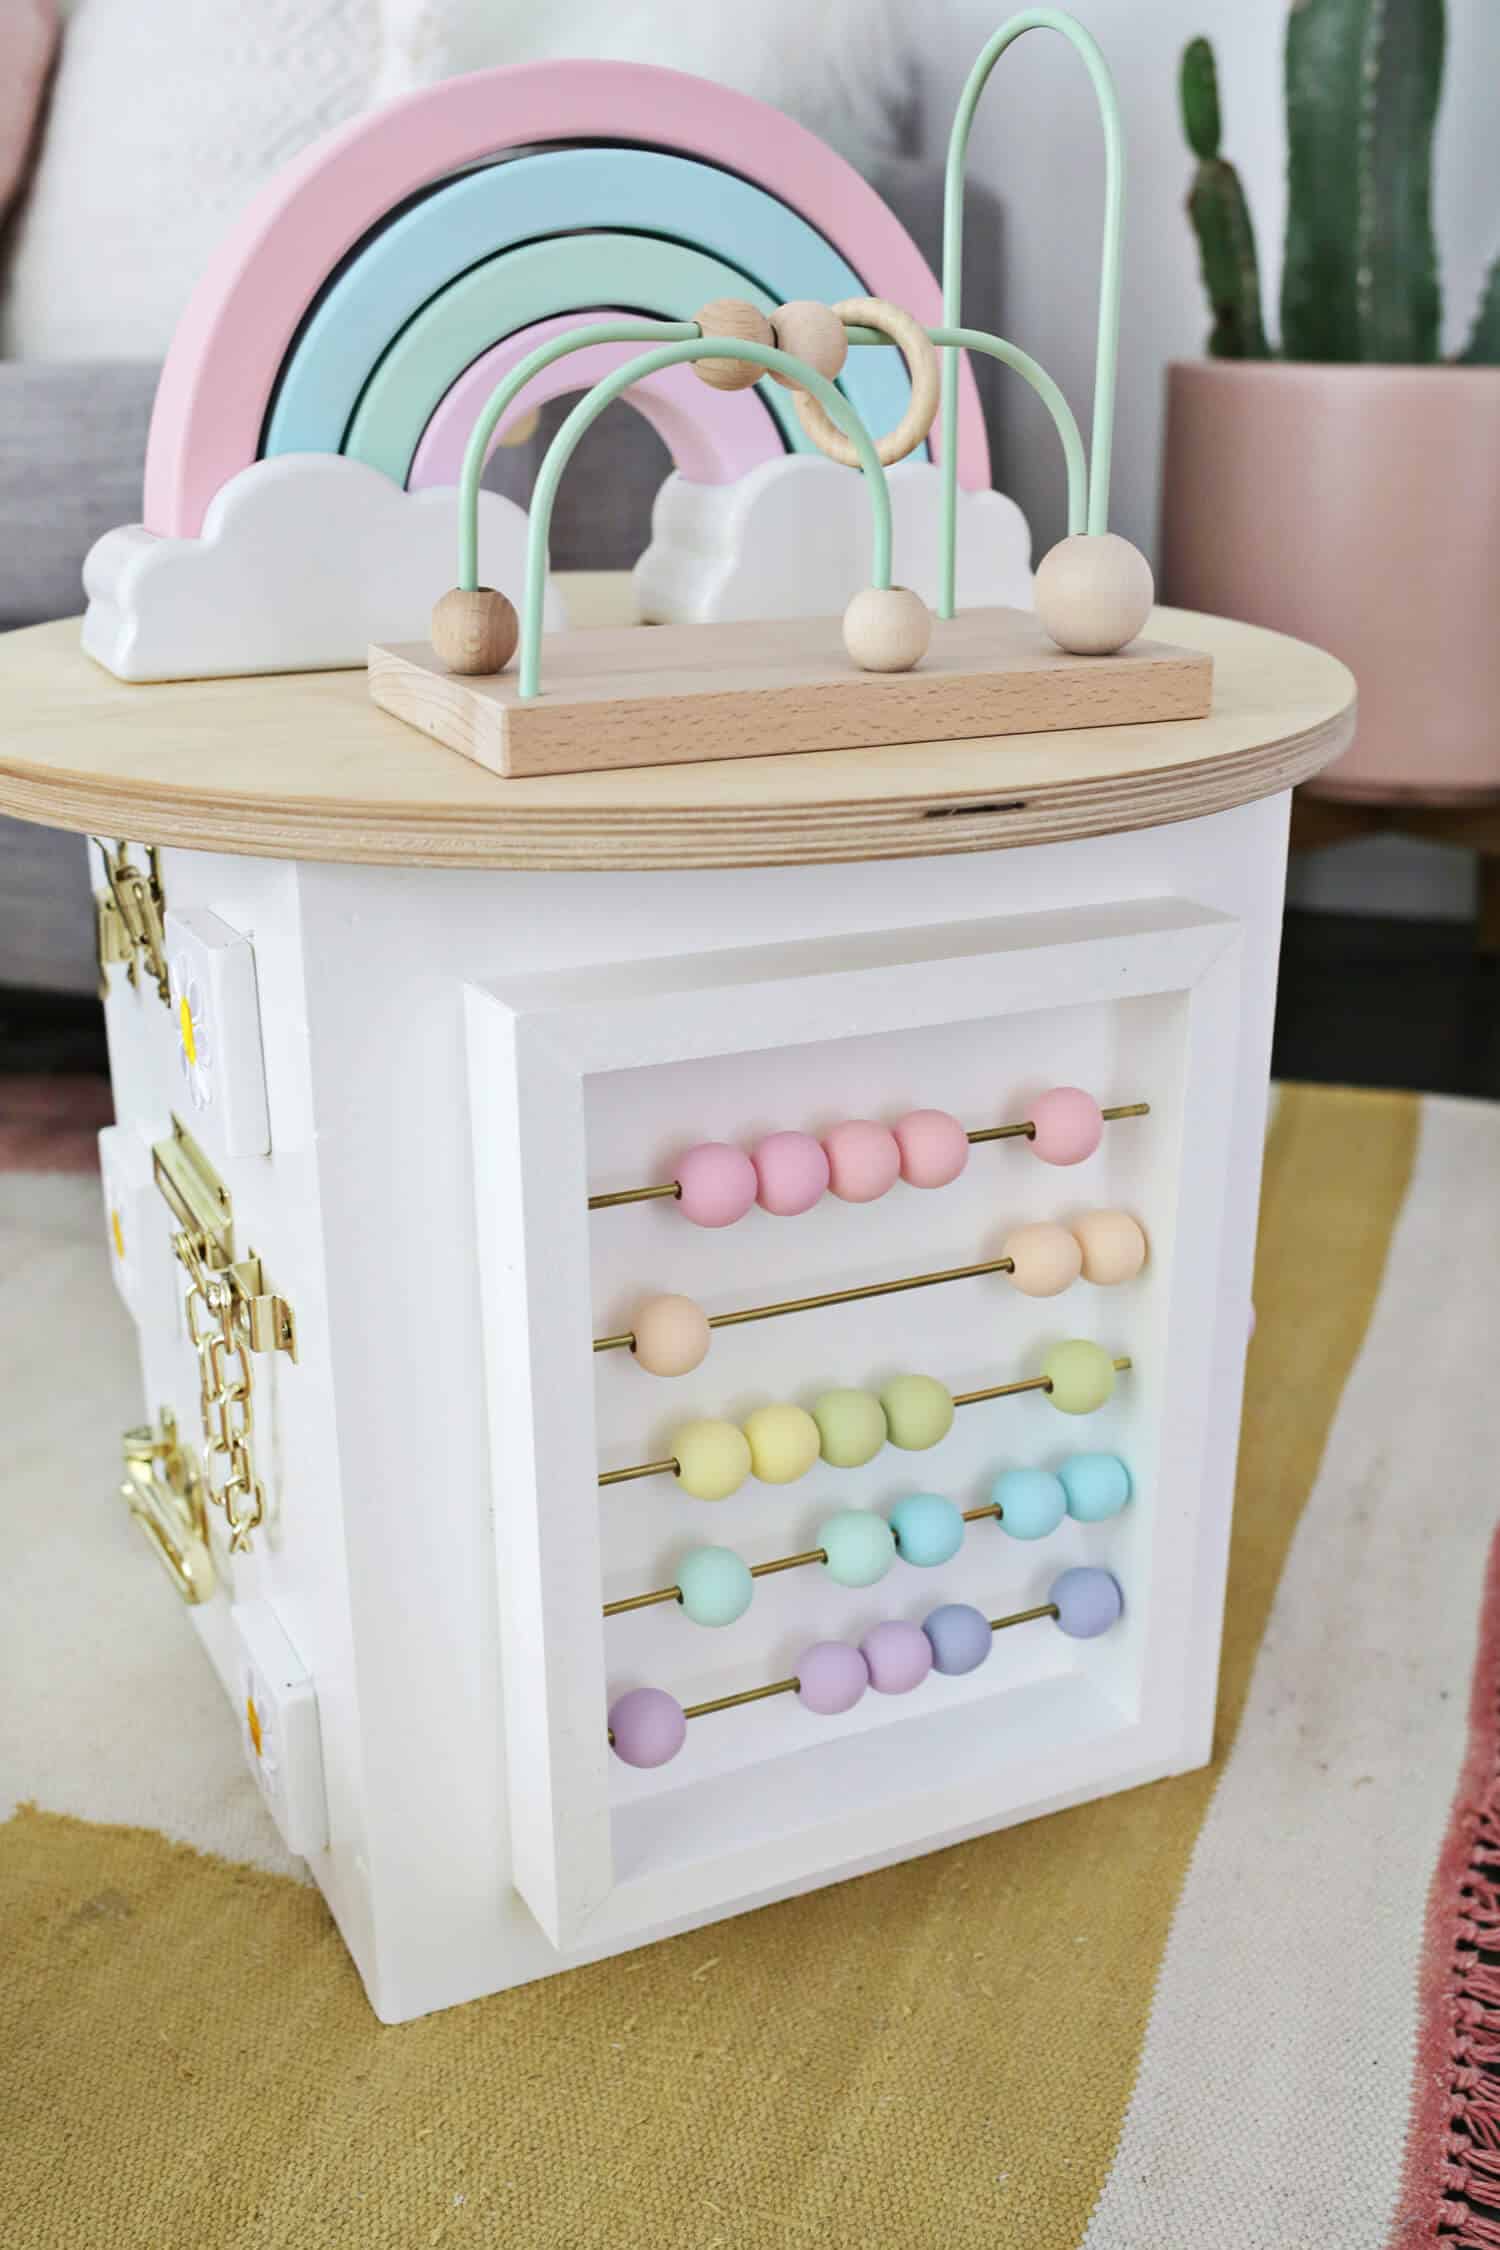 I love all the different colors on this side—so pretty! You can also buy your own mini one to save time or mount one on top instead.
 Steps to make the top side: For the top, I didn’t want to use a polyurethane since it’s a part of the toy that baby would be touching a lot. So I did a coat of food-grade mineral oil (it prevents the growth of bacteria) instead and let it dry.
Then, I used wood glue to glue the top to the bottom cube and glued on the bead maze and the cloud bases of the rainbows.
To make the springy animals, I drilled holes into the bottom of three wooden animals the width of the end of a doorstop spring (I took the white rubber top off first), drilled small holes where I wanted to mount them on the circle and screwed the bases into place.
Then, I used some super glue to secure the animals on top of the springs and they were ready to bounce around!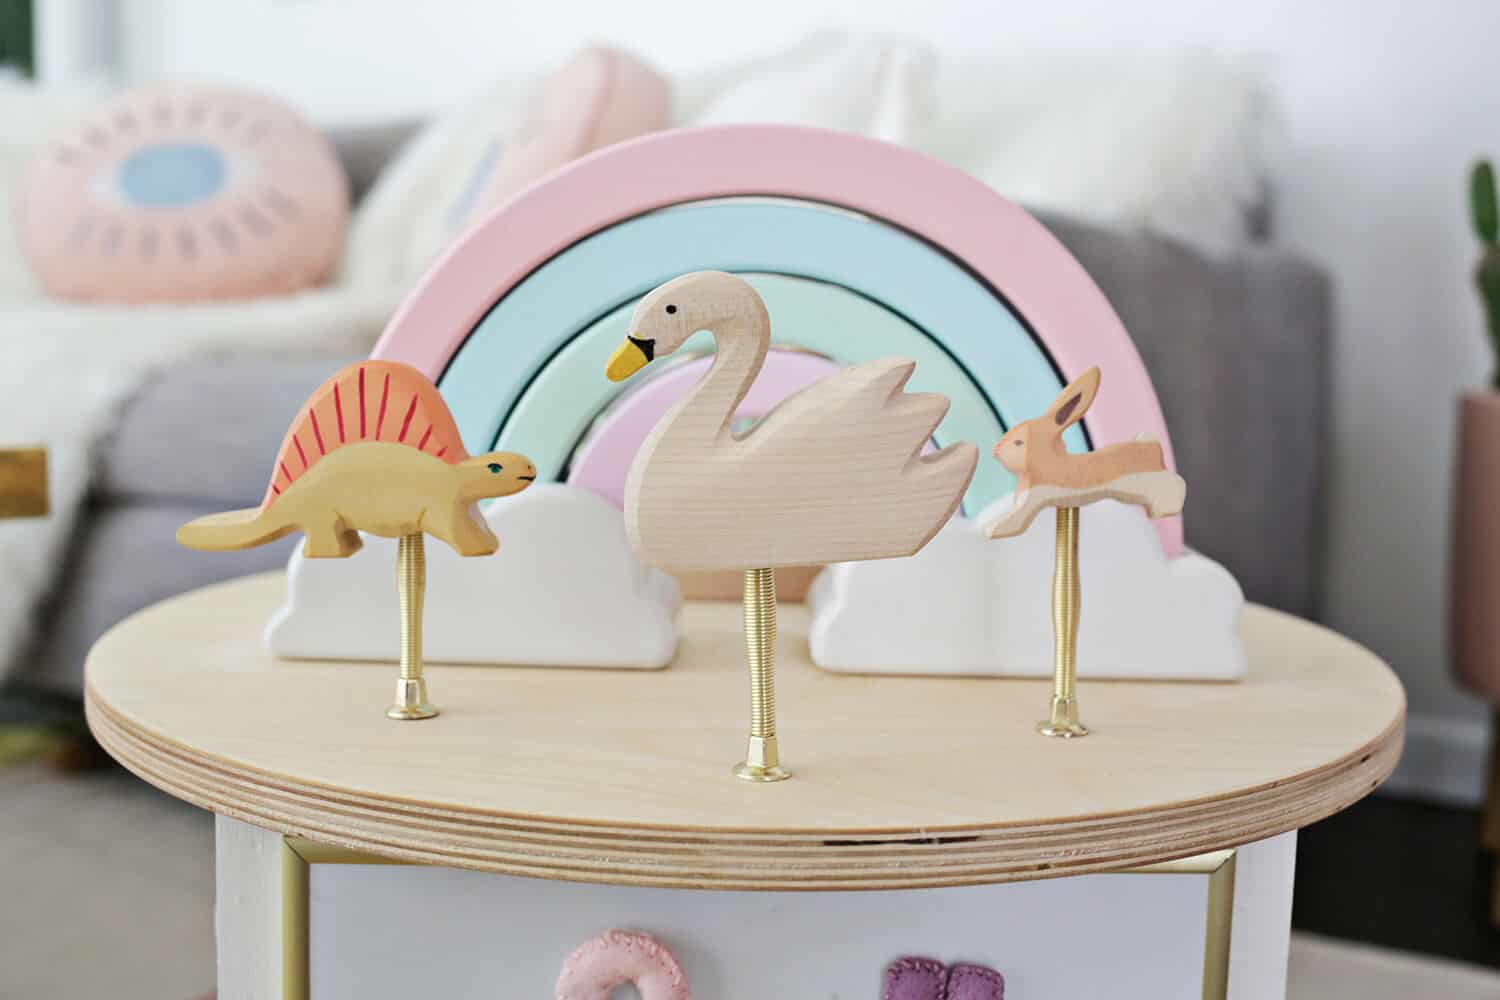 The little animals “boing” faster and the big ones go slower, but both are fun to play with!
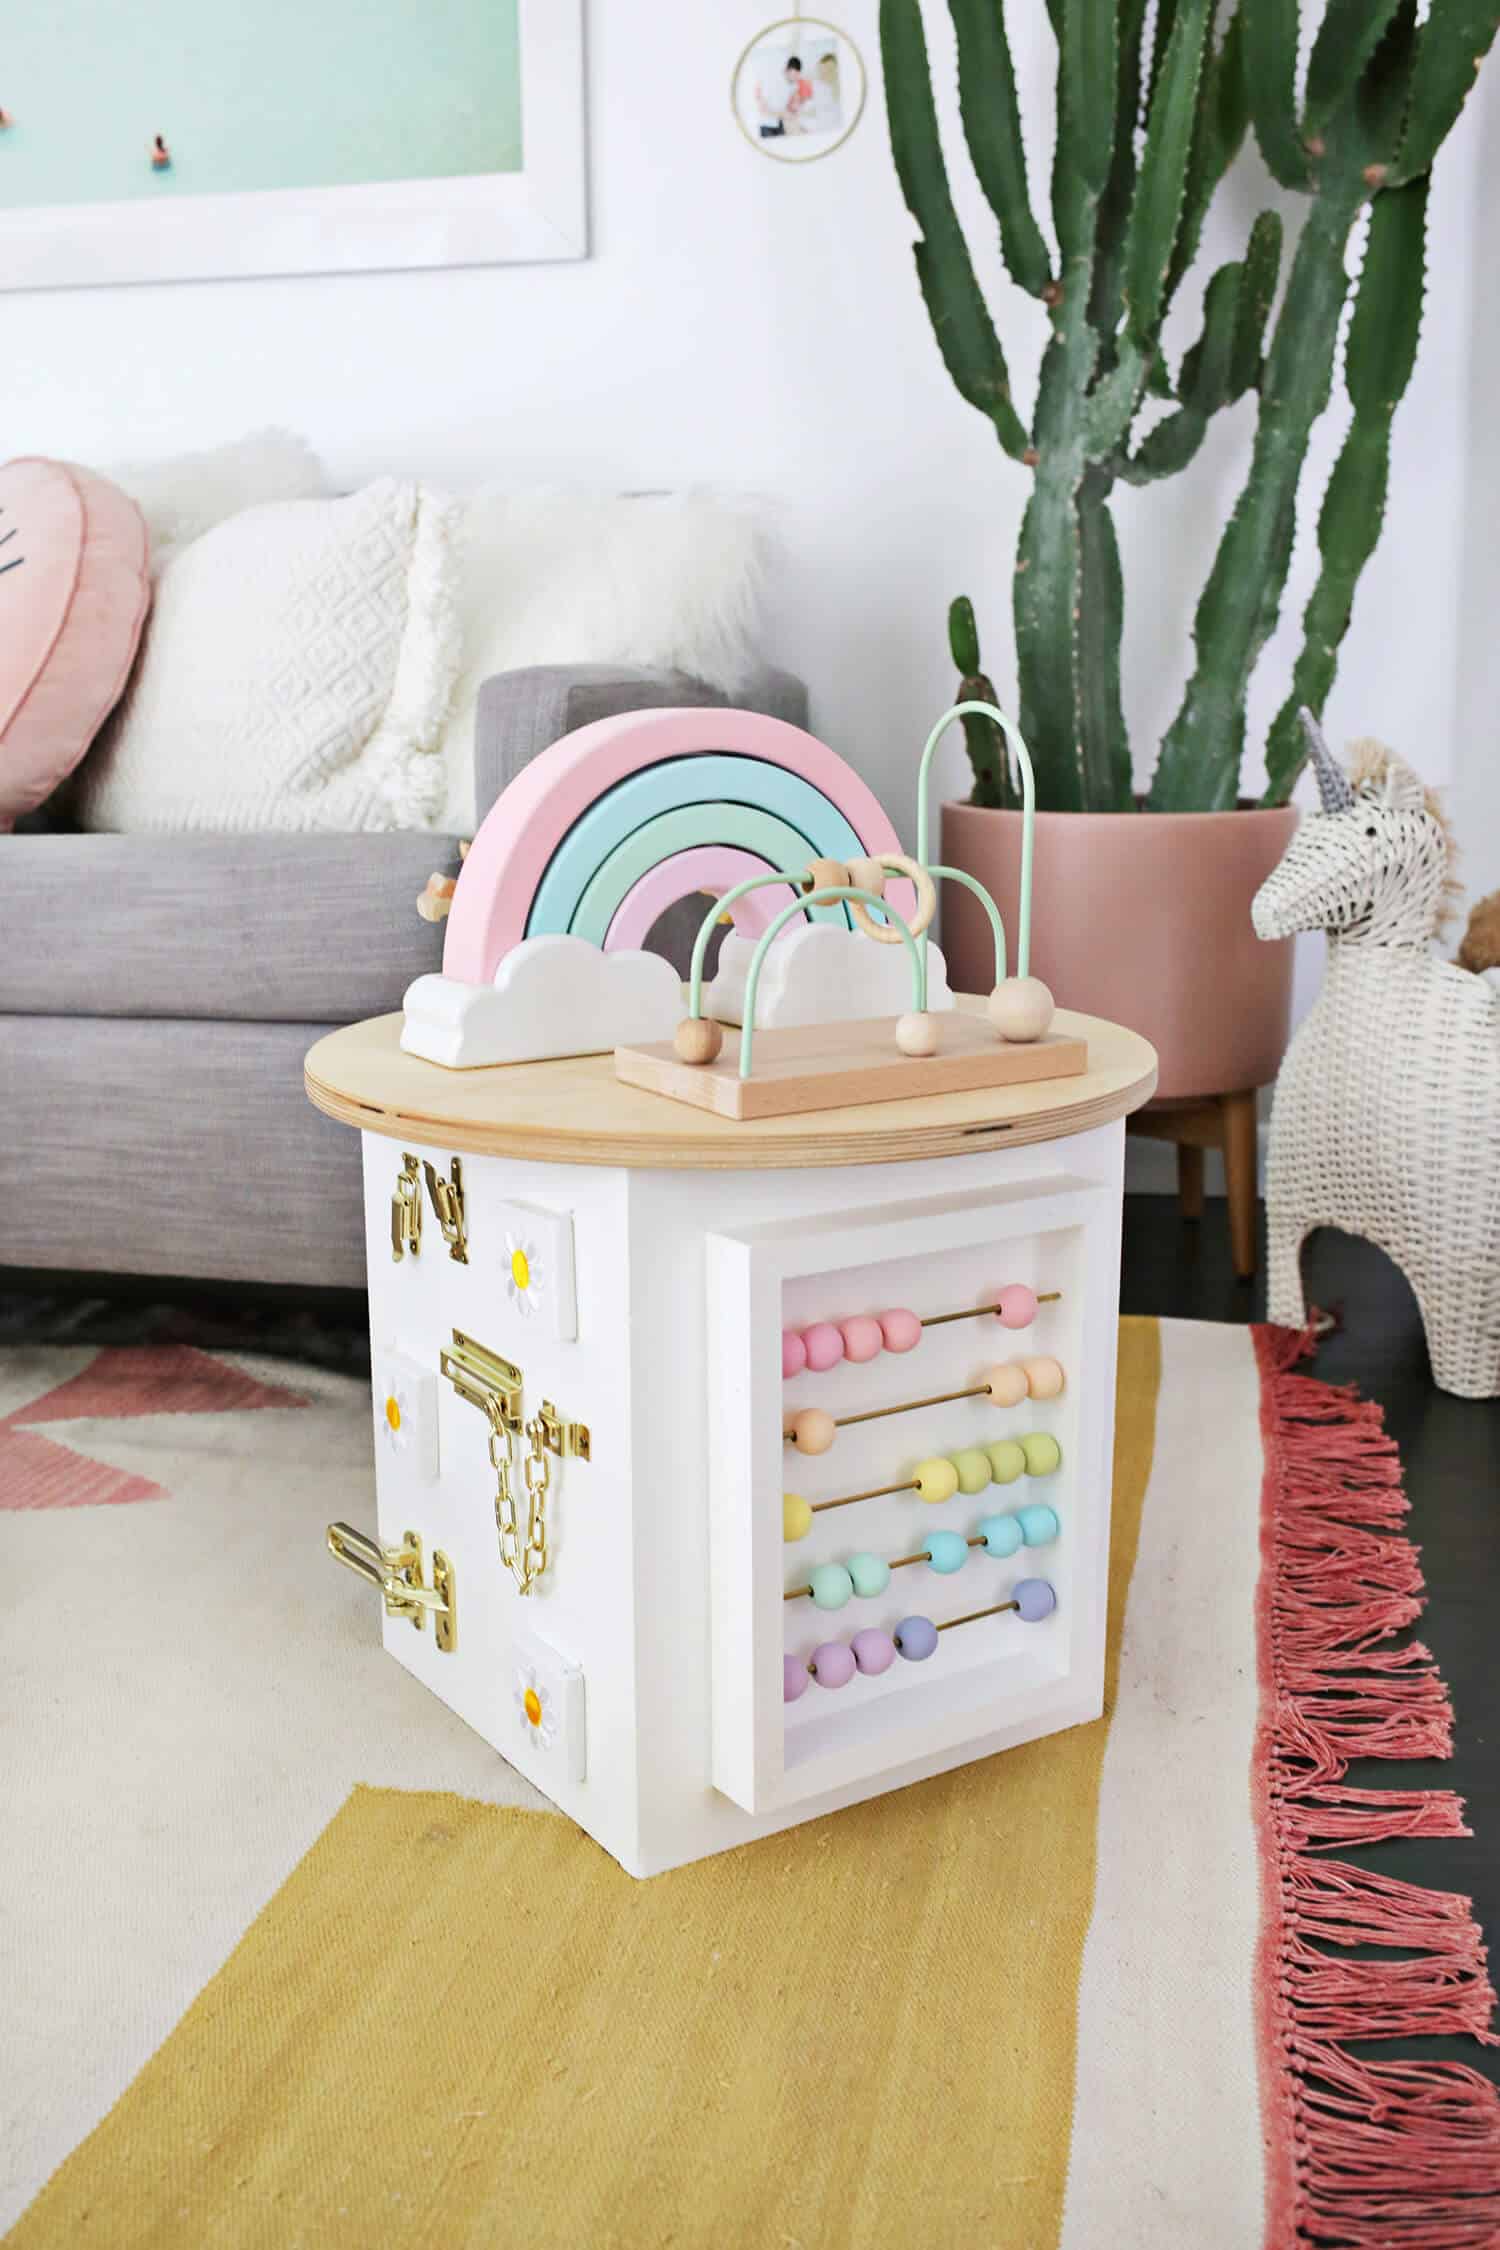
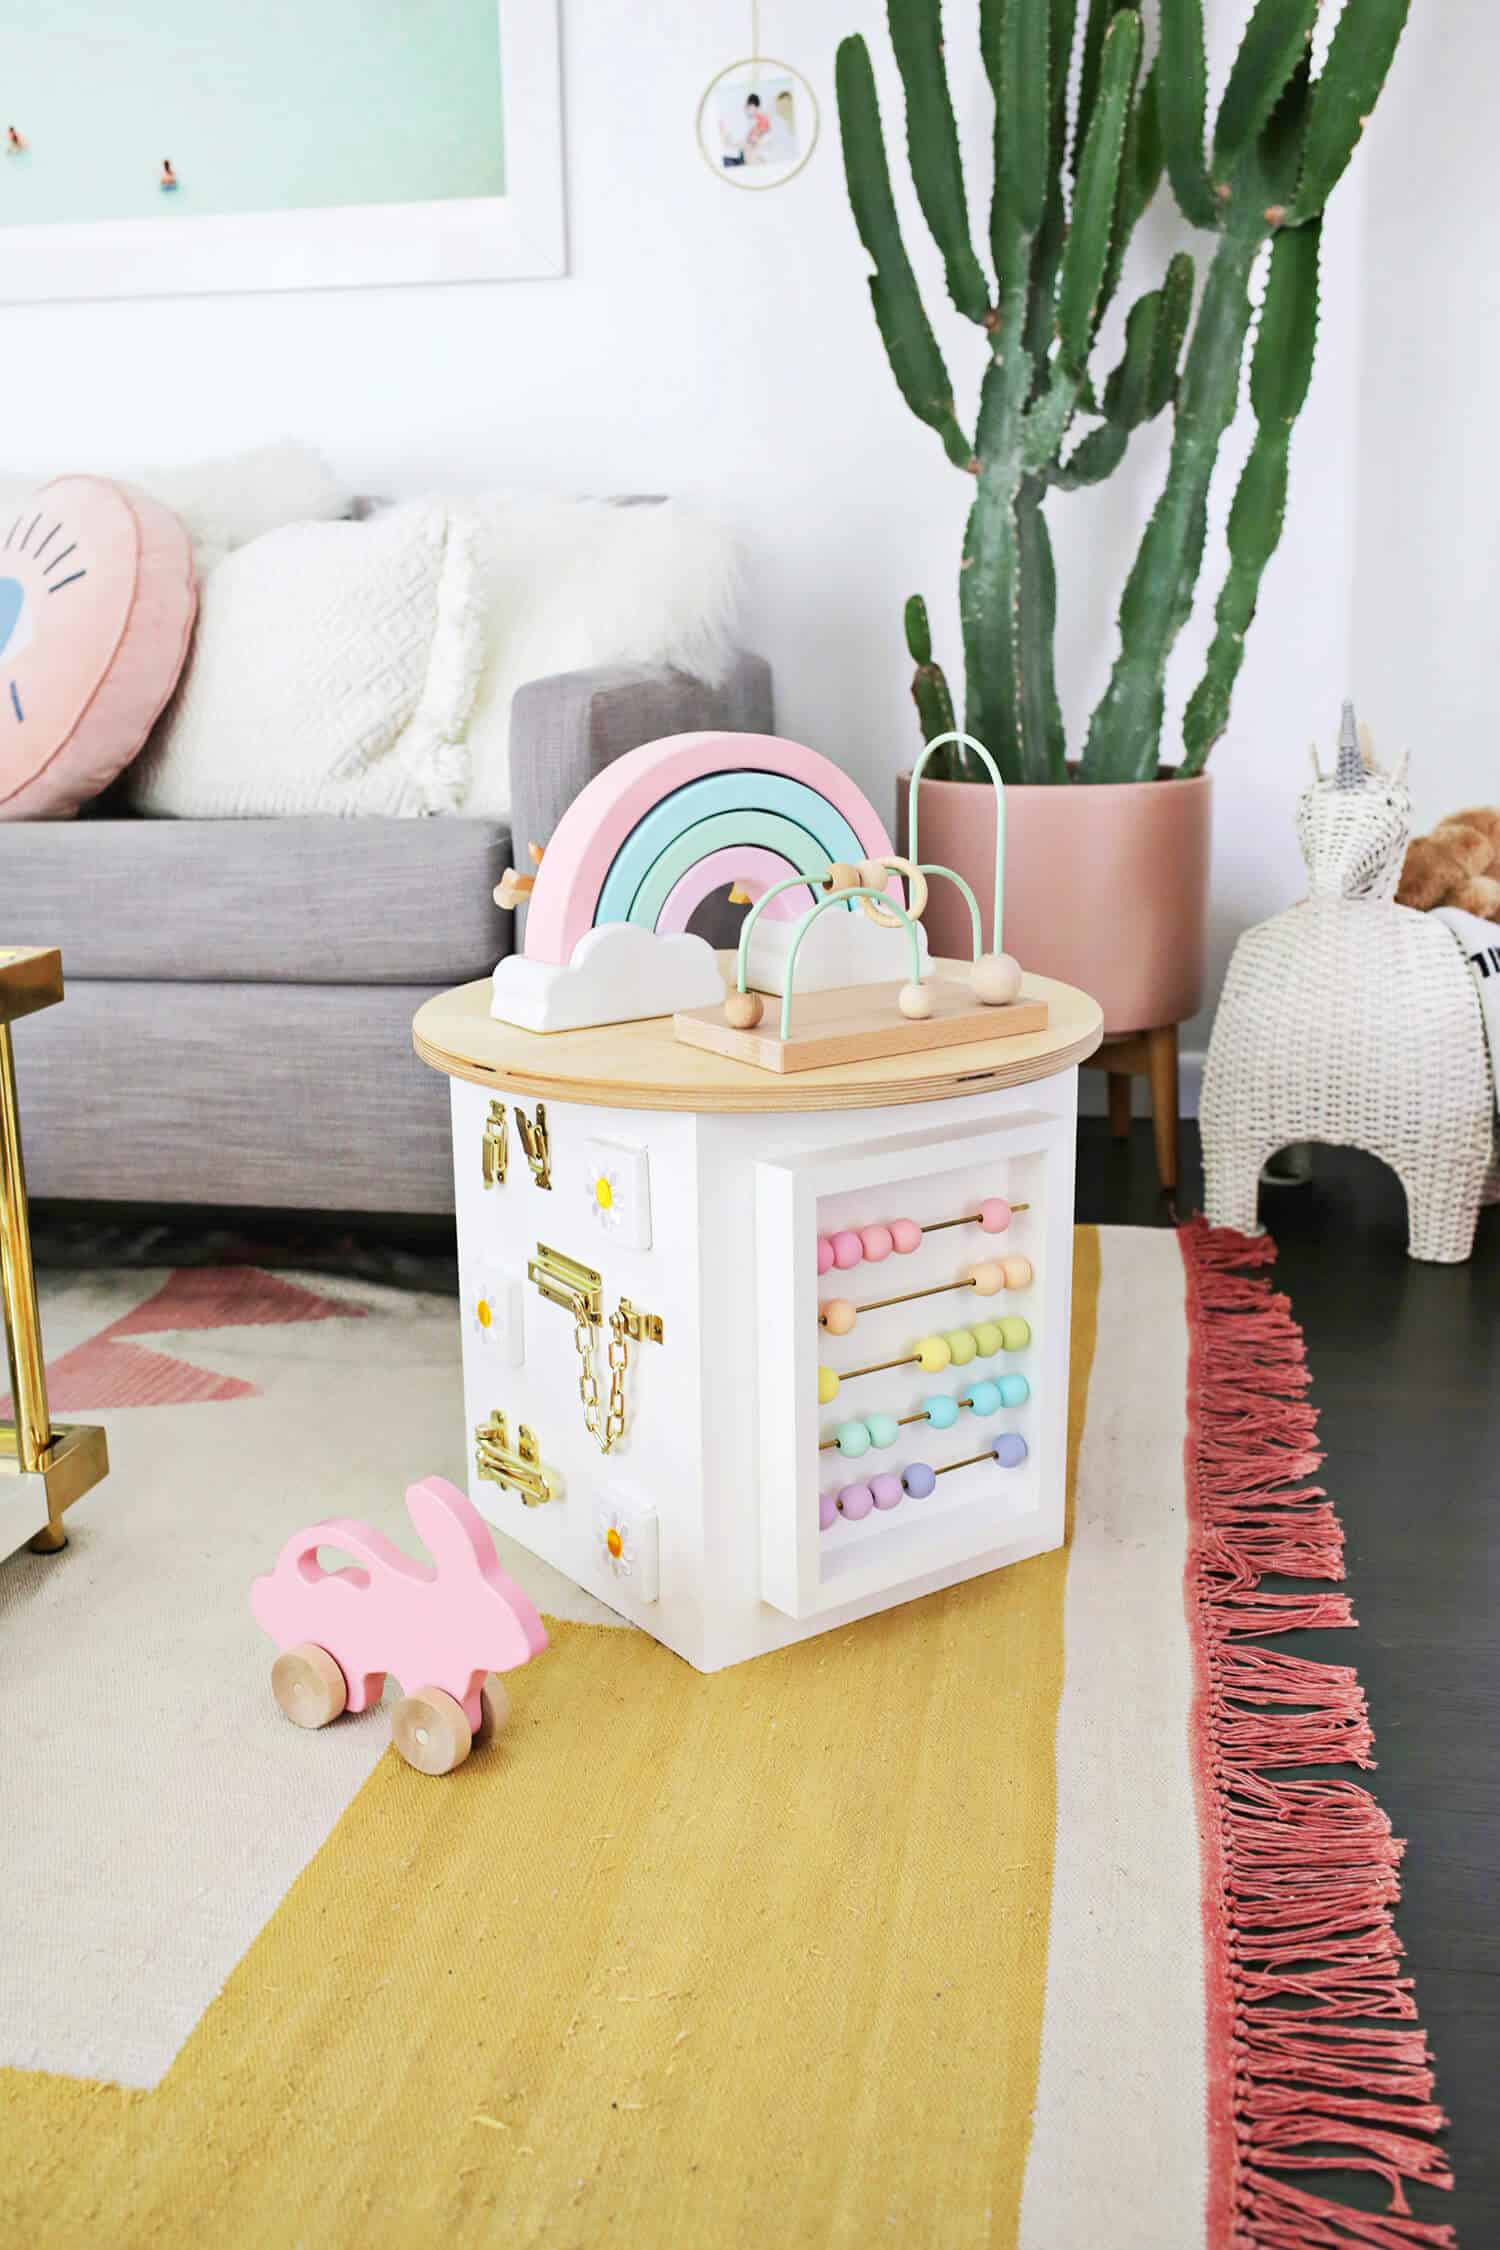
 This. Kills. Me!! Not only is it sooo much cuter than all the other ones I’d been looking at (IMHO), but it’s totally functional and you can customize the activities to whatever your toddler is into now or you can add a few things for later for them to grow to like.
It’s fun to watch them use things differently than you thought they would, like she loves to spin the beads on the abacus more than move to them from side to side, but that’s all fine as long as she is having fun.
And as a note of caution with pretty much all kid toys, I would let them play with this under adult supervision only just to be safe. Lola is able to pull herself up to standing on this without it tipping over, but even with all the other activity cubes I’ve seen, I think a kid could pull it over if they were really determined to, so you want to keep an eye on them for safe play.
And since this is not meant to be a teething toy, I went with paints that were non-toxic but not fully food-grade (food-grade paints are meant to be put in the mouth like on teethers), so if your kiddo is still in the phase where they have to taste and chew on everything, I would wait a bit to use this item.
And if you aren’t the DIY type, you can always go for a cute ready-made one this.
My favorite part about this so far is when Lola “boings” the wooden animals on the springs and then sways back and forth herself while she watches them sway—it’s SO cute!!
Hope this inspires you to make something fun for your toddler and we’ve got a full archive of kiddo DIYs if you need some inspiration! xo. Laura
P.S. Check out our tips on How to Go Out to Eat With a Toddler or make my Ikea Hack: Star Toddler Learning Tower DIY!
Love this post? Sign up for our newsletter for more ideas!

Get creative ideas for recipes, crafts, decor, and more in your inbox!
 Get the How-To

Supplies
- 12” x 3/4″ board cut into four 15” long pieces for the sides
- large round wooden circle (I got a baltic birch plywood 19″ x 3/4″ circle)
- drill and drill bits
- wood glue
- nails and a hammer
- various door latches and hinges (check the hardware section of a Home Depot-type store)
- 3-4 squares of wood about 3″ wide and about 1/2″ thick (these would work great)
- thin elastic cord
- patches or stickers to decorate doors
- sandpaper
- magnetic dry erase board (I used this one)
- felt and matching embroidery thread
- small magnets
- cotton stuffing or batting
- 1″ wooden beads
- 1/8” brass tube (x5) and tube cutter
- non-toxic paints
- 1 1/2″ x 3/4″ trim board for abacus frame
- wooden shapes for spinners (I used these and these flowers)
- machine screws and corresponding sized bolts and washers (a 3/16″ x 1 1/2″ long screw should be a good size)
- small bead maze (I used this one but this and this are also cute)
- wooden pull-apart shape toy (I got this rainbow unpainted and painted it myself with non-toxic paint)
- small wooden animals that are about 1″ thick
- food-grade mineral oil
- spring doorstops
Instructions
- To make your base, stand up your four 15” tall sides to make a tall rectangle and wood glue and nail the sides together. Sand any rough or sharp edges to soften and paint the base your desired color.
- Steps for the door and latch side: Buy a few squares of wood that are 3-4” wide (or cut some to size yourself) and use your drill bit to drill a small hole all the way through one side of the wood about ¼” from the edge. If your drill bit isn’t long enough to go all the way through, measure and mark a hole the same distance from the edge on the top and bottom and drill from both sides to make a hole the whole way through. Place your doors and your desired latches and hinges on the designated side of your activity center where you want them to go and install the hardware in place.
- Then using a small drill bit, drill a hole into your wood panel right above and below where the holes for your doors will sit, and thread a long piece of elastic cord from the back, through the wood, and back into the center of the cube. Tie the cord so the elastic is tight enough that the door will open easily and snap back into place when closed (I repainted the doors for a different look after these photos).
- You can decorate the outside and inside of your doors with stickers or patches (I used a glue gun to attach flower patches on the outside of the doors) to give baby something to see when they open the doors!
- Steps for the magnetic board side: Attach your board with glue or whatever adhesive pads your board may have come with to the cube.
- Fold your felt in half and cut out shapes or letters from your felt so you have two matching sides and stitch around the edge stuffing with cotton batting and 2-3 small magnets spread throughout so the 3D felt letter/shape will stick to the board. I would recommend securing the magnets inside the felt letter rather than gluing them on the outside so they don’t come off and become a choking hazard. You can also buy a set of whatever kind of magnets you want to use as well!
- Steps for the spinner side: Take your wooden shapes and glue 2-3 of them together if your wood shapes are really thin to make them sturdier.
- Paint the shapes your desired colors (I punched out glitter centers and used ModPodge to adhere them to the fronts with another coat on top to seal it). Place your shapes onto the cube, making sure they all have enough room to spin and drill a hole into each shape and through the cube as well.
- Place a washer onto your machine screw, then put on your wooden shape, and add a nut to the other side of the shape like above. Place that into your hole in your cube and add another nut onto the other side to secure. Tighten the two nuts toward each other but leave a little room so that the shape can spin freely.
- Steps to make the abacus side: Cut 2 boards from your trim that are 7 1/2″ long and 2 that are 11 1/2″ long.
- Place your longer pieces on the outside of your shorter boards to make a rectangle and mark 5 evenly spaced holes on the long sides of where to drill for your metal rods. You can see that I cut my boards at a 45° angle to make them fit together like a picture frame, but if you don’t have a miter saw and are using a jig saw or a hand saw, you don’t have to do that part. Use a 1/4″ drill bit to drill 1/2″ into each hole (you can wrap some tape 1/2″ up on your drill bit so you know how far to go in). Use the pipe cutter and cut your 5 rods 8 1/2″ long.
- Paint your beads your desired colors (you can put them on straws to handle them more easily and I used my bottle drying rack to set them on while they dried) and your 4 frame boards white. Place your beads onto the rods, slip the rods into the holes you drilled, and use wood glue and nails to attach your frame together.
- Wood glue usually bonds best when it’s bare wood touching bare wood, so I painted the inside area of the abacus first, glued the abacus on, and then painted around the outside to complete that side.
- Steps to make the top side: For the top, I didn’t want to use a polyurethane since it’s a part of the toy that baby would be touching a lot. So I did a coat of food-grade mineral oil (it prevents the growth of bacteria) instead and let it dry. Then I used wood glue to glue the top to the bottom cube and glued on the bead maze and the cloud bases of the rainbows. To make the springy animals, I drilled holes into the bottom of three wooden animals the width of the end of a doorstop spring (I took the white rubber top off first), drilled small holes where I wanted to mount them on the circle and screwed the bases into place. Then I used some super glue to secure the animals on top of the springs and they were ready to bounce around!
What sizes were the flowers you used?
On the spinner side, my pieces were too heavy in comparison to the machine screws, causing them to wobble a lot, also causing them to bind against the cube, finally causing the screws to tighten or unscrew.
The remedy:
I took 2” dowels and cut them into half-inch thick washers to glue against the body of the cube, then drilled the holes for the 3” machine screws, then used Loctite Permanent on the inside to keep the nut from slipping. As a result, the surface that the pieces have to rub against are the washers which prevents them from wobbling and they create a cool floating effect. On the smaller pieces, I did the same thing, but with 1” dowels cut to half an inch thick as well.
On the latch side, I replaced two of the latches with flat and traditional light switches.
Finally, instead of doing the abacus, I got a wooden puzzle and glued the base to that side. To keep the pieces on, I attached velcro to the back sides.
This is so beautiful!! My partner and I are going to try make this for our daughters 1st birthday. I’m so excited 🙂
I know you’ve linked the paint, but I was wondering what the paints are in the photo? I just adore the colors you’ve picked.
I am so excited to make this! I’m expecting any son in feb and want something fun and exciting for my toddler daughter to have. I’m thinking I’ll do a soft nautical theme for unisex fun! Love this idea and thanks for sharing!
Where did you get the three wooden animals on top? This is beautiful!
I updated the link in the supply list but they are Holztiger animals!
Laura
I know this post is from a few years ago but omg this is awesome! I was curious If you made the rainbow on top or purchased it and if so from where. I am going to get my husband to make something similar for our little one.
How did you make the rainbow?? And the other bead topper next to it?
Hi.
I’m looking to make a activity cube for my daughter and was wondering where you for the rainbow stacker from?
Thanks
Hi Kerry! Laura bought this one and painted it.
Do you have a list of the paint colors?
Only if you sold this item! I would buy immediately. haha
Hey Laura,
I can’t seem to find the bead maze you used. Would you happen to have an updated link?
Thanks!
I absolutely love this and am hoping to make some something similar for my daughter and niece.
What wood did you use? Did you use a primer before painting?
Hi Laura, can you pls advise what brand the paint is that you have used here? Loving the colours.
Thanks a lot!
Where is that darling rainbow from or did you make it ?!
Super cute! I would just worry that the spring animals would pinch those little fingers. I’ve seen several kids get hurt from trying to play with those springy door stops.
I am so obsessed with this. I am working on recreating it for my daughter for her first birthday. Can I ask did you use something specific to trace the letter? My handwriting is horrible and I will definitely need to trace something!!
Can I buy this beauty?! Haha
WOW!!! So much work and love put into this. And it really looks fantastic. Really really great job, Laura!
Much love
Eva
What kind of magnets did you use and how did you secure them inside the felt letters?
I just used 1/2″ round magnets and put them inside of two layers of a cut out letter (along with some cotton stuffing) and sewed all around the edge so the magnet is inside. Look at that photo in the steps and you’ll see what I mean 🙂
Laura
This is absolutely amazing!!! What brand are the paints and the colors? Also did you make the stacking rainbow ?
So cute and very creative!