I’ve come to a realization, and I have a confession to make—I am a litterer. A ring litterer, that is. Ever since I started wearing stacking rings, they are scattered all over my house.
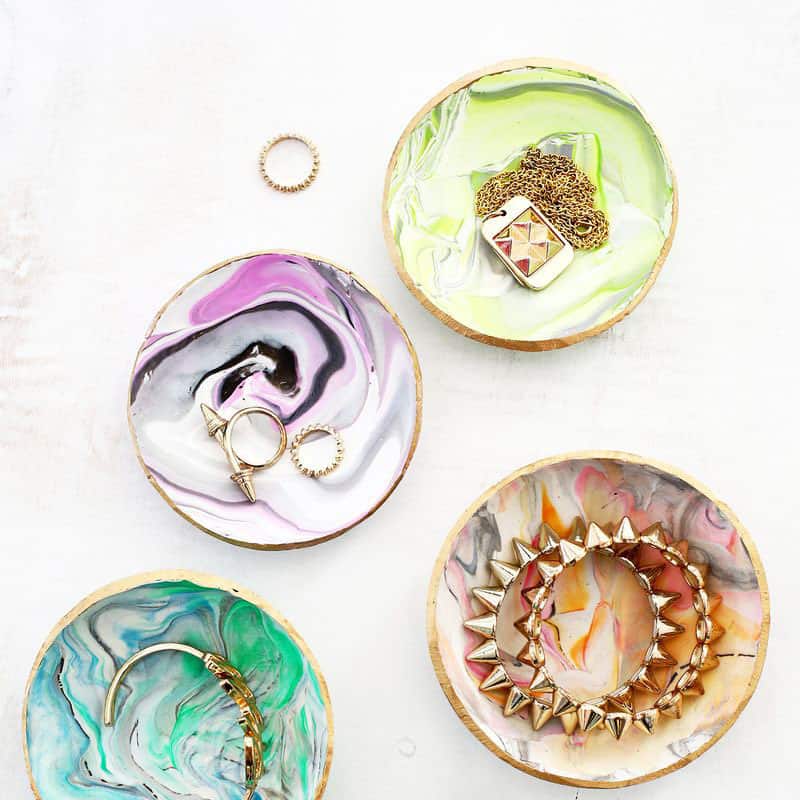
I thought it might be a good idea to keep some ring dishes throughout the house, and what’s an easy and cheap way to make a ring dish? Out of clay, of course!
Related: Palm Leaf Ring Dish DIY and 20 Easy Clay Craft Projects
Here’s a quick video tutorial to make your own marbled clay ring dishes, or keep scrolling to see the text and image tutorial:
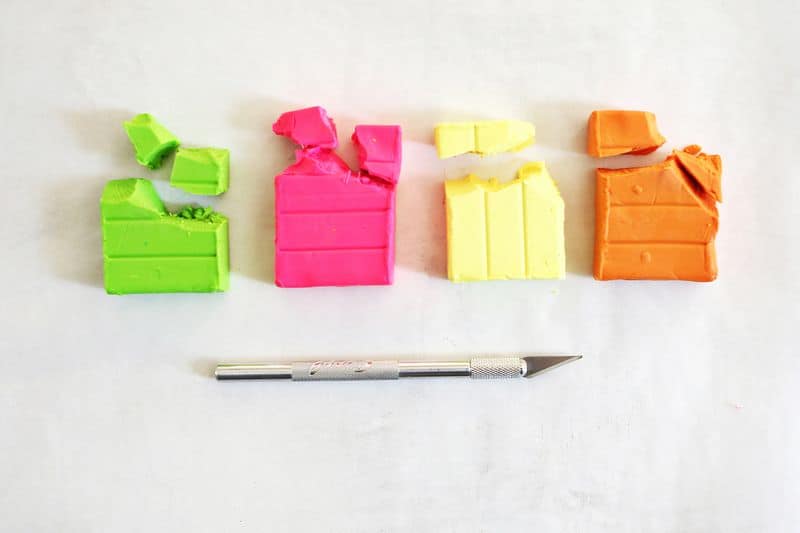
Supplies:
–oven-bake clay (white, gray, black, and the color of your choice)
*a few ounces of colored clay and the 1.75 pound white clay will make several dishes!
–X-Acto knife or plastic clay knife
-small bowl or baking ramekin (make sure they are oven safe)
–gold paint and small paintbrush
–silicone rolling pin or large round jar
-large can or jar to trace around
–glaze to seal the dish (optional)
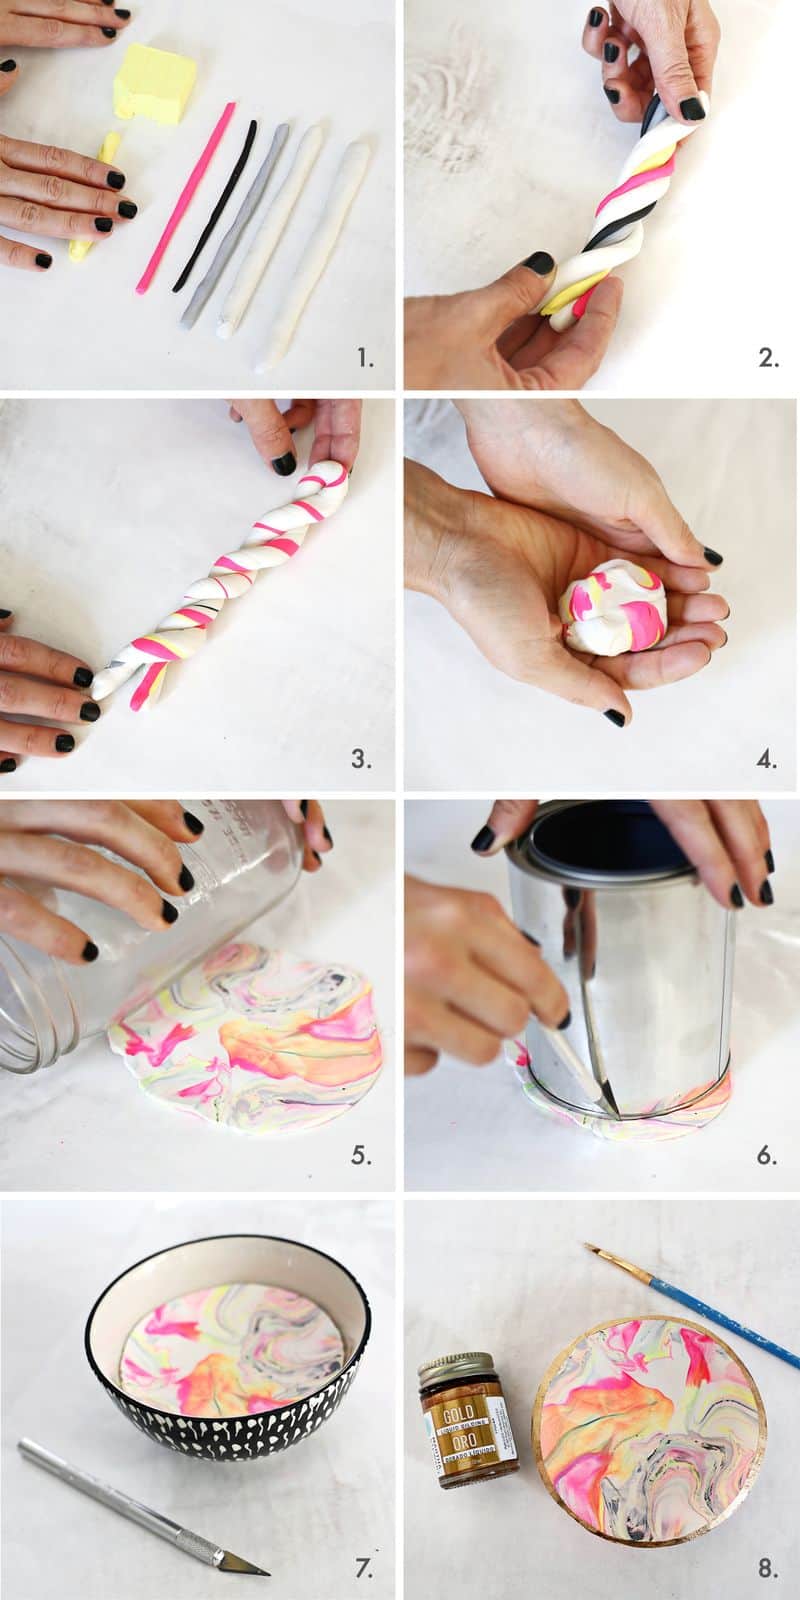
1. Roll each color of clay that you want to use into a snake (about 5″ long). I usually make two larger rolls of white, a medium roll of grey, a small roll of any color I am using, and then an extra small roll of black.
You basically want enough total clay to roll out a 6″ circle, but don’t worry about getting the exact amount of one color or another. Even if you use the same recipe every time, each dish will look different.
2. Combine the smaller rolls into one big roll and twist together.
3. Roll the large twist into a snake (about twice the original length) to combine the colors. Twist the ends opposite ways after every few motions to give the colors more of a candy cane look.
Once it’s twice the length, fold the snake in half and twist the two ends together, as pictured above. Repeat the rolling, folding, twisting, and rolling again process 2-3 times.
4. Smoosh all the clay into a ball. You want to see most of your colors on the surface of the ball, so pull the ball in half and re-smoosh together if you don’t.
5. Use a silicone rolling pin or glass jar to roll out your marbled ball. I like to use a glass jar so I can see what is happening as I roll harder or softer over certain colors.
The colors should blend together and create a marbled pattern as you roll over it. Try rolling different directions, from the edge, from the center, etc., to push the clay from different angles. Roll to 1/4″ thick.
6. Use a round item about 6″ wide as a template and cut out your dish circle with an X-Acto or clay knife.
7. Place your circle gently into an oven-safe bowl or ramekin that is a little smaller than your circle so it will sag a little in the center and give you more of a dish shape.
Bake the bowl according to the temperature on the clay package (mine was 15 minutes at 275°F). Remove the bowl from the oven and allow the clay to cool before turning the larger bowl upside down and tapping lightly until the clay dish falls out.
8. Once the clay is completely cool, use a small brush to paint the rim of the dish and allow the paint to dry. Seal the dish with a glaze if you desire.
The glaze won’t make the item food safe or totally waterproof, but it will give you a glossy finish if that’s what you’re into!
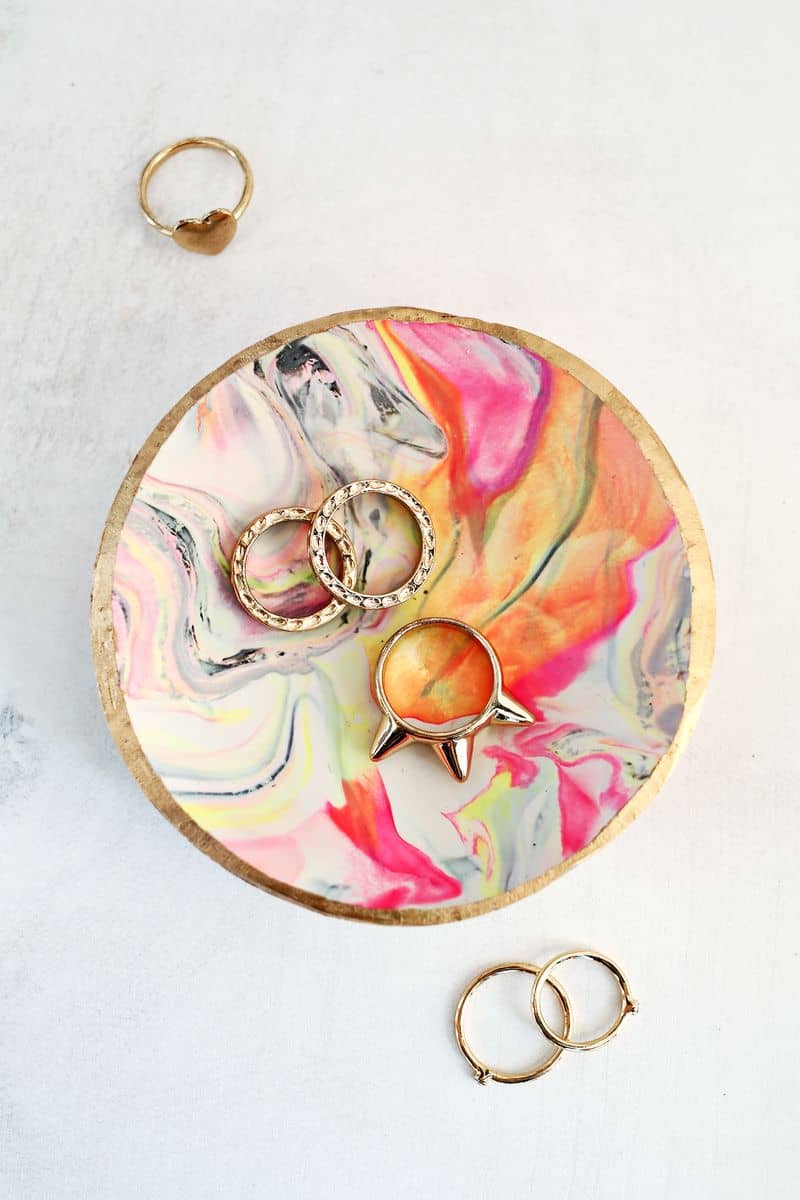
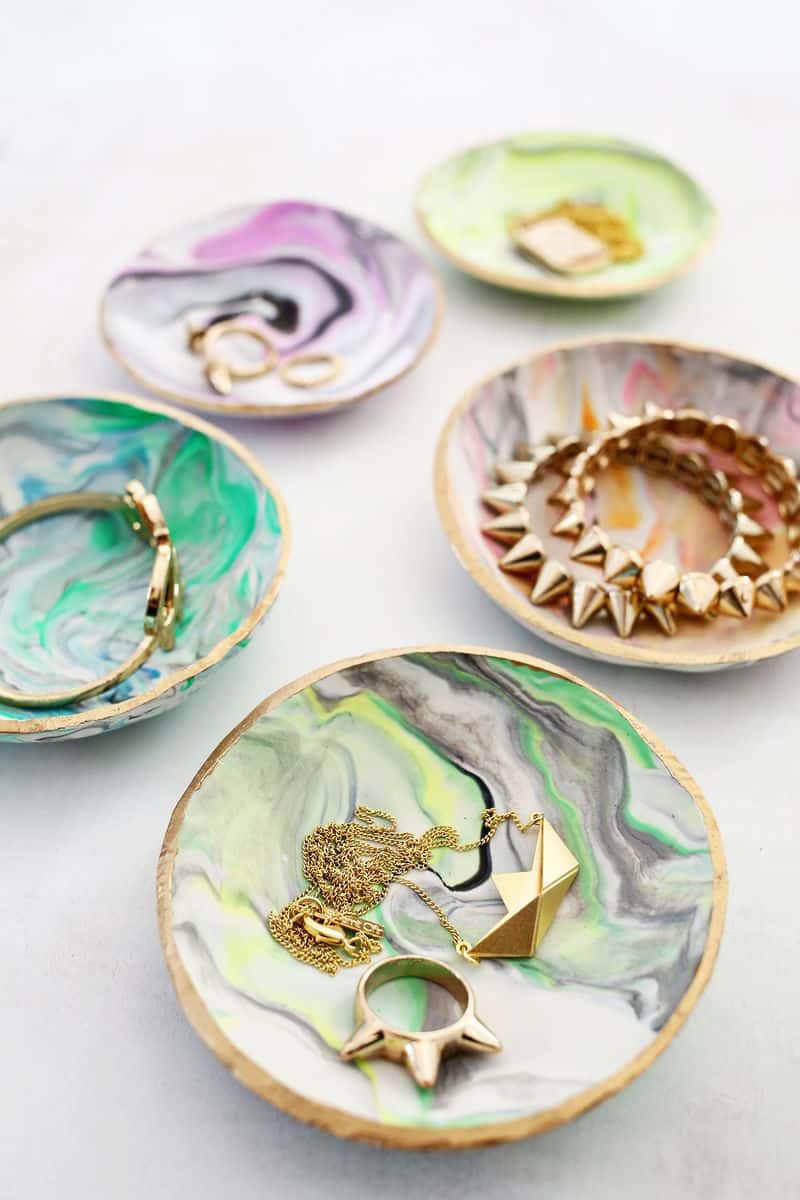
Since you are working with oven-bake clay, the dish will still be a tiny bit flexible when cooled and feel more like hard rubber than porcelain, but that’s OK! It should still keep its shape perfectly fine and hold your rings like a champ.
While the color combinations are endless, my favorites were made with white, grey, black, and two bright colors that make a pretty third color when mixed.
I would definitely suggest using a oven-bake clay like Sculpey that is already soft to start with. It will save you a lot of time and finger strength.
If you don’t feel like you’re the DIY type, you can still snag a handmade ring dish, but these bowls turned out even better than I hoped they would!
And you can see I was able to make quite a few of them, so I’ll definitely be giving a few away as gifts. How sweet would one of these be as a present with a cute ring or clay bead bracelet already in it? xo. Laura
Love this post? Sign up for our newsletter for more ideas!

Get creative ideas for recipes, crafts, decor, and more in your inbox!
 Get the How-To
Supplies
Equipment
- 1 X-acto knife or plastic clay knife
- 1 small bowl or ramekin oven-safe
- 1 silicone rolling pin or large round jar
- 1 large can or jar to trace around
Instructions
- Roll each color of clay that you want to use into a snake about 5″ long. I usually make two larger rolls of white, a medium roll of grey, a small roll of any color I am using, and then an extra small roll of black. I don’t have exact clay measurements for you (and most people don’t have a scale to weigh exact ounces of clay anyway), so just use the photo as a guide.You basically want enough total clay to roll out a 6″ circle, but don’t worry about getting the exact amount of one color or another. Even if you use the same recipe every time, each dish will look different.
- Combine the smaller rolls into one big roll and twist together.
- Roll the large twist into a snake about twice the original length to combine the colors. Twist the ends opposite ways after every few motions to give the colors more of a candy cane look. Once it’s twice the length, fold the snake in half and twist the two ends together, as pictured above. Repeat the rolling, folding, twisting, and rolling again process 2-3 times.
- Smoosh all the clay into a ball. You want to see most of your colors on the surface of the ball, so pull the ball in half and re-smoosh together if you don’t.
- Use a rolling pin or glass jar to roll out your marbled ball. I like to use a glass jar so I can see what is happening as I roll harder or softer over certain colors. The colors should blend together and create a marbled pattern as you roll over it. Try rolling different directions, from the edge, from the center, etc., to push the clay from different angles. Roll to 1/4″ thick.
- Use a round item about 6″ wide as a template and cut out your dish circle with an X-Acto or clay knife.
- Place your circle gently into a oven-safe bowl or ramekin that is a little smaller than your circle so it will sag a little in the center and give you more of a dish shape. Bake the bowl according to the temperature on the clay package (mine was 15 minutes at 275°F). Remove the bowl from the oven and allow the clay to cool before turning the larger bowl upside down and tapping lightly until the clay dish falls out.
- Once the clay is completely cool, use a small brush to paint the rim of the dish and allow the paint to dry. Seal the dish with a glaze if you desire. The glaze won’t make the item food safe or totally waterproof, but it will give you a glossy finish. This is just an optional step.

This is a great guide to making a ring dish & I’m planning to make them with the Teens at our library. Could you tell me the width of the ramekin you used?
It was probably around 4 inches. These completed dishes are small (I would guess around 3 inches).
These are sooo fun and easy to make! I love the anticipation of seeing what the colors do. I just couldn’t get the edges smooth. Suggestions?
Wondering approximately how many ounces of white and coloured clay you used for each bowl. Hoping to make with my class, but don’t want to over purchase.
Hi Stacy! The 2 oz. packages of Sculpey colored clay plus a package of white clay will make around 3 dishes.
I’ve made these several times with my preschool students, and they always turn out beautifully!!!
Do I have to place them in ramekins? For baking? Can I use disposable cup cake tins? I want to do this as a birthday party craft activity. A group of girls will be making 2 or 3 each. I do not have that make ramekins
what size ramekin did you use?
Wanting to make these with a group. Can you please advise/estimate how much clay per bowl?
So I did these dishes and they turned out great but I sprayed the glaze finish on them and it made them sticky. I have tried blow drying them and let them sit inside in a cool area for over two weeks now. I feel like it was all a waste of time because they are so sticky. What should I do?
I bought supplies for my kids to make a set of 12 for an accent dish in our kitchen. I’m trying to research the right clearcoat/seal to make them able to eat out of. Love it!
Hi. My Girl Scout troop wants to make these as one of the activities for an Artistic Crafts badge. I know you don’t measure the amount of clay exactly but would you be able to give me a rough estimate of the total amount needed for 1 dish so that I can make sure I get enough for all 10 girls? Thank you!
I made one of these for my daughter and she wants to know if she can use it for a sage smudge bowl! Can someone answer that for me?
This is amazing!
They are so beautiful. I haven’t done them yet but today I am trying them out. I only have air dry clay and only white but I figured it would still work. for the marble part I am going to put drops of nail polish in water and then dip it in.
WOULD 100% DO 10000 TIMES.
totally giving these away as christmas presents.
This website is truly amazing thank you so much A Beautiful Mess.
From Olivia.
I’ve really enjoyed making these. Thank you for sharing such a great idea. I have a question about getting the bubbles out. Sometimes, not every time, I get bubbles in the clay from rolling it and folding it. Like little air pockets. They’re not evident when I’m rolling it out. They appear once baked. Any help is appreciated. Thank you again!!
Hi! This looks beautiful . Thanks for posting! I’m ordering supplies to do this with friends and was also wondering the size of the bowl\ramekin? I’ll have to order some oven safe ones and wanted to made sure I get the right size. In the post it says use a smaller bowl then the 6″ diameter cut but watching the video it looks like a bigger bowl was used for baking. Thanks!!
Oh wow! My daughter is desperate to start playing with clay and this would be a perfect first project! They’re beautiful! Thank you for sharing. x
What size ramekin do you use? Thank you!
Hi! I was just wondering, when you put the bowls in the oven, it the clay supposed to melt and turn into liquid? =/ just not sure if i’m doing this right!
Hi! No it’s not supposed to melt. Did you follow the instructions on the package- it must be a different kind of clay.
xx!
Um…it looks really good and easy but i dont have any clay…will it work with something else like plasteline or playdough…?
Hi no it will not work you could use play dough and not put in over or u could use air dry clay and fellow directions on pkg how ever from my experience a good PolymerClay Will out last a air dry or play dough any day !! Especially if u use a uv or other resin and cover it after words !! I’ve been a PolymerClay artist foe 8yrs now .
I can’t seem to figure out what “glaze” to use. Please advise?
Seems I bought molding clay and not oven bake clay. What a waste of money darn it