
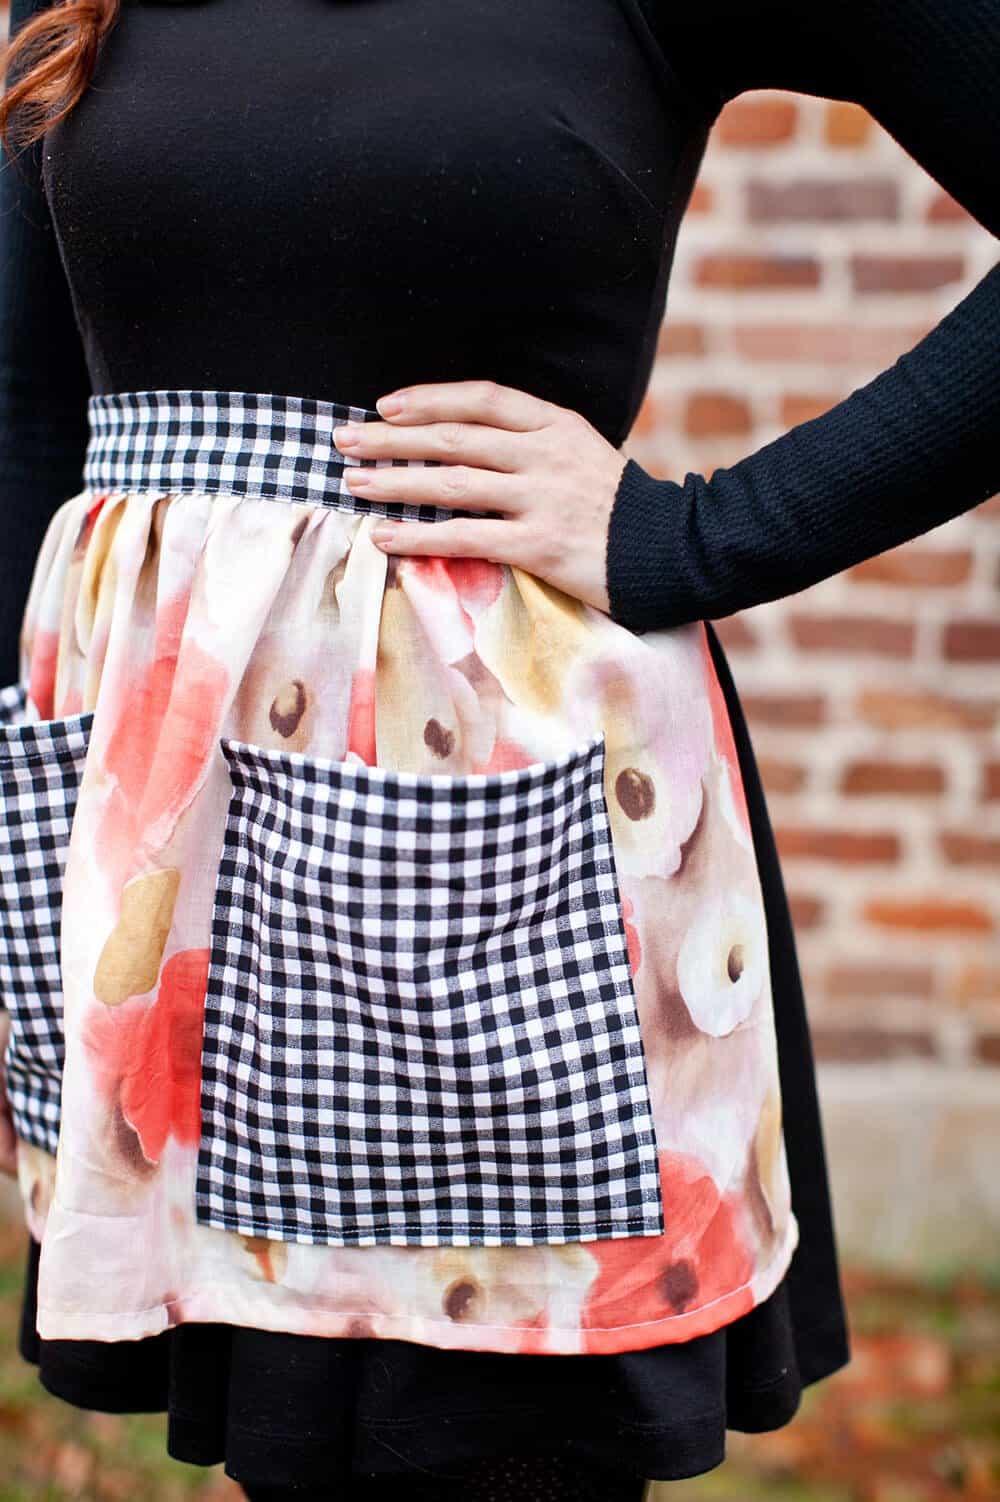
Today, I’m going to show you how to make a simple half apron with pockets. This is a great project for those still getting acquainted with your sewing machine because there aren’t any super tricky stitches or features to it.
Anyone can be successful, and you can get super creative with your choice of colors and pattern (and pattern mixing) with the fabrics for your half apron.
Related: Check out our archive of sewing projects here.

I would recommend choosing fabrics that hold up well to being machine washed (so you can USE your apron in the kitchen over and over again), but other than that, the sky is the limit!
Supplies:
-one 16″x36″ piece of cotton fabric (for the skirt)
-two 12″x12″ pieces of contrasting fabric (for pockets)
-one 54″x5″ piece of contrasting fabric (for the waistband)
-sewing machine
-iron and ironing board
–self-healing cutting mat
–scissors
–pinking shears
–straight pins
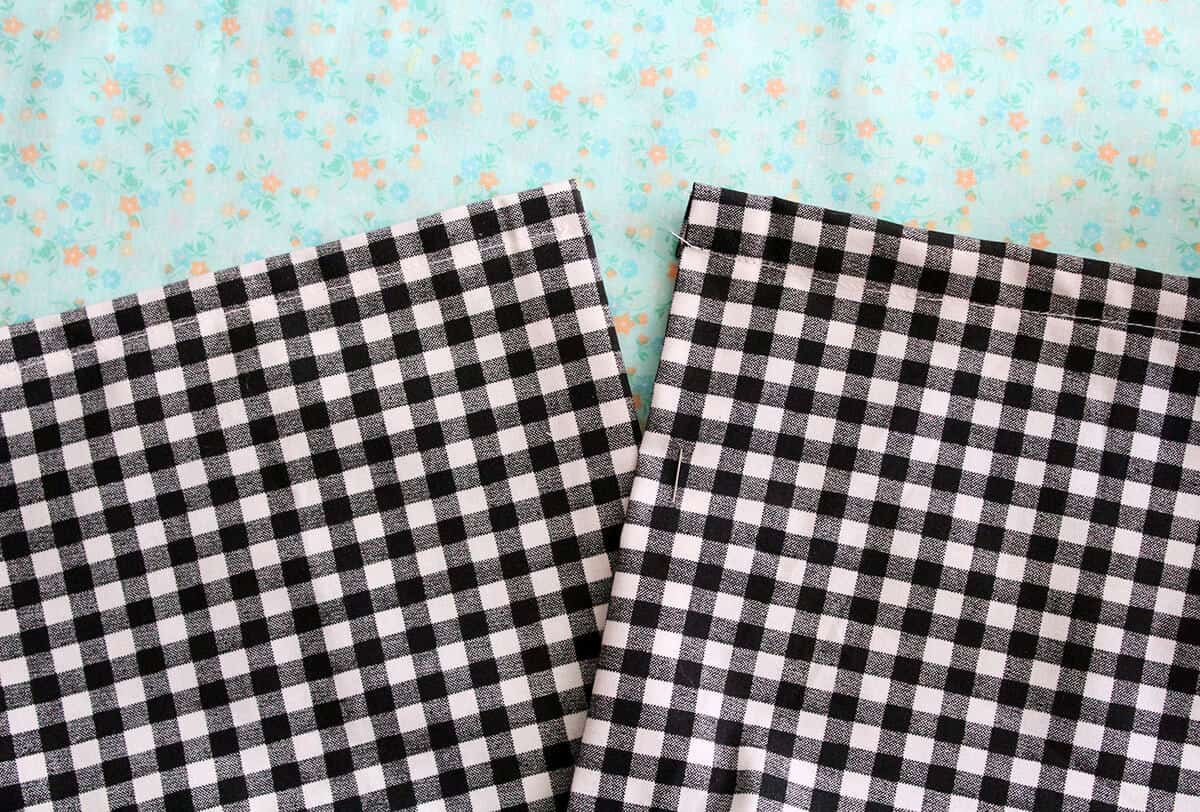
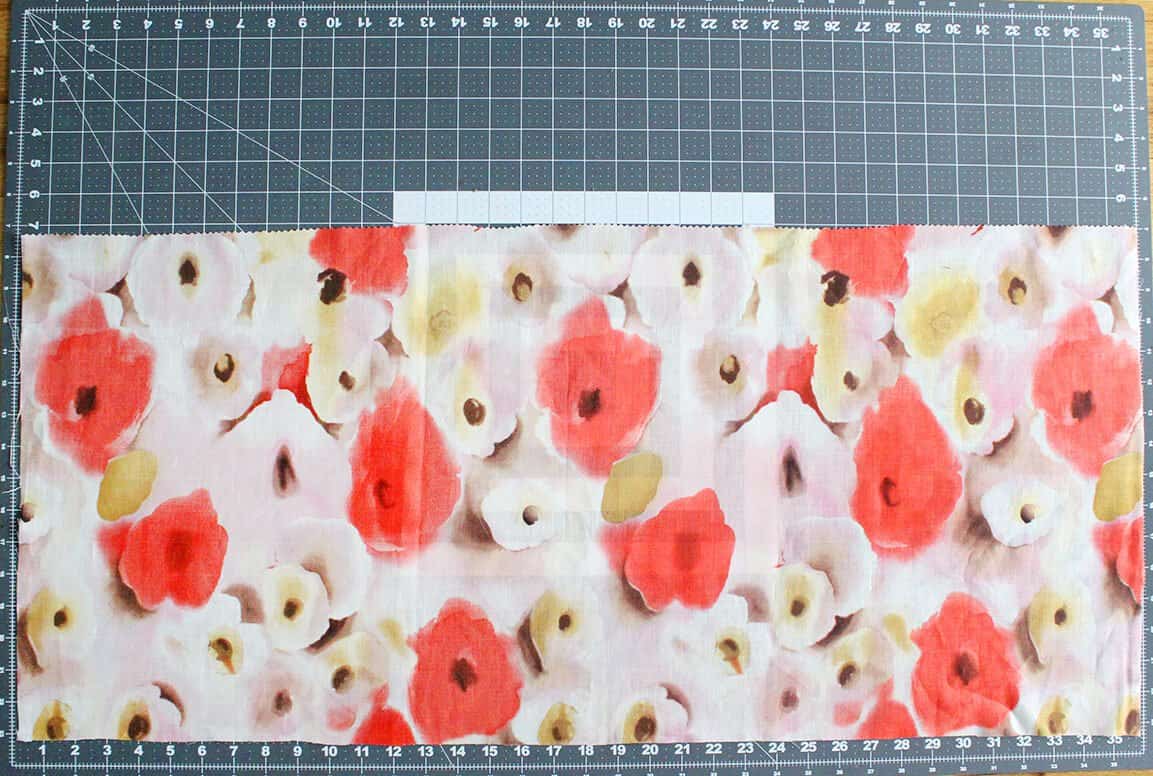 Step One: Cut out your 16″x36″ piece of fabric. This will be our skirt piece. As you can see in the photo above, I used my regular scissors for all of the edges except the top edge. I used my pinking shears for this edge. I’ll show you why in just a minute.
Step Two: Set your iron to the cotton setting because it’s time to press some edges! We are going to start with the two side edges (the 16″ sections).
Fold your side edge over 3/4″ and press. Once your edge is fully ironed, fold the edge a second time and press again. At this point you should see no raw edge. Repeat on the second side.
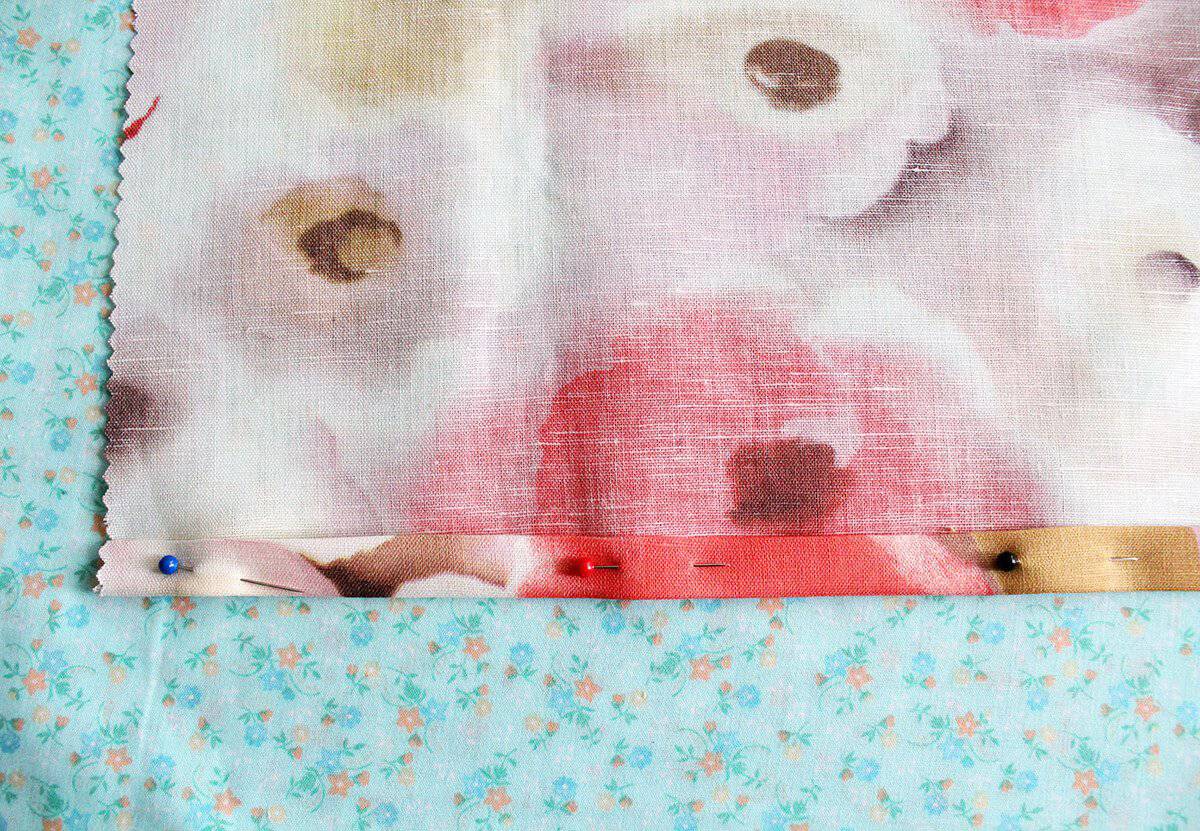 Step Three: Pin your folded edges in place. It’s time to sew our first straight edge on the sewing machine.
Step Four: Place your fabric onto your sewing machine and lower your presser foot. Remember as you start, you will want to make a stitch and then reverse it with a backstitch to secure the thread on the fabric.
Once you have done this, slowly stitch along the edge, removing pins as you go. Guide the fabric with your hand, making sure not to push it into the feed dogs. Continue stitching until you reach the end of your fabric.
Before you lift your needle and presser foot, be sure to do one or two backstitches to secure the stitch. Repeat along the second side.
 Step Five: Let’s repeat what we just did, but this time along the bottom edge. Use your iron to press 3/4″ and then fold again to press another 3/4″ hem. Take this to your sewing machine and do a straight stitch exactly as you did on the sides.
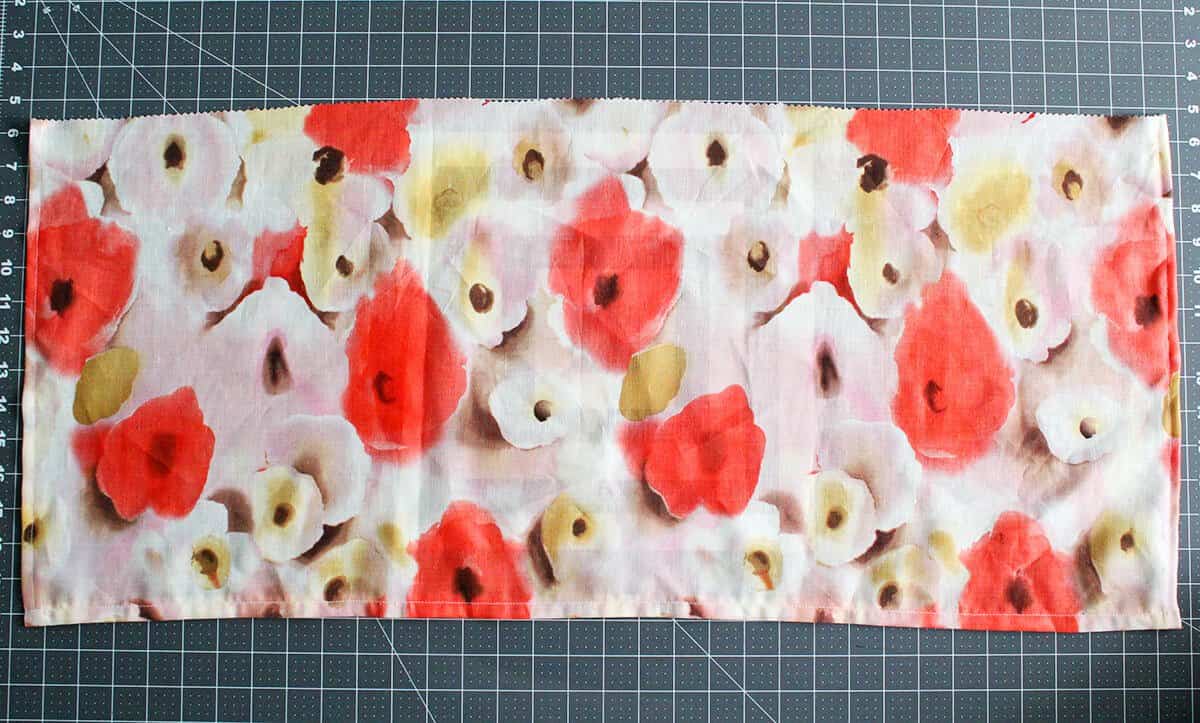 Step Six: Once you get the bottom edge stitched, it should look like this. We now have two hemmed sides and one hemmed bottom.
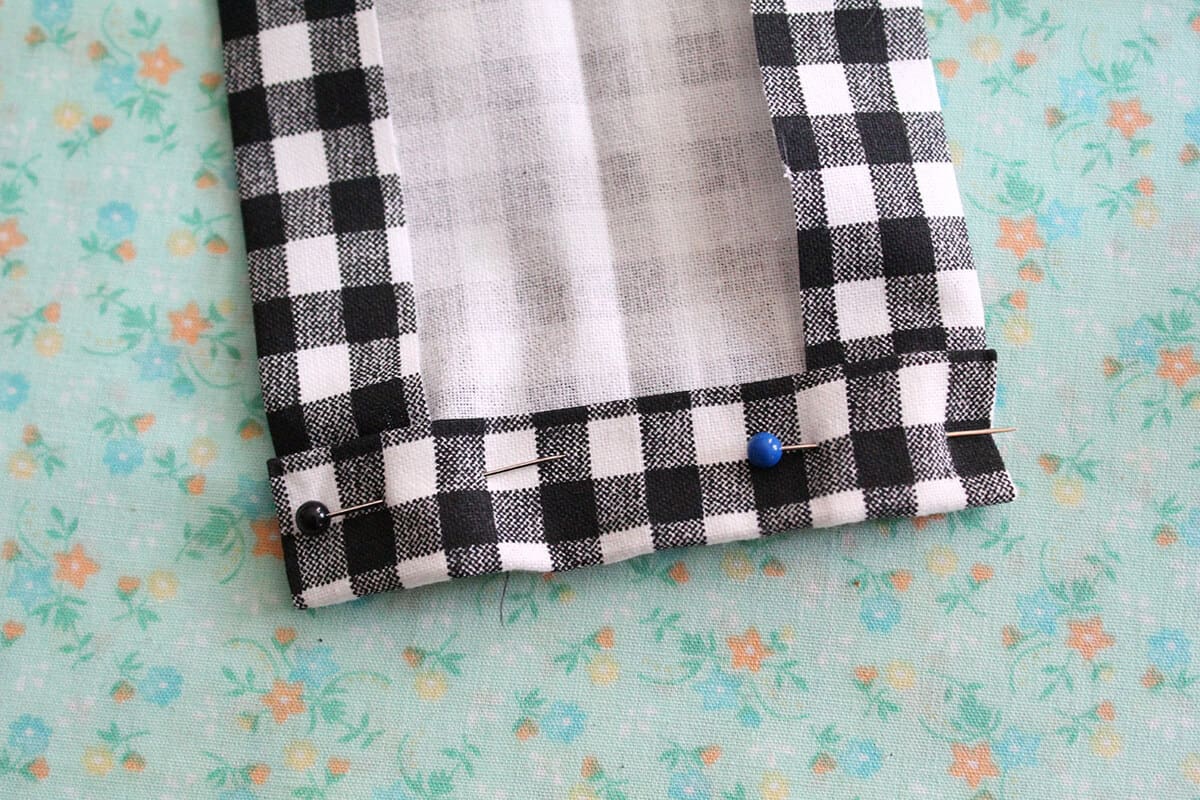
 Step Seven: Cut your 12″x12″ squares. Use your iron to press 3/4″ and then press again. Use your pins to hold your pressed hem in place.
I double folded the hem here so that when I stick my hands in the pockets, I have nice, smooth edges instead of frayed edges. If you prefer to single fold, use your pinking shears on the edges.
 Step Eight: Take both of your squares to your sewing machine. We are only stitching along the top edge of each of these squares. They should look like the photo above.
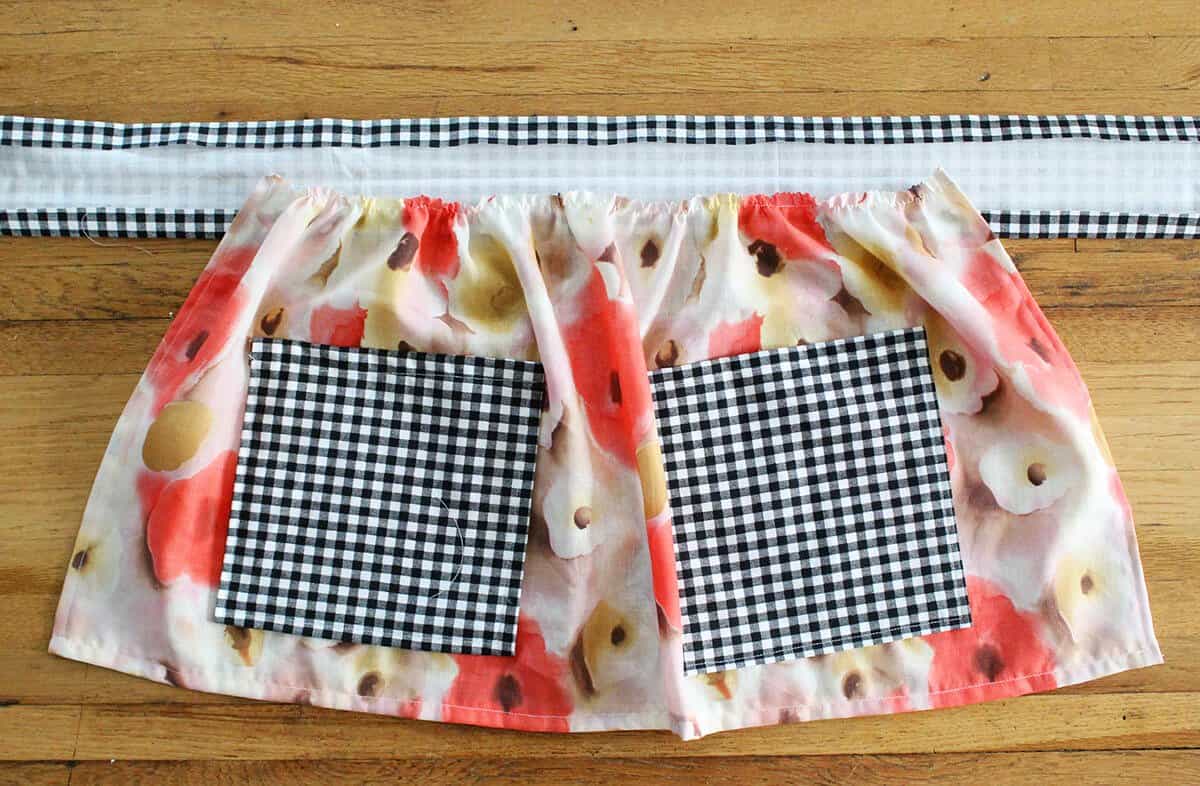
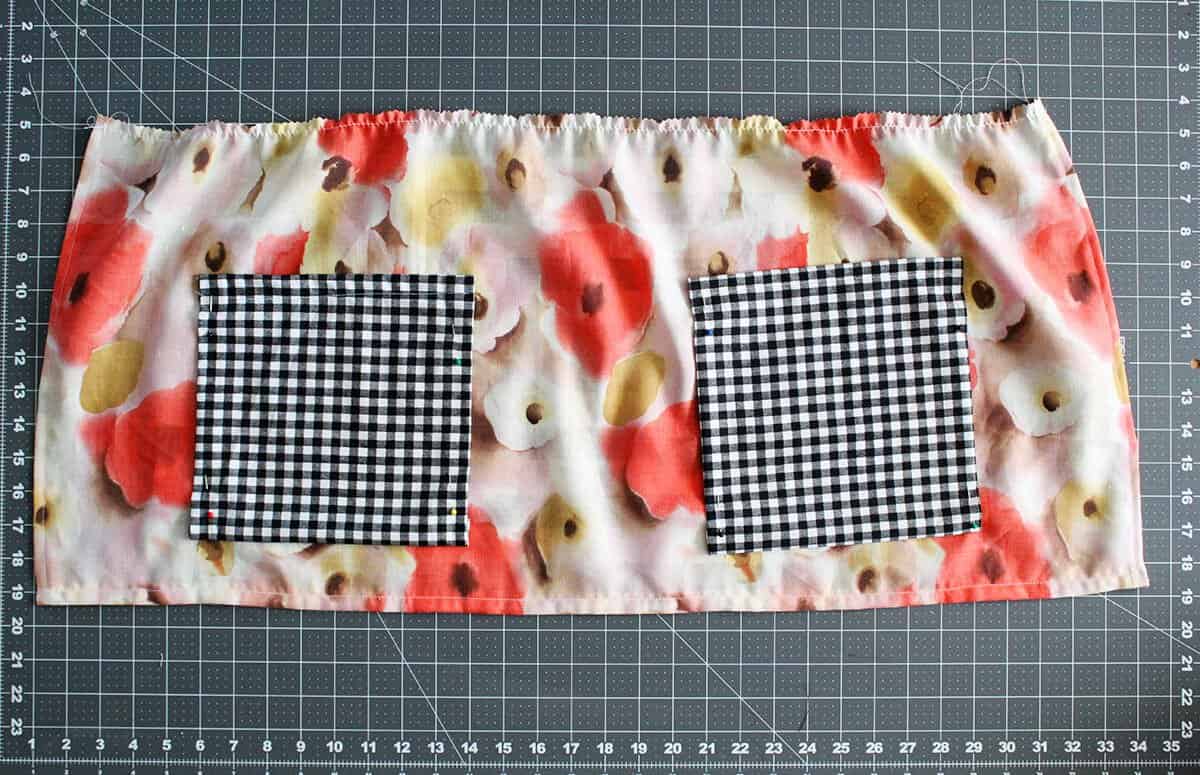 Step Nine: Take your skirt piece and run a basting stitch along the very top edge. Don’t pull the strings yet, we’ll do that soon. Position your pocket squares onto your skirt piece and pin in place.
Remember, these are going to be pockets, so the one edge we’ve already stitched on the squares (the top) will not be attached to the skirt.
Pin them down when you’re satisfied and take it to your machine. Slowly stitch along the left side, bottom, and right side. Repeat on the second pocket.
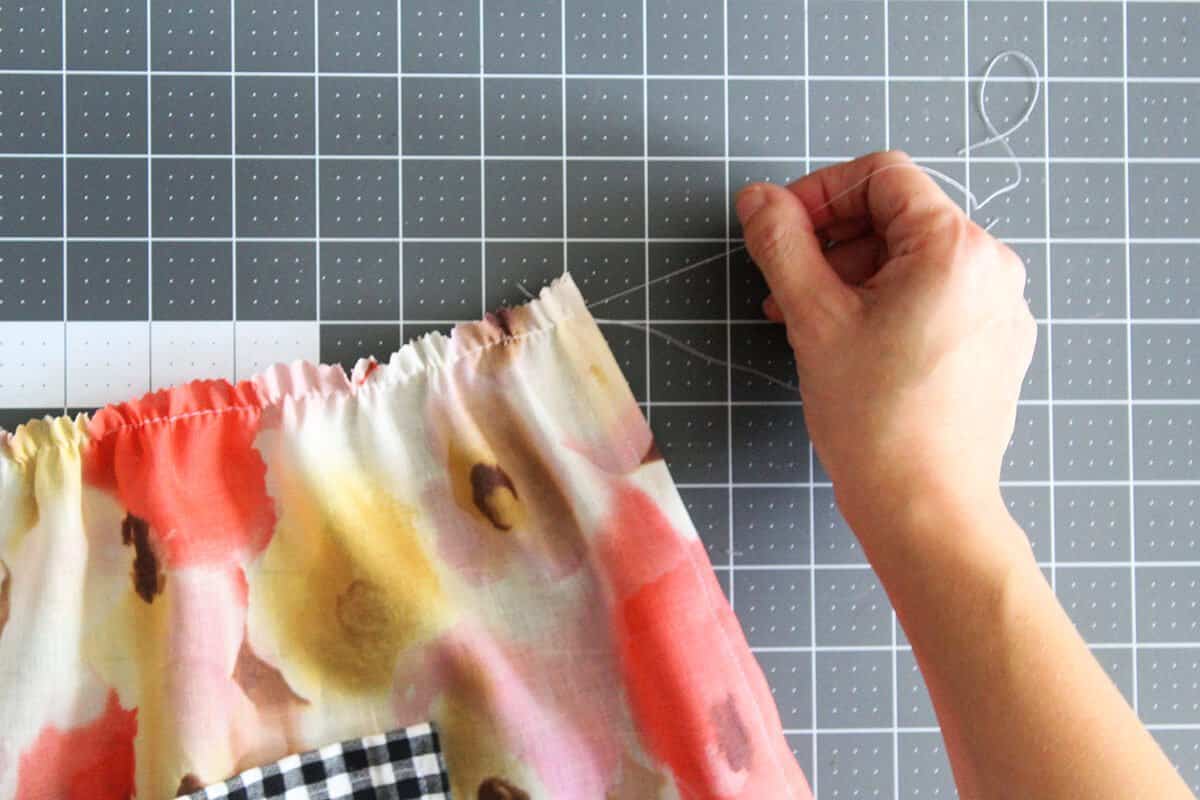 Step Ten: It’s time to pull our basting stitch! When pulling a basting stitch to cinch, it’s important to go slowly and not break the thread.
Pull the stitch and work your pleats toward the middle until you are satisfied with your gathers. Tie off each end and pull your pleats so they are distributed evenly.
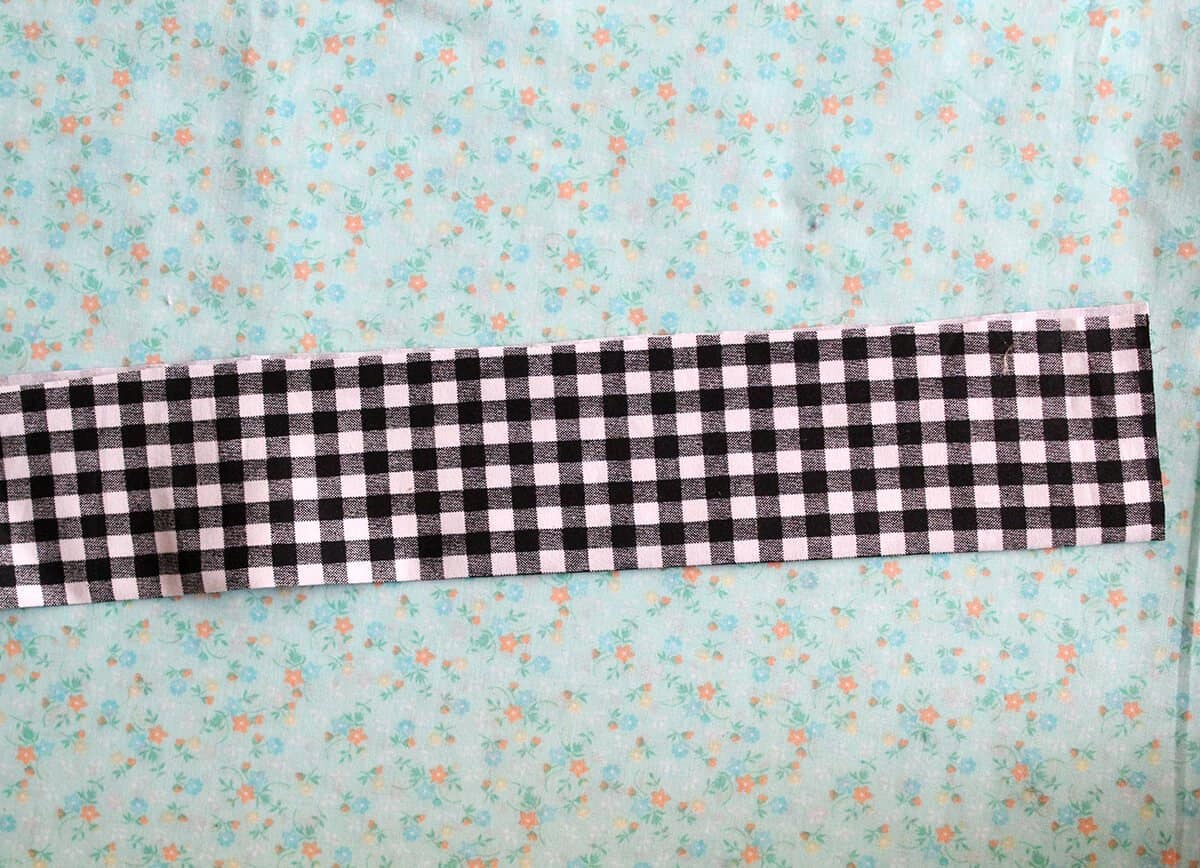 Step Eleven: Okay, now that we’ve gotten this far, it’s time to tackle the waistband! Cut out your 54″x 5″ (or longer) piece of contrasting fabric to match the pocket fabric.
Lengthwise, fold your piece in half and press with your iron. You should have a nice, crisp crease down the center.
Open the fabric up and press a 3/4″ crease into each 54″ edge. We will not be double-folding these edges. On the sides, press a 3/4″ crease. Pin into place.
 Step Twelve: Open up your waistband and let’s play a game of Pac-Man. Your waistband is Pac-Man and your skirt is a ghost. Find the center of your waistband and place the top edge of your skirt inside.
Fold the band over and pin in place. Now, let’s take this back to the sewing machine!
 Step Thirteen: Start at the short side (the ends) of your waistband and stitch along the edge. Continue around along the bottom edge of the waistband, sewing the skirt portion into the waistband along the way.
Continue until you reach the end and stitch the second short edge. Give a little backstitch, and you’re all done!
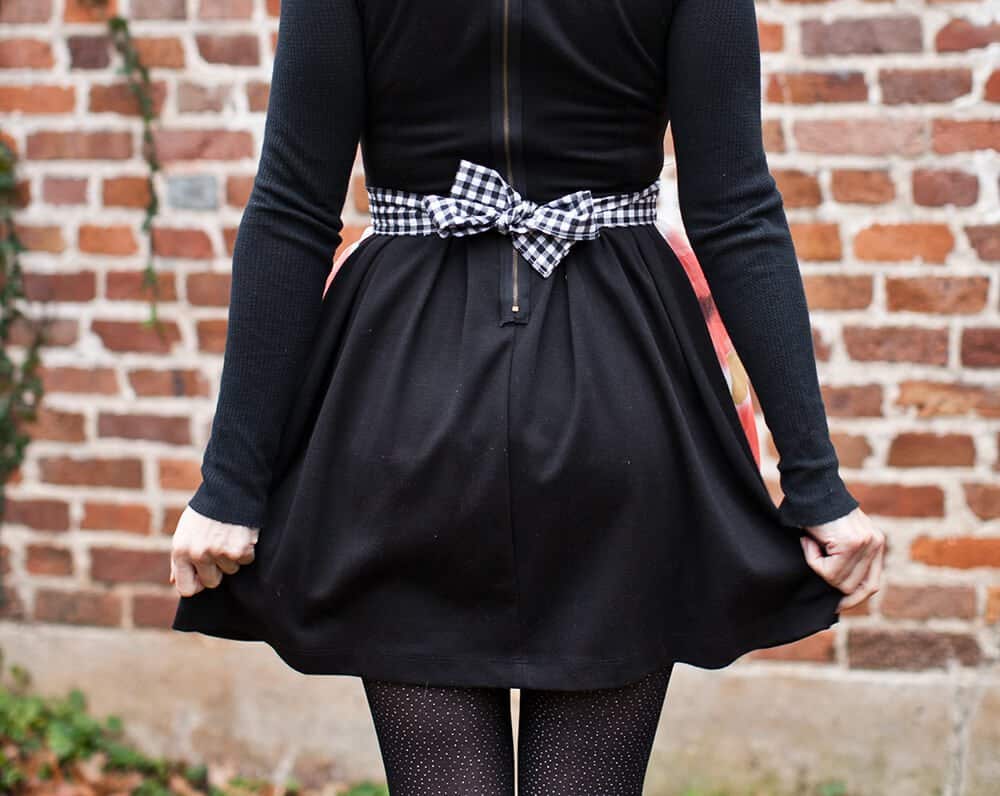 If you are making this as a gift, you can customize the length of waist tie to fit many different sizes, including kiddos in case you want to make a mommy and me matching set. 🙂
Check out more homemade gift ideas here!
 Congrats! You are now the proud owner of a pretty, new, and super functional apron. Bake some cookies and enjoy the treat, or break out a delicious cookbook and make a meal—you earned it! xo. Katie
P.S. Looking for more sewing projects? Check out …
- How to Add a Built-In Bra to Clothing
- How to Sew Your Own Leggings
- Make Your Own Bow Scrunchie
- How to Hew Your Jeans (in 4 Easy Steps)
Love this post? Sign up for our newsletter for more ideas!

Get creative ideas for recipes, crafts, decor, and more in your inbox!
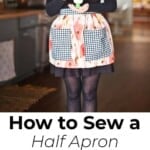
 Get the How-To

Supplies
- 1 piece 16″x36″ cotton fabric (for the skirt)
- 2 pieces 12″x12″ contrasting fabric (for pockets)
- 1 piece 54″x5″ contrasting fabric (for the waistband)
Equipment
- sewing machine
- self-healing cutting mat
- iron + ironing board
- fabric scissors
- pinking shears
- straight pins
Instructions
- Cut out your 16″x36″ piece of fabric. This will be our skirt piece. As you can see in the photo above, I used my regular scissors for all of the edges except the top edge. I used my pinking shears for this edge.
- Set your iron to the cotton setting because it’s time to press some edges! We are going to start with the two side edges (the 16″ sections).
- Fold your side edge over 3/4″ and press. Once your edge is fully ironed, fold the edge a second time and press again. At this point you should see no raw edge. Repeat on the second side.
- Pin your folded edges in place. It’s time to sew our first straight edge on the sewing machine.
- Place your fabric onto your sewing machine and lower your presser foot. Remember as you start, you will want to make a stitch and then reverse it with a backstitch to secure the thread on the fabric.
- Once you have done this, slowly stitch along the edge, removing pins as you go. Guide the fabric with your hand, making sure not to push it into the feed dogs. Continue stitching until you reach the end of your fabric.
- Before you lift your needle and presser foot, be sure to do one or two backstitches to secure the stitch. Repeat along the second side.
- Let’s repeat what we just did, but this time along the bottom edge. Use your iron to press 3/4″ and then fold again to press another 3/4″ hem. Take this to your sewing machine and do a straight stitch exactly as you did on the sides.
- Once you get the bottom edge stitched, it should look like this. We now have two hemmed sides and one hemmed bottom.
- Cut your 12″x12″ squares. Use your iron to press 3/4″ and then press again. Use your pins to hold your pressed hem in place.
- I double folded the hem here so that when I stick my hands in the pockets, I have nice, smooth edges instead of frayed edges. If you prefer to single fold, use your pinking shears on the edges.
- Take both of your squares to your sewing machine. We are only stitching along the top edge of each of these squares.
- Take your skirt piece and run a basting stitch along the very top edge. Don’t pull the strings yet, we’ll do that soon. Position your pocket squares onto your skirt piece and pin in place.
- Remember, these are going to be pockets, so the one edge we’ve already stitched on the squares (the top) will not be attached to the skirt
- Pin them down when you’re satisfied and take it to your machine. Slowly stitch along the left side, bottom, and right side. Repeat on the second pocket.
- It’s time to pull our basting stitch! When pulling a basting stitch to cinch, it’s important to go slowly and not break the thread.
- Pull the stitch and work your pleats toward the middle until you are satisfied with your gathers. Tie off each end and pull your pleats so they are distributed evenly.
- Okay, now that we’ve gotten this far, it’s time to tackle the waistband! Cut out your 54″x 5″ (or longer) piece of contrasting fabric to match the pocket fabric.
- Lengthwise, fold your piece in half and press with your iron. You should have a nice, crisp crease down the center.
- Open the fabric up and press a 3/4″ crease into each 54″ edge. We will not be double-folding these edges. On the sides, press a 3/4″ crease. Pin into place.
- Open up your waistband and let’s play a game of Pac-Man. Your waistband is Pac-Man and your skirt is a ghost. Find the center of your waistband and place the top edge of your skirt inside.
- Fold the band over and pin in place. Now, let’s take this back to the sewing machine!
- Start at the short side (the ends) of your waistband and stitch along the edge. Continue around along the bottom edge of the waistband, sewing the skirt portion into the waistband along the way.
- Continue until you reach the end and stitch the second short edge. Give a little backstitch, and you’re all done!
Jar made this for my daughter to cover her clothes at work, there a workbench with raw edges messing up her clothes. It took less than an hour and she loves it! Thank you!!!
I’m plus size so the measurements listed won’t work for me. What would be the best route to ensure the skirt and belt are appropriate widths/lengths?
I just found your apron tutorial. My grandmother made her on aprons and wore one just like this everyday around her house. I’m going to make one (or two). Thanks,
Thanks so much for this tutorial! I used your apron waist on a skirt for a Halloween costume and just sewed it all the way around and then tied it in the back. The costume is supposed to be rustic and tattered, and this was so much easier than other waistband tutorials I found.
Thanks for posting the pattern. I made this for a gift. It turned out cute, but perhaps a bit short and with too short ties. I will make it a bit bigger next time.
I rarely flow patterns anymore because I’ve been sewing since I was 8 along side my mom. I love this own!!! Ive been hoarding fabric waiting for the right design to come along for me to get back into the swing if sewing. This is definitely got me ready to sew this weekend ???
How wode is the gathered apron when it is attached to the waistband? Love the pattern
I just used some remnants to make this in less than an hour tonight! I didn’t do the pockets because I didn’t want to hide the fabric I had.
Thank you for this pattern!!! It turned out great and I cant sew to save my life!!!!
I made this apron and it is adorable. Mixed with bright yellow material for pockets and trimmed in orange ric rac. Easy directions. I am going to make more. Thank you.
It’s been a while since I’ve had my sewing machine out. I made an I Love Lucy apron using your instructions minus the pockets and adding a few details. This is for my child’s school project. Your directions worked perfectly and so easy to understand. I didn’t even make any mistakes and it turned out so cute. Thank you!
I learned how to make a handsewn apron
By hand from my Home education class,
I was 13 years old .It was a great experience
The pattern was simple and so easy to do
In a few hours . Love this apron of yours
I think I’ll make one ????????????????
I love a good apron, thanks for the instructions!
This apron is so cute! It would make a fun Mother’s Day gift!
Paige
http://thehappyflammily.com
Great choice of the print, it almost looks like apples too 🙂
That apron looks so cute, I love the fabric you chose!
https://www.makeandmess.com/
very beautiful
Oh, cute! The apron looks adorable, straight out of a movie!
Charmaine Ng | Architecture & Lifestyle Blog
http://charmainenyw.com
This is adorable! I want to make one, then cook, just so I can wear it. Thanks for the easy instruction too.
You look adorable in that apron! I feel like I need to sew something now!
www.aglassofbovino.com