 I have a theory on why I tend to love autumn and the holidays more than spring and summer. I think it might have to do with the decorations. Ha! I get really excited to pull out my seasonal decorations, as cheesy as that is.
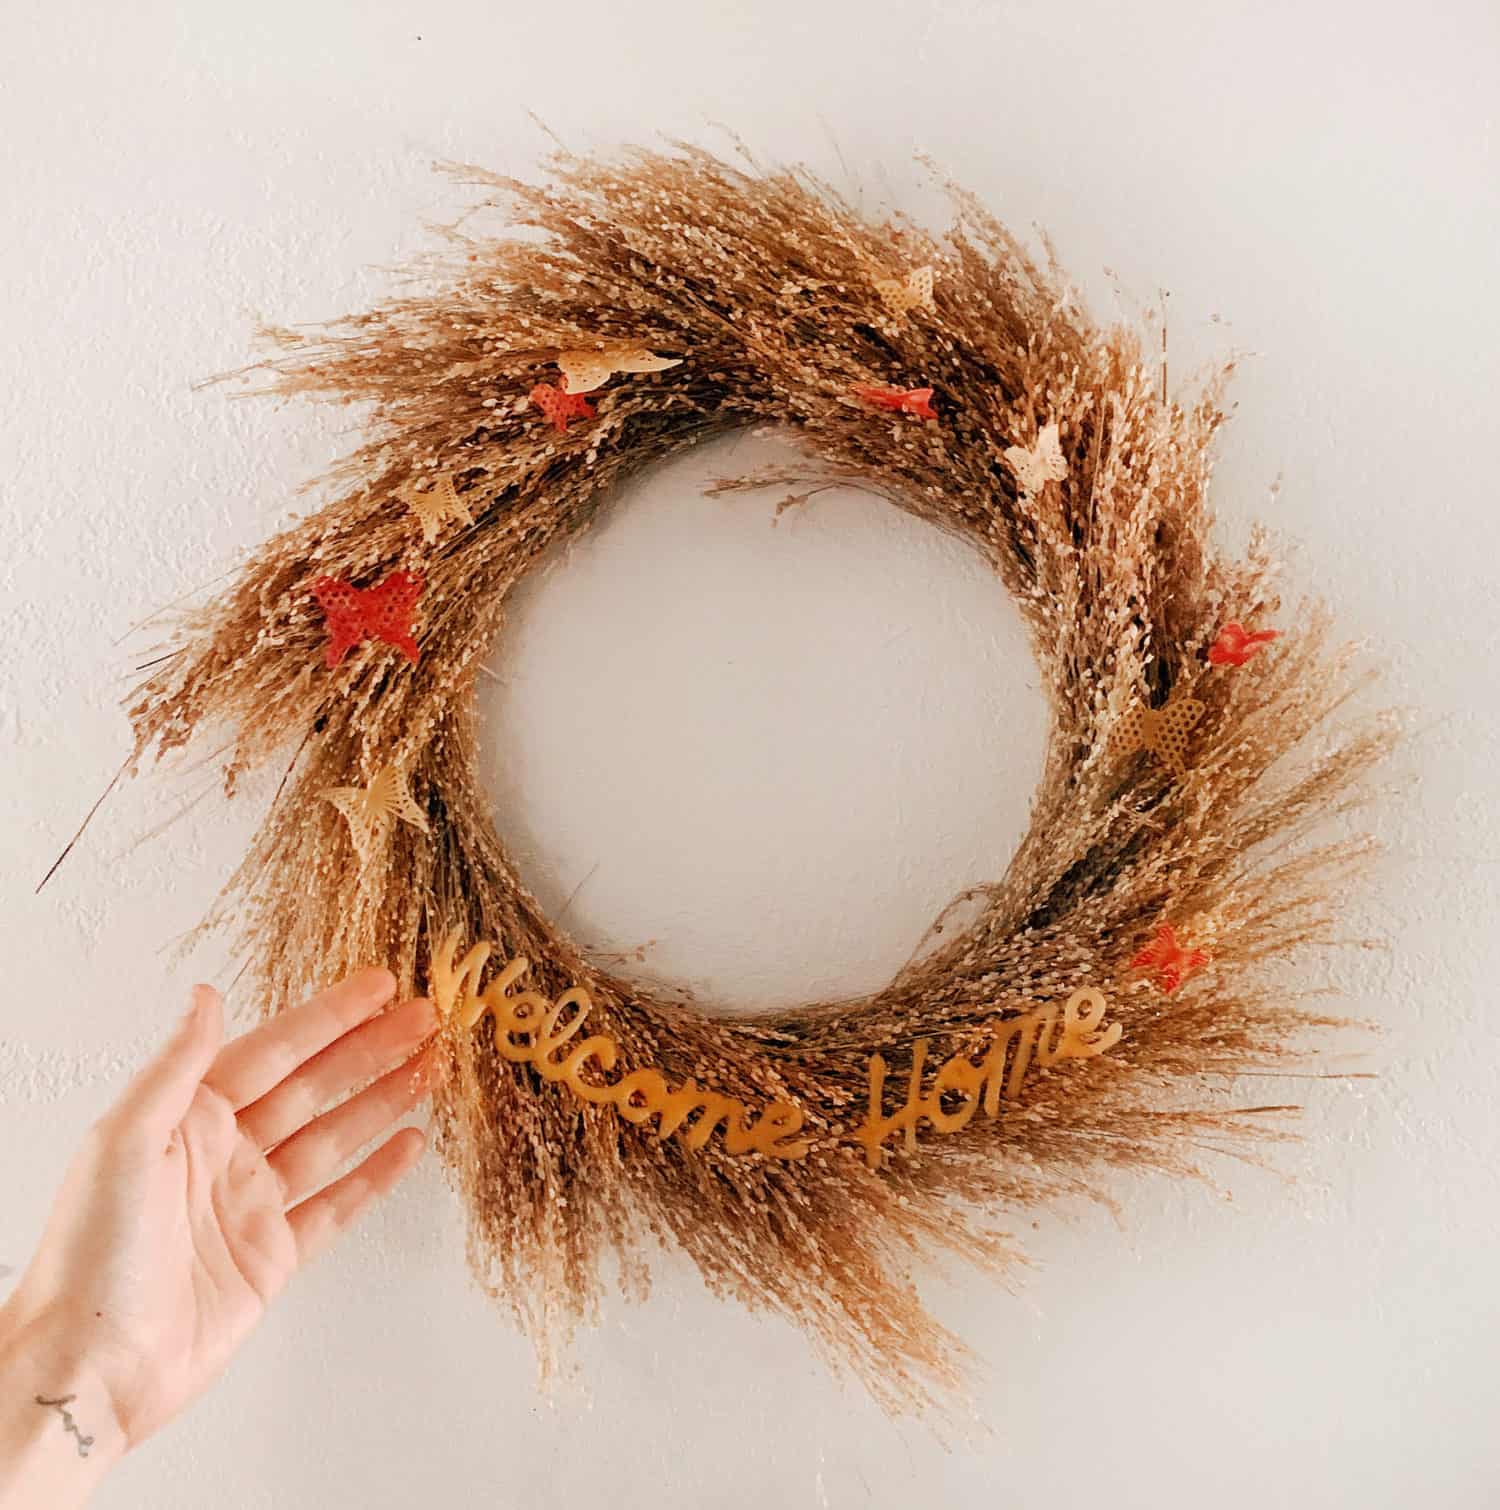
So, I’ve been thinking on making more of an effort to make or buy decorations that are for the rest of the year and not just the autumn and holiday season. I recently got a new front door and this felt like the perfect opportunity to make a wreath!
I was super excited to work with Sculpey on this post. We have quite a few clay projects on our blog, but what’s special about this project is that I got to work with Sculpey Liquid Clay.
If you’ve never used it before, it’s exactly what it sounds like—clay that is is liquid enough to squeeze from a bottle to create designs and then you bake it. You can do LOTS of different things with liquid clay, including creating words or phrases as well as molded designs.
I did both for this welcome home door wreath I made. The Sculpey Liquid Clay is available in 13 different colors, including transparent and shimmer options.
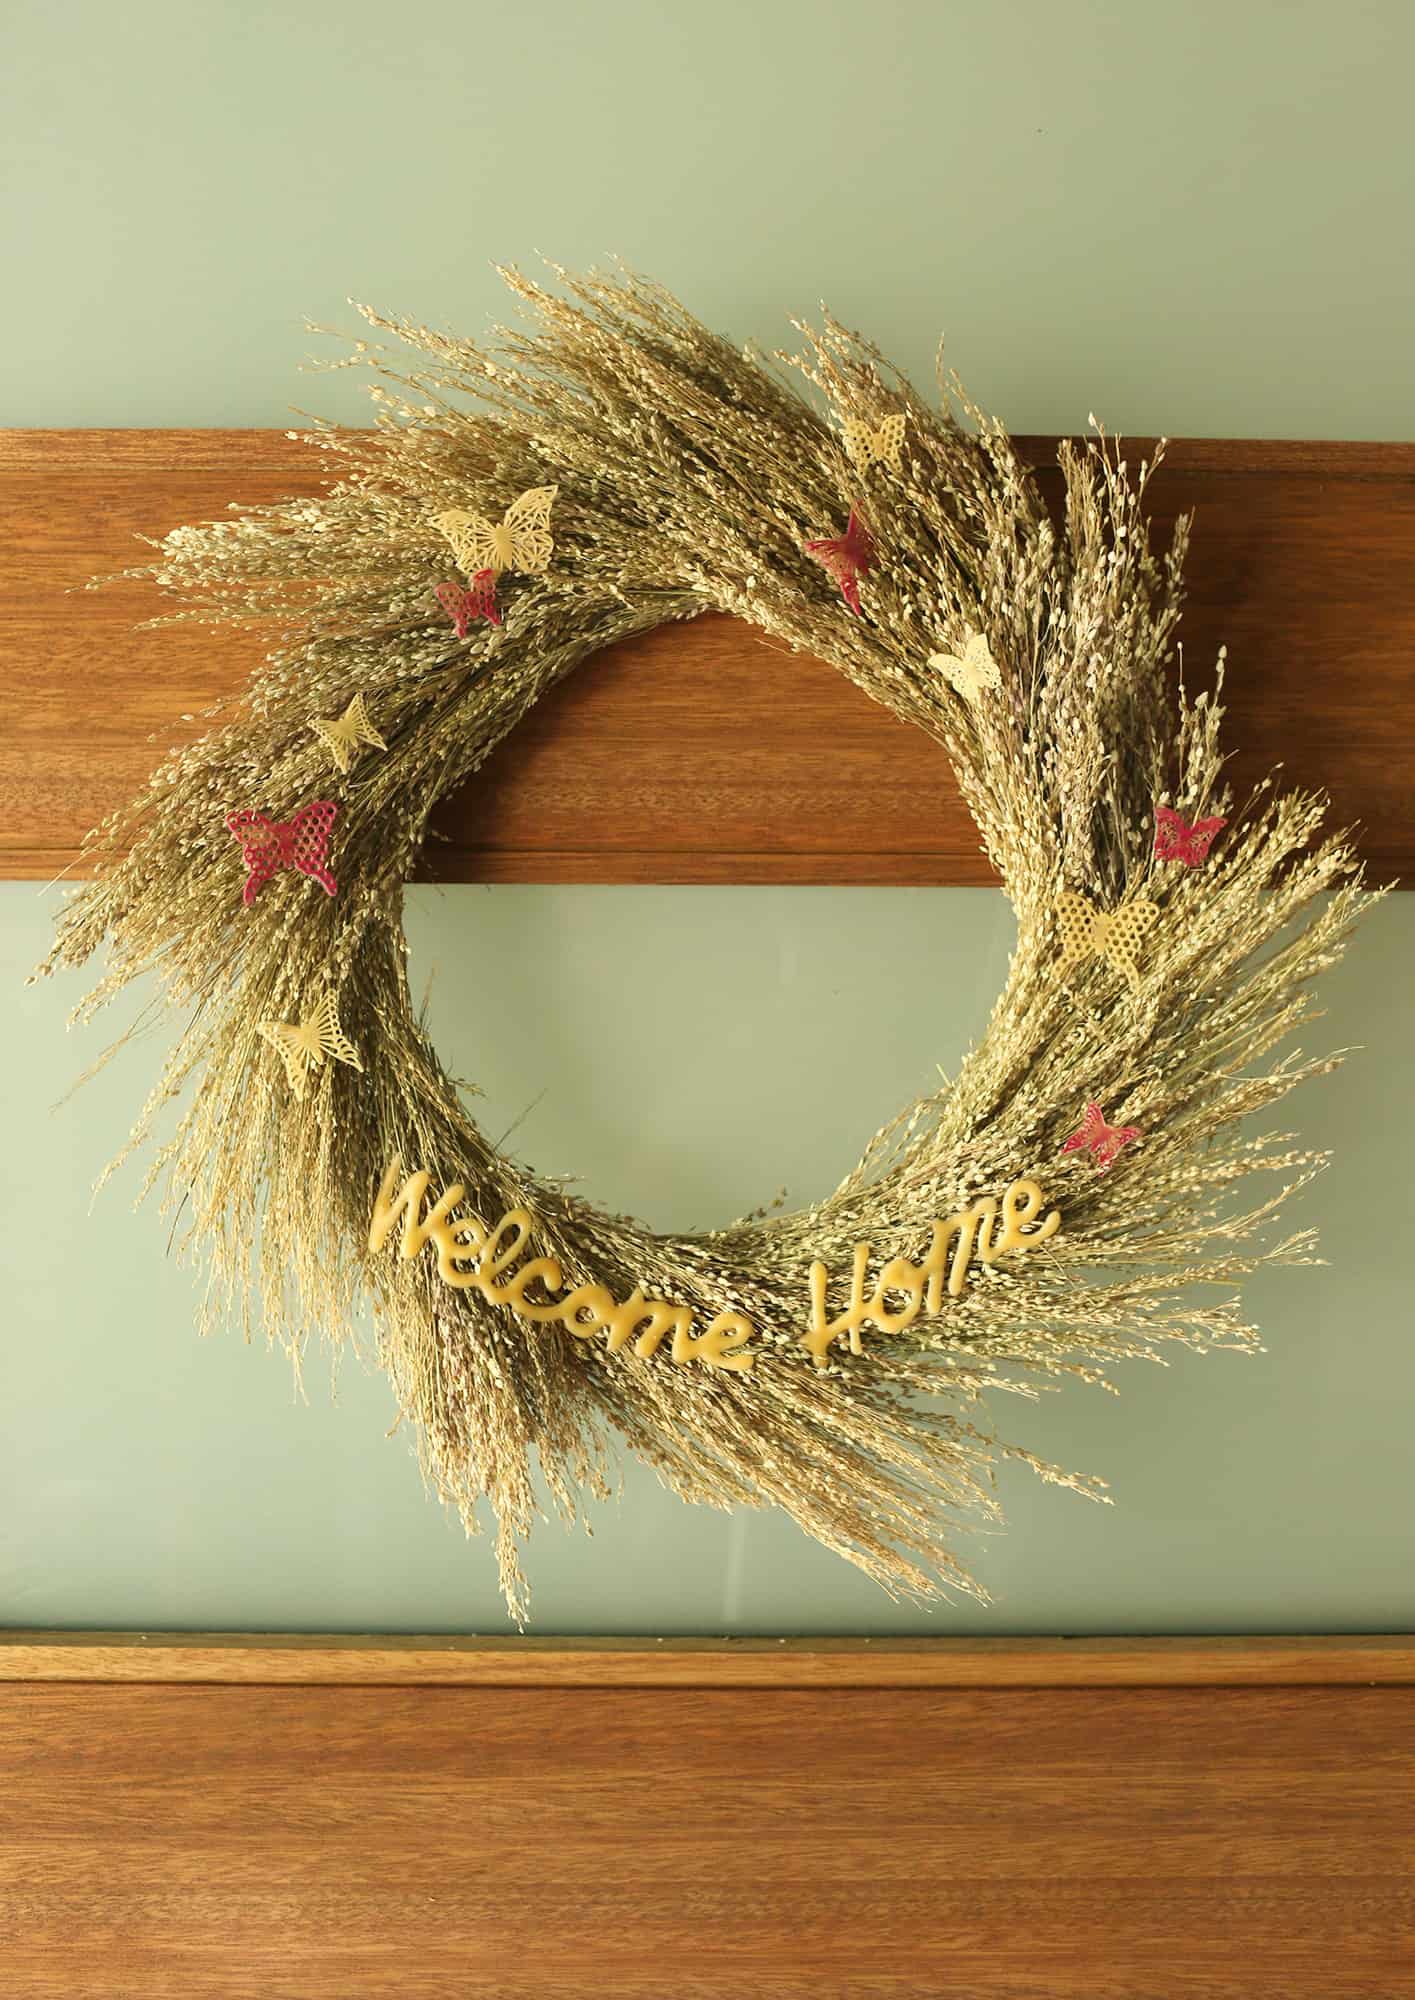
 I will show you how I used the liquid clay to create the “welcome home” phrase I added to my wreath, as well as the little butterflies.
I was aiming for a neutral colored wreath that felt appropriate for spring, summer, and maybe even early autumn.
You could use these techniques to create lots of different words, phrases, designs, and there are so many colors and other ways you could customize this project to make it your own.
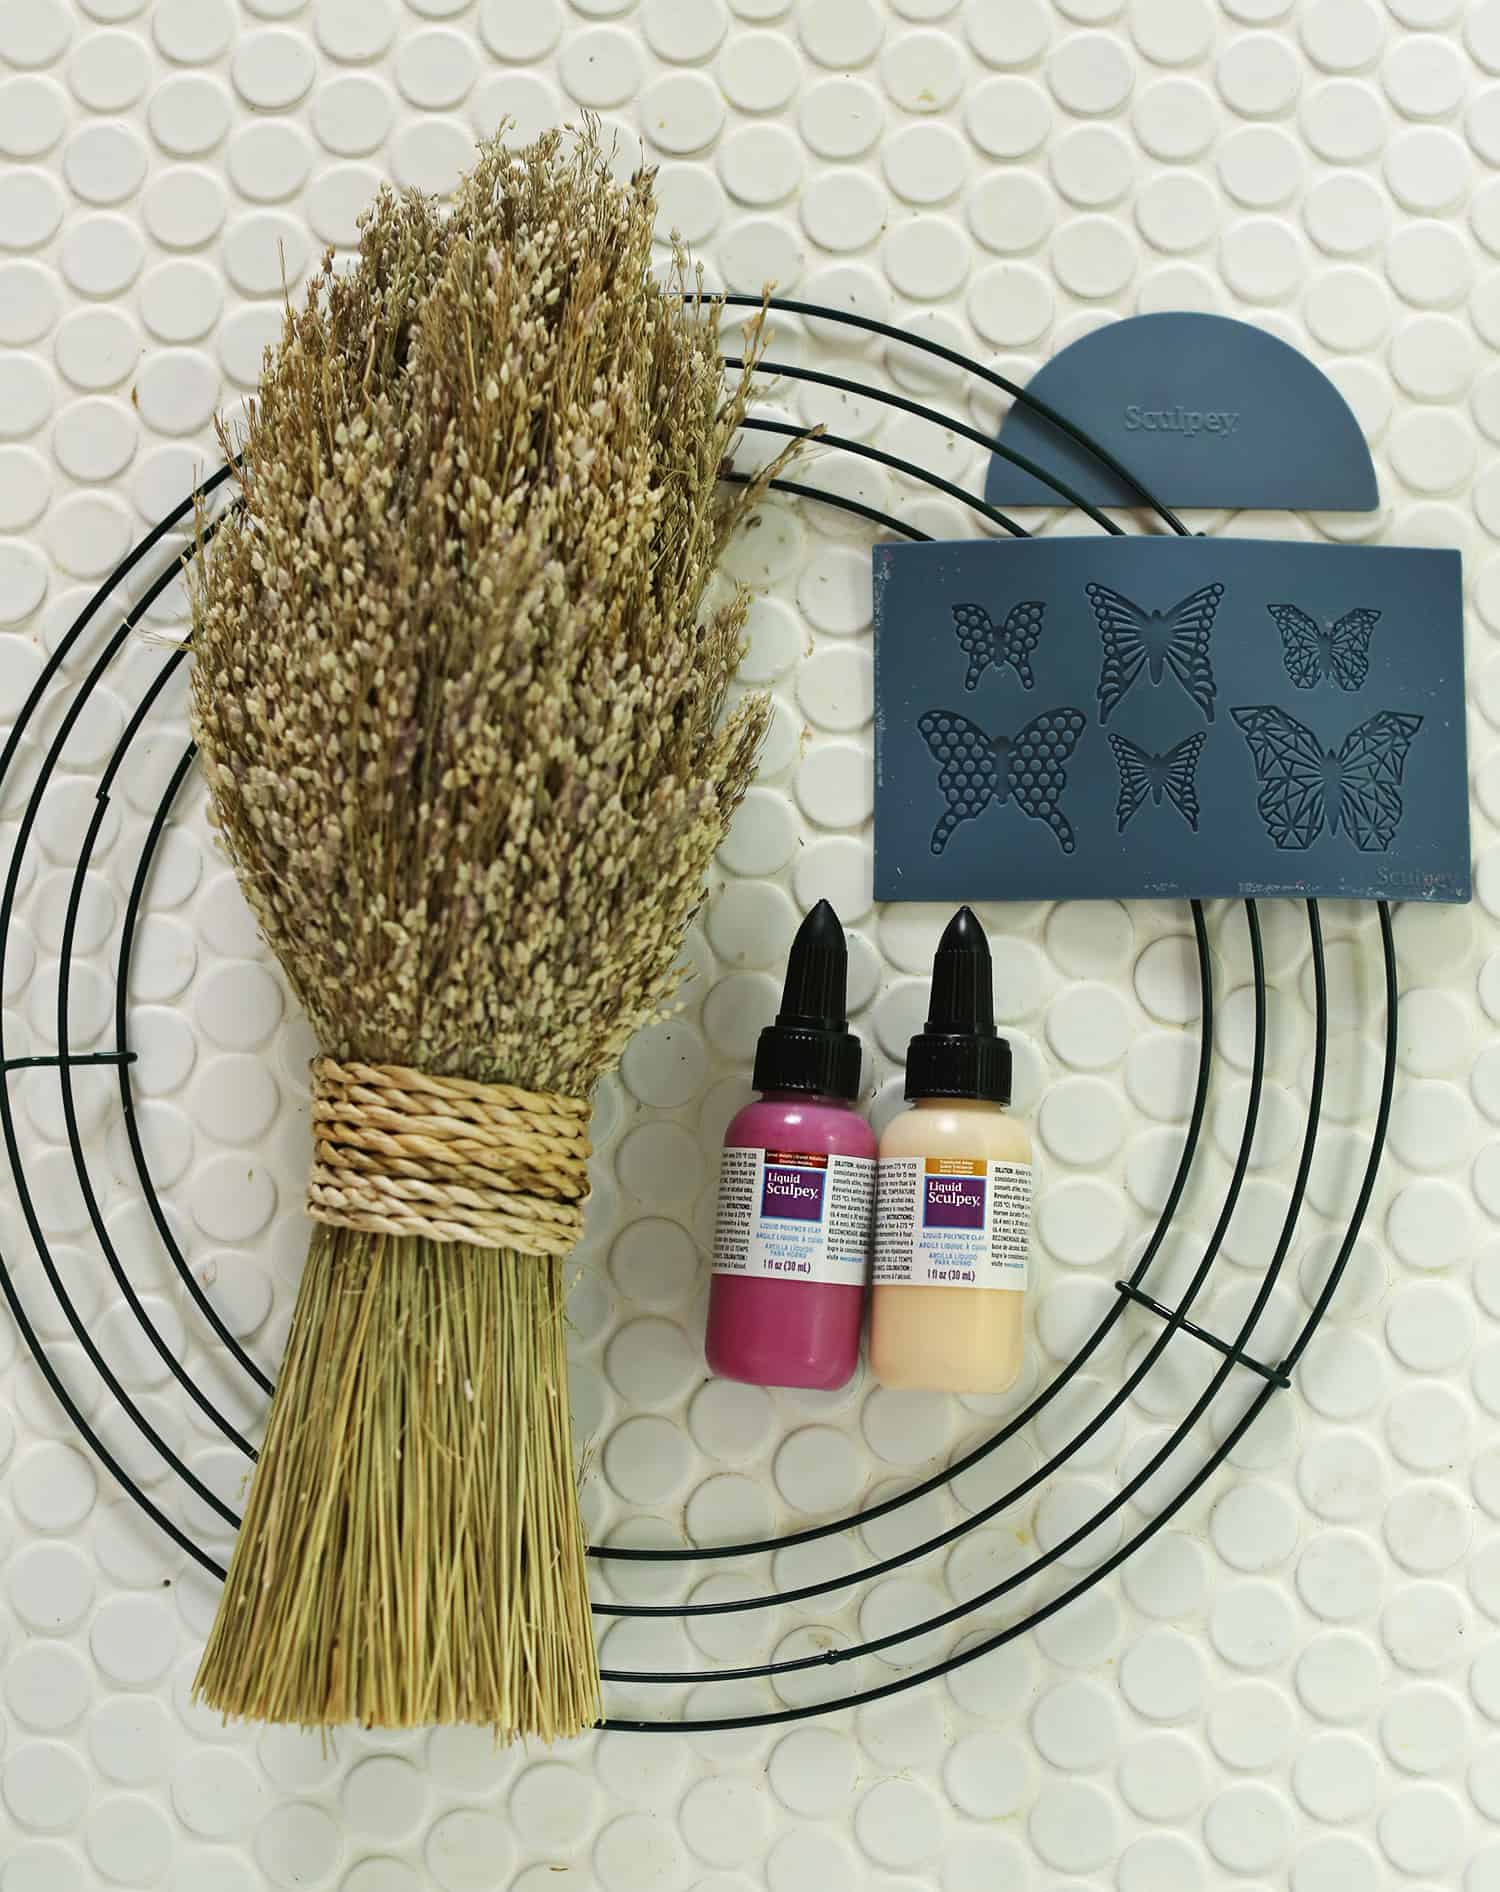 Supplies:
–wire wreath frame
-Sculpey Liquid Clay (I used Garnet Metallic and Amber Translucent)
–oven-safe silicone mold
-dried or artificial flowers
–hot glue gun and stick
–scissors
-glass and baking sheet
-printed paper template, optional
Step One: If you are not super confident in your handwriting (I’m not!), choose a font and print off a word or phrase for your wreath. Print it the size you want it to be.
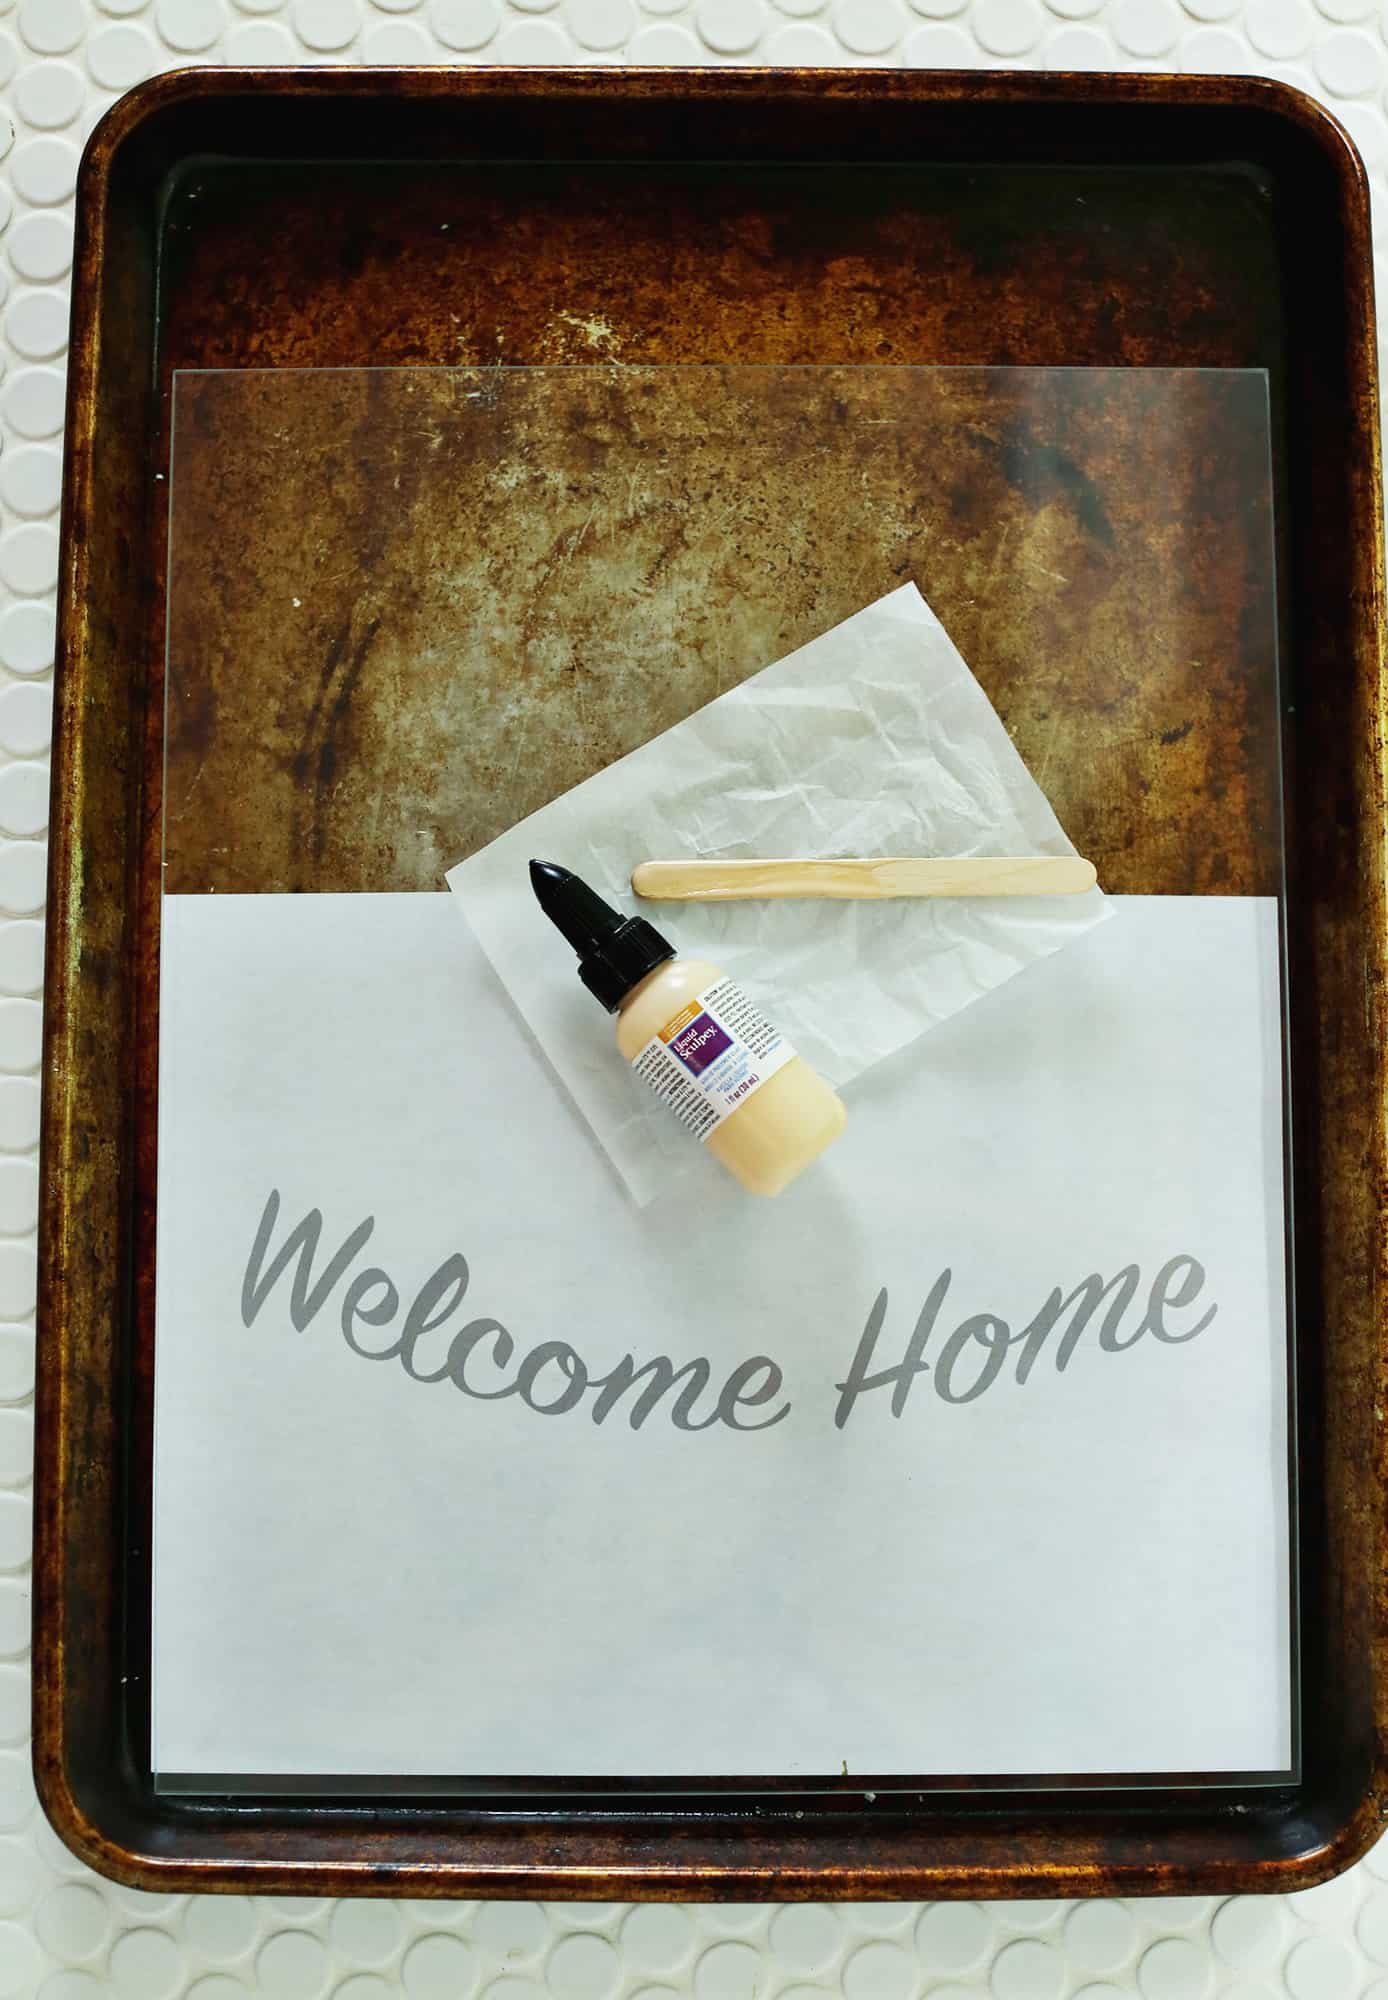 Step Two: Place a piece of glass (like from a picture frame) over the phrase on a baking sheet. Outline in the liquid clay. It’s best to gently stir the liquid clay before use. And, you may want to practice a couple times to get a hang of writing with the liquid.
Bake at 275°F for 15 minutes.
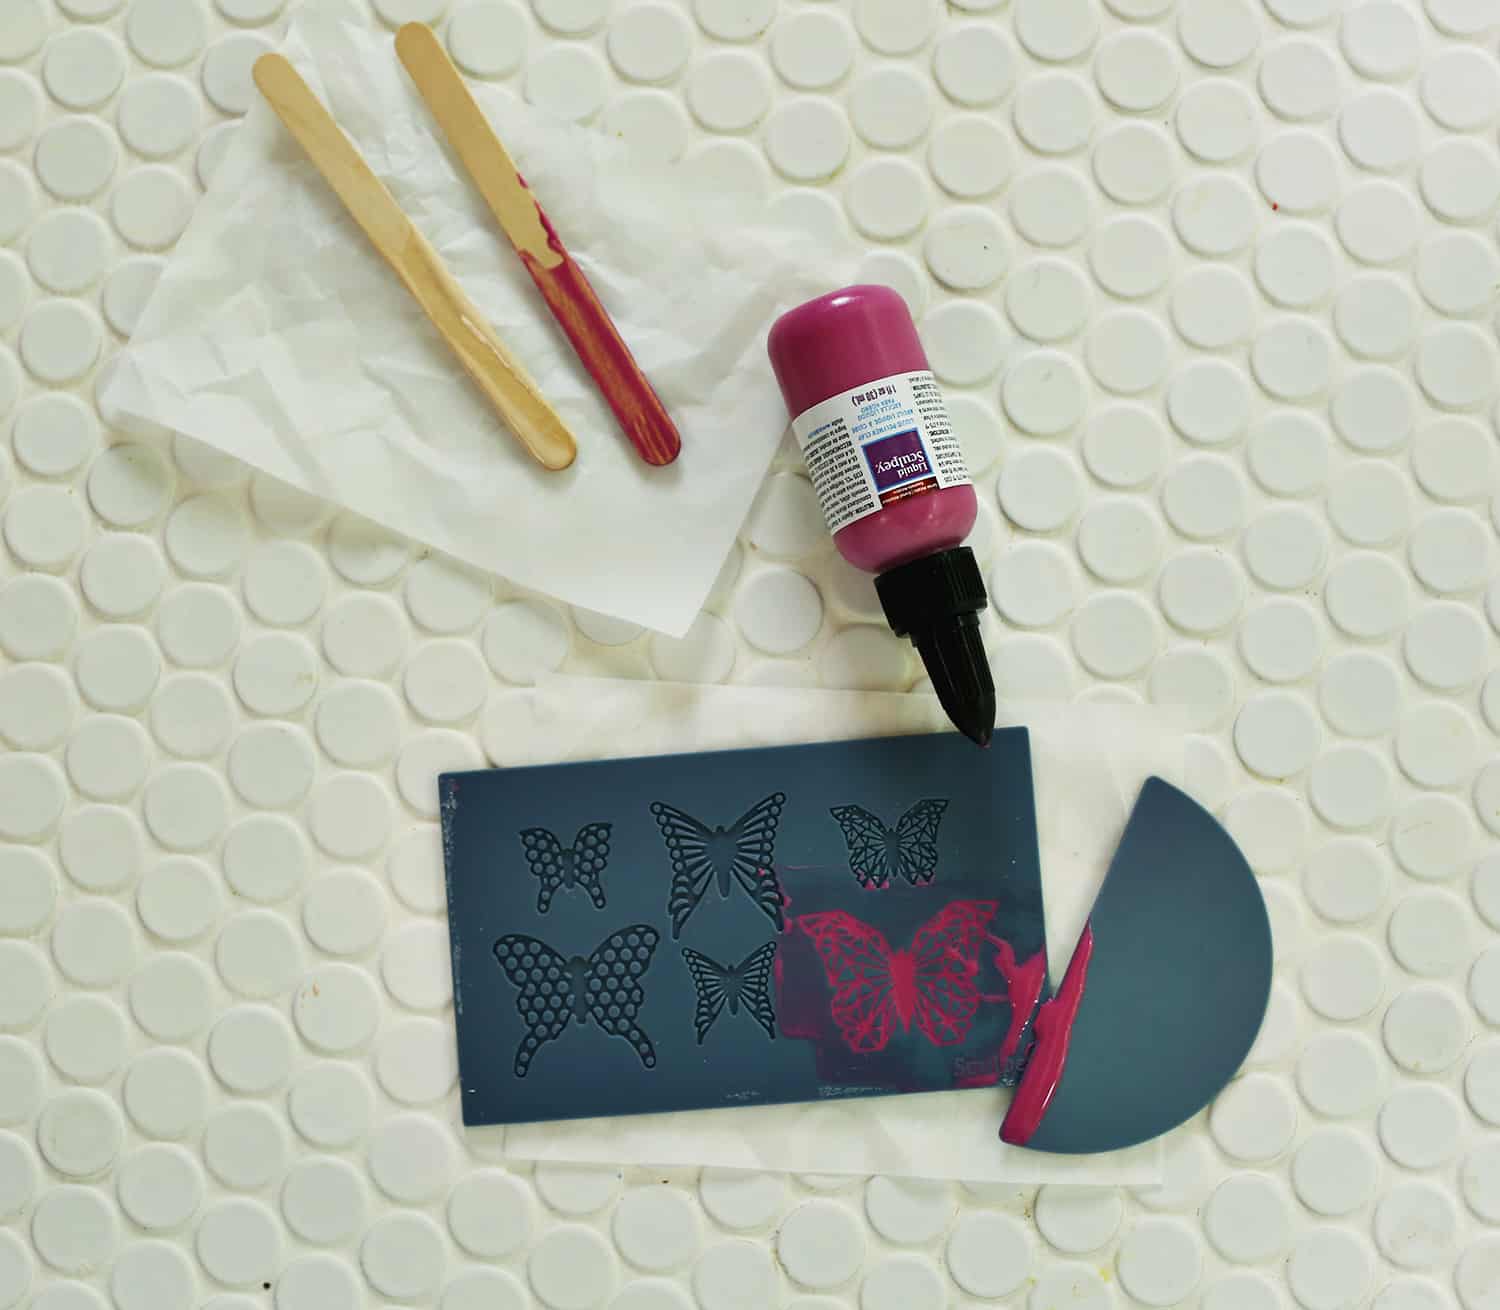 Step Three: For molded designs, add a small amount of the liquid clay (stirring before use) to the silicone mold.
Use the squeegee tool that comes with the mold (or if you’ve lost it, a used plastic card like a gift card works) to press the clay into the mold and remove excess.
Bake at 275°F for 15 minutes. You can bake this at the same time as the phrase if you are using both on your wreath like I did.
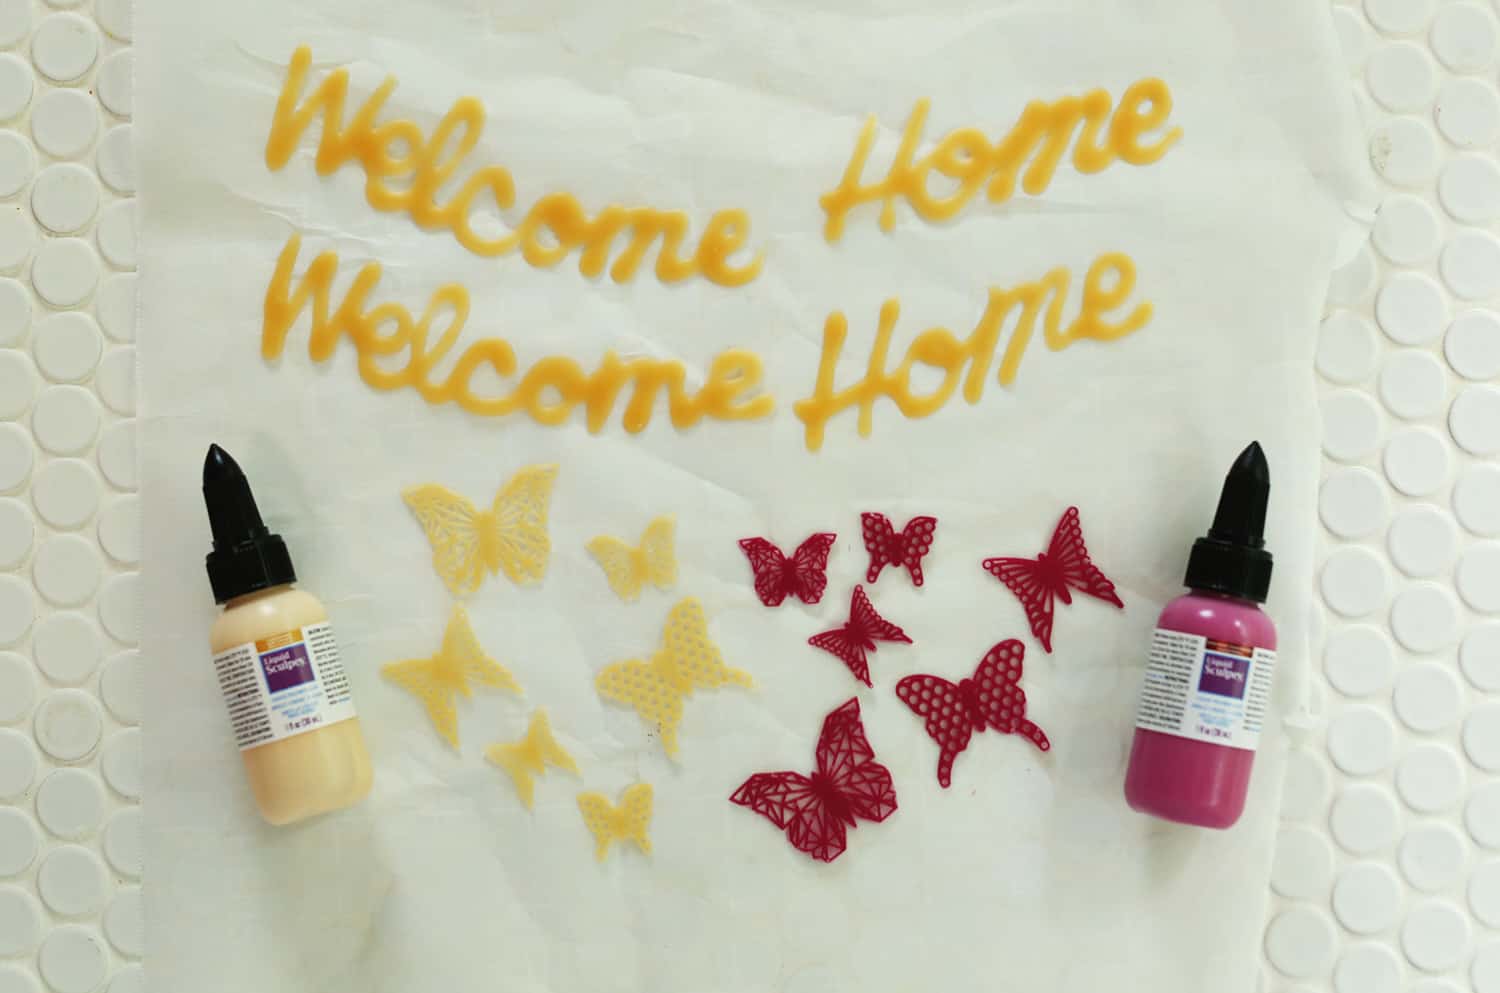 Here you can see the phrase and molded butterflies I made. I made the phrase a few times so I could use the best one since, again, I do not have the best penmanship. Ha.
This phrase can also be used as a window cling, if you don’t want to add it to a wreath. I am envisioning using this technique to create bats or spooky phrases for Halloween window clings. (There I go again—autumn obsessed!)
 Step Four: I made my wreath base but you could also buy one if you don’t want to make one. I made mine by hot gluing the dried flowers in clumps to the wire wreath base. I would trim the dried flowers as I worked.
Then, I glued the welcome home phrase and butterflies to the dried flowers.
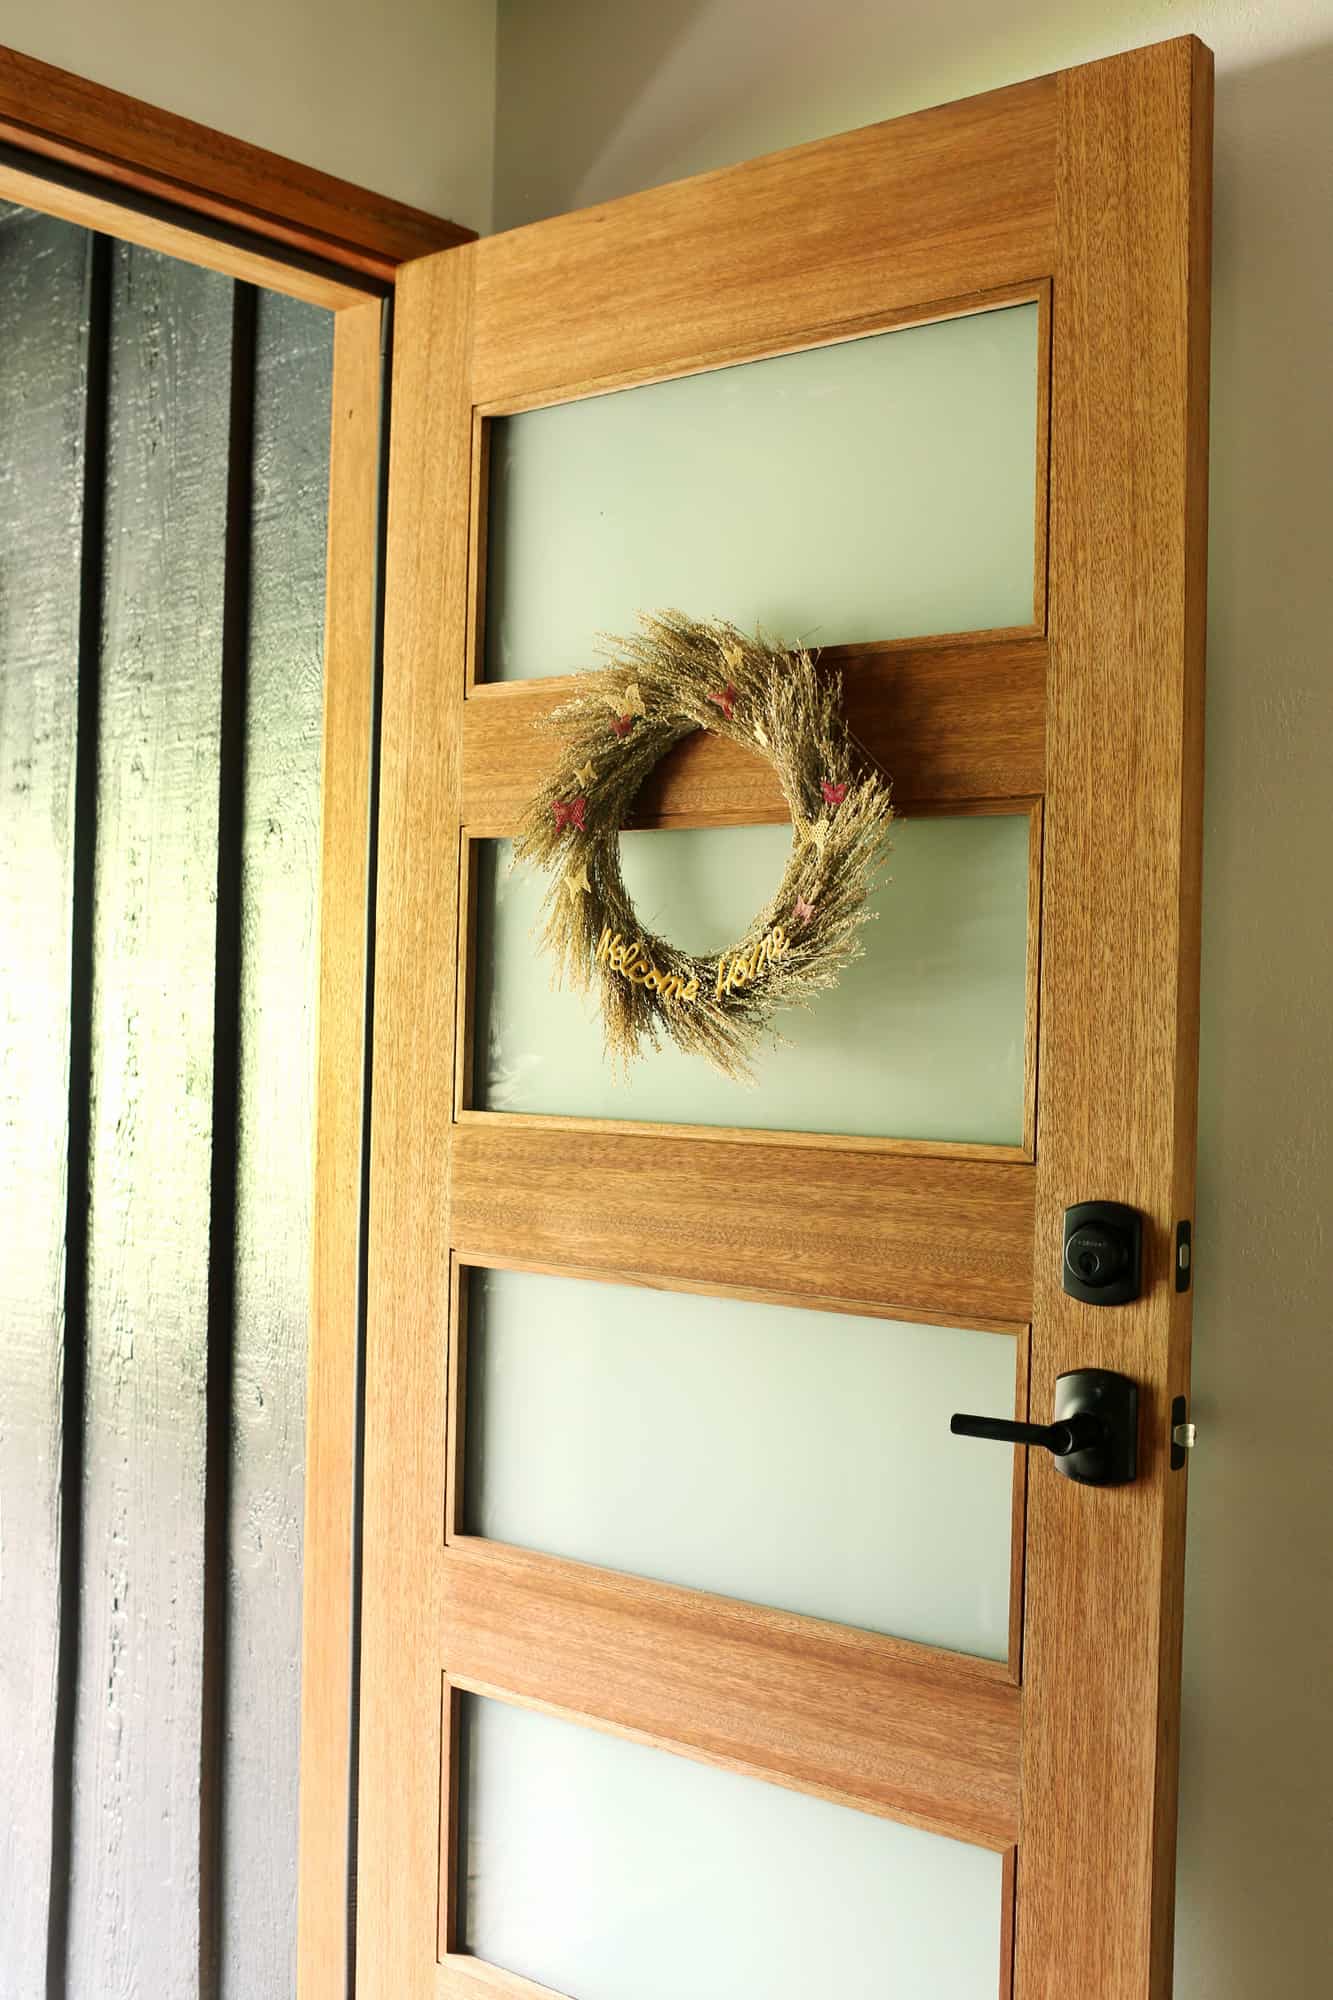
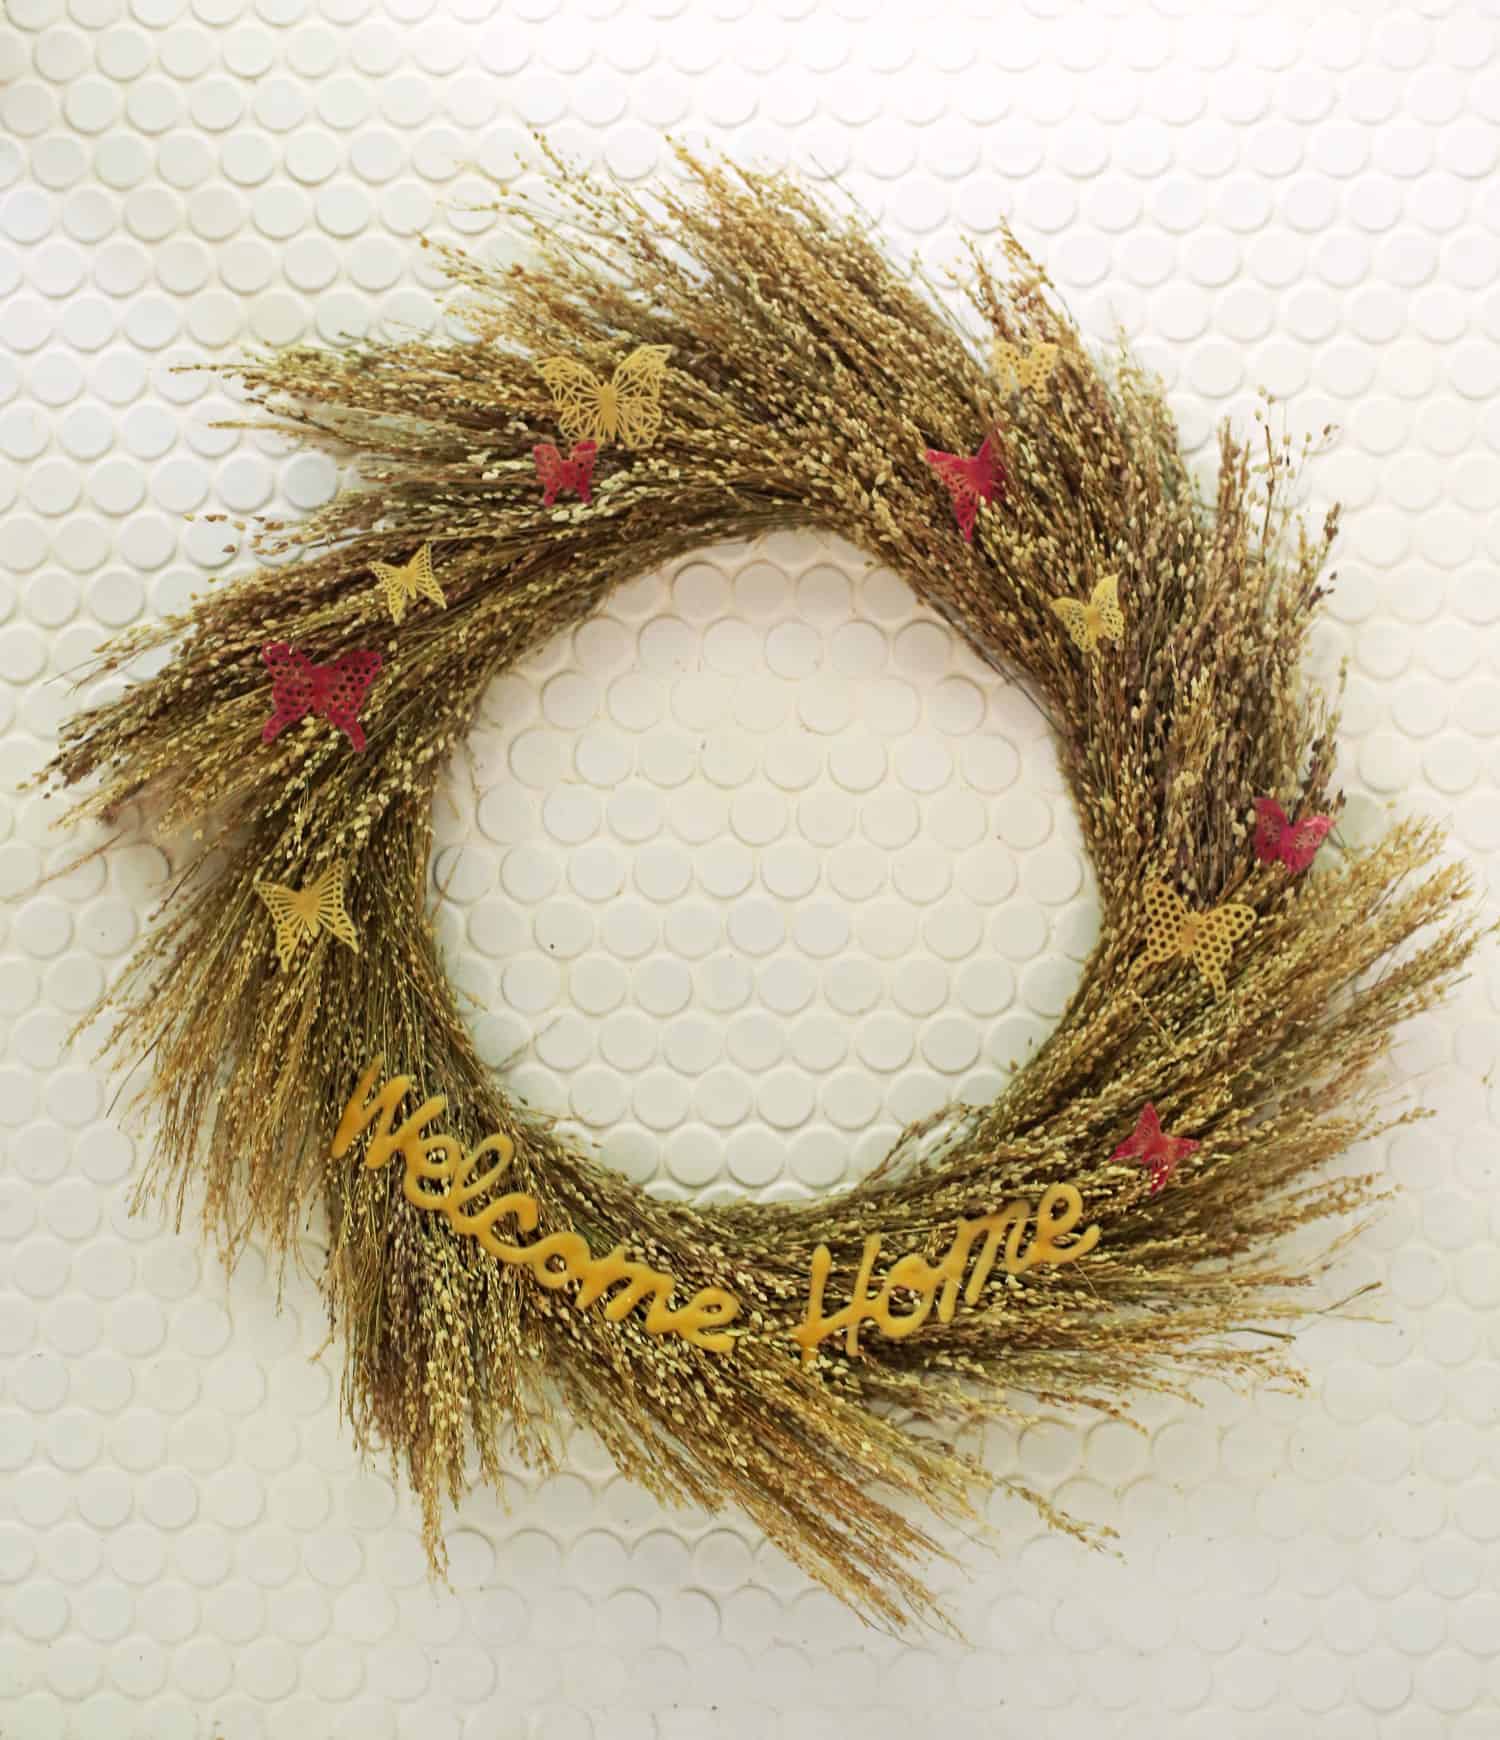 That’s it! Super simple and a really fun afternoon project. I hung my wreath by a small nail in the door—the wire frame easily holds on and my wreath is super lightweight, so it is plenty secure.
But if you used a wreath base or created something much heavier, you may want a wreath hook to hang it on.
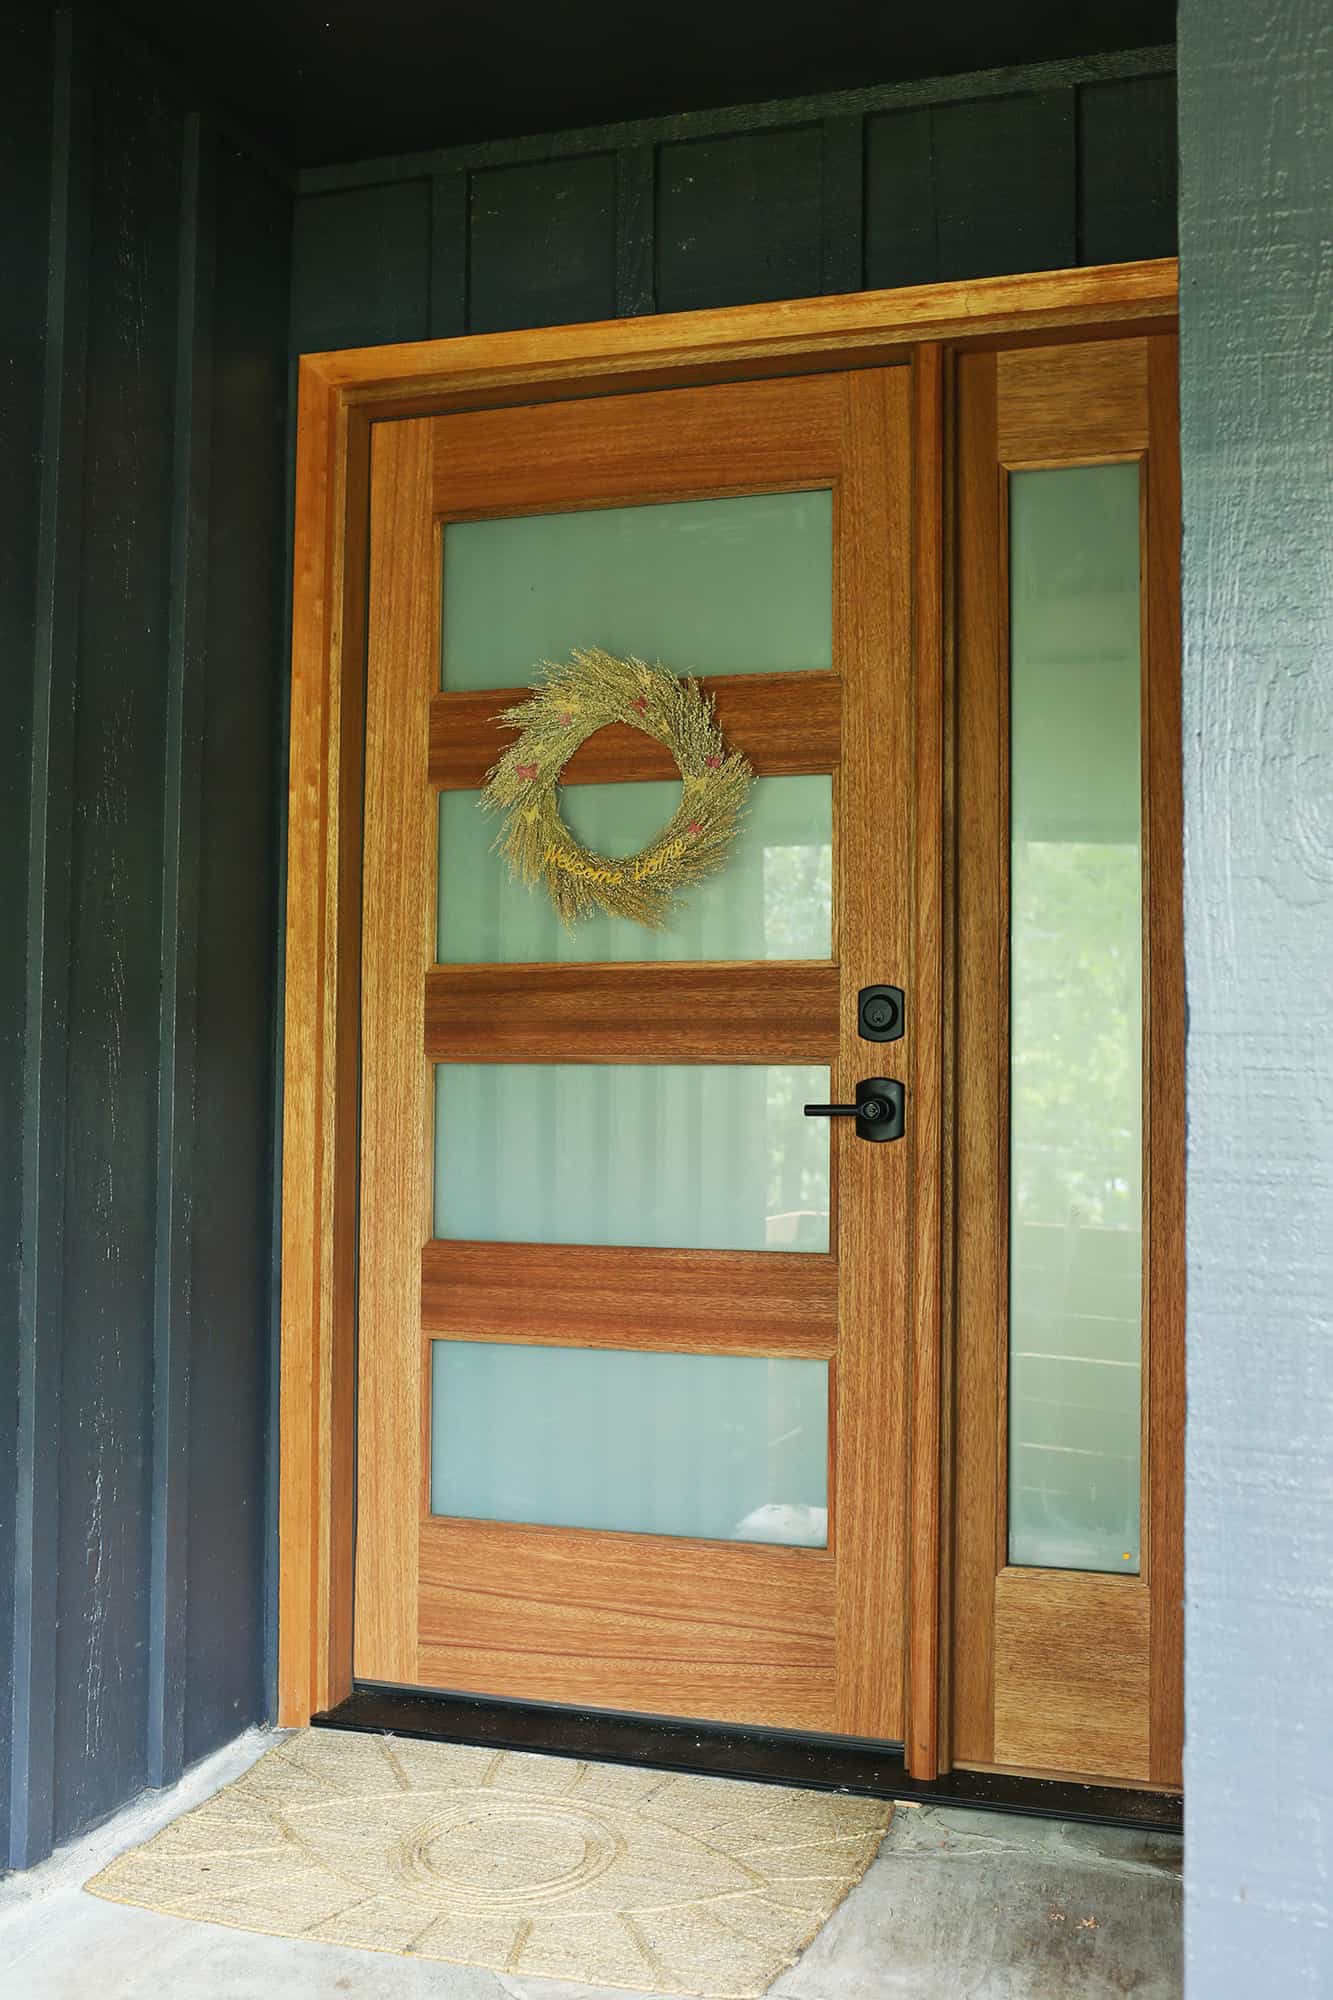
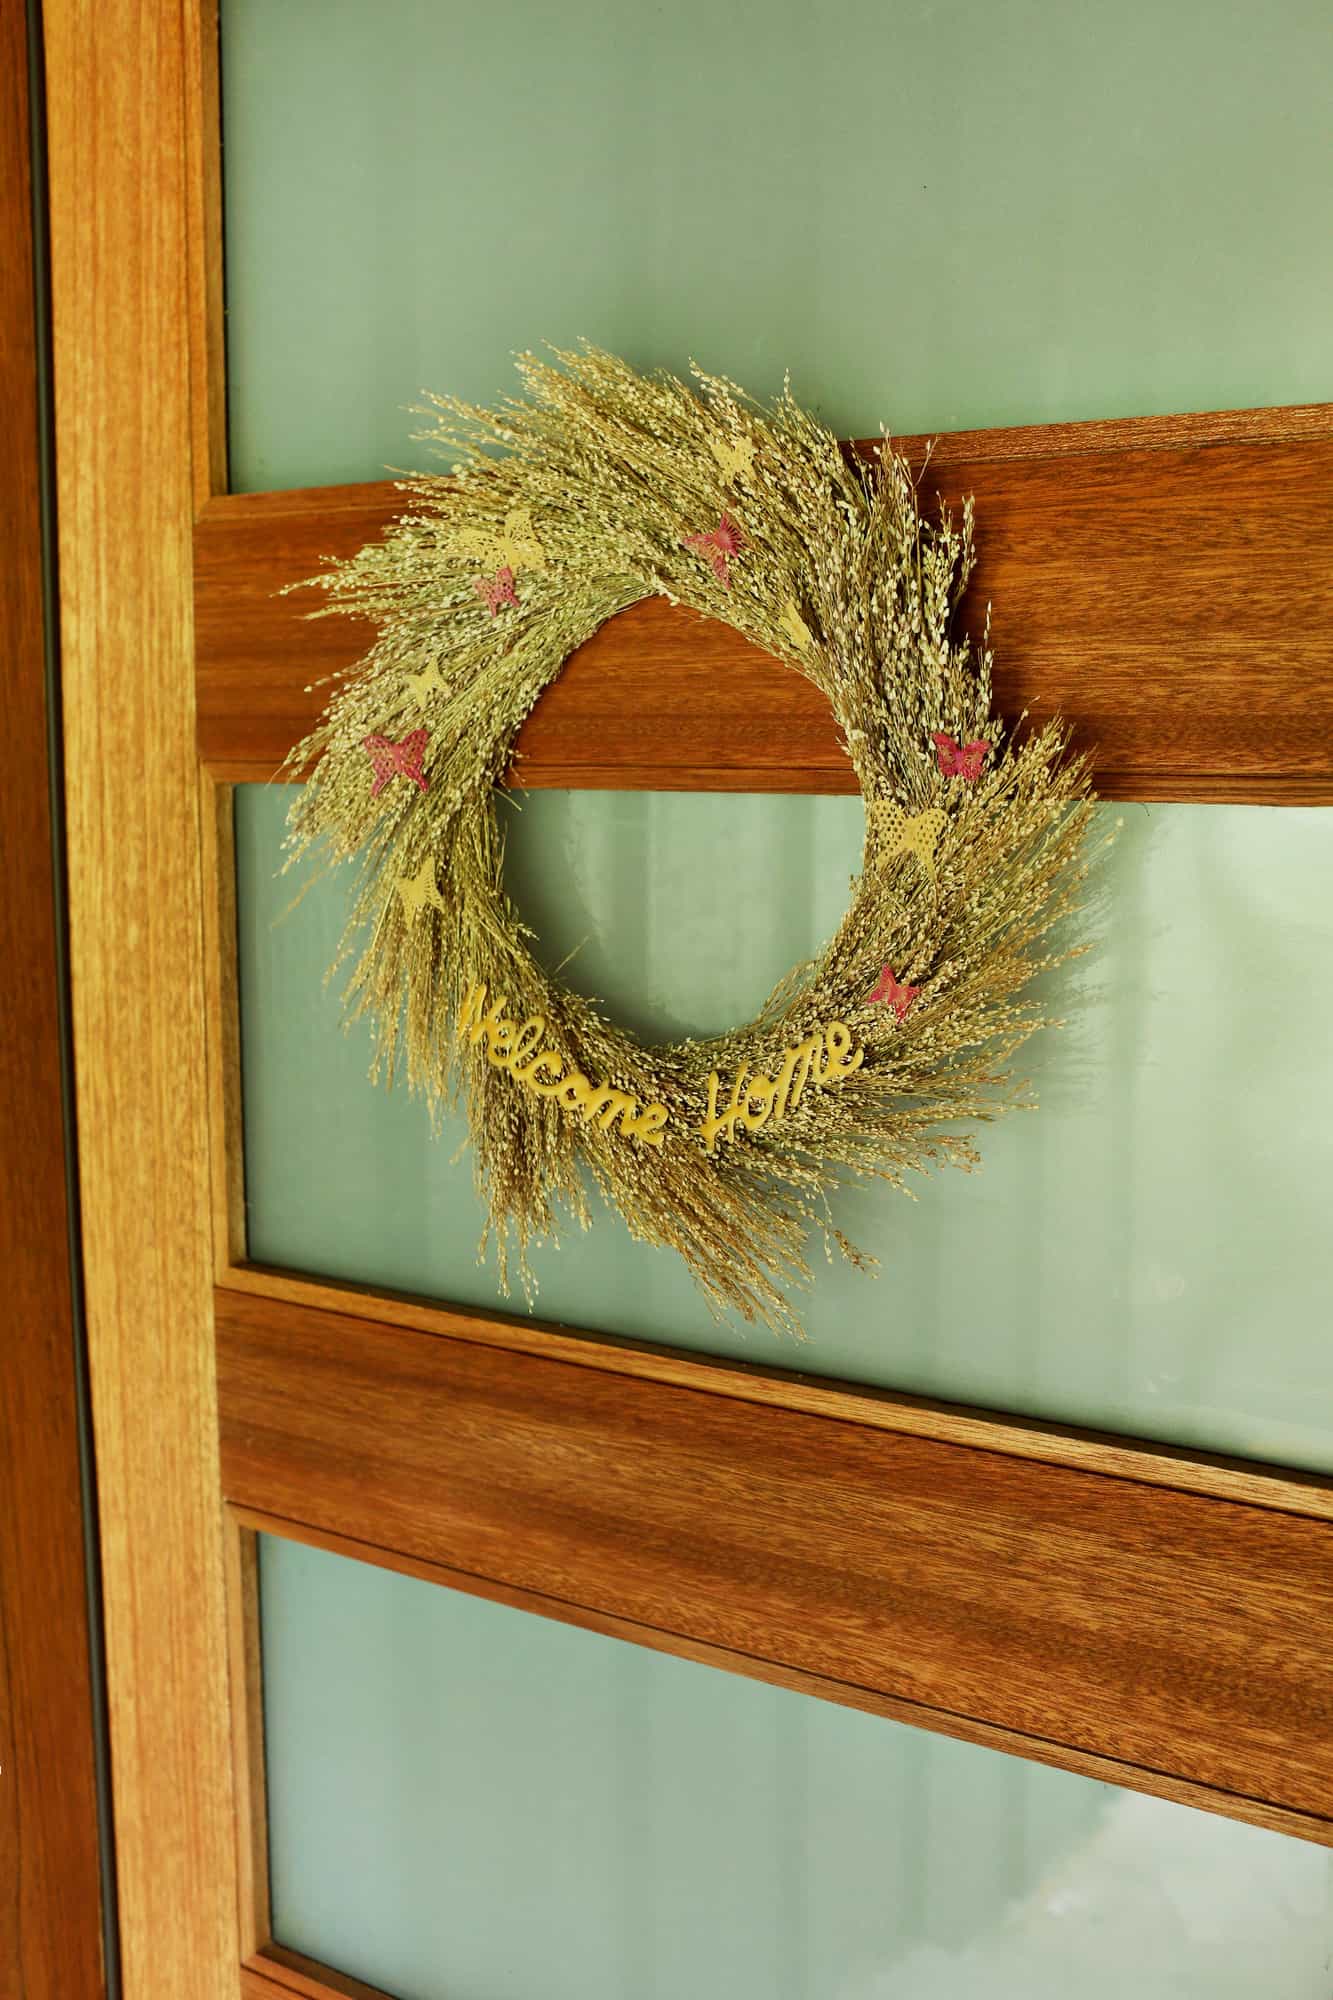 Here’s my welcome home door wreath on my new front door—it makes me smile to see it when I drive up. Thanks for letting me share! -Emma
P.S. Check out 15 Easy Fall Decor DIYs (Budget-Friendly) for more ideas!


I just started playing with Sculpey as a quarantine project to keep my hands busy, it’s great and I love getting other ideas!
I also love your door – I will soon be moving into a house that has lots of wood trim in a very similar stain, so I immediately had heart-eyes for your entryway!
This is such a fun idea. I didn’t know they had liquid clay. I definitely be trying this one out! Thanks!!
Your new front door is absolutely stunning!! Also, I’ve never heard of liquid clay before and now my brain is spinning with ideas. Thanks for introducing us to a new medium!
Ooooh, I’ve never heard of liquid clay before. Game changer!!! Also, good call on the glass-I love typography but am terrible at hand lettering.
It’s fun! Very different to work with than traditional air-dry or oven-bake clay.
Oooh I love your new front door! Cute!
Thanks! I’m really into it. Trey loves it too. 🙂